Content Hub
Stories, Ideas and Advice — Page 81
 story
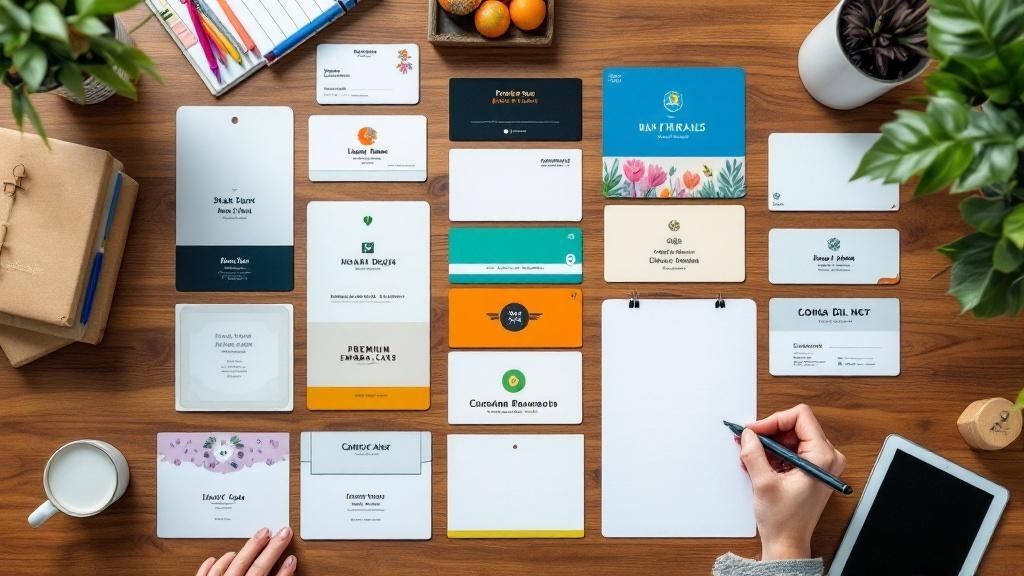
story Top 12 Printable Name Tag Templates for 2025 (Free & Premium)
Whether you're organizing a corporate conference, a networking mixer, or a classroom activity, a well-designed name tag is more than just an identifier. It's a critical tool for breaking the ice, facilitating connections, and projecting a polished, professional image for your event. Sifting through countless websites to find the right design, however, can quickly become a frustrating and time-consuming task. To streamline this process, we've compiled a definitive guide to the best sources for printable name tag templates . This resource listicle dives deep into a curated selection of platforms, from powerful online design tools to simple, ready-to-print downloadable files. We evaluate each option based on its practical features, specific use cases, and potential limitations, so you can make an informed decision without the guesswork. Forget endless searching. This article provides a clear, scannable overview with screenshots and direct links to each resource. Our goal is to help you quickly identify the ideal solution for your specific needs, whether you require a fully customizable template for a high-stakes business event or a simple, fun design for a casual gathering. Find the perfect template below and ensure your next event runs smoothly from the start. 1. Free Templates for All Your Printing Needs For those seeking a powerful and comprehensive resource, 4OVER4's platform stands out as a premier destination for creating professional printable name tag templates . Backed by over two decades of printing industry expertise, this site offers far more than just basic designs; it provides a complete ecosystem for bringing your projects from concept to professionally printed reality. The sheer volume of over 10,000 free, ready-made templates ensures that nearly any aesthetic or functional need is covered, from sleek corporate event badges to creative workshop name tags. What truly elevates this platform is its integrated online design tool. It empowers users to move beyond simple text entry and allows for detailed customization. You can adjust fonts, tweak color palettes to match your brand identity, and upload logos or images directly. This level of control is typically found in dedicated design software, yet it's presented here in an accessible, browser-based interface. Key Strengths and Use Cases The primary advantage lies in the seamless integration of design and professional printing services. After customizing your name tag template, you can get instant pricing and place a print order directly, often with same-day shipping options available for urgent needs. This makes it an ideal solution for event organizers, HR departments, and marketing professionals who require high-quality, consistent results without logistical hassles. The platform's commitment to eco-friendly printing practices is another significant benefit for sustainability-conscious brands. Considerations and Expert Tips While the online tool is robust, its capabilities are confined to the platform. Users with highly specific or complex design requirements that demand advanced vector manipulation might find it limiting. For such niche projects, exploring specialized template services can provide the custom-tailored solutions needed. To get the most out of the platform, start by browsing the name tag category to find a layout that closely matches your vision. This will save significant customization time. Use the layering and alignment tools to ensure all elements, like names, titles, and logos, are perfectly organized for a polished look. Feature Analysis Assessment Template Library Excellent (10,000+ designs) Customization Very Good (fonts, colors, images) Ease of Use Good (Intuitive for most users) Print Integration Excellent (Seamless ordering) Turnaround Time Excellent (Same-day shipping available) Website: 4OVER4 Free Templates 2. Avery Avery is a household name for labels, and its online design platform, Avery Design & Print, stands out as a robust, professional-grade tool for creating printable name tag templates. It's particularly powerful for large-scale events like corporate conferences, trade shows, or weddings where consistency and efficiency are key. The platform's mail merge feature is a significant differentiator, allowing you to import a spreadsheet of names and titles to automatically populate hundreds of unique name tags in minutes. This eliminates tedious manual entry and reduces the risk of errors, making it an invaluable asset for event organizers. While the tool itself is free to use, it is designed to work seamlessly with Avery's own line of printable badge sheets and inserts. This can be a limitation if you don't use their products, but it guarantees perfect alignment and print quality if you do. Core Features & Assessment The platform’s user interface is straightforward, guiding you from template selection to final printing. You can start from a blank slate or choose from hundreds of pre-designed templates tailored to various themes and industries. Mail Merge: A game-changer for bulk creation. Simply connect your Excel or CSV file. Barcode & QR Code Generator: Add scannable codes for attendee tracking, contact info sharing, or linking to event schedules. Printing Flexibility: Print your designs at home on Avery-compatible sheets or use their professional printing service, WePrint, for a polished, high-volume result. The primary drawback is its "walled garden" approach. The templates are optimized for Avery-specific product numbers and layouts, so printing on non-Avery paper may require significant manual adjustments. Website: https://www.avery.com/ 3. Label Blanks Label Blanks caters to the DIY user who prefers working offline with familiar software. Instead of an online design tool, it offers a straightforward library of free, downloadable printable name tag templates formatted for Microsoft Word and Adobe Illustrator. This approach is ideal for small businesses, community events, or anyone needing a quick, no-frills solution without learning a new platform. The key value is precision; each template is pre-sized to perfectly match Label Blanks' own label sheets, eliminating guesswork and printing misalignments. The process is incredibly simple: find your label product number on their site, download the corresponding template, and open it in your preferred editor to add names and logos. Once you’ve selected your templates, ensure you're using the right physical blanks. For more detailed information on the types of materials available, explore a guide on choosing the best materials for your labels . While this requires you to have the necessary software installed, it offers total control over the design elements. Core Features & Assessment The platform’s strength lies in its simplicity and directness. There are no sign-ups or logins required, allowing for immediate access to the files you need. Software Compatibility: Templates are provided in common formats like .DOCX and .AI, appealing to a wide range of users from office administrators to graphic designers. Zero-Cost Templates: All templates are completely free to download, making it a budget-friendly option, especially if you already own their label products. Guaranteed Alignment: By using templates designed for specific label sheets, you avoid the frustrating trial-and-error printing process. The primary limitation is the lack of an integrated online editor and advanced features like mail merge or QR code generation. It’s a pure template provider, best for those who handle design and data management themselves. To learn more, explore the options for online labels . Website: https://labelblanks.com 4. InkPx InkPx offers a straightforward, no-frills approach to acquiring printable name tag templates, making it an excellent resource for users who need quick designs without the complexity of an online editor. The platform's strength lies in its simplicity and accessibility. It provides a diverse library of pre-made name tag designs that are completely free to download in multiple high-resolution formats, including PDF, PNG, and JPG. This flexibility allows users to download a template and then personalize it using their preferred external software, such as Adobe Photoshop, Illustrator, or even Microsoft Word. This method is ideal for those who already have design software and want full control over the final product without being tied to a specific platform's tools. The availability of both A4 and US Letter sizes ensures compatibility with standard printers worldwide, making it a versatile choice for small-scale events, classroom activities, or community gatherings where professional event badges are not required. You can explore more options for professional printing if you're looking for high-quality event badges from 4over4 . Core Features & Assessment The user experience on InkPx is centered around direct downloads. You simply browse the collection, find a design you like, and download it instantly. This removes the learning curve associated with new design platforms. Multiple File Formats: Offering PDF, PNG, and JPG files gives users the freedom to choose the best format for their editing software and printing needs. Standard Paper Sizes: Templates are ready-to-print on both A4 and US Letter paper, eliminating guesswork and resizing issues. Completely Free: There are no hidden costs, subscriptions, or sign-ups required to access and download the templates. The main limitation is the lack of an integrated editor. All customization, from adding names to changing colors, must be done on your own computer with separate software. This means it lacks features like mail merge for bulk creation, making it less suitable for large events. Website: https://inkpx.com 5. WordLayouts WordLayouts provides a straightforward, no-frills approach for users who prefer working in familiar software environments. It offers a curated collection of high-resolution, printable name tag templates designed for Microsoft Word, Google Slides, and Adobe Illustrator. This makes it an ideal choice for small businesses, schools, or community groups needing professional-looking name tags without learning a new online design tool. The focus is on providing a solid, editable foundation that users can quickly customize. The primary advantage is its simplicity and compatibility. Since the templates are standard document files, you have full control over fonts, colors, and layout using software you already own. This is particularly useful for one-off events or when you need a quick solution without registering for a new service. For a fully branded event, you can even pair your custom tags with accessories. Learn more about custom lanyards for a cohesive look . Core Features & Assessment The platform is essentially a high-quality download repository. You find a design you like, download the corresponding file format, and start editing on your local machine. This offline editing capability is a key differentiator. Multi-Format Support: Offering files for Word, Google Slides, and Illustrator caters to a wide range of user skills, from office administrators to professional designers. High-Resolution Files: The templates are designed for quality printing, ensuring your final name tags look crisp and professional, not pixelated. Completely Free: There are no hidden costs, subscriptions, or premium-only templates. All designs are free to download and use. The main limitation is the lack of an integrated design platform or advanced features like mail merge. You are responsible for manually inputting each name, which can be time-consuming for large events. The design selection is also more limited compared to dedicated platforms. Website: https://wordlayouts.com/ 6. Cutepartyprints Cutepartyprints is an excellent resource for anyone needing cheerful and straightforward name tags for informal events like classroom activities, birthday parties, or small community gatherings. The platform's main appeal is its simplicity and cost-effectiveness; it offers a collection of free, attractively designed templates that can be downloaded instantly. These are not complex, database-driven solutions but rather simple, editable documents perfect for low-volume printing needs. The process is refreshingly simple: select a design, download the file (often a PDF or DOC), and edit the text fields with your own software like Adobe Reader or Microsoft Word. This makes it highly accessible for users who are not graphic designers but want something more creative than a basic label. For events requiring more durable or professional identification, users might consider pairing these designs with sturdier materials; you can find more information on plastic card printing options for enhanced durability. Core Features & Assessment The site focuses on providing visually appealing, ready-to-use templates that require minimal technical skill to customize. The fun and colorful themes are particularly well-suited for events involving children or casual social functions. Editable PDF/DOC Files: Templates are provided in common file formats, allowing you to easily add names using widely available software before printing. Variety of Fun Themes: The collection includes designs for holidays, school subjects, and general party themes, offering more personality than standard office templates. Completely Free: There are no hidden costs or subscriptions, making it a budget-friendly choice for creating printable name tag templates. The primary limitation is the lack of an on-site editor and advanced features like mail merge. Customization is confined to what your own software allows, and you are responsible for sourcing your own paper and ensuring correct printer alignment. Website: https://cutepartyprints.com 7. Template.net Template.net positions itself as a massive digital library for all kinds of documents, and its collection of printable name tag templates is impressively diverse. The platform is ideal for users who prefer working in familiar software like Microsoft Word, Publisher, or Adobe PDF, as it provides templates in these downloadable formats. This approach bypasses the need to learn a new online design tool, offering a straightforward path from download to print for school events, small business meetings, or community gatherings. While many templates are free, the platform operates on a freemium model. The most polished and professional designs are often locked behind a premium subscription, which is a key consideration for budget-conscious users. However, the sheer volume of free options still provides significant value, especially for those needing a quick, well-designed solution without extensive customization. Core Features & Assessment The main strength of Template.net is its focus on downloadable, pre-formatted files. This saves time and caters to users who are comfortable editing documents on their own computers rather than in a cloud-based editor. Broad Format Compatibility: Templates are available for Word, PDF, Adobe Illustrator, and Photoshop, providing flexibility for different skill levels and software access. Industry-Specific Designs: You can find name tags tailored for specific sectors like healthcare, real estate, or education, complete with relevant design motifs. Clear Categorization: The library is well-organized, making it easy to filter and find a suitable template for your specific event or professional need. The primary drawback is the dependency on having the right software installed. Unlike a web-based tool, you can't edit these templates without applications like Microsoft Office or Adobe Creative Suite. This also means features like automatic mail merge are not built-in; you would need to perform that function within your chosen software. Website: https://www.template.net/ 8. Canva Canva has become a go-to online design platform for just about everything, and its capabilities for creating printable name tag templates are no exception. Its strength lies in its sheer accessibility and user-friendliness, making it perfect for individuals, small businesses, or event planners who need professional-looking designs without a steep learning curve or specialized software. The drag-and-drop interface allows for effortless customization, from fonts and colors to adding logos or graphics. Unlike more specialized tools, Canva offers a vast library of design elements, allowing for creative freedom beyond a simple name and title. While the core platform is free, many of its premium templates, stock photos, and graphics are reserved for Canva Pro subscribers. However, the free selection is often more than enough for creating stylish and effective name tags for workshops, small conferences, or community events. Core Features & Assessment Canva's platform is entirely web-based, meaning there is no software to install and your designs are saved to the cloud. You can start with a blank canvas or browse thousands of templates to find a style that fits your event's theme. Massive Template Library: Choose from a huge variety of pre-made name tag designs that you can quickly customize. Intuitive Drag-and-Drop Editor: Easily add text, upload your own logo, and incorporate graphic elements with no design experience needed. Team Collaboration: Share your design with colleagues to get feedback or allow them to make edits directly, streamlining the approval process. The main limitation is that some of the best design elements are locked behind the Canva Pro paywall. Additionally, for bulk creation, you would need to manually duplicate pages and edit names, as it lacks a dedicated mail merge feature like Avery. Website: https://www.canva.com 9. PosterMyWall PosterMyWall is an accessible online design tool known for social media graphics, but it also offers a surprisingly capable name tag maker. Its primary strength lies in its simplicity and speed, making it ideal for smaller events, classroom activities, or last-minute needs where professional-grade features like mail merge aren't necessary. The platform provides a wide array of visually appealing, customizable templates that can be edited with an intuitive drag-and-drop interface. Unlike more specialized tools, PosterMyWall allows you to download your finished design as a high-resolution image file for printing at home or with a local service. This gives you complete freedom over the paper stock and printing method you use. While the core editor is free, some premium templates and features require a subscription, but there are plenty of free options to create effective printable name tag templates without any cost. For those planning larger events, integrating your brand across all materials is key; you can explore complementary items like custom event tents to create a cohesive look. Core Features & Assessment The platform is designed for users with little to no design experience, emphasizing quick customization over complex functionality. You can easily change colors, fonts, and add your own logo to any template. Drag-and-Drop Interface: Extremely user-friendly, allowing for fast and simple design modifications. Large Template Library: Offers a diverse collection of pre-made designs suitable for various themes, from casual parties to business mixers. High-Resolution Downloads: Provides high-quality JPG or PNG files that are perfect for clear, crisp printing on any standard printer. The main limitation is the lack of event-specific management tools. You cannot import a list of names to auto-populate tags, so each one must be created individually, making it less suitable for large-scale conferences. Website: https://www.postermywall.com/ 10. TemplateLab TemplateLab functions as a vast digital library, offering a curated collection of free, high-quality name tag templates well-suited for users who prefer working in familiar software. Instead of an online editor, it provides downloadable files in Microsoft Word and PDF formats. This approach is ideal for those who want quick, professional-looking designs without learning a new platform, making it perfect for smaller office meetings, school events, or personal gatherings where simplicity is paramount. The templates are designed to be easily editable and print-ready. This direct-download model means you can be offline while customizing your name tags, a key advantage over web-based tools. The site’s strength lies in its collection of diverse, business-appropriate, and event-specific designs that serve as excellent starting points. Because the files are standard formats, you have full control over fonts, colors, and layout, provided you have the necessary software like Microsoft Word or Adobe Acrobat. Core Features & Assessment The experience is straightforward: find a design you like, download it, and open it in your preferred editor. There are no accounts to create or online tools to navigate, which significantly speeds up the process from selection to printing. Familiar Editing Environment: Customize templates using Microsoft Word or a PDF editor, eliminating any learning curve. Completely Free: All templates are available for immediate download at no cost, without hidden fees or sign-ups. Diverse Formats: Offers a range of layouts, from standard ID-style badges to more creative and decorative tags suitable for informal events. The main limitation is the lack of an integrated mail merge or QR code generator. Bulk creation requires manual data entry or using Word's own mail merge function, which adds an extra step. Furthermore, you are dependent on the provided designs and must have the correct software installed. Website: https://templatelab.com/ 11. TeachersMag TeachersMag is an invaluable resource for educators seeking free printable name tag templates designed specifically for the classroom environment. Unlike corporate-focused platforms, this site offers designs that are colorful, engaging, and child-friendly, aimed at making students feel welcome and encouraging class participation. The templates often feature playful themes like animals, crayons, or seasonal elements, perfect for the first day of school, field trips, or daily use. The platform’s strength lies in its simplicity and direct focus on the educational niche. Teachers can quickly find, download, and print visually appealing tags without navigating complex design tools. While the templates are free, customization is somewhat limited; most are provided as static image files (JPG or PNG) or PDFs, requiring users to add names manually after printing or use external software like Microsoft Word or a photo editor. Core Features & Assessment The experience is less about deep customization and more about quick, effective solutions for classroom management and student engagement. The designs are created by educators, for educators, ensuring they resonate with young learners. Classroom-Ready Designs: Templates are fun, age-appropriate, and themed for school activities, helping to create a vibrant learning atmosphere. Editable & Static Options: Some templates come in editable formats, but many are designed for quick printing, where names can be handwritten for a personal touch. Completely Free: All resources on the site are available for free download, making it an excellent budget-friendly option for teachers. The primary limitation is its niche focus. The designs are not suitable for professional or corporate events. Furthermore, the need for external software to digitally add names before printing may be a small hurdle for those less tech-savvy. Website: https://www.teachersmag.com/ 12. Shining Mom Shining Mom is a creative blog that offers a surprisingly delightful collection of free, stylish, and printable name tag templates. It stands out for its charming and kid-friendly designs, making it an excellent resource for teachers, parents, and organizers of school events, birthday parties, or community gatherings. The focus here is less on corporate functionality and more on aesthetic appeal and ease of use for smaller, more personal occasions. The templates are typically provided in a ready-to-print PDF format. Unlike dedicated software, Shining Mom provides pre-designed sheets that you download and then customize. This approach is perfect for users who want beautiful, print-ready options without navigating a complex design tool. The simplicity is its core strength; you find a design you like, download it, and print. For customization, you'll need to use external software like Microsoft Word or a PDF editor to add names before printing. Core Features & Assessment The platform’s value lies in its curated, high-quality designs that are completely free to use for personal events. It's a go-to for anyone needing a quick, visually appealing solution. Creative & Themed Designs: Offers a variety of fun, colorful, and elegant themes that are hard to find on more corporate-focused sites. Simple Download Process: No sign-up or software installation required. Just find a post, click the download link, and the file is yours. Editable Formats: Many templates are offered in Microsoft Word, allowing for easy text entry and font changes before printing. The primary limitation is the lack of an integrated design platform. All customization happens offline, and there are no advanced features like mail merge or QR code generation. Website: https://www.shiningmom.com/ Printable Name Tag Templates Comparison Table Product Core Features & Customization ✨ User Experience & Quality ★★★★☆ Value Proposition & Pricing 💰 Target Audience 👥 Unique Selling Points 🏆 Free Templates (4OVER4) 10,000+ templates, online design tool Professional print quality ★★★★☆ Competitive pricing, fast same-day shipping 💰 Businesses & individuals Extensive template library, eco-friendly printing ✨ Avery Customizable templates, barcode/QR code Beginner-friendly, versatile printing ★★★★ Free tool; professional print options 💰 Small businesses & event organizers Mail merge, barcode/QR integration ✨ Label Blanks Downloadable Word/Illustrator templates Reliable alignment, DIY printing ★★★★ Free downloads, no sign-up 💰 DIY users & small events Precise sizing for labels, offline customization InkPx Multi-format templates (PDF, PNG, JPG) Easy download, free templates ★★★ Completely free templates 💰 Event planners & casual users Variety of formats, free access WordLayouts Word, Google Slides, Illustrator formats High-res professional designs ★★★★ Free to download 💰 Formal & casual event users Multi-format, professional quality templates Cutepartyprints Editable text fields, variety of fun designs User-friendly, event variety ★★★ Free to use 💰 Parties, schools, conferences Fun & engaging designs, ease of use Template.net Extensive free & premium templates High quality, easy customization ★★★★ Mix of free and premium; premium subscription 💰 Personal & professional users Wide range across industries, premium options Canva Drag-and-drop design, collaboration Intuitive, no skills needed ★★★★☆ Free with premium features 💰 Individuals, teams, marketers Collaboration, direct print ordering ✨ PosterMyWall Drag-and-drop, high-res downloads Quick customization, free with upgrades ★★★ Freemium model 💰 Casual & professional designers Digital sharing, easy online use TemplateLab Editable Word & PDF templates Professional, easy to edit ★★★★ Free access 💰 Personal & professional use Simple editing, focused collection TeachersMag Colorful classroom designs Engaging for kids ★★★ Free to use 💰 Educators & students Classroom focus, student engagement Shining Mom Editable templates, variety of designs Accessible, easy to use ★★★ Free access 💰 General users, events Creative, stylish templates Choosing the Right Template for a Lasting Impression Navigating the world of printable name tag templates can feel overwhelming, but as we've explored, the perfect solution is within reach. From the straightforward, no-cost downloads offered by sites like WordLayouts and TemplateLab to the powerful, integrated design suites of Canva and PosterMyWall, there is a tool tailored to every skill level, budget, and event type. Your final choice hinges on balancing convenience, customization, and quality. The key takeaway is that a name tag is more than a simple identifier; it is a critical piece of your event's branding and a direct reflection of your professionalism. It's often the first physical touchpoint an attendee has with your organization, setting the tone for their entire experience. Therefore, investing a small amount of time to select the right resource pays significant dividends. Making Your Final Selection To narrow down your options, consider these critical factors: Technical Skill and Software Access: Are you comfortable working within Microsoft Word or Adobe Illustrator? If so, the downloadable templates from Avery or TeachersMag offer a great starting point. If you prefer a browser-based, all-in-one solution, platforms like Canva provide an intuitive drag-and-drop interface that requires no specialized software. Event Scale and Formality: For a small, casual workshop or a classroom setting, a simple, clean design from a free resource like Shining Mom may be perfectly adequate. For corporate conferences, trade shows, or high-stakes networking events, a more polished, professionally printed name tag is essential to make a strong impression. Customization and Branding Needs: Evaluate how much control you need over the design. Basic templates might only allow for name and title changes. More advanced tools, however, empower you to upload logos, adjust brand colors, change fonts, and even add interactive elements. To elevate the attendee experience and create a modern impression, consider exploring creative QR code display ideas for events that can be integrated into your name tag design. This small addition can link to event schedules, speaker bios, or networking profiles. Ultimately, the best printable name tag templates are the ones that align with your specific goals. By thoughtfully considering your event's context and your own capabilities, you can move beyond a simple label and create a valuable tool that enhances branding, facilitates connections, and contributes to a memorable and successful event. Ready to move from template to tangible, professional results? For a seamless experience that combines high-quality design with expert printing, explore the custom name tag solutions at 4OVER4 . We handle the entire process, ensuring your name tags are flawlessly printed, perfectly cut, and ready to impress your attendees right out of the box.
 story
story Choosing the Right Table Tent Dimensions
Walk into almost any restaurant or browse a trade show, and you'll see them: little cardboard sentinels sitting on every table. The most common table tent dimensions you'll find are 4"x6" and 5"x7" per folded panel. They've become the industry standard for a simple reason—they hit the sweet spot between being noticeable and not hogging precious table space. Think of them as tiny, effective billboards right where your customers are looking. Decoding Standard Table Tent Sizes Picking the right size for your table tent is the first real decision you'll make, and it matters more than you might think. While you can always go custom, the classic 4"x6" and 5"x7" options dominate the scene because they’re perfectly scaled for most dining tables, checkout counters, and reception desks. In fact, the 5"x7" size is the undisputed champion, making up about 65% of all table tent orders . Its slightly larger canvas gives you more room to play with, perfect for displaying a detailed dessert menu or a visually rich promotion without overwhelming the setting. The more compact 4"x6" size is a close second, accounting for roughly 25% of orders . It’s the ideal choice when you need something for a simple promotion, like a QR code, or when tables are already crowded. This infographic gives you a quick visual breakdown of the two most popular sizes. As you can see, the choice often boils down to how much you need to say. For a completely cohesive look, think about pairing your table tents with custom-printed promotional table covers to tie your entire space together. To make things even easier, here’s a quick reference table to help you match the right dimensions to your specific needs. Standard Table Tent Dimensions and Their Best Uses Dimension (Per Panel) Total Flat Size Primary Use Case 4" x 6" 4" x 16.5" Great for drink specials, QR codes, and simple announcements. 5" x 7" 5" x 21" Ideal for dessert menus, event promotions, and more detailed info. Ultimately, choosing between these two depends on your message and your environment. A simple, punchy call-to-action fits perfectly on a 4"x6", while a more detailed story or menu feels right at home on a 5"x7". Exploring Different Table Tent Styles While getting the size right is a good start, the actual shape—or style—of your table tent is what truly affects how people engage with it. The structure you pick can either elevate your message or let it fall flat. Honestly, this decision is just as critical as the dimensions. A-Frames and Pyramids The most familiar style you'll see is the classic A-Frame . Picture a simple book standing on its own, and you've got it. This design gives you two clean panels, which is perfect for hitting customers with a main message on one side and a secondary one, like a happy hour special, on the other. It's direct, effective, and gets the job done. Then there’s the three-sided Pyramid . This one is a bit more dynamic, showing off information from multiple angles like a cut gem. It’s a fantastic choice for round tables or busy central displays where people are coming from all directions. You could use each of the three panels to feature different parts of a meal—appetizers, entrees, and desserts. Four-Sided Towers and Beyond For maximum real estate, the four-sided Tower acts like a mini information kiosk right on the table. This style is your best bet when you have more to say but want to avoid a cluttered design. You can dedicate each side to a different event, service, or product line, encouraging customers to pick it up and explore. By selecting a shape that aligns with your content and environment, you turn a simple paper advertisement into an interactive and effective marketing tool. The right style invites engagement and makes your message more memorable. As you're thinking about these styles, it’s a good idea to consult a comprehensive restaurant furniture guide to make sure your choice fits your overall vibe. And if a full 3D tent feels like too much, you can still make a strong statement with well-designed custom counter cards , which offer a simpler, single-panel display. Every style has its own strategic advantage, turning its shape into a functional part of your marketing. How to Select the Perfect Table Tent Dimensions Choosing the right size for your table tent isn’t just a random guess—it’s a strategic move. The perfect dimensions strike a delicate balance between your environment, your message, and your brand's unique personality. Think of it as managing prime real estate on a tabletop. Your promotion has to grab attention without getting in the way of plates, drinks, and conversation. The goal is to enhance the customer experience, not clutter it up. For example, a minimalist coffee shop with small bistro tables would be the perfect home for a compact 4x6 inch tent. It delivers a quick message without overwhelming the space. On the other hand, a steakhouse detailing its extensive wine list needs the larger canvas of a 5x7 inch tent to present that information clearly and elegantly. Assess Your Environment and Content Before you commit to a size, take a moment to consider these critical factors. Your physical space and the complexity of your message will point you toward the ideal table tent dimensions. Table Size and Clutter: How much room do you actually have to work with? A sprawling table in a fine dining setting can easily accommodate a bigger tent, while a small, busy cafe counter demands a more modest footprint. Message Complexity: Are you just displaying a simple QR code, or are you listing a detailed menu of seasonal cocktails? Simple, bold messages shine on smaller tents, but more complex content needs the readability that only a larger format can provide. Viewing Distance: Where will your customers be when they see the tent? A tent on a cozy two-person table is viewed up close, but one placed on a large communal table needs to be legible from much farther away. The right size ensures your message is not just seen but also absorbed. It respects the customer's space while effectively communicating your offer, turning a simple piece of paper into a powerful sales tool. While standard sizes are always popular, we're seeing a growing trend toward unique, custom dimensions. In fact, custom sizes now make up nearly 30% of all table tent orders worldwide , showing just how much brands want to tailor their marketing materials. This is especially true for promotional campaigns, where custom sizes drive over 40% of sales in major urban markets. When you're thinking about how table tents fit into your bigger marketing strategy, exploring effective brand activation ideas can spark some real inspiration. Your table tent is often just one piece of a much larger puzzle, and it should work seamlessly with your other point-of-sale displays to create a consistent and powerful brand message. Getting Your Design Ready for Print Taking a design from your screen to a physical, printed product involves a few technical—but totally crucial—steps. Getting these print specs right is the key to making sure your table tents look polished and professional, avoiding common headaches like blurry images or text that gets awkwardly chopped off. Think of your design file like a piece of art you're putting into a picture frame. The safe zone is the very center of that art, where all your most important stuff—like your logo, main text, and QR codes—needs to live. Keeping everything here guarantees it won't get accidentally trimmed off during production. The trim line is the edge of the frame itself. This is where the final cut will happen to create the exact table tent size you ordered. Bleed, Trim, and Safe Zones Explained So what happens right at that edge? That's where the bleed comes in. The bleed is the part of your design that stretches a little bit past the trim line, usually by 0.125 inches on all sides. This extra sliver of color or imagery acts as a safety buffer, making sure no weird, unprinted white edges show up on your final product after it's cut. A design without a proper bleed is one of the most common reasons people have to reprint their orders. It's a tiny detail that makes a massive difference in getting that clean, finished look. Beyond these layout rules, two other settings are non-negotiable for top-notch printing. Always set your design file to 300 DPI (dots per inch) for sharp, crystal-clear graphics, and use the CMYK color mode , which is the universal standard for physical printing. Following these guidelines will save you from the frustration (and cost) of a reprint. And if you're looking to create a table tent that's more than just a simple rectangle, you can always explore custom die-cutting services to craft a truly unique shape that will definitely get noticed. Choosing the Right Material and Orientation The physical presence of your table tent—its feel and form—delivers a powerful message about your brand before anyone reads a single word. Getting the material and orientation right isn't just a detail; it’s a critical step that defines the entire impact of your design. Think of the paper stock as your brand's handshake. A standard 100 lb. cover is a reliable and budget-friendly choice, perfect for short-term promos. But if you're aiming for a more lasting impression that screams quality, upgrading to a thicker 16 pt. cardstock provides a sturdy, premium feel that stands up much better to being passed around the table. Vertical vs Horizontal Layouts How you orient your table tent directly influences how your message is seen and understood. Each layout has its own strategic advantages. Vertical (Portrait): This is the classic, space-saving orientation. Its tall, narrow format is perfect for lists, like drink specials or event schedules, because it guides the eye downward in a natural reading motion. Horizontal (Landscape): A more modern and stable choice, the horizontal layout gives you a wider canvas to play with. It’s ideal for showcasing impactful graphics, wide-format photos, or promotions that need a bit more room to breathe. The decision between vertical and horizontal isn't just about looks; it’s functional. A vertical tent conserves precious table space, while a horizontal one offers a stable, eye-catching base for compelling visuals. Durability and Industry Standards In busy restaurants, bars, or event spaces, durability is everything. Industry standards are shifting to emphasize both visibility and stability, especially in these high-traffic venues. Many displays now aim for a height of around 30 inches to ensure they’re seen without blocking sightlines, and stability is often beefed up with reinforced bases. You can learn more about how industry standards for tent cards are evolving for these demanding settings. To get more mileage out of your investment, consider adding a protective finish. A quick look at our guide on professional laminating options shows how a gloss or matte coating can guard against spills and smudges, extending the life of your table tents and keeping them looking sharp. When you nail the material and orientation, you ensure your message doesn't just get seen—it makes a statement about quality. To help you decide, let's break down the common materials and what they bring to the table. Comparing Table Tent Materials and Finishes Material Type Typical Weight (GSM/pt) Best For Pros & Cons Standard Cover Stock 270 GSM / 100 lb. Short-term promotions, budget-friendly campaigns, single-use menus. Pros: Cost-effective, lightweight. Cons: Less durable, can crease or bend easily. Heavy Cardstock 350 GSM / 16 pt. Long-term displays, premium branding, QR code menus, high-traffic areas. Pros: Very durable, premium feel, resists wear and tear. Cons: Higher cost, bulkier. Gloss Coated Varies Vibrant, photo-heavy designs, eye-catching promotions. Pros: Enhances color, shiny finish, some spill resistance. Cons: Can show fingerprints, glare can make it hard to read. Matte Coated Varies Elegant and sophisticated designs, text-heavy content, menus. Pros: No glare, smooth texture, professional look. Cons: Colors may appear slightly muted. Laminated Stock Varies Maximum durability, outdoor use, frequently handled items like drink menus. Pros: Waterproof, tear-proof, easy to clean. Cons: Highest cost, adds thickness and rigidity. Ultimately, choosing the right material is a balance between your budget, your brand's image, and how long you need your table tents to last. A well-chosen material ensures your message not only gets seen but also makes a quality statement. Common Questions About Table Tent Dimensions Even with a solid plan, a few questions always seem to pop up right when you’re about to finalize your table tent design. We get it. This section is all about giving you direct answers to those nagging last-minute queries so you can send your project to print with total confidence. What Is the Most Popular Table Tent Size for Restaurants? The hands-down winner here is the 5x7 inch size for each panel. It's the industry go-to for a reason. This size hits the sweet spot—it’s large enough for eye-catching graphics and text that’s easy to read, but it won’t clutter up the table. It’s perfect for everything from drink menus and dessert specials to event promotions, making it a super reliable standard. Should I Use a Vertical or Horizontal Table Tent? This decision should really come down to your content and brand vibe. Each orientation has its own strategic advantages. Vertical (Portrait): This is the classic, space-saving choice. It’s ideal for lists, like happy hour specials or a featured wine list, because it naturally guides the eye down the page. Horizontal (Landscape): This format gives you a wider canvas, which is perfect for big, impactful images. It feels a bit more modern and, thanks to its lower center of gravity, it’s also more stable—a nice bonus in a busy restaurant. If your design is heavy on text, stick with vertical. But if it’s driven by bold graphics or photos, a horizontal layout will probably serve you better. The right orientation isn’t just an aesthetic choice; it’s a functional one. It determines how easily customers can absorb your message and how well the tent fits into its physical environment. What Paper Thickness Is Best for Table Tents? For a table tent that can handle a few spills and constant handling, you absolutely need a sturdy paper stock. Flimsy paper that creases or falls over is a non-starter. The best practice is to use a thick cardstock of at least 100 lb. cover , which is about 12 pt. or 270 GSM . This gives it a professional feel and the rigidity it needs to stand up straight. If you’re placing these in high-traffic areas like bars, bustling cafes, or family restaurants, it’s a smart move to upgrade to an even heavier 14 pt. or 16 pt. stock . Adding a protective coating, like a matte or gloss laminate, is another great way to boost its longevity and protect it from wear and tear. Ready to create table tents that perfectly capture your brand’s message? At 4OVER4 , we offer a wide range of sizes, materials, and finishes to bring your vision to life. Start designing your custom table tents today!
 story
story The Definitive Guide to Table Tent Specs for Perfect Printing
When you hear "table tent specs," what we're really talking about are the foundational details for printing them correctly: the standard dimensions, paper weight, and the technical setup for your design files. The most common sizes you'll see are 4" x 6" and 5" x 7" , which refers to the size of the front display panel. To make sure they stand up properly on their own, they're almost always printed on a sturdy 14pt or 16pt cardstock . Understanding Key Table Tent Specifications At their core, table tents are self-standing, three-dimensional prints designed for tabletop promotions and information. Think of them as miniature billboards, perfectly placed to catch a customer's eye, whether they're showcasing restaurant specials or listing event schedules. Their direct line-of-sight marketing power is undeniable. In fact, their effectiveness is fueling some serious market growth. The global table tents market is projected to double from USD 2.2 billion in 2025 to USD 4.4 billion by 2035 , all thanks to high demand from businesses and event organizers who count on these compact displays. Getting a handle on the basic table tent specs is the first step to creating professional, error-free marketing materials. It's what ensures your digital design translates perfectly to a physical product, helping you sidestep common print headaches like blurry images, unexpected color shifts, or critical text getting trimmed off. Key Table Tent Specifications at a Glance This guide will walk you through every technical detail you'll need. But first, here’s a quick-reference table summarizing the most critical specifications. Use this as a checklist to make sure your design settings are good to go before diving into the more detailed sections. Specification Industry Standard 4OVER4 Recommendation Common Sizes 4" x 6", 5" x 7", 4.25" x 5.5" 4" x 6" for concise messaging, 5" x 7" for more detailed content. Paper Weight 12pt - 16pt Cardstock 14pt or 16pt C2S for superior durability and a premium feel. File Bleed 0.125" (1/8 inch) on all sides A non-negotiable 0.125" bleed is required to prevent white edges. File Formats PDF, AI, PSD, JPG High-resolution PDF is strongly preferred for accurate printing. Color Profile CMYK Always design and export files in CMYK to avoid color shifts. This table covers the essentials for standard table tents. Getting these specs right is the foundation for a flawless print run. And if you find yourself needing something larger and even more prominent for a countertop display, you might want to check out the specifications for counter cards . Choosing the Right Paper Stocks and Finishes Getting the paper right is the first real decision you'll make when spec'ing out your table tents. It's foundational. This choice directly affects everything from durability and appearance to the simple tactile feel of the finished piece. The paper’s weight, or thickness, is what determines how well your tent will actually stand up to being handled and just sitting on a table. For pretty much any application, a sturdy cardstock isn't just a suggestion—it's essential for stability. In the world of print, two industry-standard weights have really become the go-to for their reliability and premium feel. These options give you the rigidity needed to prevent that sad sagging or toppling over, keeping your message upright and visible where it belongs. Understanding Common Paper Stocks Paper stock thickness for table tents is measured in points ( pt ), where one point is just one-thousandth of an inch. A bigger point value means a thicker, more durable paper. Simple as that. 14pt Cardstock: This is the workhorse of the industry. It’s a hugely popular and versatile choice that hits the sweet spot between sturdiness and cost-effectiveness. It's noticeably more substantial than regular paper and has a professional feel that works great for corporate events, trade shows, and general promotions. 16pt Cardstock: When you need maximum durability and want to make a more luxurious impression, 16pt cardstock is the way to go. That extra thickness provides superior rigidity, making it the ideal choice for high-traffic environments like restaurants and bars where table tents get passed around and handled constantly. Table tents have come a long way from the simple 'menu cards' of the 19th century, and these standards have evolved with them. Today, a beefy 16pt stock is often the default choice for longevity, especially if you're pairing it with a protective coating. Plus, some data suggests that adding premium finishes like foil stamping to these thick stocks can boost brand recall by as much as 30% , turning a simple material choice into a strategic one. You can dig deeper into these production trends and their market impact on print technology shifts at rocsoft.com . Selecting the Perfect Finish Once you've locked in your paper stock, the finish is your next critical decision. A finish, or coating, is applied after the ink is down, and it does two very important jobs: it protects the print from moisture, scuffs, and fading, and it seriously enhances your visual design. Pro Tip: Your finish should be a deliberate choice that reflects both your brand's personality and the environment where the table tent will live. A high-gloss finish might be perfect for a vibrant, modern brand, while a matte finish often conveys a more subtle, elegant vibe. Here’s a breakdown of the most common finishes and where they shine: Glossy UV: This is a high-shine, reflective coating that makes colors pop with incredible vibrancy and saturation. It’s a fantastic choice for designs heavy on bold graphics and photography. The UV coating also adds a tough, protective layer that's easy to wipe clean—a lifesaver for restaurant menus. Matte: For a non-reflective, smooth, and elegant look, matte is your best bet. It’s perfect for designs that are text-heavy or aiming for a sophisticated, modern aesthetic. While it offers solid protection, it can be more prone to showing fingerprints than its glossy counterpart. Uncoated: An uncoated stock has no finish applied at all, giving it a natural, raw paper texture that you can feel. This option is spot-on for a rustic or organic brand identity. It’s also the only finish that’s easy to write on, making it super useful for interactive promotions or event sign-in tables. For yet another layer of protection and a unique sensory feel, you might also consider lamination. You can learn all about the benefits and different options in our guide to custom laminating services . Understanding Dielines, Folds, and Scores The structural backbone of any table tent is its dieline . Think of it as the blueprint for your print file, a critical part of the table tent specs. This template layer is essential because it shows our production team exactly where to make cuts, where to create folds ( scores ), and where to add any perforations. Getting a handle on this template is the first step to avoiding common design mistakes. Your artwork needs to sit perfectly within the boundaries set by the dieline. This is the only way to guarantee the final, assembled product looks exactly like you planned. It’s the guide that separates a professional piece from a misaligned mess. The Role of Score Lines in Professional Folds Score lines are simply indentations pressed into the paper right where it needs to bend. Their main job is to create a clean, crisp fold without cracking or damaging the paper fibers. This becomes incredibly important when you're working with thicker, more substantial materials like 14pt and 16pt cardstock . If you try to fold heavy cardstock without a proper score, you’ll likely see the paper crack and the ink flake off along the crease. The result is an unprofessional, damaged-looking finish. This one simple step ensures every fold is precise and keeps your design looking sharp. The journey from selecting your paper stock and finish to the final, perfectly folded table tent is a connected one, as you can see below. This process really highlights how those foundational choices in paper and finish directly influence the quality of the final folded piece. Dieline Complexity: A-Frame vs. Interlocking Table tent dielines can be simple or complex, depending on how they're built. The two most common types each come with their own design challenges that you'll need to account for when setting up your artwork. A-Frame Tents: These are the most straightforward. They're usually made with just a single score line down the center. Designing for them is pretty simple—you place your artwork on the two main panels that will face out when folded. Interlocking Tents: These get a bit more complex, featuring a base with tabs or slits that lock together. The dieline will show multiple score lines and specific cutouts that allow the base to assemble for greater stability. Artwork placement here is more intricate; you have to be mindful of the bottom tabs and make sure no critical design elements end up in those areas. A very common mistake we see is placing text or a key part of an image directly over a score line. Once folded, that element will be distorted or split, which can ruin your message. Always keep your critical content well within the safe zones shown on the template, far away from any fold lines. Understanding how materials behave is key for more than just table tents. It's just as crucial when designing the best golf scorecard for a tournament or creating any other folded print item. The same principles of clean folds and durable stock apply. If you want to dive deeper into the technical side of creating custom shapes and folds, take a look at our guide on die-cutting. Mastering Bleed, Safety Margins, and Trim To get a truly professional-looking table tent, you have to get three parts of your design file right: the bleed , the trim line , and the safety margin . Getting these specs right isn't just a suggestion—it's the only way to avoid common print headaches like weird white borders or clipped text. Think of these margins as a buffer zone. They exist to account for tiny mechanical shifts that happen during the printing and cutting process. No machine is perfect down to the micrometer, so building in these guides is how we protect your design’s integrity and deliver a flawless final product. Defining the Bleed Area The bleed is the part of your design that extends past the final cut edge of your table tent. Any background colors, patterns, or images that you want to run right to the edge must stretch all the way out to this bleed line. The industry standard, and what we require for our presses, is a 0.125-inch (or 1/8 inch) bleed on all four sides. Missing this is easily one of the most common—and preventable—design mistakes we see. What happens if you don't add a bleed? If your background stops right at the trim line, even the slightest shift during cutting will expose a thin, unprofessional-looking white sliver along the edge. It's a small detail that can instantly make your table tent look cheap. Understanding the Trim Line The trim line is exactly what it sounds like: it shows the final, finished size of your table tent panel after it’s been cut from the larger sheet. So, if you're designing a 4" x 6" panel, your trim line is the 4" x 6" rectangle. This is the line where the blade is supposed to cut. But since a hair's breadth of variation is always possible, the bleed and safety areas are your insurance policy for a clean result every time. Protecting Content with the Safe Area The safe area , also known as the safety margin, is an inner boundary set inside the trim line. You absolutely must keep all your critical content—logos, text, and key parts of images—tucked neatly inside this zone. This is your content's best defense against getting sliced off. Standard Margin: Just like the bleed, the safe area is typically set 0.125 inches inside the trim line. Critical Content Placement: By keeping your essential elements within this boundary, you guarantee they won’t be affected by the trimming process, even if the cut isn't perfectly on the line. Here's the simple way to think about it: background elements go past the trim line into the bleed, while your important foreground elements stay inside the safe area. Getting this placement right is a fundamental part of nailing your table tent specs. Preparing Your Artwork Files for Print Getting your artwork file ready for the press is the final, and arguably most critical, step in the whole process. This is where your design specs truly come to life, and a little attention to detail here ensures everything translates perfectly from your screen to the finished table tent. Think of it as a preflight check; it guarantees fonts, images, and colors render exactly as you planned, saving everyone from the headache of reprints and delays. The absolute best format to send us is a high-resolution PDF . Unlike other file types, a PDF is a neat, self-contained package. It embeds your fonts, images, vector graphics, and color information all into one reliable file. This simple choice eliminates a ton of common problems, like fonts not showing up correctly or images going missing. What you see on your screen is exactly what we’ll see on ours. Choosing the Correct Color Mode One of the most common hiccups we see in print design is the color mode. It is absolutely essential to design and save your files using the CMYK color model, which stands for Cyan, Magenta, Yellow, and Key (Black) . This is the universal standard for professional printing. Here’s a quick breakdown of why it matters: CMYK for Print: This is what’s called a "subtractive" color model. Physical ink is applied to paper, and the combination of these four colors subtracts brightness from the white paper to create the full spectrum of colors you see on the finished product. RGB for Screens: Your computer monitor and phone use an "additive" color model: Red, Green, and Blue . Tiny points of light are added together to create the colors you see on screen. If you design in RGB and then convert to CMYK for printing, you’re likely in for a surprise. This conversion can cause noticeable and often disappointing color shifts. Those super-vibrant blues and greens you perfected in RGB can look much duller or muted in CMYK. To avoid this, always start your design project in CMYK from the very beginning to ensure color accuracy. The table below breaks down our specific recommendations for file formats and color modes to get the best possible print results. File Format and Color Mode Comparison Attribute Recommended for Print (4OVER4) Avoid for Print Reasoning File Format High-Resolution PDF (PDF/X-1a) JPEG, PNG, GIF, DOCX, PPTX PDF is a universal standard that embeds fonts, images, and vectors, ensuring nothing gets lost or changed. Other formats can cause resolution, font, and color issues. Color Mode CMYK RGB, Pantone (unless specified) CMYK is the 4-color process used by all professional printers. RGB is for screens and will cause major color shifts when converted for print. Resolution 300 DPI (or higher) 72 DPI, 150 DPI 300 DPI is the industry standard for sharp, crisp printing. Lower resolutions, common on the web, will result in blurry, pixelated images. Fonts Embedded or Outlined Live/Active Fonts Embedding or converting fonts to outlines (curves) turns the text into a vector shape, preventing any font substitution issues if we don't have the exact font file. Sticking to these recommendations is the surest way to get a final product that looks exactly like your original design. Ensuring High Image Resolution For your logos, photos, and graphics to look sharp and professional, they need to have a high enough resolution. The industry benchmark for print quality is 300 DPI (dots per inch) calculated at the final print size. If you pull an image from a website, it's likely a low-resolution file, often 72 DPI . Using an image like that will result in a blurry, pixelated mess. Always try to use original, high-quality image files. If you have a logo or graphic in a vector format—like .AI , .EPS , or .SVG —that’s always the best choice. Vector graphics are built with mathematical equations instead of pixels, which means they can be scaled to any size imaginable without losing a shred of quality. They’re perfect for print. For a deeper dive into achieving top-tier results, check out our guide on digital printing services . Common Design Pitfalls and a Preflight Checklist Even the sharpest design can hit a snag with a few common, totally preventable mistakes. Think of this section as your final quality check—the last stop to catch those little errors before they turn into a costly reprint. Getting a handle on these pitfalls is a big part of mastering your table tent specs. A lot of the time, problems pop up when we forget we're designing something that will exist in the real world. A flat design has to fold into a 3D object, and a digital image needs enough data to look crisp on paper. Let's walk through the most frequent design blunders and how to sidestep them. Top 5 Design Mistakes to Avoid Before you hit that upload button, give this list a quick once-over. A few minutes here can save you hours of headaches and the hassle of a do-over. Forgetting Bleed: We've said it before, but it’s the number one issue we see. Failing to extend your background artwork 0.125 inches beyond the final trim line will almost certainly leave you with thin, unprofessional-looking white edges after cutting. Low-Resolution Images: Grabbing images from the web is tempting, but they're almost always low-resolution (typically 72 DPI ). When printed, they'll look fuzzy and pixelated. For a sharp, professional finish, every raster image in your file must be at least 300 DPI at its final printed size. Text Too Close to the Edge: It's easy to let a phone number or logo creep too close to the edge. If it falls outside the safe area (usually 0.125 inches inside the trim line), it's in danger of getting sliced off during trimming. Keep all your critical elements tucked safely inside this margin. Incorrect Panel Orientation: This one’s especially sneaky on interlocking or three-sided tents. In your flat dieline file, it’s surprisingly easy to place artwork for one panel upside down. Always take a moment to visualize how the piece will fold and assemble to make sure every panel faces the right way. Font Issues: This is a classic print problem. If your fonts aren't embedded in the PDF or converted to outlines, our system might substitute them with a default font. This can completely throw off your entire design, changing the look and feel you worked so hard to create. A Quick Fix for Fonts: In Adobe Illustrator , just select all your text (Ctrl+A or Cmd+A), then head to Type > Create Outlines (Shift+Ctrl+O or Shift+Cmd+O). This simple step converts your text into vector shapes, locking them in place so they print exactly as you see them on screen. Your Essential Preflight Checklist Use this checklist as your final safety net. Running through these points ensures your table tent specs are dialed in and your file is ready to fly through production. Document Setup Correct Dimensions: Is your document sized to the final flat dimensions of the table tent, including all panels? Bleed Included: Does your artwork extend 0.125" past the trim line on all sides? Safe Margins Respected: Is all your important text and imagery safely inside the designated safe zone? Dieline on Separate Layer: Is the dieline template on its own non-printing layer, or has it been removed completely from the final print file? Color and Resolution CMYK Color Mode: Have you converted your entire document to CMYK, not RGB? 300 DPI Resolution: Are all placed images high-resolution ( 300 DPI )? Rich Black Values Correct: For large areas of black, did you use a rich black build (like C=60, M=40, Y=40, K=100 ) instead of just 100% K for a deeper, more solid color? Content and File Export Fonts Outlined or Embedded: Have you converted all fonts to outlines or made sure they are properly embedded in your PDF? Spelling and Grammar Checked: Has everything been proofread one last time for typos? File Format is Correct: Are you exporting as a high-quality, print-ready PDF? Checking off these items is the best way to guarantee your file moves smoothly through our system, giving you a perfect table tent that gets your message across without a hitch. Frequently Asked Questions About Table Tent Specs When you're dealing with a three-dimensional product like a table tent, a few specific questions always pop up. It's only natural. Getting the specs right is the difference between a project that works and one that doesn't. This section tackles the most common queries we hear from designers and marketers, giving you clear, straightforward answers. Think of this as your final check-in. We'll reinforce the key ideas from this guide and help you sidestep those little practical challenges that can trip up a project. From achieving perfect color to ensuring your tent survives a busy Saturday night, we've got you covered. What Is the Most Durable Paper for a Restaurant Table Tent? For a high-traffic spot like a restaurant, durability is everything. You need a table tent that can handle spills, constant handling, and frequent wipe-downs without falling apart. The best choice, hands down, is a heavy cardstock—specifically 16pt C2S (Coated 2 Sides) . It provides excellent stability and has that premium feel you want. To really maximize its lifespan, you’ll want to pair that sturdy stock with a Glossy UV coating . This finish isn't just for making your colors pop; it creates a protective, water-resistant layer. This barrier makes the table tent easy to clean, extending its usability and keeping it looking sharp long after it hits the table. Can I Design a Three-Sided Table Tent with Different Information? Absolutely. Three-sided table tents—sometimes called triangle or Toblerone-style tents—are fantastic for organizing information. You could dedicate one panel to daily specials, a second to the drink menu, and the third to a QR code for online ordering. It's a powerful way to deliver multiple messages in one compact footprint. The non-negotiable part of this is using the correct dieline template. The template is your blueprint, showing you the exact orientation and placement for each of the three panels. Following it is the only way to guarantee all your content appears upright and correctly aligned once the tent is folded. Pay close attention to how the panels are ordered in the flat layout to avoid any surprises. Key Takeaway: A dieline template isn't just a guide; it's the map for a successful multi-panel design. It ensures that what you create flat will fold perfectly into its final 3D form, preventing upside-down text or misaligned graphics. Why Does My Logo Look Blurry on the Proof? If you see a blurry logo or image on a print proof, it’s almost always a resolution issue. For professional printing, any raster artwork (like a JPEG or PNG) must have a resolution of at least 300 DPI (dots per inch) at its final printed size. Most images pulled from websites are optimized for screens at 72 DPI and simply won't cut it for print. To fix this, you have to swap out the low-resolution file for a high-quality version. The ideal solution, especially for logos, is to use a vector file format like .AI , .EPS , or .SVG . Because vector graphics are built from mathematical paths instead of pixels, they can be scaled to any size without losing a shred of quality, guaranteeing a perfectly crisp result every time. For a closer look at file requirements, you can explore the different types of table tents we offer and see their specific needs. How Do I Ensure My Brand Colors Print Correctly? Getting accurate color reproduction comes down to a two-step process in your file setup. First and foremost, you have to design and export your file in CMYK color mode , not RGB. If you design in RGB, you’re setting yourself up for significant and often disappointing color shifts when the file is converted for printing. Second, if your brand has very specific colors, referencing their Pantone (PMS) value is a great starting point to find the closest, most accurate CMYK equivalent. For projects where color is absolutely critical, we always recommend ordering a hard copy proof. This lets you see the final printed colors on your chosen paper stock before you commit to the full run—it's the ultimate peace of mind. At 4OVER4 , we specialize in turning your precise designs into high-quality printed materials. Ready to create a table tent that stands out? Explore our options and start your project today at https://www.4over4.com .
 story
story Top Trade Show Booth Ideas to Boost Visitors and Engagement
The trade show floor is a battleground for attention, where a sea of competitors vies for the same prospects. In this high-stakes environment, generic backdrops and a simple table piled with brochures no longer guarantee a return on your significant investment. To capture qualified leads and generate real ROI, your exhibit must evolve into an experience. The difference between being overlooked and being inundated with enthusiastic visitors lies in creativity, strategic planning, and flawless execution. This guide moves beyond the basics to deliver innovative and actionable trade show booth ideas designed to make a powerful, lasting impact. We will explore 10 distinct concepts that transform your standard booth into a must-see destination on the event floor. For each idea, we provide a blueprint for success, breaking down practical implementation steps, specific design strategies, and ways to utilize high-quality custom printing to bring your vision to life. Prepare to learn how to create an immersive, engaging, and unforgettable presence that not only draws crowds but also actively drives conversations, builds brand loyalty, and delivers measurable results. Let's get started. 1. Interactive Technology Showcase Move beyond static displays and transform your space into a hands-on digital playground. An interactive technology showcase uses cutting-edge tools like touchscreens, VR/AR, and motion sensors to create immersive experiences. Instead of just telling attendees about your product, you let them experience it directly, making your booth a memorable destination on the trade show floor. This is one of the most effective trade show booth ideas for demonstrating complex products or services in a simplified, engaging way. How It Works This approach centers on user-driven engagement. For example, a real estate developer could use a large touchscreen to let visitors explore a 3D model of a new property. A software company might use VR headsets to immerse potential clients in a virtual demo environment. The goal is to replace passive viewing with active participation, significantly boosting engagement and recall. To truly captivate attendees, consider integrating digital elements, and delve into strategies for creating engaging interactive videos that can elevate your booth's appeal. Tips for Success Prioritize Intuitive Design: Ensure the technology is simple for anyone to use without a lengthy learning curve. Test interfaces thoroughly. Have a Backup Plan: Technology can fail. Always have a non-digital alternative and on-site tech support ready to troubleshoot. Balance Tech and Talk: Use technology to attract and engage, but ensure your staff is available to answer questions and build personal connections. The tech should be a conversation starter, not a replacement for human interaction. 2. Experiential Product Demonstration Hub Turn your booth into a dynamic, hands-on activity center where attendees don't just see your product, they use it. An experiential demonstration hub allows visitors to actively test, try, and interact with your offerings in a controlled environment. This direct engagement makes the product’s value tangible and memorable, moving beyond a simple sales pitch to a convincing, real-world proof of concept. This is one of the most powerful trade show booth ideas for brands with physical products whose benefits are best understood through experience. How It Works This concept creates a mini-environment focused on firsthand use. For instance, a power tool company like Craftsman might set up stations where attendees can test drills on different materials. Similarly, Dyson often demonstrates its vacuums' effectiveness on various challenging surfaces, allowing people to see the results instantly. The goal is to prove your product's claims on the spot, building immediate trust and excitement. Tips for Success Schedule and Promote Demos: Run demonstrations at regular, advertised intervals to build anticipation and draw a crowd. Use a prominent sign to display the schedule. Train Engaging Presenters: Your staff should be more than just experts; they need to be charismatic presenters who can involve the audience and tell a compelling story. Show Dramatic Results: Use clear before-and-after scenarios to visually highlight the product's benefits. The more dramatic the transformation, the more memorable the demo. Have Backups Ready: Ensure you have multiple products and supplies on hand to run demonstrations continuously without interruption, especially during peak traffic times. 3. Social Media-Optimized Photo Experience Turn your booth into a viral sensation by designing it as a shareable photo opportunity. A social media-optimized experience features visually striking backdrops, unique props, and branded elements that compel visitors to take photos and post them online. This strategy harnesses the power of user-generated content, transforming attendees into brand ambassadors and extending your marketing reach far beyond the physical event. It’s one of the most powerful trade show booth ideas for generating organic buzz and digital engagement. How It Works This concept focuses on creating a designated, visually appealing space that looks incredible on camera. Think of Airbnb recreating its most popular rental listings at travel expos or cosmetic brands like Sephora setting up professional makeup trial stations with perfect lighting for selfies. The goal is to create a moment so unique that attendees feel an urge to capture and share it. By integrating your branding subtly but clearly, every photo shared becomes a micro-endorsement for your company. Tips for Success Create a Branded Hashtag: Develop a unique, short, and memorable hashtag. Display it prominently on custom banners and signs so visitors know exactly what to tag. Offer Sharing Incentives: Encourage posting by running a contest or giveaway. Offer a small prize or a discount to attendees who share a photo from your booth using the official hashtag. Train Your Team: Your staff should be ready to act as photographers. Train them to help visitors get the best shot, which creates a positive interaction and ensures high-quality content. Engage in Real-Time: Monitor your hashtag throughout the event. Like, comment on, and reshare posts from visitors to amplify their content and show your appreciation. 4. Hospitality and Networking Lounge Transform your booth from a sales pitch station into a welcoming oasis where connections are cultivated. A hospitality and networking lounge shifts the focus from aggressive selling to relationship-building, offering a comfortable environment with seating, refreshments, and quiet corners for conversation. This approach positions your brand as a gracious host, creating a relaxed atmosphere that encourages attendees to stay longer and engage more meaningfully. It's one of the best trade show booth ideas for brands looking to build long-term relationships and community. How It Works This concept creates a destination by offering value beyond product demos, such as comfort and networking opportunities. Think of HubSpot's customer appreciation lounges or Salesforce's Trailblazer spaces at major conferences. The goal is to provide a memorable, positive experience that attendees associate with your brand. By offering premium coffee, charging stations, and comfortable furniture, you draw in visitors who are tired of walking the show floor and create a natural setting for your team to start organic, low-pressure conversations. Tips for Success Offer Premium Refreshments: Serve high-quality coffee, snacks, or even a signature cocktail that reflects your brand's standards and leaves a positive impression. Balance Public and Private Spaces: Create an open area for casual networking alongside semi-private nooks or small meeting pods for more focused discussions. Train Staff as Facilitators: Equip your team to be conversation starters and connectors, not just sales representatives. Their goal should be to make guests feel welcome and facilitate introductions. Host Scheduled Events: Drive traffic by scheduling specific events like a "happy hour" or an expert Q&A session. You can even promote these using custom printed door hangers at the host hotel to invite VIPs. 5. Educational Workshop and Learning Center Transform your booth from a sales pitch into a valuable educational destination. A workshop-style booth positions your brand as a thought leader by offering mini-presentations, expert talks, or hands-on learning sessions. Instead of just selling to attendees, you provide them with actionable knowledge and skills they can use, creating a powerful draw for professionals eager for development. This is one of the best trade show booth ideas for building authority and attracting a highly qualified audience. How It Works This approach centers on delivering genuine value through education. For example, a software company like HubSpot could host 15-minute sessions on inbound marketing tactics, while a financial services firm like QuickBooks might offer workshops on small business tax planning. The goal is to create a hub of learning that attracts attendees seeking expertise, not just a product. This builds trust and positions your company as an indispensable resource in your industry, subtly showcasing your solutions as the tools for success. Tips for Success Focus on Value, Not Sales: Structure your content to be genuinely helpful and educational. A hard sell will undermine your credibility. The sales conversation happens naturally after you've demonstrated your expertise. Promote Your Schedule: Announce your workshop topics and times well before the event through email and social media to build anticipation and draw a crowd. Provide Tangible Takeaways: Offer printed handouts, worksheets, or a QR code to download presentation slides. This extends the learning and ensures attendees remember your brand. A well-designed takeaway, along with professionally printed business cards, ensures your experts can connect with attendees for follow-up conversations. You can find options for high-quality, memorable business cards at 4OVER4.com . Keep It Engaging: Use interactive elements like Q&A sessions, live polls, or short, hands-on activities to maintain audience attention in a busy trade show environment. 6. Themed Environment and Storytelling Space Turn your booth from a simple sales pitch into an unforgettable destination. A themed environment uses immersive design, props, and storytelling to transport attendees into your brand’s world. Instead of just seeing your products, visitors experience the lifestyle, values, or mission behind them. This is one of the most powerful trade show booth ideas for building a strong emotional connection and making your brand the talk of the event. How It Works This strategy focuses on creating a multi-sensory narrative. For example, an outdoor gear company like Patagonia might recreate a rustic campsite complete with faux fire pits and nature sounds, allowing visitors to feel the spirit of adventure. The goal is to make the booth an experience in itself, where every element, from the flooring to the scent in the air, reinforces the brand story. This method transforms passive observers into active participants in your narrative, fostering deeper brand loyalty. Tips for Success Ensure Thematic Authenticity: The theme must genuinely reflect your brand’s core values and mission. An inconsistent theme can feel confusing or dishonest. Create Discovery Points: Design the space with multiple points of interest that encourage exploration. This keeps visitors engaged longer and allows them to uncover different aspects of your story. Incorporate All Senses: Engage more than just sight. Use sounds, scents, textures, and even tastes (if applicable) to make the environment completely immersive and memorable. Guide the Journey: Use clear pathways and visual cues to guide attendees through your narrative, ensuring they experience the story as you intended. 7. Sustainable and Eco-Friendly Design Showcase your brand's commitment to corporate social responsibility by creating a booth that is as green as it is impressive. A sustainable and eco-friendly design uses recycled or renewable materials, energy-efficient lighting, and mindful practices to reduce your environmental footprint. This approach resonates powerfully with environmentally conscious attendees and authentically reflects a company's values, making it one of the most relevant trade show booth ideas for modern brands. How It Works This concept centers on making deliberate, eco-conscious choices at every stage of booth design and execution. Instead of traditional builds, you might use reclaimed wood, recycled aluminum frames, or modular components designed for repeated use. Examples include Patagonia's booths made from recycled materials or Interface Inc.'s carbon-neutral exhibits. The goal is to prove that sustainability and stunning design can go hand-in-hand, creating a powerful brand statement. Tips for Success Communicate Your Efforts: Use small signs or digital displays to explain the sustainable elements of your booth, like "This wall is made from 100% reclaimed timber." Plan for Reuse: Design your booth with modularity in mind. Elements that can be easily disassembled, stored, and reconfigured for future shows significantly reduce waste. Go Digital to Reduce Paper: Replace paper brochures and flyers with QR codes linked to digital downloads. For essential signage, explore reusable options. You can learn more about durable and reusable vinyl banner printing for an eco-friendlier choice. Incorporate Natural Elements: Use live, potted plants to enhance your booth's aesthetic. After the show, donate them to a local school or charity to give them a second life. 8. Gamification and Contest Integration Turn your booth into an energetic hub of activity by incorporating game elements, competitions, and interactive challenges. Gamification uses the psychology of play to boost engagement, increase dwell time, and create memorable experiences that attendees will talk about long after the event. This is one of the most powerful trade show booth ideas for collecting visitor information naturally and fostering a sense of community around your brand. How It Works This approach transforms passive observation into active participation. For instance, a software company like Salesforce might create a CRM simulation game, or a brand like Starbucks could host a coffee-knowledge trivia contest. The goal is to create a fun, competitive atmosphere that draws people in and keeps them engaged with your brand message. To truly immerse visitors and add a playful element, consider how you can create a 'choose your adventure' video for your gamification strategy. Tips for Success Educate Subtly: Design games that teach attendees about your product’s key features or benefits without feeling like a sales pitch. Offer Relevant Prizes: Ensure rewards are valuable and appealing to your target audience. Branded items are excellent for this, and you can explore a wide range of promotional products on 4OVER4.com for ideas. Keep it Moving: Implement time limits or simple rules to manage crowds and prevent long wait times, ensuring a steady flow of participants. Train Your Team: Staff should be enthusiastic facilitators who can explain the rules, encourage participation, and maintain a high-energy environment. 9. Multi-Sensory Brand Experience Elevate your brand presence from merely visual to truly experiential by engaging all five senses. A multi-sensory brand experience uses carefully chosen scents, sounds, textures, lighting, and even tastes to create a deeply immersive environment. This approach moves beyond traditional trade show booth ideas by forging powerful emotional connections, making your brand far more memorable than those relying on sight alone. When attendees can feel, hear, and smell your brand, it leaves a lasting impression. How It Works This concept is about creating a holistic brand atmosphere. For example, a luxury hotel chain could use a signature scent diffused in their booth, soft lighting, plush textiles on furniture, and calming ambient music to replicate the feeling of their properties. A coffee company might offer tasting samples while playing the sounds of a bustling café and using rich, warm textures in its design. The goal is to build a cohesive narrative where every sensory input reinforces your brand identity, like Godiva does with its rich chocolate tastings set in elegantly designed spaces. Tips for Success Subtlety is Key: The goal is to enhance, not overwhelm. A faint, pleasant scent is more effective than a strong perfume. Ensure sensory elements are sophisticated and complementary. Create Sensory Zones: Design distinct areas within your booth, each focusing on a different sense. For instance, have a tactile station with product materials next to a comfortable listening lounge. Consider Allergen-Free Options: Be mindful of attendees with sensitivities. If using scents or food, have scent-free zones or allergen-free taste samples available to ensure inclusivity. Train Your Team: Staff should be trained to guide visitors through the experience, explaining how each sensory element connects to the brand story, thus deepening the engagement. 10. Celebrity and Influencer Partnership Leverage the star power of a well-known personality to make your booth an unmissable main event. A celebrity or industry influencer partnership draws significant crowds, generates buzz, and transfers credibility to your brand through association. This is one of the most powerful trade show booth ideas for cutting through the noise and creating an instant attraction that attendees will talk about long after the event. How It Works This strategy centers on bringing a recognized face to your booth for scheduled appearances, meet-and-greets, product demos, or live Q&A sessions. For example, a sports nutrition brand might host an autograph session with a famous athlete, while a software company could have a respected tech influencer host a live-streamed product walkthrough from their booth. The goal is to use their established audience and authority to draw traffic and lend authenticity to your message. You can create a compelling backdrop for these appearances with custom trade show products that highlight both your brand and the guest star. Tips for Success Ensure Authentic Alignment: Choose a partner whose personal brand and values genuinely reflect your company’s. An inauthentic pairing can feel forced and damage credibility. Structure the Engagement: Don't just have them stand there. Plan specific activities like a photo op, a short talk, or a product demonstration to maximize their time and create clear value for attendees. Promote Heavily in Advance: Announce the partnership across all your channels (social media, email, press releases) well before the show to build anticipation and ensure a large turnout. Prepare for Crowd Management: Have a clear plan for managing lines and ensuring the safety and comfort of both the influencer and your visitors. Rope stanchions and dedicated staff are essential. To gain a deeper understanding of the influencer landscape and identify potential collaborators, insights on how to become an influencer can be invaluable. Top 10 Trade Show Booth Ideas Comparison Booth Concept Implementation Complexity 🔄 Resource Requirements ⚡ Expected Outcomes 📊 Ideal Use Cases 💡 Key Advantages ⭐ Interactive Technology Showcase High – advanced tech setup and maintenance High – technical support, hardware, software High engagement, memorable immersive demos Tech companies, automotive, aerospace, B2B High visitor engagement, detailed demos Experiential Product Demonstration Hub Medium-High – space and staffing intensive Medium-High – trained demo specialists, demo products Builds trust, emotional connections, direct feedback Consumer products, tools, appliances, fitness Immediate credibility, qualified leads Social Media-Optimized Photo Experience Medium – setup lighting and photo zones Medium – props, social media monitoring Extended reach via user-generated content Lifestyle, fashion, food & beverage, travel Viral marketing, cost-effective amplification Hospitality and Networking Lounge Medium – spatial needs and hospitality staff Medium-High – refreshments, seating, amenities Strong relationships, longer interactions B2B services, consulting, financial services Builds personal connections, comfortable space Educational Workshop and Learning Center Medium-High – requires SME and content prep Medium – AV equipment, expert presenters Establishes thought leadership, quality leads Software, consulting, training organizations Builds trust, provides valuable knowledge Themed Environment and Storytelling Space High – creative design and thematic setup High – custom fabrication, props, trained staff Memorable, emotional brand connection Lifestyle, entertainment, travel, experience Highly shareable, immersive storytelling Sustainable and Eco-Friendly Design Medium-High – sourcing and planning needed Medium – sustainable materials, eco tech Appeals to eco-conscious, media attention Green tech, sustainable products, eco brands Authentic sustainability, corporate responsibility Gamification and Contest Integration Medium – game design and prize management Medium – games, staff facilitation, prizes Increased engagement, fun experiences Tech, fitness, gaming, youth-focused products High engagement, data collection, repeat visits Multi-Sensory Brand Experience High – sensory design expertise and control High – scents, lighting, sound, taste props Deep emotional connection, strong recall Luxury, food & beverage, cosmetics, hospitality Engages multiple senses, emotional impact Celebrity and Influencer Partnership Very High – coordination, security, costs Very High – appearance fees, logistics Massive traffic, media coverage Consumer brands, entertainment, fashion, sports Increased visibility, PR value, social buzz Bringing Your Vision to Life: Your Next Move The journey through these ten distinct trade show booth ideas has illuminated a fundamental truth: a successful booth is far more than just a physical space. It's an immersive brand experience, a strategic networking hub, and a powerful engine for generating qualified leads. From the high-tech allure of interactive displays to the genuine connection fostered in a hospitality lounge, the common thread is a commitment to creating memorable, value-driven interactions. We’ve moved beyond generic advice to explore actionable concepts. Whether it's integrating gamification to drive engagement, using sustainable materials to communicate brand values, or crafting a multi-sensory environment that captivates attendees, each idea is a blueprint for standing out in a crowded exhibition hall. The goal is no longer just to be seen, but to be remembered, discussed, and sought out. Key Takeaways for Your Next Event To transform these concepts from inspiration into a tangible reality, focus on these core principles: Align with Your "Why": The most effective trade show booth ideas are those that are deeply aligned with your brand's core mission and specific event goals. Are you launching a new product? Aim for an experiential demo. Building brand awareness? A social media photo experience might be your best bet. Prioritize the Attendee Experience: Put yourself in the shoes of your visitors. What would make them stop, engage, and share their contact information? Comfort, education, entertainment, and genuine hospitality are powerful motivators. Quality in Execution Matters: A brilliant concept can be undermined by poor execution. The quality of your printed materials, from the main backdrop to the smallest handout, directly reflects the quality of your brand. Crisp graphics, durable materials, and professional finishing are non-negotiable. Your Actionable Next Steps Feeling inspired? It's time to transition from ideation to implementation. Start by identifying the single most important objective for your next trade show. Is it lead generation, brand visibility, or networking with partners? Once you have your primary goal, revisit the list and select the one or two trade show booth ideas that best support it. Begin outlining the key components you'll need. This includes the structural elements, the technological integrations, and, crucially, the printed collateral that will tie everything together. Think about custom banners, branded flooring, interactive signage, and premium marketing materials that will leave a lasting impression. Ultimately, your trade show booth is a strategic investment in your brand’s future. By choosing a thoughtful, well-executed concept, you create an environment that not only attracts foot traffic but also converts curious visitors into loyal customers. Make your next event your most impactful one yet. Ready to build a booth that commands attention and delivers results? 4OVER4 specializes in bringing your most ambitious trade show booth ideas to life with high-quality, custom printing solutions, from stunning fabric backdrops and displays to professional marketing collateral. Explore our full range of trade show and event printing options at 4OVER4 and start planning your award-winning presence today.
 story
story 9 Game-Changing Trade Show Displays Ideas for 2025
The trade show floor is a battleground for attention. In a sea of banners and brochures, standing out requires more than just a well-placed logo. It demands innovation, engagement, and an unforgettable experience. Generic displays fade into the background, but a truly creative concept can transform your booth from a simple stall into a must-see destination. As we move into 2025, the most effective trade show displays ideas are those that merge technology, sustainability, and human-centric design to forge genuine connections. This article unveils nine powerful concepts that go beyond the traditional, providing you with actionable strategies to captivate attendees, generate high-quality leads, and maximize your event ROI. We will explore specific, practical approaches, from interactive LED video walls and modular exhibit systems to experiential VR/AR stations. You'll gain a blueprint for creating an exhibit that not only attracts foot traffic but also converts it into meaningful business opportunities. To inspire your exhibit planning for the coming years, explore other groundbreaking pixel streaming use cases for 2025 that push the boundaries of audience engagement. Prepare to rethink what your exhibit can achieve. 1. Interactive LED Video Walls: Command Attention with Dynamic Visuals An interactive LED video wall is one of the most powerful trade show displays ideas for brands aiming to make an unforgettable impact. Moving far beyond static backdrops, these large-scale, high-resolution screens transform your booth into a dynamic, immersive digital environment. They serve as a powerful centerpiece, capable of showcasing everything from cinematic brand stories and live product demonstrations to engaging interactive games that draw attendees in from across the exhibition hall. The modular nature of LED panels allows for customization in shape and size, enabling you to create unique architectural features like curved walls or archways. This versatility establishes your brand as a modern, high-tech leader. Big names like Samsung at CES and Apple at their launch events have mastered this by creating seamless, stunning visual experiences that dominate the show floor. To complete the professional look, these digital displays are often complemented by high-quality static elements. Explore options for custom vinyl banners from 4OVER4 to frame your video wall and reinforce your branding. How to Implement This Idea Content is King: Your hardware is only as good as the content you display. Invest in professionally produced motion graphics, high-resolution videos, and interactive applications that tell a compelling story or offer a tangible benefit to the user. Plan for Logistics: LED walls require significant power and a stable structure. Work closely with your booth builder and the event organizers to ensure you have adequate electrical supply and that the rigging or floor support meets safety standards. Integrate Interactivity: Use touch-screen overlays or connections to mobile devices to let visitors control the content. This could involve exploring a 3D product model, playing a brand-centric game, or taking a quiz. Consider Pixel Pitch: Select a pixel pitch (the distance between LEDs) appropriate for the expected viewing distance. A smaller pitch means higher resolution, ideal for up-close interaction, while a larger pitch can be effective for displays viewed from afar. 2. Modular Exhibit Systems: Adaptability and Scalability for Any Event Modular exhibit systems offer one of the most practical and cost-effective trade show displays ideas for businesses that attend multiple events with varying booth sizes. These displays are built from standardized, interlocking components, such as lightweight aluminum frames and tension fabric graphics, that can be easily reconfigured. This flexibility allows you to scale your display up for a major industry expo or down for a smaller regional conference, all while maintaining a consistent and professional brand image. This "building block" approach maximizes your return on investment by eliminating the need for multiple, single-use displays. Companies like Skyline Displays and Nimlok have popularized these systems, which are now staples at major events from CES to medical conferences. For smaller, more targeted displays within your modular setup, you can incorporate rigid graphics. Consider adding foam core signs from 4OVER4 to highlight specific products or promotions with sharp, high-quality visuals. How to Implement This Idea Plan Your Configurations: Before purchasing, map out the different booth sizes you typically use (e.g., 10x10, 10x20, 20x20). Work with your provider to ensure the component inventory you select can create a compelling layout for each scenario. Invest in Quality Graphics: The visual impact of a modular system relies heavily on its graphics. Opt for high-resolution, dye-sublimated tension fabric, which provides a seamless, vibrant, and wrinkle-resistant finish. Create a Component Library: Keep a detailed inventory of all your parts, including frames, connectors, shelves, and graphics. This makes packing for a show and designing new configurations much more efficient. Think Hybrid: Enhance your modular framework with custom elements. You can integrate unique reception counters, product showcases, or lighting fixtures to create a semi-custom look that stands out without the full custom-build price tag. 3. Experiential VR/AR Stations: Create Unforgettable Immersive Experiences One of the most powerful trade show displays ideas for capturing attendee imagination involves experiential virtual reality (VR) and augmented reality (AR) stations. This technology transports visitors beyond the confines of your booth, offering immersive product demonstrations, virtual tours, or gamified brand interactions that are impossible to forget. By handing attendees a headset, you give them a unique, first-person perspective on your product's value, creating a deep and memorable connection that static displays cannot match. This approach positions your brand as a forward-thinking innovator, willing to invest in cutting-edge experiences. Companies like Volvo have used VR to offer virtual test drives at auto shows, while IKEA's AR app lets customers visualize furniture in their own homes. These stations generate significant buzz and social sharing, turning your booth into a must-see destination. To ensure your physical space is just as polished, complement the high-tech setup with professionally printed materials, such as custom pop up displays from 4OVER4 that provide branding and context for the digital experience. How to Implement This Idea Design for Throughput: Keep experiences concise, ideally between 2-3 minutes, to manage queues and allow more visitors to participate. A compelling, short-form interaction is more effective than a lengthy one with long wait times. Prioritize Technical Support: Have backup equipment and a dedicated technical support person on-site. Glitches can happen, and having immediate assistance ensures minimal downtime and a smooth visitor experience. Ensure Relevance: The VR or AR experience must directly relate to your product or service. Whether it’s a virtual tour of a property, a simulation of complex machinery, or an AR product overlay, the goal is to educate and sell, not just entertain. Plan for Hygiene and Staffing: Provide disposable sanitary covers for VR headsets and have staff on hand to clean equipment between uses. Ensure your team is thoroughly trained to guide visitors, troubleshoot issues, and explain the technology confidently. 4. Sustainable and Eco-Friendly Displays: Showcase Your Brand's Values Demonstrating corporate social responsibility is more important than ever, and a sustainable booth is one of the most powerful trade show displays ideas for connecting with a socially conscious audience. This approach involves using recycled, recyclable, or renewable materials to construct your exhibit, minimizing waste and reducing your carbon footprint. From bamboo structures and recycled aluminum frames to non-toxic inks and LED lighting, an eco-friendly display sends a clear message that your brand values sustainability as much as profit. This strategy aligns your physical presence with your corporate ethos, creating an authentic brand experience. Companies like Patagonia have famously used reclaimed wood and recycled materials in their displays, while B Corporations often lead the way in showcasing innovative, low-impact designs. These booths not only attract environmentally aware attendees but also position your brand as a forward-thinking industry leader. Even smaller, targeted print materials can reflect this ethos; consider using recycled paper stock for items like custom door hangers from 4OVER4 to distribute special offers or "do not disturb" signs for hotel room drops during the event. How to Implement This Idea Choose Green Materials: Opt for materials like bamboo, reclaimed wood, recycled aluminum, and fabrics made from recycled plastics. Work with a booth builder that specializes in sustainable construction and can provide documentation of their material sources. Highlight Your Efforts: Your sustainability is a key selling point. Use small signs or graphics within your booth to explain the materials you've used and your commitment to the environment. This educates visitors and reinforces your brand story. Reduce and Reuse: Design a modular booth that can be easily reconfigured and reused for multiple shows, which reduces long-term waste and cost. Prioritize digital displays and tablets over single-use printed brochures to minimize paper consumption. Plan for End-of-Life: Think about what happens to your booth after the show. Partner with local organizations to donate materials, or ensure your components are easily recyclable. Implement a clear waste-sorting system within your booth for staff and visitors. 5. Multi-Level and Mezzanine Structures: Maximize Your Footprint by Building Up When floor space is at a premium, one of the most impactful trade show displays ideas is to build vertically with a multi-level or mezzanine structure. These two-story exhibits effectively double your usable square footage without increasing your floor plan cost, creating an imposing and prestigious presence that stands tall above the competition. This approach allows you to segment your booth into distinct zones, using the ground floor for high-traffic activities like product demos and the upper level for more exclusive engagements. The commanding physical presence of a second story naturally attracts attention and communicates market leadership. Major tech companies like IBM and Cisco often use these structures to house private meeting rooms, VIP lounges, or specialized demonstration centers, separating high-value prospects from the general crowd. This strategy not only enhances the visitor experience for key clients but also adds an element of exclusivity and aspiration to your brand. How to Implement This Idea Plan and Permit Early: Double-deck structures are complex and require engineering approval and permits from the event venue and local authorities. Start this process many months in advance to avoid last-minute complications and ensure full compliance with all safety and building codes. Design for Functionality: Designate clear purposes for each level. The ground floor should be open and inviting to attract general attendees, while the upper level can be designed for quiet conversations, detailed presentations, or hospitality. Ensure Accessibility: A crucial and often required aspect is accessibility. Plan for an elevator or lift to ensure all guests, regardless of mobility, can access the upper level. This demonstrates inclusivity and meets ADA requirements. Integrate Lighting and Branding: Use strategic lighting to highlight the architectural features of your structure. Ensure branding is visible from all angles, including from across the show floor, to maximize the visual impact of your vertical investment. 6. Product-Centric Demonstration Zones Sometimes, the best way to sell a product is to let it speak for itself. Product-centric demonstration zones are powerful trade show displays ideas that create dedicated spaces for attendees to get hands-on experience. Instead of just talking about features, these zones allow visitors to touch, use, and see your product in action, transforming passive viewers into active participants. This direct interaction builds trust and provides undeniable proof of your product’s value and quality, making a far more lasting impression than a brochure ever could. This approach is masterfully executed by brands like Dyson, which sets up stations with various floor types and debris for attendees to test its vacuums. Similarly, consumer electronics giants like Canon create live photography sets where visitors can trial different cameras and lenses. By designing a controlled environment that showcases your product’s key strengths, you create a memorable, high-impact experience. To guide visitors and manage flow, consider using professionally designed signage like custom foam board signs from 4OVER4 to label demo areas and provide clear instructions. How to Implement This Idea Train Your Experts: Your demonstration staff are crucial. Ensure they are not just salespeople but true product experts who can answer tough questions, guide users through features, and troubleshoot on the fly. Structure the Experience: Develop a clear, concise demonstration script that highlights key selling points. However, allow for flexibility so staff can tailor the demo to an individual attendee’s specific interests or pain points. Prepare for High Traffic: Always have backup units and necessary supplies ready to go. A non-functioning demo station is a missed opportunity, so plan for continuous operation throughout the event. Incorporate Lead Capture: Use the demonstration as a natural point to collect contact information. Offer to email attendees a product spec sheet, a video of their demo, or a special post-show discount in exchange for their details. 7. Branded Hospitality Lounges: Foster Relationships with Comfort and Class Among the most effective trade show displays ideas for relationship-focused businesses is the creation of a branded hospitality lounge. This concept shifts the focus from a quick transactional pitch to fostering deeper connections in a comfortable, inviting environment. Instead of a standard booth, you design a welcoming space with comfortable seating, refreshments, and a relaxed atmosphere that encourages attendees to linger, network, and engage in meaningful conversations away from the chaotic show floor. This strategy is about creating an exclusive retreat that makes visitors feel valued. It’s an ideal setting for one-on-one meetings, product deep-dives, or simply offering a moment of respite. Companies like Salesforce with their "Trailblazer" community lounges and professional services firms like Deloitte have perfected this by creating sophisticated, on-brand spaces that serve as hubs for networking and high-level discussions. The key is to make the experience, not just the product, the main attraction. To complete the look, ensure every surface reflects your brand, including using high-quality custom table covers from 4OVER4 for serving areas and meeting points. How to Implement This Idea Design for Brand Personality: Your lounge's aesthetic should be a direct reflection of your brand. A tech company might opt for a modern, minimalist design with charging stations, while a luxury brand could choose plush furniture and premium finishes. Offer Quality Refreshments: Go beyond basic water bottles. Consider offering barista-made coffee, gourmet snacks, or even a themed mocktail. The quality of your hospitality speaks volumes about your brand's attention to detail. Train Staff for Engagement: Booth staff in a lounge setting should act as gracious hosts, not aggressive salespeople. Train them to facilitate introductions, start natural conversations, and make guests feel comfortable. Implement a Reservation System: For high-traffic shows or exclusive meeting areas within the lounge, use a simple online reservation system to manage schedules and ensure key stakeholders can secure a private conversation. 8. Theatrical and Performance Displays: Create Unforgettable Moments Transforming your booth into a stage is a bold and highly effective trade show display idea that creates an entertainment spectacle around your brand. By incorporating live performances, theatrical elements, or professionally staged presentations, you move beyond simple product showcases and offer attendees a memorable experience. This approach captures attention on a grand scale, using the power of performance art to convey brand messages, highlight product features, and evoke strong emotions, ensuring your booth is a must-see destination on the show floor. This strategy is mastered by brands that understand the value of "show, don't just tell." Think of BMW's dramatic, choreographed car reveals at auto shows or Red Bull's electrifying extreme sports exhibitions. These displays generate immense buzz because they provide genuine entertainment value. The performance becomes a shareable moment that attendees capture and post, extending your reach far beyond the exhibition hall. To ground the spectacle, pair the performance with solid branding elements like professionally printed foam board signs that provide context and reinforce your message. How to Implement This Idea Align Performance with Brand Identity: The show must reflect your brand. A luxury brand might hire a string quartet or a magician, while a tech company could feature a futuristic dance troupe with LED costumes. The performance should feel like a natural extension of your brand story. Schedule and Promote Showtimes: Treat your performance like a main event. Create a clear schedule with multiple showtimes throughout the day and promote it heavily on social media and in pre-show communications to build anticipation and draw a crowd. Hire Professional Talent and Production: Amateur performances can reflect poorly on your brand. Invest in professional performers, choreographers, and a production team to manage lighting, sound, and staging for a polished, seamless execution. Ensure Venue Compliance: Live performances often have specific requirements for space, safety, sound levels, and insurance. Work closely with event organizers from the beginning to ensure your concept complies with all venue regulations and safety standards. 9. Data-Driven Digital Experiences: Personalize for Maximum Impact Take visitor engagement to the next level with data-driven digital experiences. These sophisticated trade show displays ideas use real-time analytics, AI, and personalization to create customized interactions for each attendee. Instead of a one-size-fits-all presentation, your booth can adapt its content based on visitor demographics, stated interests, or even real-time behavior tracked by IoT sensors. This approach transforms a passive viewing experience into a highly relevant and memorable personal consultation. Leading tech companies excel at this. Think of IBM using its Watson AI to answer complex questions or Salesforce demonstrating how its CRM integrates live data to personalize a customer journey on screen. These dynamic displays prove your brand’s technical prowess while delivering immense value to attendees, showing them exactly how your solutions can solve their specific problems. This strategy positions your brand as a forward-thinking leader that understands the power of personalization. To further enhance these digital interactions, you can discover more about data-driven customer engagement strategies at 4OVER4 to complement your display. How to Implement This Idea Focus on Visitor Value: The technology should serve a purpose. Ensure your data-driven experience provides a clear benefit, such as personalized product recommendations, a tailored cost-savings analysis, or a custom solution roadmap. Start Small and Scale: You don't need a massive AI infrastructure from day one. Begin with a simple interactive quiz that captures attendee interests and then displays relevant case studies or video testimonials based on their answers. Prioritize Data Privacy: Be transparent about the data you are collecting and how you are using it. Ensure your system is compliant with all relevant data privacy regulations like GDPR or CCPA to build trust with visitors. Train Your Team: Staff must be able to explain how the digital experience works and assist visitors who may not be tech-savvy. They are crucial for bridging the gap between the technology and the human connection. Trade Show Display Ideas Comparison Matrix Item Implementation Complexity 🔄 Resource Requirements ⚡ Expected Outcomes 📊 Ideal Use Cases 💡 Key Advantages ⭐ Interactive LED Video Walls High - requires technical expertise, setup High - costly equipment, power, content High impact, immersive visual engagement Product launches, large-scale brand demos Extremely eye-catching, versatile content Modular Exhibit Systems Low to Medium - tool-free assembly, modular Moderate - initial component investment Good flexibility, easy reconfiguration Multiple shows, adaptable booth layouts Cost-effective, easy transport and setup Experiential VR/AR Stations High - custom app development, tech setup High - equipment, skilled operators Memorable, engaging, detailed visitor data Immersive demos, buzz generation Highly engaging, generates social media buzz Sustainable and Eco-Friendly Displays Medium - limited materials and design options Medium - eco-friendly materials can cost more Positive brand image, aligns with sustainability Green brand messaging, eco-conscious audiences Aligns with sustainability goals, long-term cost savings Multi-Level and Mezzanine Structures Very High - engineering, safety, permits Very High - construction, labor, large space Maximized space, premium meeting areas Large booth footprints, VIP meetings Impressive visual impact, separates activities Product-Centric Demonstration Zones Medium - requires knowledgeable staff Medium - demo products, setup complexity Direct product experience, customer trust Hands-on product trials, detailed demos Drives sales, builds confidence Branded Hospitality Lounges Medium - space planning, staffing Medium to High - ongoing refreshments Longer visitor engagement, relationship building Networking, lead generation Positive brand associations, comfortable space Theatrical and Performance Displays High - production, rehearsal, scheduling High - talent, lighting, sound systems Memorable, shareable entertainment experiences Live brand storytelling, buzz generation Differentiates brand, creative storytelling Data-Driven Digital Experiences Very High - complex tech, privacy compliance High - development, maintenance, support Personalized, measurable engagement AI-driven demos, real-time data visualization Highly relevant experiences, valuable analytics From Idea to Impact: Activating Your Next Great Exhibit The journey through these nine innovative trade show displays ideas reveals a powerful truth about modern exhibiting: success is no longer about simply showing up. It’s about creating an immersive environment that captivates, connects, and converts. We've explored a wide spectrum of possibilities, from the high-tech allure of interactive LED walls and VR/AR stations to the strategic sophistication of multi-level structures and branded hospitality lounges. Whether you lean towards the sustainable-first approach of an eco-friendly build or the captivating drama of a theatrical performance, the core principle remains consistent. The most effective exhibits are not static advertisements; they are dynamic, multi-sensory experiences. They are thoughtfully designed to do more than just attract attention. They are engineered to facilitate meaningful interactions and build lasting brand recall long after the event concludes. Synthesizing Strategy and Creativity The key takeaway is that the best trade show displays ideas are born at the intersection of strategic goals and creative execution. It's not enough to have a great product; you must present it within an equally great experience. Consider how a product-centric demonstration zone can demystify a complex offering or how a data-driven digital experience can provide personalized value to every visitor. Each concept we've discussed is a tool to help you achieve a specific objective, be it lead generation, brand education, or industry leadership. Your next steps should involve a critical review of your own marketing goals. What is your primary objective for the next trade show? Is it to launch a new product, generate qualified leads, or increase brand awareness? Who is your target attendee? What are their pain points, and what kind of experience would resonate most deeply with them? What is your brand's story? How can your booth’s design, from its structure to its graphics, tell that story in a compelling way? Answering these questions will guide you toward the right combination of ideas for your unique situation. Remember, you don't have to choose just one concept. Many of the most impactful booths strategically combine elements, like using a modular system to create distinct zones for product demos and a small hospitality area. The future of trade show marketing is undeniably experiential and purposeful. By moving beyond passive displays and embracing active engagement, you transform your booth from a simple space on the floor into a must-visit destination. The investment you make in a well-planned, strategically executed exhibit is an investment in building stronger customer relationships and driving measurable business growth. Your exhibit is your brand's physical handshake, your live-action story, and your most powerful opportunity to make a lasting impression. Make it count. Ready to bring your visionary trade show displays ideas to life with flawless execution? Ensure every graphic, banner, and sign reflects the quality of your brand by partnering with the printing experts at 4OVER4 . Explore our comprehensive range of custom trade show printing solutions at 4OVER4 and build an exhibit that stands out for all the right reasons.
 story
story Trade Show Marketing Materials That Actually Convert
Trade show marketing materials are all the physical and digital tools you bring to the fight—from towering banners and slick brochures to handy QR codes and can’t-miss swag. These assets are your frontline soldiers, tasked with grabbing attention, sparking conversations, and making sure your brand sticks in people's minds long after they've left the building. Why Your Booth Is Incomplete Without Strategic Materials Picture your trade show booth as a stage. You can score the best spot on the floor and bring your most charismatic team, but without the right props and script—your marketing materials—the whole performance just falls flat. These items are the crucial bridge that turns a casual passerby into a genuine lead, transforming fleeting glances into real business discussions. It's time to move past the old idea of just "handing out stuff." A better way to think about these materials is as a complete, strategic communication system. Every single piece, from a pen to a pop-up display, has a specific job to do. Creating a Cohesive Brand Experience Everything should work together. The massive backdrop that tells your brand’s story in three seconds, the brochure that keeps the conversation going days later, and the branded tote bag they carry it all in—it’s all part of the same narrative. A cohesive set of trade show marketing materials creates an immersive brand experience that slices through the noise of a packed exhibition hall. The mission is to build a story that’s consistent, memorable, and ultimately, persuasive. Remember, these assets are a core part of a bigger modern trade show marketing strategy designed to win. Your materials do the talking before your team even says hello. They have to be compelling enough to make an attendee stop, look, and listen in an environment overflowing with distractions. Capturing High-Value Attention The competition on the show floor is absolutely fierce, but the rewards are massive. The quality of attendees has never been higher, with a staggering 81% of participants holding direct buying authority. With more and more companies exhibiting, standing out is no longer a luxury—it's a necessity. Powerful materials are your best bet for capturing the attention of these key decision-makers. A well-designed collection of physical and digital assets ensures you capitalize on every single interaction. Whether it’s a beautifully designed business card or an engaging digital display, each piece adds to your overall success. By investing in a well-planned set of trade show products , you give your team the tools they need to not just participate, but to truly own the event floor and walk away with a powerful return on your investment. Your Essential Pre-Show and At-Show Collateral When you think about trade show marketing, it’s easy to picture the big, flashy booth and stacks of brochures. But the real pros know that a winning strategy starts long before the event doors ever open. Success isn't about what you bring on the day; it's about a smart, two-phase approach: the pre-show hype and the at-show execution. Each stage has its own goals, and you’ll need a different set of tools for each one. Building Pre-Show Momentum The weeks leading up to a trade show are your golden opportunity to build some serious buzz. Your goal is to turn your booth into a must-see destination, not just another stop on a long walk through the convention center. This is where digital materials are your best friend. Targeted Email Campaigns: Don't just send a generic blast. Personalize your invitations to existing contacts who might be there. Tease what’s new, offer a sneak peek, or give them a compelling reason to book a meeting with your team right then and there. Social Media Graphics: Create a sharp, consistent set of visuals for platforms like LinkedIn and X (formerly Twitter). Jump on the event-specific hashtags and share posts that clearly show your booth number and what makes you special. Dedicated Landing Pages: A simple, focused webpage for the event works wonders. It should be incredibly easy for visitors to see your show-specific offers and book a demo or meeting directly on your team's calendar. Think of these pre-show efforts as a powerful magnet. You're pulling the most qualified, interested attendees straight to your booth before the chaos of the show floor even begins. Mastering Your At-Show Arsenal Once the event kicks off, your physical trade show materials get their time to shine. These aren’t just random handouts; they need to work together as a cohesive system to grab attention, educate visitors, and ultimately, convert them into leads. This infographic breaks down how different materials should work together to create a full brand experience, tell a compelling story, and spark genuine conversations. As you can see, there's a clear hierarchy. Your booth design creates the overall vibe, big banners tell your story from a distance, and smaller items like brochures and sell sheets facilitate the one-on-one conversations. To make sure you have all your bases covered, here’s a handy checklist organizing the must-have physical materials by their job on the show floor. Essential At-Show Marketing Materials Checklist Material Category Specific Items Primary Purpose Booth Structure & Signage Pop-Up Banners, Backdrops, Hanging Signs Attract attention from a distance and communicate your core value proposition in seconds. Brand Reinforcement Branded Table Covers, Podium Wraps Add a professional touch and reinforce your brand identity for visitors approaching the booth. Informational Takeaways Brochures, One-Page Sell Sheets, Catalogs Provide detailed information that visitors can take with them to review later. Lead Capture & Follow-Up Business Cards, Lead Capture Forms/Apps Exchange contact information and ensure you have a reliable way to continue the conversation post-show. This checklist helps ensure that every piece of collateral has a purpose, from the largest banner down to the smallest business card. For that crucial post-show follow-up, you can get creative. Instead of just another email, consider sending custom-printed postcards with a personalized thank-you note to make a memorable impression. Every single item at your booth, from the massive backdrop to the business card you hand out, must have a clear job. If it doesn't help attract, inform, or convert, it's just clutter. Designing Materials That Command Attention On a chaotic trade show floor, you have about three seconds to make an impression before a potential customer walks right by. Your trade show marketing materials don’t just need to look good; they have to act like a powerful beacon, pulling people in from the crowded aisle. This is where you move beyond just pretty pictures and start thinking about strategic design. Think of your design as your silent salesperson. It needs to communicate your core message in the blink of an eye. This all starts with understanding how attendees visually scan a busy environment and then designing your assets to meet them where their eyes naturally go. The single biggest mistake I see exhibitors make? Information overload. When you try to cram every feature and benefit onto a banner or flyer, you just create visual noise that people are trained to ignore. Your real goal is to create clarity and spark curiosity—not to deliver your entire sales pitch on paper. Create a Clear Visual Hierarchy Visual hierarchy is simply the art of arranging things to guide the viewer’s eye. At a trade show, this isn't some fancy design-school concept; it’s a survival tool. A strong hierarchy makes sure your most important information gets seen first, fast. To build a hierarchy that actually works on the floor, focus on these three things: A Bold Headline: This is your hook. It should be the biggest piece of text, shouting a powerful benefit or asking a question that stops your ideal customer in their tracks. High-Impact Imagery: One big, high-quality photo or graphic is worth a dozen small ones. Your image should tell a story, show your product in action, or just create a feeling that connects with your brand. A Clear Call-to-Action (CTA): What do you want them to do next? Whether it’s “Scan for a Demo” or “Enter to Win,” your CTA needs to be distinct and easy to spot from a few feet away. This simple, structured approach cuts through the clutter and gets your message across with maximum impact, even from a distance. Leverage Color and Typography Color is a powerful psychological tool. You already know this. Bright, bold colors like red or orange are fantastic for grabbing attention, while cooler tones like blue and green can project a sense of trust and professionalism. Your color palette should absolutely be consistent with your brand, but you also need to pick colors that will pop in the specific lighting and environment of the show. Typography is the voice of your written message. On the trade show floor, that voice needs to be loud and clear—literally. Your font choice is just as critical. For big displays like banners, stick with bold, sans-serif fonts that are easy to read from 10-15 feet away . When it comes to smaller, handheld materials like brochures, just make sure the body text is legible and has enough breathing room. Well-designed banners are often the very first handshake you have with an attendee. For a deeper dive, check out these best practices for designing and printing vinyl banners. At the end of the day, every single design choice you make should serve one primary goal: making an instant connection that pulls people into your booth for a real conversation. Choosing Giveaways People Actually Want to Keep Let’s be honest: most trade show swag ends up in the hotel trash can. It’s not just a waste of money—it’s a huge missed opportunity to make a lasting impression and build some real brand loyalty. The secret is to pick promotional items that actually solve a problem or offer genuine value. That's how you stay on their desk, not in the bin. Forget the cheap pens and flimsy keychains. Your goal is to find giveaways that connect with your brand and meet the real-world needs of your audience. A great piece of swag acts as a constant, useful reminder of your company, not just another piece of junk to clutter up a drawer. Companies are pouring serious cash into events these days. In a recent year, the average company's annual spending on trade shows hit a staggering $1.4 million —a 70% jump from the year before. With events eating up 12.7% of total marketing budgets, it’s critical to make every dollar spent on giveaways an investment, not an expense. A Tiered Approach to Swag Instead of handing the same thing to everyone who walks by, try a more strategic, tiered approach. This lets you match the value of the swag to the level of engagement, stretching your budget and making a bigger impact where it counts. Tier 1: The Universal Handout This is for anyone who stops by your booth. Think low-cost but high-utility. Things like branded microfiber cloths for cleaning screens, simple phone stands, or a really good lip balm. These are items people will genuinely use and appreciate. Tier 2: The Qualified Lead Gift Save something a little nicer for prospects who sit through a demo or have a meaningful conversation with your team. This could be a sturdy water bottle, a portable power bank, or a quality notebook and pen set. It’s a small gesture that acknowledges their time and interest. Tier 3: The Premium Item Keep your best stuff for high-value prospects or those scheduled meetings with key decision-makers. We’re talking premium items like a Bluetooth speaker, a high-end travel mug, or maybe even a gift card. This shows you’re serious about building a partnership and truly value their time. By matching the value of the giveaway to the value of the interaction, you create a more memorable and impactful experience for everyone who visits your booth. This tiered system ensures your budget for customizable promotional products is used wisely, rewarding genuine interest and turning your swag into a powerful tool for building real business relationships. Integrating Digital Tools for a Modern Booth Experience In the fast-paced world of trade shows, the sharpest marketing materials are no longer just physical—they’re a smart mix of tangible presence and digital savvy. A modern booth is more than just a product display; it’s an interactive journey for attendees, woven together with tech that makes the experience stick and your follow-up seamless. This isn't just a hunch; it reflects a massive shift in the event industry. Virtual and hybrid events are booming, with virtual-only events accounting for about 21% of all trade shows globally in a recent year. And with the global virtual events market hitting a $236.7 billion valuation, it’s crystal clear: attendees now expect digital interaction even when they're standing right in front of you. You can discover more about these evolving event trends and what they mean for your next show. Bridging Print and Pixels The easiest place to start is by making your printed materials pull double duty. Don't think of a QR code as a tired gimmick; see it as a direct bridge from a physical brochure to a rich digital experience. A single, well-placed code can instantly whisk a curious visitor to a destination you've designed just for them. On Business Cards: Link straight to your personal LinkedIn profile or an online meeting scheduler. No more fumbling for details. On Banners: Drive foot traffic to a dedicated landing page with a show-exclusive discount or resource. On Sell Sheets: Connect them to powerful video testimonials or in-depth case studies that make your claims undeniable. This strategy gives people immediate access to more information without cluttering up your designs. It respects their time while snagging their interest. Creating an Interactive In-Booth Journey Static displays just don't hold attention anymore. Ditch the stacks of pamphlets and bring in a few tablets. This simple switch allows for dynamic, personalized presentations. Your team can walk prospects through interactive demos, capture their contact info directly into your CRM, and email them relevant follow-up materials on the spot. Your booth should be more than a static display; it should be an experience. By integrating digital tools, you empower attendees to engage with your brand on their own terms, leading to more qualified and memorable interactions. Large screens are another game-changer. Instead of a looping PowerPoint, use them to showcase eye-catching product animations, customer success stories, or even a live social media feed featuring your event hashtag. This creates a buzz and energy that pulls people in from the aisle, turning passive observers into active participants. It’s this fusion of tangible trade show marketing materials and smart digital tools that creates a memorable, data-rich experience—one that pays dividends long after the convention center doors have closed. Turning Event Leads into Customers After the Show The banners are packed away and the trade show floor is empty, but don't be mistaken—the most important part of your event has just begun. All those conversations you started and leads you gathered are just potential until you act on them with a swift, strategic follow-up plan. This is where your post-show trade show marketing materials really start to shine. Those first 48 hours after the event are absolutely critical. Your brand is still fresh in everyone's mind, so you can't afford to wait. The real key here is to move beyond a generic, one-size-fits-all "thanks for stopping by" email. You need to segment your leads based on how interested they were and what you actually talked about. Tailoring Your Follow-Up Strategy Let's be honest: not all leads are created equal. Taking a moment to segment them ensures your message actually connects and doesn't just get buried in a crowded inbox. Hot Leads: These are the people who scheduled demos or got deep into the weeds with you about their specific problems. You need to send them a highly personalized email within 24 hours . Reference your conversation directly and attach that case study or sell sheet they asked for. Make it feel like a seamless continuation of your chat. Warm Leads: This group showed real interest but wasn't quite ready to pull the trigger. Add them to a nurturing email sequence that offers value over time. Think a well-researched white paper or an invitation to your next webinar. Keep the relationship warm without being pushy. General Booth Visitors: For everyone who just dropped a business card in a fishbowl for a prize, a general thank-you email is fine. A link to a "show highlights" blog post works great here. It's low-pressure and keeps you on their radar. The whole point of post-show follow-up is to continue the conversation you started, not just to hard-sell. When you provide immediate, relevant value, you build trust and keep your brand top-of-mind. This focused approach is a core part of any successful lead generation process. By getting the right content to the right person at the right time, you guide them naturally from a simple trade show connection to a paying customer. To really squeeze every drop of ROI from your trade show budget, it's also worth looking into broader general conversion rate optimization strategies to polish up your entire sales funnel. Finally, don't let the momentum die on social media. Share a highlight reel or a photo gallery from the event, and be sure to tag any partners or key visitors you connected with. This extends the life of the show and reinforces that positive experience for everyone who stopped by your booth. You can dive deeper into turning these interactions into real business in our guide to improving your lead generation . Frequently Asked Questions When it comes to trade show marketing materials, a few common questions always seem to pop up. Let's tackle some of the details that exhibitors often puzzle over when gearing up for an event. How Far in Advance Should I Prepare My Trade Show Materials? You'll want to get the ball rolling 3-4 months before the event, especially if it's a big one. This timeline gives you plenty of breathing room for hashing out your strategy, going through design mockups, and getting everything printed and shipped without paying a fortune in rush fees. Your big-ticket items—like large banners, booth backdrops, and any custom promotional goodies—usually take the longest to produce. Get those sorted out first. Trust me, having a well-planned timeline is the best way to avoid those expensive, last-minute panics. What Is the Biggest Mistake to Avoid with Booth Materials? Hands down, the most common and damaging mistake is visual clutter . So many exhibitors fall into the trap of trying to cram every last detail about their company onto a banner or flyer. The result? A mess that just overwhelms attendees and makes their eyes glaze over. The primary goal of your trade show marketing materials is not to tell your entire company story, but to start a conversation. Think of it this way: your materials are the hook. All you need is one killer headline, a powerful image, and a crystal-clear call-to-action. Let your materials grab their attention, and then let your expert booth staff use them as a springboard to dive into the details. How Can I Measure the ROI of My Marketing Materials? Measuring the return on investment (ROI) from your materials all comes down to tracking. If you can't trace a lead back to a specific piece of collateral, you're just guessing. The trick is to embed tracking right into your materials. Use unique QR codes on different assets that lead to event-specific landing pages. Or, you could offer a show-only discount code printed right on your flyers. After the show, it's just a matter of connecting the dots. See how many of those specific leads turned into actual customers. Compare the revenue they brought in against what you spent on the materials, and you’ll have a clear picture of your true ROI. Ready to create marketing materials that stop people in their tracks and get you real results? From stunning banners to giveaways people actually want to keep, 4OVER4 has everything you need to make your next trade show a massive success. Start designing your winning trade show materials today!
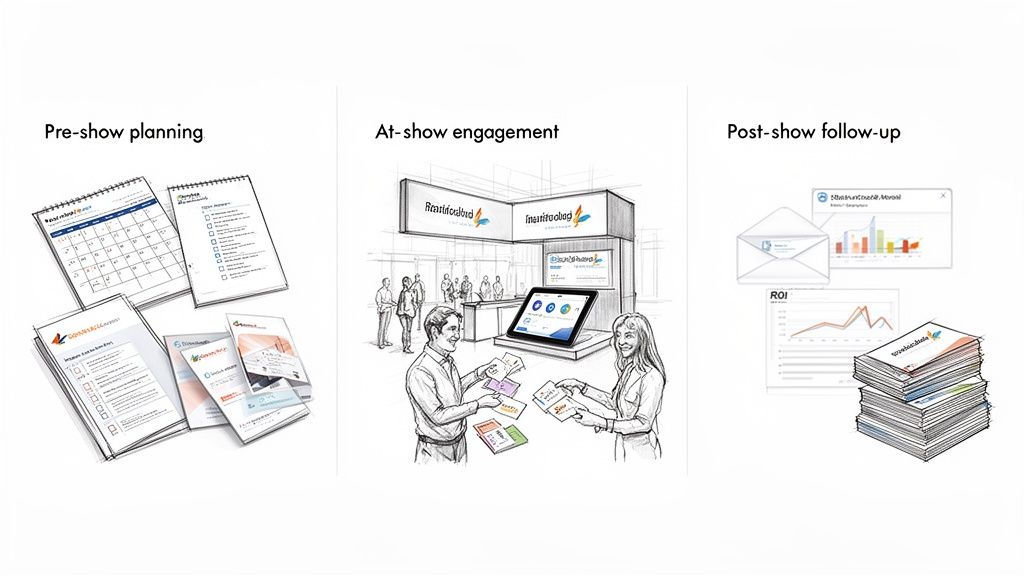 story
story 10 Game-Changing Trade Show Marketing Strategies for 2025
Trade shows are no longer just about having a booth; they're about creating a multi-faceted brand experience that drives measurable ROI. Standing out in a crowded exhibition hall requires more than a simple banner and a bowl of candy. It demands a strategic, integrated approach that engages attendees before they arrive, captivates them on the floor, and nurtures them long after the event ends. For small and medium-sized businesses, mastering this lifecycle is the key to transforming a significant event expenditure into tangible business growth. This guide moves beyond generic advice to provide a comprehensive blueprint of 10 actionable trade show marketing strategies . We will explore how to fuse high-impact printed materials with smart digital tactics to create a seamless and memorable attendee journey. Each strategy is designed to be practical, scalable, and focused on delivering results, from pre-show mailers that build anticipation to post-show follow-ups that convert hot leads. To ensure your trade show presence generates significant buzz and achieves its objectives, explore these effective event marketing strategies . You will learn how to: Design an immersive booth experience with custom printed backdrops, banners, and signage. Implement targeted direct mail campaigns to draw high-value prospects to your booth. Leverage QR codes on everything from business cards to product labels for instant digital engagement. Create must-have leave-behind materials and training collateral that empowers your sales team. We'll provide actionable steps for each point, including design guidance using 4OVER4's services, helping you build a plan that guarantees you won't just participate at your next event, you'll dominate. 1. Customized Booth Design with Branded Printed Materials Your trade show booth is more than just a physical space; it’s a temporary storefront and the primary embodiment of your brand. An effective booth design uses strategically printed materials to create a cohesive, immersive experience that stops attendees in their tracks. This trade show marketing strategy moves beyond a simple banner and table, turning your plot of floor space into a powerful brand statement. The core idea is to use high-quality, consistently branded printed assets to tell a visual story. This includes everything from large-format tension fabric backdrops and retractable banners to smaller details like branded table throws, podium graphics, and even custom floor decals. When executed well, these elements work together to communicate your value proposition instantly, making your booth inviting and easy to understand from a distance. Actionable Implementation and Tips To transform your booth from a generic display to a magnetic brand hub, focus on integration and quality. A well-designed booth not only attracts visitors but also guides them through a planned experience. Plan for Impact: Begin the design process 6-8 weeks before your event. This provides ample time for concept development, revisions, and production. Coordinate with your print provider to ensure all materials, from banners to brochures, share the same color profiles and design language. Material and Finish Matter: The quality of your materials reflects the quality of your brand. Opt for weather-resistant vinyl banners for outdoor or high-traffic events. For indoor displays, consider premium finishes like matte or velvet lamination on signage to create a sophisticated, tactile experience that encourages interaction. Integrate Modern Printing Tech: For innovative branding on both your booth and promotional items, explore powerful new printing methods. The versatility of UV DTF transfers allows for durable, vibrant designs on a wide array of surfaces, from hard-shelled equipment to unique swag items. Maximize Every Surface: Treat every visible part of your booth as a marketing opportunity. Ensure key messaging, a clear call-to-action (like "Scan for a Demo"), and your website or social media handles are visible on backdrops, podiums, and even the edge of your table cover. By investing in a thoughtful and professionally produced environment, you create a memorable destination that facilitates meaningful conversations. You can explore a wide range of options for your display with professionally curated trade show booth kits . 2. Pre-Show Direct Mail and Collateral Campaigns Long before the event floor opens, the most effective trade show marketing strategies are already at work. A pre-show direct mail campaign is a powerful way to cut through the digital noise and place your brand directly in the hands of key decision-makers. This strategy involves sending targeted printed materials like postcards, personalized mailers, or product sneak-peeks to a curated list of potential attendees, warming them up to your brand and giving them a compelling reason to seek you out. This tactile approach builds anticipation and establishes a connection weeks before your competitors even have a chance. The goal is to make your booth a planned destination rather than an accidental discovery. By combining a physical mailpiece with a clear call-to-action, such as an invitation to a private demo or an exclusive giveaway, you transform a cold prospect into an engaged lead who arrives at your booth with intent. Actionable Implementation and Tips To execute a successful pre-show campaign, your approach must be timely, targeted, and integrated with your digital efforts. The physical mailer acts as the hook, while digital touchpoints reel in the engagement. Timeline is Everything: Begin your campaign 6-8 weeks before the trade show. Send your initial mailer so it arrives approximately 4-5 weeks out, with a follow-up piece landing 1-2 weeks before the event. This timing keeps your brand top-of-mind as attendees finalize their schedules. Leverage Personalization: Use variable data printing to customize each mailpiece with the recipient's name, company, or even a personalized message related to their industry. A mailer addressed directly to "Maria, Creative Director" is far more impactful than a generic one. Create a Compelling Offer: Your mailer must include a strong incentive to visit your booth. This could be an exclusive "show-only" discount, a high-value giveaway item reserved for mailer recipients, or a VIP invitation to a happy hour event you're hosting. Integrate a Digital Bridge: Embed a unique QR code on every postcard or mailer. This code should link to a personalized landing page where attendees can book a meeting with your team, watch a product demo, or pre-register for your giveaway. By creating a multi-channel pre-show buzz, you ensure a steady stream of qualified traffic to your booth. To get started with a targeted and effective campaign, you can explore professional direct mail printing services . 3. Leave-Behind Promotional Materials, Branded Giveaways, and Packaging/Unboxing Experience Your interaction with an attendee shouldn't end when they walk away from your booth. A powerful trade show marketing strategy involves creating a tangible brand touchpoint that travels with them, extending your influence long after the event concludes. This is achieved through thoughtfully designed promotional items, useful branded giveaways, and a memorable packaging or "unboxing" experience. The core idea is to provide value beyond a simple sales pitch, offering items that are both desirable and functional. Instead of a generic pen, consider a tech company offering a beautifully packaged screen-cleaning cloth with a QR code to their latest software demo. This approach transforms a simple giveaway into a lasting impression, reinforcing brand quality and ensuring your contact information remains top-of-mind. Actionable Implementation and Tips To elevate your giveaways from forgotten trinkets to effective marketing tools, focus on perceived value, utility, and presentation. The goal is to create an item that attendees are genuinely happy to receive and use. Choose Utility Over Novelty: Select items that solve a common problem for your target audience. Branded notebooks, high-quality stickers for laptops, or portable power banks are far more likely to be used and seen than a disposable novelty item. Ensure every item prominently displays your logo and website. Invest in Premium Finishes: The quality of your giveaway reflects your brand's standards. Use premium finishes like embossing on business cards or metallic foil on product sample boxes to create a perception of high value. A well-packaged sample feels like a gift, not just a handout. Create a Memorable Unboxing Experience: For high-value prospects, design a complete unboxing experience. Use custom-printed boxes, branded tissue paper, and a personalized insert to make the interaction feel exclusive. This attention to detail is often shared on social media, generating organic buzz. Plan Your Quantities and Timeline: Order your promotional items 2-3 months in advance to allow for design, proofing, and production without rush fees. Plan for 20-30% more items than your expected number of qualified leads to account for high-volume foot traffic and unexpected opportunities. By investing in high-quality leave-behinds, you give attendees a physical reminder of your brand's value proposition. You can explore a vast selection of customizable items to find the perfect fit for your audience in a professionally curated collection of promotional products . 4. Interactive Digital Integration with Printed QR Code Strategy Connecting your physical booth with your digital ecosystem is a crucial trade show marketing strategy for modern exhibitors. This approach uses printed materials embedded with QR codes or NFC tags to serve as direct gateways to online experiences, effectively bridging the gap between in-person interaction and digital engagement. It transforms static collateral like banners, brochures, and business cards into interactive lead-capture and content-delivery tools. The core idea is to make engagement seamless for attendees. A visitor can scan a QR code on a product display to watch a demo video, access a detailed case study, or sign up for a free trial directly from their smartphone. This not only enriches their booth experience but also provides you with a measurable way to track interest and capture qualified leads without manual data entry. Actionable Implementation and Tips To successfully integrate this digital bridge, your strategy must be intentional, user-friendly, and trackable. The goal is to lower the barrier to engagement and create a frictionless path from physical curiosity to digital conversion. Segment and Track Your Codes: Create unique QR codes for different printed materials (e.g., one for your main backdrop, another for your takeaway flyers, and a third for business cards). This allows you to track which assets are driving the most scans, giving you clear insight into what captures attendee attention. Optimize the Destination: Ensure every QR code links to a mobile-optimized landing page, not your desktop website homepage. The page should load quickly and have a single, clear call-to-action, such as "Book a Demo" or "Download the Whitepaper," to maximize conversions. Provide Clear Incentives and Instructions: Don't just place a QR code and hope for the best. Add a clear, compelling instruction next to it, like "Scan to Enter Our Giveaway!" or "Scan for an Exclusive 20% Discount." This provides the necessary motivation for attendees to pull out their phones. Ensure High-Quality Printing: A blurry or poorly printed QR code is useless. Use high-resolution printing to ensure your codes are sharp and scannable from a distance. You can enhance the visual appeal and durability of these interactive touchpoints with professionally produced finishing options for printed materials . 5. Targeted Attendee List Marketing with Segmented Messaging One of the most powerful pre-show trade show marketing strategies involves moving beyond generic outreach and engaging in precision targeting. This approach uses the official attendee list, often available for purchase from event organizers, to segment your audience based on specific criteria. By dividing prospects into meaningful groups, you can deliver personalized printed and digital messaging that speaks directly to their unique challenges and goals. The core idea is to treat different attendee personas as distinct audiences. For instance, a B2B software company might segment its list by company size, sending one message about scalability to enterprise-level VPs and another about ease of implementation to small business owners. This data-driven strategy ensures your marketing efforts are highly relevant, dramatically increasing the likelihood of securing valuable booth appointments and converting leads. Actionable Implementation and Tips To execute a successful segmented outreach campaign, you need to combine data analysis with creative, personalized communication. This transforms your pre-show marketing from a broad announcement into a series of strategic, one-to-one conversations. Acquire and Segment Early: Purchase the attendee list 8-10 weeks before the event. This gives you enough time to analyze the data and segment it into 3-5 key personas, such as "Decision-Makers," "Technical Implementers," and "Industry Influencers." Craft Persona-Specific Messaging: Develop distinct value propositions and offers for each segment. A plant manager might receive a postcard highlighting efficiency gains, while a procurement officer gets a message focused on ROI and cost savings. This targeted messaging makes your brand feel more relevant. Leverage Variable Data Printing: Use technology to personalize your direct mail at scale. With variable data printing, you can customize elements like names, company names, and even specific images on each postcard or mailer, creating a truly bespoke piece of communication for every segment. Integrate and Track: Coordinate your direct mail campaign with targeted emails for a multi-touchpoint approach. Use unique promo codes or QR codes for each segment to track which groups respond most effectively, allowing you to analyze ROI by audience type and refine future trade show marketing strategies. 6. Booth Staff Training Materials and Sales Collateral Your booth staff are the most critical asset on the trade show floor, but even the best team needs the right tools to succeed. Empowering them with comprehensive printed training materials and sales collateral is a powerful internal-facing trade show marketing strategy. This approach ensures every team member can communicate value, handle objections, and qualify leads with consistent, professional messaging. The core idea is to equip your staff with well-designed, easy-to-reference documents that reinforce their training and support live conversations. These are not customer-facing handouts but rather internal cheat sheets, guides, and comparison charts. This preparation transforms your booth from a collection of individual reps into a unified, knowledgeable sales force ready to engage prospects effectively. Actionable Implementation and Tips To arm your team for success, create materials that are functional, durable, and designed for quick access in a busy environment. Well-prepared staff are confident staff, and that confidence translates directly to more productive conversations. Design for Quick Reference: Create pocket-sized, laminated cards or small booklets instead of bulky binders. Use clear headings, icons, and 3-5 bullet points per topic to make information easily scannable during a conversation. Segment Your Content: If you have multiple products or target audiences, color-code your materials by segment. For instance, a software company could use blue cards for enterprise features and green cards for small business benefits, allowing staff to quickly grab the right talking points. Focus on Differentiation: One of the most common questions is "How are you different from [Competitor]?" Prepare your team with laminated comparison charts that clearly outline your unique advantages, pricing, and key features side-by-side. Include Practical Details: Don't forget to include key operational information. A simple card with the WiFi password, lead scanner instructions, key contacts, and the day's schedule can prevent confusion and keep the team running smoothly. By investing in clear and concise support documents, you ensure your brand message is delivered accurately and persuasively every time. You can create a full suite of durable, professionally printed materials by exploring custom training material options . 7. Post-Show Follow-Up Mailers and Nurture Sequences The conversations you have at the trade show are just the beginning; the real work starts once the event ends. A systematic follow-up strategy is what separates a successful event from a wasted investment. This approach uses a blend of timely digital and high-impact print communications to nurture leads, maintain momentum, and guide promising prospects through your sales funnel. The core idea is to create a multi-touchpoint campaign that extends the positive interaction from the booth into the prospect's daily workflow. Instead of a single generic email, a powerful nurture sequence combines personalized digital messages with tangible, memorable printed pieces. This integrated approach ensures your brand stays top-of-mind long after the show floor has been cleared, demonstrating a level of professionalism and dedication that builds trust. Actionable Implementation and Tips To convert booth visitors into loyal customers, you must deploy a consistent and well-timed follow-up plan. This thoughtful combination of print and digital marketing transforms a fleeting encounter into a lasting business relationship. Act with Urgency and Personalization: Send an initial follow-up within 24-48 hours. A personalized thank you email paired with a high-quality, handwritten note or a small branded postcard makes a powerful first impression. Mention a specific point from your conversation to show you were actively listening. Leverage Variable Data Printing: Create highly customized follow-up materials at scale. Use a service like 4OVER4’s variable data printing to automatically insert a prospect's name, company, or even a specific ROI projection relevant to their industry onto your printed mailers, making each piece feel uniquely tailored. Coordinate a Multi-Channel Cadence: Plan your follow-up touches to work in harmony. For example, send an email with a case study, then have a printed version of that case study or a relevant testimonial postcard arrive a few days later. Space these interactions 2-3 weeks apart to maintain engagement without overwhelming your prospect. Provide Continuous Value: Each touchpoint should offer something new. Your first mailer might be a simple thank you, the second could be a detailed brochure about the product they showed interest in, and a third could include a printed postcard with an exclusive limited-time offer or a QR code to schedule a personalized demo. This is one of the most critical trade show marketing strategies for maximizing ROI. 8. Photo Opportunity and Social Media Activation Backdrops Transform your booth from a static display into a dynamic content-creation hub. A social media activation backdrop is a purpose-built, visually engaging space designed to encourage attendees to take photos and share them online. This trade show marketing strategy extends your brand’s reach far beyond the event floor by turning visitors into digital brand ambassadors who generate authentic, user-generated content. The goal is to create an "Instagram-worthy" moment that is too good not to capture and share. This involves more than just a logo; it means designing a stunning visual experience with bold graphics, interactive elements, or unique props. When attendees post their photos, your brand, booth, and event-specific hashtag are broadcast to their entire network, creating organic reach and social proof that you can’t buy. Actionable Implementation and Tips To create a photo opportunity that drives social engagement, focus on design, promotion, and tracking. Your backdrop should be an irresistible focal point that naturally draws people in and makes sharing easy and fun. Design for the Share: Use bold colors, interesting textures, and 3D elements that stand out in photos. Ensure your backdrop is large enough for group shots and includes a clear, unique, and easy-to-read hashtag like #[YourBrand][EventYear] . Prioritize Print Quality and Lighting: A photo's quality is everything on social media. Use premium large-format printing with vibrant, anti-glare finishes to ensure your backdrop looks professional on camera. Good lighting is equally crucial; use ring lights or small spotlights to eliminate shadows and create flattering photos. Incentivize Participation: Encourage sharing with a clear call-to-action. Run a contest or giveaway where attendees who post a photo with your hashtag are entered to win a prize. This simple incentive can dramatically increase participation rates. Monitor and Engage: Actively monitor your event hashtag on social platforms during the trade show. Like, comment on, and reshare user-generated content in real-time to amplify its reach and show appreciation for attendees who are promoting your brand. 9. Educational Content and Thought Leadership Printed Packages Move beyond simple sales brochures by positioning your brand as an industry authority. This trade show marketing strategy involves creating and distributing high-value printed educational content, such as whitepapers, industry reports, or detailed buyer's guides. Instead of just selling, you are providing genuine insights that help attendees solve their biggest challenges, building immediate credibility and trust. The core idea is to shift the booth interaction from a pitch to a consultation. By offering a professionally printed, data-rich report or a comprehensive "how-to" guide, you provide a tangible asset that attendees will want to keep and reference. This positions your company not just as a vendor, but as an indispensable resource, making your booth a destination for serious, well-qualified prospects seeking expertise. Actionable Implementation and Tips To execute this strategy effectively, your printed materials must look and feel as credible as the information they contain. This means investing in professional design, writing, and high-quality production to create a premium resource. Plan for Substance: Begin content development 4-6 months before the event to allow for thorough research, writing, and professional design. Focus on a key topic that directly addresses a major pain point or question for your target audience. Invest in a Premium Feel: The physical quality of your report reflects your brand's credibility. Use professional finishing options to create a polished final product. Consider perfect binding for thick reports or saddle-stitching for shorter guides , paired with a heavy, laminated cover to make it feel substantial and authoritative. Gate for Lead Generation: Use the printed content as a powerful lead magnet. Require a business card scan or email signup to receive a copy, ensuring you capture contact information from genuinely interested prospects. This also increases the perceived value and exclusivity of the material. Bridge Physical and Digital: Include a QR code inside the printed report that links to a digital version or related online resources. This allows attendees to easily share the content with their teams and provides you with another touchpoint for tracking engagement. Coach Your Booth Staff: Train your team to use the content as a conversation starter. Instead of asking, "Can I help you?" they can ask, "Are you interested in our latest report on [Industry Trend]?" This frames the interaction around providing value from the start. 10. Printed Event Badges, Lanyards, and Badge Holders with Sponsorship Visibility One of the most effective yet often overlooked trade show marketing strategies involves turning essential attendee identification into a mobile branding tool. By designing custom event badges, lanyards, and badge holders, you create a powerful medium for brand visibility. This strategy capitalizes on the fact that every attendee wears their credentials, transforming them into walking advertisements for your company or your event's sponsors. The core idea is to move beyond generic, supplied identification and produce high-quality, branded materials that serve dual purposes. For event organizers, this creates a valuable sponsorship asset. For exhibitors sponsoring these items, it guarantees constant brand exposure that follows attendees everywhere, from the show floor to networking events. This turns a functional necessity into a prominent marketing placement. Actionable Implementation and Tips To successfully leverage this strategy, focus on quality, early planning, and cohesive design. A well-executed lanyard or badge becomes a desirable keepsake rather than a disposable item, extending your brand's reach even after the event concludes. Secure Sponsorship Early: If you are an exhibitor, negotiate badge or lanyard sponsorship opportunities with event organizers at least six months in advance. This gives you ample time to influence the design and ensure production deadlines are met. Prioritize Professional Design: Your brand is on display, so the quality must be impeccable. Use premium materials for lanyards and consider special finishes like spot UV or foil stamping on VIP badges to create a sense of exclusivity and importance. Integrate a Digital Call-to-Action: Don't just display a logo. Include a QR code on the lanyard or badge holder that directs attendees to a landing page, a special offer, or your booth location on the event map. Leverage Variable Data Printing: Personalization makes a significant impact. Use variable data printing to add each attendee's name, company, and even a custom welcome message directly onto their badge, creating a more professional and engaging experience. For organizers, offering tiered designs for different attendee levels (e.g., VIP, Speaker, Exhibitor) adds organizational clarity and perceived value. By investing in custom-printed credentials, you ensure your brand is not just seen at your booth but is a constant, visible presence throughout the entire event. You can create a fully customized look for your event with professional badge holder printing. 10-Point Trade Show Marketing Comparison Item 🔄 Implementation Complexity ⚡ Resource & Timing Requirements ⭐ / 📊 Expected Effectiveness & Impact Ideal Use Cases 💡 Key Advantage / Quick Tip Customized Booth Design with Branded Printed Materials High — complex design, production, logistics High cost & lead time (6–8+ weeks), storage/transport needs ⭐ Strong brand recall; 📊 High foot-traffic and photo-worthiness Major trade shows, brand launches, visual differentiation Use modular components; test mock-ups; invest in premium finishes Pre-Show Direct Mail and Collateral Campaigns Medium — list coordination and mailing logistics Moderate cost; start ~6 weeks prior; needs accurate attendee lists ⭐ Higher engagement vs digital alone; 📊 Drives pre-qualified booth visits B2B events targeting high-value prospects Personalize with variable data; include tracked QR codes and follow-up email Leave-Behind Promotional Materials & Packaging/Unboxing Medium — design, inventory and packaging logistics Medium–high per-unit cost; order 2–3 months ahead; storage required ⭐ High perceived value; 📊 Extends brand exposure post-event Premium brands, creative agencies, VIP prospecting Choose useful items; use specialty finishes; consider sustainability Interactive Digital Integration with Printed QR Strategy Medium — printing + backend/analytics setup Low–medium print cost; requires landing pages & analytics; test scans ⭐ Enables instant lead capture & attribution; 📊 Measurable engagement Tech/SaaS booths, demo-driven activations Use unique codes per asset; link to mobile-optimized pages; test QR readability Targeted Attendee List Marketing with Segmented Messaging High — data management, segmentation, privacy compliance Medium–high (list purchase, CRM work); start 8–10 weeks prior ⭐ High relevance & conversion; 📊 Better budget efficiency and lead quality Enterprise B2B, high-deal-value events Segment into 3–5 personas; use variable data printing; track segment performance Booth Staff Training Materials and Sales Collateral Low–Medium — content creation and updates Low print cost; need subject-matter input; durable stock recommended ⭐ Improves messaging consistency; 📊 Faster qualification and professional interactions Complex products, large or rotating booth teams Design pocket-sized reference cards; laminate for durability; keep 3–5 key bullets Post-Show Follow-Up Mailers and Nurture Sequences Medium — CRM integration and sequencing Ongoing printing/mailing costs; time-sensitive (start within 48 hrs) ⭐ Differentiates follow-up; 📊 Improves conversion across long sales cycles Long B2B sales cycles, high-value leads Send personalized note within 48 hrs; use variable data and staggered touches Photo Opportunity & Social Media Activation Backdrops Low–Medium — visual design and staging Medium large-format print cost; invest in lighting/props ⭐ High social amplification via UGC; 📊 Boosts booth traffic and reach Consumer brands, influencer-heavy events, lifestyle sectors Make hashtags visible; use vibrant prints; incentivize tagging/sharing Educational Content & Thought Leadership Printed Packages High — research, writing, design, production High time and cost; plan 4–6+ months ahead; binding/finishing needs ⭐ Positions as expert; 📊 Attracts highly qualified, research-driven leads Consulting, financial, healthcare, enterprise tech Focus on 1–2 high-value topics; offer gated or selective distribution; include digital access Printed Event Badges, Lanyards & Badge Holders Medium — coordination with organizers, variable data Medium cost; negotiate 6+ months ahead; production scale needs ⭐ Continuous brand visibility; 📊 Sponsorship revenue and high exposure Event organizers, sponsors seeking omnipresent branding Secure sponsorship early; use premium materials; add QR for tracking From Strategy to Success: Your Next Move The journey through the ten comprehensive trade show marketing strategies we've explored reveals a powerful, unifying theme: success is not accidental. It is the direct result of a meticulously planned, multi-stage approach that transforms your booth from a simple space on the show floor into a magnetic brand experience. The most effective exhibitors understand that the event doesn't begin when the doors open or end when they close. Instead, it’s a continuous cycle of engagement, connection, and follow-through. By weaving together the tangible impact of high-quality printed materials with the trackable precision of digital tools, you create a powerful, cohesive experience that resonates with attendees and delivers measurable results. Each of these ten strategies offers a unique lever to pull, from generating pre-show buzz with personalized direct mail campaigns to extending conversations post-event with thoughtful follow-up mailers. The key is to build a comprehensive plan that covers every stage of the attendee journey. Key Takeaways for Maximum Impact Let's distill the core principles that will elevate your next event from an expense to a high-return investment: Integration is Non-Negotiable: The most potent strategies are integrated. A QR code on a business card (Strategy 4) should lead to the educational content you’ve printed (Strategy 9). Your pre-show mailer (Strategy 2) should tease the interactive photo opportunity at your booth (Strategy 8). This creates a seamless, memorable brand narrative. Tangibility Creates Memory: In a digitally saturated world, a high-quality, well-designed leave-behind (Strategy 3) or a thoughtfully packaged giveaway has a profound impact. Physical collateral occupies space in a prospect's office and mind long after the digital noise of the trade show has faded. The Follow-Up is Half the Battle: The connections made on the show floor are fragile. A robust post-show follow-up plan (Strategy 7), combining both digital nurture sequences and personalized printed mailers, is essential for converting warm leads into loyal customers. Neglecting this step is one of the most common and costly mistakes exhibitors make. Your Actionable Blueprint for Success Mastering these concepts is no longer a "nice-to-have" it's a competitive necessity. Your competitors are vying for the same attention, and a well-executed strategy is your ultimate differentiator. By investing in a holistic approach, you’re not just generating leads; you're building brand authority, fostering genuine relationships, and creating a pipeline of qualified prospects that will fuel your growth for months to come. Your next move is to transition from learning to doing. Review the ten strategies and identify the three to five that most directly align with your specific goals and budget for your next event. Is your primary goal brand awareness? Focus on a stunning booth design and social media activation. Is it lead generation? Prioritize targeted attendee marketing and a flawless follow-up system. With a partner like 4OVER4, you have access to the printing expertise and vast product range needed to bring every one of these ideas to life, ensuring every banner, business card, and backdrop reflects the premium quality of your brand. Now is the time to start planning. Your next trade show can be more than just an appearance; it can be a pivotal, record-breaking moment for your business. Ready to transform your trade show marketing strategies from theory into reality? Bring your vision to life with premium, professionally crafted print materials from 4OVER4 , your reliable partner for everything from custom banners and backdrops to business cards and promotional giveaways. Explore our extensive collection of trade show essentials and start building your success story today at 4OVER4 .
 story
story 8 Unforgettable Vendor Table Display Ideas for 2025
In the bustling environment of markets, fairs, and conventions, your vendor table is more than just a surface for your products. It's your storefront, your brand ambassador, and your silent salesperson, all condensed into a few square feet. A compelling display can stop potential customers in their tracks, turning a passing glance into a genuine connection and, ultimately, a sale. But how do you create a setup that not only showcases your goods but also tells your brand's story and drives meaningful engagement? The secret is moving beyond simply laying out your items and, instead, strategically designing an experience. A well-executed display leverages psychology, design principles, and smart branding to create an irresistible pull for attendees. It's the critical difference between a potential customer walking by or walking up to your table, ready to learn more about what you offer. This is where thoughtful planning transforms a simple booth into a powerful conversion tool. This comprehensive guide is built to provide you with more than just inspiration. We will explore eight distinct and actionable vendor table display ideas , each complete with practical implementation details, material suggestions, and setup best practices. From creating dynamic tiered systems to integrating interactive elements, you will learn how to build a display that not only looks professional but also works as hard as you do. Let's transform your space from a simple table into a destination that effectively converts browsers into loyal buyers. 1. Tiered Display System A tiered display system is one of the most effective vendor table display ideas for instantly adding professionalism and depth to your setup. Instead of laying products flat on a table, this approach uses risers, shelves, and platforms of varying heights to guide the customer's eye upward, creating a dynamic and engaging visual journey. This method not only maximizes vertical space but also prevents your display from looking cluttered and overwhelming. This strategy allows you to showcase a greater volume of products in a small footprint while ensuring each item gets its moment in the spotlight. By breaking up the horizontal plane, you create visual interest that draws shoppers in from a distance. Why This Approach Works A tiered system transforms a flat, one-dimensional table into a curated, three-dimensional shopping experience. It gives your products a sense of hierarchy and importance, making your entire presentation look more like a boutique display than a simple market stall. Maximizes Visibility: Every product is visible, preventing smaller items from getting lost behind larger ones. Improves Traffic Flow: An organized, visually appealing display is more approachable and encourages customers to stop and browse. Creates Visual Hierarchy: It allows you to strategically place best-sellers or high-margin items at eye level, where they are most likely to be noticed. How to Implement a Tiered Display System Getting started with a tiered system is straightforward. You can use a variety of materials, from custom-built shelving to everyday objects repurposed for your display. Choose Your Risers: Wooden crates, acrylic stands, stacked books, or custom-made wooden platforms all work well. For a cohesive look, stick to materials and colors that align with your brand aesthetic. Apply the "Rule of Threes": Arranging items or display levels in odd numbers (like three or five) is often more visually appealing and dynamic than even-numbered groupings. Ensure Stability: Test your setup for sturdiness before the event begins. A wobbly display is unprofessional and dangerous. Use museum wax or double-sided tape to secure lightweight items if needed. Strategic Placement: Place your most popular or eye-catching products on the middle tier, which is typically at eye level for most customers. Use the lower tier for larger, heavier items and the top tier for smaller, delicate products. 2. Color-Coordinated Theme Display A color-coordinated theme is one of the most powerful vendor table display ideas for creating a memorable brand experience. This approach involves strategically using a select color palette across all elements of your display, from products and props to your tablecloth and signage. The result is a cohesive, professional, and visually stunning setup that instantly communicates your brand identity and captures attention from across the room. This method goes beyond just matching colors; it creates an immersive atmosphere. For example, a bath and body vendor might use a clean white and gold palette with natural eucalyptus accents to evoke a sense of luxury and wellness. This visual harmony makes your booth feel intentional and curated, encouraging shoppers to engage more deeply with your products. Why This Approach Works A strong color theme acts as a visual anchor, making your booth instantly recognizable and appealing. It streamlines the customer's visual experience, eliminating distractions and focusing their attention directly on what you are offering. This polished look builds trust and conveys professionalism. Reinforces Brand Identity: Consistent use of brand colors creates a strong, memorable identity that shoppers will recall long after the event. Creates Emotional Connection: Colors evoke specific emotions. Using color psychology can help you connect with your target audience on a subconscious level. Boosts "Instagrammability": A beautifully themed booth is highly shareable on social media, providing organic marketing and extending your reach beyond the event itself. How to Implement a Color-Coordinated Theme Creating a themed display is about making deliberate choices that support your brand. The key is consistency in every detail, from the largest backdrop to the smallest price tag. Select a Core Palette: Choose two to three primary colors that represent your brand. Complement them with a neutral shade like white, grey, or beige to create balance and prevent the display from becoming overwhelming. Incorporate Your Theme Everywhere: Your color scheme should extend to your display props, packaging, business cards, and even your attire. A custom-printed table cover is an excellent foundation for your theme. You can explore a variety of options for custom table covers on 4over4.com to anchor your look. Use Texture and Materials: Enhance your color theme with textures that align with your brand. A rustic food vendor could use burlap and wood, while a modern jewelry maker might opt for sleek acrylic and rose gold metal. Consider Seasonal Updates: Keep your display fresh by subtly updating your theme with seasonal colors or props. This encourages repeat customers to see what's new at your booth. 3. Interactive Demonstration Station An interactive demonstration station is a powerful vendor table display idea that transforms your booth from a static showcase into a dynamic, hands-on experience. Instead of simply telling customers about your products, you show them in action, allowing them to see, touch, or taste what you offer. This approach builds instant credibility and turns passive browsers into engaged potential buyers. This strategy is particularly effective for products whose value is best understood through experience. By creating a designated area for live demos or "try-before-you-buy" opportunities, you answer customer questions organically and create a memorable interaction that sets you apart from competitors. Why This Approach Works An interactive station captivates the senses and builds trust through transparency. Customers can verify your product's quality firsthand, which significantly lowers the barrier to purchase. It creates a buzz around your table, drawing in crowds who are curious to see what is happening. Boosts Engagement: It stops traffic by providing an activity, encouraging shoppers to linger longer at your booth. Educates Customers: A live demonstration is often the clearest and most persuasive way to explain how a product works or what makes it special. Drives Sales: Allowing customers to try a product creates a sense of ownership and makes them more likely to make a purchase on the spot. How to Implement an Interactive Demonstration Station Setting up a successful demo area requires thoughtful planning to ensure it runs smoothly and effectively draws people in. Schedule Demonstrations: Plan your demos for peak traffic times to maximize viewership. Announce the schedule on a small sign to build anticipation. Keep It Tidy: A clean, organized demonstration area is crucial. Have cleaning supplies on hand and reset the station between each demonstration to maintain a professional appearance. Prepare Your Pitch: Develop a concise 30 to 60-second "elevator pitch" to deliver during the demonstration, highlighting the key benefits and features of your product. Delegate Roles: If possible, have an assistant handle sales and answer questions from the crowd while you focus on the demonstration. This ensures no potential customer is ignored. Gather Feedback: This is a great opportunity to collect customer feedback. You can use custom notepads to jot down comments or capture email addresses for follow-ups. You can discover more about customized notepads on 4over4.com . 4. Storytelling Display with Brand Narrative A storytelling display is one of the most powerful vendor table display ideas for building an authentic connection with customers. This approach goes beyond simply showcasing products; it uses visual elements to communicate your brand's origin, mission, or the journey behind what you create. By sharing your "why," you invite shoppers into your world, transforming a transactional interaction into a memorable, emotional experience. This method helps you stand out in a crowded market by giving your products context and meaning. Whether you feature photos of your workspace, snippets of your family's history, or details about your ethical sourcing, storytelling makes your brand more human and relatable. Why This Approach Works A storytelling display builds trust and brand loyalty by establishing a genuine connection. Customers who understand your passion, process, and values are more likely to become advocates for your business, as they are not just buying a product, but a piece of your story. Creates an Emotional Connection: Stories resonate with people on a deeper level, making your brand more memorable than competitors. Justifies Premium Pricing: When customers see the craftsmanship, high-quality materials, or ethical practices involved, they better understand the value of your products. Builds Brand Authenticity: Sharing your unique journey differentiates you from mass-produced alternatives and fosters a sense of trust. How to Implement a Storytelling Display Effectively weaving your narrative into your display requires a thoughtful combination of visuals and text. The goal is to make your story easy to digest at a glance. Keep It Concise and Visual: Use high-quality photos, infographics, or even a short video loop on a tablet. For example, a farm-to-table vendor could display large, vibrant photos of their farm and growing process. Use Professional Signage: A well-designed sign or banner can succinctly tell your origin story or mission. For a more polished look, you can explore professional printing for custom vinyl banners to showcase your brand narrative. Show, Don't Just Tell: Let your materials and props do the talking. A crafter could show a "before and after" of their raw materials turning into a finished product, while a family-run bakery might feature vintage photos and handwritten recipe cards. Focus on the Customer: Frame your story around the benefits to the shopper. Instead of saying, "I started this business in my garage," try, "Handcrafted from my home studio to bring unique, artisanal quality directly to you." 5. Minimalist Clean Line Display A minimalist clean line display is a sophisticated approach that leverages the power of simplicity and "less is more." This is one of the most powerful vendor table display ideas for brands that want to convey luxury, quality, and meticulous craftsmanship. The core principle is to use ample negative space, clean lines, and a highly curated product selection to make each individual item a hero. This creates a calm, gallery-like atmosphere that commands attention through understatement. This strategy works by eliminating visual noise, allowing shoppers to focus entirely on the product's quality and design. It suggests confidence in what you're selling, implying the items are special enough to stand on their own without needing loud, flashy marketing to attract buyers. Why This Approach Works A minimalist display transforms your table into a high-end, curated space, signaling premium value before a customer even touches a product. By intentionally showing less, you create a sense of exclusivity and desirability, often allowing for higher price points. Elevates Perceived Value: The clean, uncluttered presentation makes products feel more luxurious and high-quality. Reduces Decision Fatigue: By showcasing fewer items, you help customers focus and avoid feeling overwhelmed, which can lead to easier purchasing decisions. Highlights Craftsmanship: It puts the spotlight directly on the intricate details, materials, and design of your products. How to Implement a Minimalist Clean Line Display Successfully executing a minimalist display requires discipline and a sharp eye for detail. The focus is on quality over quantity in both products and display props. Curate Ruthlessly: Do not try to show your entire inventory. Select only your best-sellers, highest-margin items, or a cohesive collection. For example, an artisan soap maker might feature just three signature scents on individual white pedestals. Invest in Quality Materials: Use sleek, high-quality display props. Think matte acrylic blocks, polished metal stands, or fine-grain wood in a neutral finish. Avoid cheap plastic or cluttered-looking materials. Embrace Negative Space: Don't be afraid of empty space on your table. This "white space" is a design element itself, giving your products room to breathe and drawing the eye toward them. Use Strategic Lighting: A single, well-placed spotlight can transform a simple product into a work of art. Use small, battery-powered LED spotlights to create focused highlights and dramatic shadows. 6. Seasonal/Holiday Themed Display A seasonal or holiday-themed display is a powerful strategy among vendor table display ideas that taps into the festive spirit and timely interests of shoppers. This approach involves adapting your booth's aesthetic to reflect current seasons, holidays, or local events. By incorporating relevant colors, props, and product arrangements, you create a display that feels current, exciting, and highly relevant to what customers are already thinking about. This method goes beyond just selling products; it creates an immersive atmosphere that resonates with customers on an emotional level. Whether it's a cozy autumn theme or a sparkling holiday wonderland, a seasonal setup makes your table a destination, encouraging shoppers to stop and explore what you have to offer. Why This Approach Works A themed display demonstrates that your brand is dynamic and in tune with the calendar. It capitalizes on the heightened purchasing intent that often accompanies holidays and seasonal changes, making your products seem like perfect, timely gifts or purchases. Creates Urgency and Relevance: A seasonal theme connects your products to a specific time of year, encouraging immediate purchases. Boosts Emotional Connection: Tapping into the festive or cozy feelings associated with a season helps build a stronger bond with customers. Keeps Your Display Fresh: Regularly changing your theme prevents your booth from looking stale and gives repeat customers something new to see each time. How to Implement a Seasonal/Holiday Themed Display Executing a seasonal theme effectively requires planning and a balance between festive elements and your core brand identity. Plan Ahead: Begin sourcing decorations and planning your layout 4-6 weeks before the season or holiday. This prevents last-minute scrambling and ensures you have a cohesive look. Invest in Versatile Decor: Choose items that can be adapted for multiple seasons. For example, a set of string lights can be used for a cozy winter market, a summer night fair, or a festive holiday event. Neutral-colored crates can be filled with pumpkins in the fall and faux snow in the winter. Integrate, Don't Overwhelm: Weave seasonal elements into your display rather than letting them take it over. A few well-placed pumpkins, some pine garland, or a color palette of reds and pinks for Valentine's Day is often more effective than a complete decorative overhaul. Ensure your branding and products remain the main focus. Tailor to the Event: Consider the specific event and its audience. A local fall festival might call for rustic, harvest-themed decor, while a chic urban holiday market may require a more modern and minimalist festive approach. 7. Lighting-Enhanced Display Strategic lighting is one of the most transformative vendor table display ideas for creating ambiance and making your products irresistible. Relying solely on the often poor, inconsistent lighting of a market or event venue is a missed opportunity. A lighting-enhanced display uses artificial sources like LED strips, spotlights, or string lights to overcome dim environments, draw attention from afar, and highlight the quality and details of your merchandise. This approach creates a warm, inviting atmosphere that makes your booth a beacon for shoppers. Proper illumination can make colors appear more vibrant, textures more pronounced, and premium products look even more luxurious, directly influencing a customer's perception and buying decision. Why This Approach Works Lighting does more than just help people see; it sets a mood and directs focus. A well-lit booth feels professional, welcoming, and high-end, instantly separating you from competitors who have overlooked this crucial detail. It makes your space feel like an intimate, curated gallery. Creates Ambiance: Warm lighting can make a space feel cozy and inviting, encouraging shoppers to linger longer. Enhances Product Appeal: Good lighting makes products pop. For example, it can make jewelry sparkle, bring out the rich colors in artwork, and highlight the fine craftsmanship of handmade goods. Draws Attention: A bright, well-lit table is a magnet for eyes in a crowded hall, pulling customers to your display from across the room. How to Implement a Lighting-Enhanced Display Integrating lighting is simple with modern, portable solutions. The key is to be intentional with placement and color temperature to complement your brand and products. Choose the Right Lights: For most products, warm white LEDs (around 3000K) create a welcoming glow. Jewelry vendors can use cool white LEDs to maximize sparkle. Battery-powered puck lights, flexible LED strips, and clip-on spotlights are all excellent, portable options. Position for Impact: Place lights to eliminate shadows and illuminate key product features. Run LED strips along the inside edges of shelves or crates. Use small spotlights to highlight your hero products. For a technical guide on integrating linear lighting, learning about professional under cabinet lighting installation can provide transferable skills. Come Prepared: Always bring backup batteries, power banks, and extension cords. Test your complete lighting setup at home to ensure everything works and you know how to assemble it quickly on-site. Consider Light Boxes: For a truly professional look, integrating branded light boxes can elevate your signage and product displays, ensuring they are seen even in the busiest environments. You can learn more about creating custom light boxes at 4over4.com . 8. Multi-Functional Display Furniture Multi-functional furniture is one of the smartest vendor table display ideas for sellers working with limited booth space. This approach involves using pieces that serve more than one purpose, such as providing product display surfaces, built-in storage, and even seating for the vendor. Instead of cluttering your small area with separate items for each function, you can integrate them into a cohesive, efficient, and professional-looking setup. This strategy is about working smarter, not harder, to create a display that is both beautiful and highly practical. By choosing furniture that pulls double duty, you can reduce setup time, minimize the items you need to transport, and keep your booth tidy and organized throughout a long event. Why This Approach Works Using multi-functional furniture transforms your booth from a simple sales table into a well-designed, self-contained retail environment. It shows customers that you are organized and professional, while secretly solving major logistical challenges like inventory management and personal comfort during the event. Maximizes Space Efficiency: It allows you to get the most out of every square inch, combining display, storage, and utility into a single footprint. Enhances Professionalism: A clean, uncluttered booth free of visible storage boxes and personal bags presents a more polished and inviting brand image. Improves Vendor Experience: Having integrated storage and a place to sit reduces physical strain, allowing you to stay energized and focused on customers. How to Implement Multi-Functional Display Furniture Incorporating this idea is all about strategic selection. Look for pieces that solve your specific pain points, whether that's a lack of storage, a need for easy transport, or both. Choose Your Pieces: Look for storage ottomans that can act as display platforms and seating, foldable display cases with hidden storage compartments, or nesting tables that can be stacked or spread out as needed. A simple bench can display products and hold backstock underneath. Prioritize Mobility: If you frequent different venues, select furniture with wheels or pieces that are lightweight and collapsible. This makes setup, breakdown, and repositioning much easier. Maintain Brand Cohesion: Ensure the furniture’s style, material, and color align with your brand aesthetic. A rustic wooden chest works for a handmade brand, while sleek metal and glass pieces suit a modern one. Test Functionality: Before a big event, do a trial run with your setup. Make sure drawers open easily, lids are simple to lift, and the pieces are stable enough to hold your products securely. For related point-of-sale setups that complement this approach, you can explore various options for a cohesive look. Learn more about point-of-sale displays on 4over4.com . Vendor Table Display Ideas Comparison Matrix Display Type Implementation Complexity 🔄 Resource Requirements ⚡ Expected Outcomes 📊 Ideal Use Cases 💡 Key Advantages ⭐ Tiered Display System Medium - needs risers and setup Moderate - display materials and time Increased visibility; professional look Small spaces needing vertical organization Maximizes vertical space and product visibility Color-Coordinated Theme Display Medium - color/material coordination Moderate - coordinated props/materials Strong brand recognition; cohesive look Brand-focused vendors; social media appeal Enhances brand identity and memorability Interactive Demonstration Station High - requires live demos and space High - materials, vendor presence Builds trust; memorable engagement Product demos, experiential marketing Drives sales through interaction and experience Storytelling Display with Brand Narrative Medium - visual and signage prep Moderate - photos, signage Emotional connection; brand loyalty Story-driven brands; artisan products Creates emotional ties and differentiates Minimalist Clean Line Display Medium - curated selection, lighting Moderate - quality materials Premium perception; reduced decision fatigue Luxury/high-margin products Highlights product quality elegantly Seasonal/Holiday Themed Display Medium - seasonal updates required Moderate to high - decorations Urgency; repeat customer interest Holiday events and seasonal sales Taps into seasonal shopping and trends Lighting-Enhanced Display Medium - electrical setup Moderate - lights and equipment Improved visibility; inviting atmosphere Poorly lit venues; night markets Enhances product appeal and photography Multi-Functional Display Furniture Medium to High - furniture design High - furniture pieces Efficient space use; practical vendor benefits Small booths; long events needing storage Maximizes space and vendor convenience Putting It All Together: Your Blueprint for a Standout Booth Throughout this comprehensive guide, we've explored a powerful arsenal of vendor table display ideas, moving from foundational structures to immersive, brand-centric experiences. We've deconstructed everything from the vertical allure of a Tiered Display System to the captivating narrative of a Storytelling Display . We’ve seen how a Color-Coordinated Theme creates instant brand recognition and how a Minimalist Clean Line Display can communicate sophistication and confidence. Each concept, whether it’s the inviting warmth of a Lighting-Enhanced Display or the hands-on engagement of an Interactive Demonstration Station , serves as a vital component in your trade show toolkit. The true magic, however, lies not in choosing a single idea but in strategically blending them to create a cohesive and compelling presentation. Your vendor table is more than just a point of sale; it's the physical embodiment of your brand and the first handshake you offer potential customers. Mastering your display is a crucial step in transforming passive browsers into loyal advocates. The Synthesis Strategy: Combining Ideas for Maximum Impact Think of your display as a recipe. The best dishes aren't made with just one ingredient. Your goal is to layer flavors to create something unforgettable. Here’s a practical blueprint for combining the concepts we've discussed: Start with a Strong Foundation: Begin with a Tiered Display System as your structural base. This immediately breaks the flat, boring plane of the table, creating height and drawing the eye upward. Pair this with a striking, high-quality printed table cover that establishes your Color-Coordinated Theme . This combination alone sets a professional and visually organized stage. Layer in Your Brand's Personality: Next, decide on your primary engagement strategy. Are you product-focused or story-focused? If your products are best understood through use, integrate an Interactive Demonstration Station as your centerpiece. If your brand's origin or mission is your key differentiator, weave in elements of a Storytelling Display using custom-printed signage, brand timelines, or QR codes linking to your story. Refine with Professional Accents: The final layer is about polish and atmosphere. This is where a Lighting-Enhanced Display can dramatically elevate the mood and spotlight your hero products. Even simple, battery-powered puck lights or clip-on spotlights can make a world of difference. Complement this with Multi-Functional Display Furniture , like a vintage suitcase or wooden crates, to add texture and reinforce your brand’s aesthetic, whether it's rustic, modern, or whimsical. Key Takeaway: The most effective vendor table displays are a deliberate synthesis of structure, branding, and engagement. Don’t just pick one idea; build a layered experience that guides your customer on a journey from first glance to final purchase. As you plan your setup, remember that your table is just one part of a larger booth environment. When conceptualizing your entire booth, gaining inspiration from a range of fresh exhibition display ideas can help you create a truly impactful presence that captures attention from across the event floor. Your Final Checklist for Success Before your next event, run through this final mental checklist. Have you considered height, color, lighting, interaction, and brand story? Does your display feel cluttered or clean? Is your call to action clear? Every element should have a purpose, working in harmony to stop traffic, start conversations, and drive sales. Your vendor table is a powerful engine for business growth, a dynamic stage where you get to connect with your community face-to-face. Armed with these versatile and actionable vendor table display ideas, you are no longer just showing up; you are strategically creating an experience. Go forth and build a booth that not only looks incredible but also works tirelessly for your brand. Ready to bring your vision to life with professional, high-quality printed materials? From custom tablecloths and vinyl banners to foam board signs and flyers, 4OVER4 has everything you need to build a stunning and effective vendor display. Elevate your brand presence at your next event by visiting 4OVER4 and exploring the tools that will make your booth unforgettable.
A Guide to Custom Logo Shopping Bags
The material you choose for your custom logo shopping bags is the very foundation of the final product. It's so much more than just durability; the material is a tangible piece of your brand's identity and values. Get this right, and you communicate your commitment to sustainability, luxury, or practicality before a customer even peeks inside. Choosing Materials That Reflect Your Brand The first thing to do is align the bag's feel with your brand's personality. Is your company known for its eco-conscious mission? A natural cotton or jute bag instantly reinforces that message. Or are you a high-end boutique? A sleek, laminated paper bag with elegant ribbon handles whispers luxury and care. You also have to think about how your customers will actually use the bag after they leave your store. A sturdy canvas tote is a fantastic "walking billboard" for a grocery store or farmer's market, giving you repeated brand exposure. On the other hand, a simple kraft paper bag works perfectly for a quick, one-time purchase from a local cafe or bookstore. Comparing Common Bag Materials To help you make the best decision, let's break down the most popular options out there. Each material brings something different to the table, suiting different business goals and budgets. Cotton and Canvas: These natural fibers are soft, incredibly durable, and highly reusable. They're a perfect match for brands that want to emphasize sustainability and quality. The textured surface is also a fantastic canvas (pun intended) for screen printing, making logos pop with vibrant, long-lasting color. You can find a huge variety of options by exploring custom tote bags printing to see just how versatile this material is. Non-Woven Polypropylene: This is your go-to for a budget-friendly and water-resistant option. It's a fantastic choice for large-scale giveaways at trade shows or events where you need to make a big impact without breaking the bank. While it doesn't have the premium feel of canvas, it's still surprisingly durable and provides a great surface for bold, colorful logos. Paper (Kraft and Laminated): The classic retail choice for a reason—paper bags offer immense versatility. Brown kraft paper gives off a rustic, earthy vibe, while white or colored laminated paper provides a polished, high-end look. They are easily recyclable and can be customized with all sorts of handle types, from simple twisted paper to elegant grosgrain ribbon. I've put together a quick-reference table to make comparing these materials even easier. Bag Material Comparison Guide Material Key Features Best For Eco-Friendliness Price Point Cotton & Canvas Durable, reusable, soft, natural feel, great for screen printing Eco-conscious brands, retail, grocery, promotional giveaways High (Reusable, biodegradable) $$ - $$$ Non-Woven Polypropylene Lightweight, water-resistant, budget-friendly, strong Trade shows, large events, budget-conscious promotions Medium (Reusable, recyclable) $ Kraft Paper Recyclable, biodegradable, rustic look, affordable Cafes, bookstores, boutiques, one-time use retail High (Recyclable, compostable) $ - $$ Laminated Paper Sleek, polished finish, moisture-resistant, durable Luxury retail, high-end boutiques, gift bags Low (Difficult to recycle) $$ - $$$ As you can see, each material tells a slightly different story. Your choice will guide the customer's perception of your brand long after they've left your store. A bag's material does more than carry a product; it carries your brand's story. Choosing a material that aligns with your values creates a cohesive and memorable customer experience that extends far beyond the point of sale. The promotional products industry absolutely recognizes this power, with custom bags becoming a non-negotiable branding tool. In fact, this sector is forecast to hit USD 24 billion by 2025 , a surge driven largely by the demand for personalized, sustainable items that boost brand recall. Ultimately, the right material acts as a silent ambassador for your brand. It should feel like a natural extension of your products and the experience you work so hard to provide, ensuring your custom bags become a valued accessory, not just disposable packaging. Designing a Logo That Prints Perfectly The success of your custom logo shopping bags really boils down to one thing: your logo's print quality. A fantastic design can fall completely flat if it isn't set up correctly for production. The most common mistake I see is people using the wrong file format, which leads to blurry, pixelated logos that just don't look professional. To sidestep this issue entirely, you have to provide your printer with a vector file . Unlike raster files (like JPEGs or PNGs) that are built from tiny pixels, vector files (think AI, EPS, or SVG) use mathematical equations. This means you can scale them to any size you want—from a tiny accent on a business cards printing to a huge print on a tote bag—without losing a single bit of clarity. It’s like the difference between a photograph and a blueprint. You can't blow up a photo forever without it getting grainy, but a blueprint's instructions can build something massive with perfect precision. Simplify for the Biggest Impact Even if you have the right file format, a super complex logo with tiny details or subtle gradients might not print well on certain materials. A design that looks incredible on your computer screen can turn into a muddy mess on the textured surface of a canvas bag. For the best results, you might need to simplify your design a bit. This isn't about losing your brand identity; it's about making smart adaptations for the specific medium. Cut Down on Colors: Screen printing is a really popular method for bags, but it often needs a separate screen for every single color. Sticking to one or two bold colors can save money and actually create a much stronger visual punch. Beef Up Fine Lines: Those elegant, whisper-thin lines in your logo? They can easily disappear or break apart during printing, especially on fabric. Make sure every element is thick enough to show up clearly. Ditch Complex Gradients: Solid colors just reproduce more reliably on bag materials than smooth gradients do. If you absolutely need gradients, it's worth talking to your supplier about other options, like digital printing. Think About Color and Placement Finally, you need to consider how your logo’s colors will look against the bag itself. A chic, light gray logo might be perfect on a crisp white paper bag, but it could become almost invisible on a natural-colored canvas tote. High contrast is your friend here; it’s all about visibility. Positioning is just as critical. Slapping the logo right in the center is the classic move for a reason—it gets the most eyeballs. But don't be afraid to explore other options. A smaller, tastefully placed logo in a corner can give off a more minimalist, high-end vibe. Printing on the side gussets is another great way to add a subtle, unexpected touch of branding. Your logo on a shopping bag is basically a walking billboard. Simplicity and high contrast are what make your brand instantly recognizable from across a crowded street. A clear, bold design will always win out over a complicated one in this arena. No matter what you decide, always, always ask for a digital proof. This lets you see exactly how your design will look before you commit to a full production run, saving you from any costly surprises down the line. Selecting the Right Printing Method You’ve got your logo perfected and you know what kind of bag you want. Now comes the fun part: getting that design onto the bag. This isn't just a technical step; the printing method you choose for your custom logo shopping bags is what brings your brand to life. It affects the final look, the texture, the durability, and of course, the cost. Choosing the right technique is a balancing act. What works perfectly on a smooth paper bag might be a disaster on a textured canvas tote. Your budget, the complexity of your logo, and your chosen material all have a say in this decision. Let's walk through the most common options to figure out what’s best for you. Screen Printing For Bold Simplicity Screen printing is an absolute workhorse, especially for fabric bags like cotton or canvas. It’s been around forever for a reason. The process involves pushing ink through a stenciled mesh screen directly onto the material, which creates a thick, vibrant, and incredibly durable print. This method is king for logos with just one or two solid colors. Because a new screen has to be made for each color in your design, it’s most cost-effective for simpler graphics and larger orders. The result is a bold, slightly raised print that really lasts. Heat Transfer For Colorful Detail But what if your logo is a kaleidoscope of colors and fine lines? That’s where heat transfer comes in. This technique prints your design onto special transfer paper first, then applies it to the bag using—you guessed it—heat and pressure. Think of it as a professional-grade, super-durable iron-on. It’s fantastic for full-color, photorealistic images without needing a dozen different screens. This makes it a smart choice for smaller print runs or complex artwork where screen printing would get way too expensive. The best printing method is one that honors your design's intent while respecting your budget. A simple, bold logo shines with screen printing, while a complex, multi-hued design is best served by heat transfer or digital methods. To give you a clearer picture, this infographic breaks down the key differences between printing methods at a glance. As you can see, there are trade-offs. Screen printing gives you that rugged durability for simple designs at a great price, while digital printing is the champion for complex images, though it costs a bit more. To help you weigh the options, here’s a quick breakdown of how these methods stack up against each other. Printing Method Breakdown Print Method Best for Designs Material Compatibility Durability Cost Profile Screen Printing Simple graphics, 1-3 solid colors, bold logos Cotton, canvas, jute, non-woven polypropylene Very High Low cost for large runs, high setup cost for small runs Heat Transfer Full color, complex details, photographic images Cotton, polyester, blends, some plastics Good Moderate cost, great for small to medium runs Digital (DTG) Photorealistic, gradients, unlimited colors Primarily cotton and natural fabrics Good to High Higher cost per item, no setup fees, ideal for small orders Embroidery Logos, text, simple graphics for a premium feel Heavy canvas, denim, thick fabrics Excellent Highest cost, based on stitch count Choosing the right method ensures your investment pays off with a bag that looks fantastic and represents your brand well. Digital Printing And Other Options For designs that need to look like a photograph, Direct-to-Garment (DTG) or other benefits of digital printing are the way to go. This process works a lot like your office inkjet printer, applying ink directly onto the fabric. It’s unmatched for reproducing gradients, subtle shadows, and incredibly detailed images with pinpoint accuracy. And for a truly premium, textured finish, you could even consider embroidery. While it’s less common for shopping bags and more suited for heavy-duty canvas totes, it adds a touch of class that printing can’t replicate. Each method has its place, ensuring there’s a perfect technique out there to make your brand’s vision a reality. Getting Your Order Just Right Alright, you've got your design dialed in and you know how you want it printed. Now comes the part where we turn that digital file into a stack of real-life custom logo shopping bags . This stage is all about the details and making sure you and your supplier are on the same page. The first hurdle is getting your artwork submitted correctly. Every supplier has its own preferences for file formats and resolutions, and they're usually not shy about listing them. Take a minute to double-check those specs before you upload. It’s a simple step that can save you a world of back-and-forth emails and delays down the line. Confirming Every Detail Before Production Before you give the green light for a full production run, you absolutely must review a proof. This is non-negotiable. Think of it as your final safety check. Suppliers typically offer a couple of different proofing options, and each one has its place. Digital Proof: This is usually a PDF or an image that shows you exactly how your logo will be sized and placed on the bag. It’s your last chance to catch a typo, fix a color issue, or tweak the layout before it's too late. Physical Sample: If you're placing a large order or just want that extra peace of mind, ask for a physical sample. It might cost a little extra, but holding an actual bag lets you feel the material, see the true print colors, and confirm the quality with your own hands. It’s a smart move. Once you sign off on that proof, your order is officially in the production queue. After that point, fixing a mistake becomes a much bigger—and more expensive—headache. Understanding Costs and Timelines The price you see per bag isn't always the full story. When you get a quote, you'll likely see a few other charges, and it's important to know what they are. For instance, a setup fee is pretty standard; it’s a one-time charge for getting the printing press calibrated and ready for your specific design. Also, don't forget to ask about price breaks for larger quantities. The cost per bag almost always drops as you order more. This is key when you're looking at the Minimum Order Quantity (MOQ) , which is the smallest order a supplier is willing to run for you. Always get a detailed quote that breaks down everything: setup fees, the per-bag cost at different quantities, and an estimate for shipping. Getting that clarity upfront saves you from any nasty budget surprises later on. Finally, have a clear conversation with your supplier about turnaround times. Ask for their production schedule and get an estimated delivery date. This lets you plan your marketing launches or events without guessing when your bags will show up. The demand for shopping bags is no joke—the market was valued at around USD 18.71 billion in 2025 , with a huge chunk of that coming from the Asia Pacific region. That high volume means you need to lock in your production slot early. You can dig into more of the numbers in this shopping bag market research report . By handling these details proactively, you’re setting yourself up for a smooth process and a final product that truly represents your brand. Turning Your Bags into Marketing Assets Here's a little secret: your investment in custom logo shopping bags doesn't end when a customer walks out the door. In fact, that's exactly where the real work begins. The smartest brands know these bags aren't just packaging. They're mobile advertisements, a tangible reminder of a great experience, and a surprisingly effective way to build a community. When you start thinking strategically about distribution, you turn a simple carrier into a dynamic marketing asset. The goal is pretty straightforward—get your bags seen in as many places as possible. Every customer becomes a walking billboard for your brand. Beyond the Checkout Counter If you're only giving out custom bags at the point of sale, you're leaving money on the table. It's time to think bigger. Where does your audience hang out, and how can your branded bag add real value to their experience there? Local Events and Sponsorships: Are you sponsoring a local farmer's market, a 5K charity run, or a community festival? Hand out your high-quality totes. They’re infinitely more useful than another flyer and will carry your brand all over the event and long after it's over. Trade Show Giveaways: At a busy conference, a sturdy, stylish bag is one of the most sought-after pieces of swag. Attendees are desperate for something to carry all the brochures and samples they collect. Your bag can be the one they grab, giving you visibility across the entire show floor. Customer Loyalty Programs: Why not reward your best customers? Include a premium reusable bag when they hit a certain spending threshold. It’s a great way to show you appreciate their business, and it encourages them to bring your brand along on their future shopping trips. To get the most mileage out of your bags, think of them as the centerpiece of a broader strategy that uses unique promotional swag to build your brand identity. Encouraging Reuse and Social Sharing The ultimate win? When a customer loves your bag so much they start using it in their daily life. This creates organic, repeated brand exposure at zero extra cost to you. A fantastic design is the first step, but you can also give them a little nudge. Consider adding a small, discreet message on the bag itself. Something like, "Tag us in your travels with #YourBrandAdventure!" or "Show us how you reuse your bag!" This simple call-to-action can spark a wave of user-generated content, turning a physical item into a social media conversation starter. Pairing these bags with other high-quality marketing materials creates a cohesive brand experience that people remember. The real value of a custom bag isn't just in the initial transaction. It's in every subsequent use—at the grocery store, the gym, or the park—where your brand becomes a visible part of your customer's life. This focus on reusability is what's driving major market growth. The global tote bag market, a huge piece of the custom bag world, is projected to hit USD 6.94 billion by 2025 . Why? Because people want sustainable, stylish accessories. By tapping into this trend, your bags become more than just packaging—they become a lasting symbol of your brand's quality and values. Common Questions About Custom Bags When you're jumping into the world of custom logo shopping bags , a few questions pop up almost every single time. Getting good answers to these can save you a ton of time, money, and headaches, making sure your project goes off without a hitch. Let's dive right into the most common ones we hear. What Is The Best File Format For My Logo? This is probably the most important technical detail to get right. For the sharpest, cleanest print, you absolutely want to use a vector file . That means files ending in .AI, .EPS, or .SVG . Think of it this way: vector files are built with math, not pixels. That means you can blow them up to the size of a billboard or shrink them down to fit on a pen, and they will never, ever get blurry. The lines will always be crisp. Now, if all you have is a JPG or a PNG, don't panic. It's not the end of the world, but it’s not ideal either. You’ll need to send the highest resolution file you can find—we’re talking at least 300 DPI (dots per inch) —to have a fighting chance against a blurry or pixelated final print. Still, your printer will always prefer a vector file to guarantee a professional result. How Do I Choose The Right Bag Material? Finding the perfect material for your bags comes down to a balancing act between three things: your brand's vibe, your budget, and how your customers will actually use them. For an upscale or eco-conscious brand: You can't go wrong with natural fibers like cotton or canvas. They have a premium feel, they're built to be reused over and over, and they send a strong message about sustainability. You can explore plenty of options that fit this mission in our guides on eco friendly printing . For big promotions and giveaways: When budget is the name of the game, non-woven polypropylene is a fantastic choice. It’s surprisingly durable for its low cost, making it a true workhorse for trade shows. For that classic retail experience: You can never go wrong with paper. It's incredibly versatile. You can get that earthy, rustic feel with kraft paper or go for a sleek, high-end look with a laminated finish. Think about the bag's second life. A sturdy canvas tote becomes a walking billboard at the grocery store, while a beautiful paper bag from a boutique makes the whole purchase feel like a special event. What Is A Setup Fee In Custom Printing? A setup fee is a totally standard, one-time charge in the printing world. It covers the cost for the printer to get all their equipment prepped and calibrated specifically for your design. For a process like screen printing, for example, this fee pays for creating the physical screen for each individual color in your logo. It’s a necessary step and is billed separately from the price you pay per bag, so make sure you factor it into your initial budget. You might see it waived for huge reorders of the exact same design, but you should always plan for it on a new project. What Does Minimum Order Quantity Mean? The Minimum Order Quantity (or MOQ ) is simply the smallest number of bags a supplier will print for you in one go. They set these minimums to make sure that each production run is efficient and covers their own setup costs. MOQs can be all over the map depending on the bag material, the printing method, and the supplier themselves. It’s really important to ask about the MOQ right at the start to make sure it works for your needs and budget. While it can be tempting to go with a lower MOQ for a small project, just remember that the price per bag almost always drops as your order gets bigger. Larger runs usually offer a much better value in the long run. Ready to create custom bags that get your brand noticed? 4OVER4 offers a wide range of high-quality, customizable shopping bag options perfect for any business. Start designing your bags today at https://4over4.com
 story
story 8 Inspiring Mug Design Ideas for 2025
More than just a vessel for your morning coffee, a mug is a canvas for creativity, a statement of personality, and a powerful marketing tool. In a world saturated with generic drinkware, a unique and thoughtful design can make all the difference, whether you're creating a personalized gift, launching a merchandise line, or building brand awareness. The challenge lies in moving beyond the obvious and crafting something truly memorable. A well-executed concept transforms a simple ceramic item into a cherished daily ritual. This comprehensive guide delivers a curated collection of mug design ideas , each packed with actionable insights and practical examples to elevate your creations. We move past generic advice to provide you with a strategic toolkit for designing drinkware that connects with an audience and achieves specific goals. Whether you are a graphic designer seeking fresh inspiration or a business owner developing promotional products, the concepts here are designed for immediate implementation. Our list explores a wide spectrum of creative avenues, ensuring there is a perfect fit for any project. You will discover how to leverage: Interactive elements like color-changing, heat-sensitive inks. The power of minimalist typography for a sophisticated aesthetic. Textural innovations that provide a unique tactile experience. From novelty humor to professional, occupation-specific themes, we will dissect what makes each of these mug design ideas effective. Get ready to transform a simple ceramic item into a functional work of art that people will love to use every single day. 1. Color-Changing Heat-Sensitive Mugs Among the most captivating and interactive mug design ideas, heat-sensitive mugs offer a unique element of surprise and delight. These mugs utilize a special thermochromic ink that remains opaque at room temperature but becomes transparent when heated. This technological magic allows a hidden design to emerge or an existing one to transform when a hot beverage is poured inside, creating a dynamic and memorable user experience. The transformation is the core appeal. A seemingly plain black mug can suddenly reveal a detailed star map, or a simple logo can bloom into a full-color illustration. This "reveal" effect not only grabs attention but also creates a lasting impression, making it an excellent choice for promotional items, unique gifts, and branded merchandise. Why Choose This Design? Heat-sensitive mugs are powerful marketing tools because they encourage interaction. The user actively participates in the design's reveal, which builds a stronger connection to the brand or message. This approach is ideal for businesses that want their merchandise to be more than just a static object; they want it to tell a story or create a moment of joy. Companies like The Unemployed Philosophers Guild have popularized this concept with creative designs ranging from disappearing historical figures to blooming works of art. Actionable Implementation Tips To execute this idea effectively, focus on the contrast between the "cold" and "hot" states. Maximize Visual Contrast: Design with high contrast in mind. A solid black or dark blue thermochromic coating that reveals a vibrant, colorful image underneath delivers the most dramatic effect. Create a Dual-Purpose Design: Ensure the mug looks appealing in both its cold and hot states. The initial design should be intriguing on its own, not just a blank slate, making the reveal even more rewarding. Test Temperature Sensitivity: Work closely with your manufacturer to confirm the activation temperature of the thermochromic ink. This ensures the design reveals smoothly and completely with a standard hot beverage. Provide Clear Care Instructions: Heat-sensitive mugs often require special care (e.g., hand-wash only, not microwave-safe). Include clear instructions to preserve the longevity of the effect and ensure customer satisfaction. A great example is a NASA-themed mug that shows an empty night sky when cold but reveals detailed constellations and nebulae when hot coffee is added. This simple yet brilliant concept connects the act of "warming up" with the awe of cosmic discovery, making it a perfectly executed heat-sensitive design. 2. Personalized Photo and Text Mugs Personalized photo and text mugs stand as a timeless and deeply personal design choice, leveraging the power of sentimentality to create a cherished item. This approach involves printing custom photographs, names, meaningful dates, or favorite quotes directly onto a mug's surface, typically using sublimation printing for vibrant, long-lasting results. The design transforms a simple piece of drinkware into a unique keepsake, capturing a specific memory or emotion. The primary appeal lies in its emotional connection. A mug featuring a beloved pet's portrait, a family vacation photo, or an inside joke shared between friends creates an instant bond that mass-produced items cannot replicate. This makes it one of the most popular mug design ideas for gifts, commemorative merchandise, and promotional items that aim to build a genuine relationship with the recipient. Why Choose This Design? Personalized mugs are exceptionally effective because they tap into the user's personal life and memories, ensuring the item is used and valued. For businesses, this translates to high-impact promotional gifts that feel more like a thoughtful present than a marketing tool. Companies like Shutterfly and Vistaprint have built entire business models around this concept, demonstrating its powerful and consistent market appeal. The feeling is similar to receiving a heartfelt greeting card; for more inspiration, explore our guide on designing custom greeting cards . Actionable Implementation Tips To create a high-quality personalized mug, attention to detail is paramount. Ensure High-Resolution Images: Insist on customer-submitted photos with a resolution of at least 300 DPI (dots per inch). This prevents pixelation and ensures the final print is sharp and clear. Offer Design Previews: Provide a digital mock-up or preview of the final design before production. This manages customer expectations and reduces the likelihood of returns due to layout or text errors. Enhance Photo Quality: Use basic photo editing to correct colors, improve brightness, or crop the image effectively. A simple enhancement can dramatically improve the visual impact of the final product. Consider Wraparound Designs: A panoramic photo or a design that wraps around the entire mug offers a more immersive and premium feel compared to a simple, centered image. For advanced personalization, consider drawing inspiration from sophisticated methods like laser engraved glassware designs , which offer intricate detailing beyond simple prints. A perfect example is a set of mugs created for a family reunion, each featuring a group photo on one side and the individual family member's name on the other. This not only serves as a practical item for the event but also becomes a treasured memento of the occasion. 3. Minimalist Typography Mugs In an era where clarity and simplicity are highly valued, minimalist typography mugs stand out with their sophisticated and modern appeal. This design approach strips away unnecessary clutter, focusing on the power of a single word, a concise phrase, or elegant lettering. By leveraging clean fonts, ample white space, and a deliberate layout, these mugs convey their message with quiet confidence and style, making them a popular choice for professional settings and design-conscious consumers. The core principle of this design is that less is more. A simple, well-chosen word like 'Focus', 'Create', or 'Breathe' can serve as a daily mantra, while a beautifully rendered monogram adds a touch of personalized elegance. These mug design ideas resonate because they integrate seamlessly into a modern aesthetic, transforming a functional object into a piece of subtle, everyday art. Why Choose This Design? Minimalist typography is versatile and universally appealing, making it a safe yet powerful choice for corporate gifts, branded merchandise, and retail products. Its clean aesthetic communicates professionalism and a modern brand identity. This style avoids polarizing imagery and focuses on a timeless, elegant message that fits any environment, from a busy office desk to a calm home kitchen. Brands like West Elm and countless independent Etsy designers have successfully used this approach to create products that feel both premium and personal. Actionable Implementation Tips To create a successful minimalist design, every detail of the typography must be perfect. Choose Fonts with Intention: The font is the centerpiece of the design. Select a typeface that reflects the tone of the message. A clean sans-serif like Helvetica or Futura feels modern and direct, while a classic serif like Garamond or Bodoni can convey tradition and elegance. Master Spacing and Kerning: Pay meticulous attention to the spacing between letters (kerning) and lines (leading). Proper spacing is critical in minimalist design and is often what separates an amateur look from a professional one. Use White Space Strategically: Treat the blank surface of the mug as an active design element. Generous white space draws the eye to the text and enhances its impact, creating a sense of calm and order. Test for Legibility: Print a mockup of your design and wrap it around a mug to test its legibility from different angles. Ensure the text is readable whether the mug is on a desk or in someone's hand. A great example is a mug featuring the word "Clarity" in a crisp, light-grey sans-serif font, placed slightly off-center. The design is understated yet impactful, providing a subtle daily reminder of its message without overwhelming the senses. This demonstrates how minimalist typography can elevate a simple object into a meaningful one. 4. Interactive Handle Designs Moving beyond the surface, interactive handle designs transform a mug’s most functional component into a centerpiece of creativity and engagement. This approach rethinks the handle not just as something to hold, but as an integral part of the mug’s overall aesthetic and user experience. It turns a simple ceramic vessel into a piece of functional art, where the handle itself tells a story or offers a unique tactile interaction. The core idea is to make the handle a distinctive feature that complements or completes the mug's body. This can range from novelty shapes like a knuckle duster or a carabiner to more subtle artistic integrations where the handle forms the trunk of a painted tree or the tail of an animal illustrated on the mug. This approach is one of the most inventive mug design ideas for creating a truly memorable and physically unique product. Why Choose This Design? Interactive handles create an immediate talking point and a strong physical connection with the user. Unlike a printed design, a uniquely shaped handle is experienced through touch, making the mug stand out in a crowded cupboard. This design style is perfect for brands that want to convey innovation, playfulness, or artistry. Boutique ceramic artists and novelty gift companies often leverage this concept to create products that feel custom-made and highly collectible, distinguishing them from mass-produced items. Actionable Implementation Tips To execute this idea effectively, the balance between creative form and ergonomic function is paramount. Prioritize Comfort and Usability: While creativity is key, the handle must remain comfortable and safe to hold, especially with hot liquids. Test prototypes with various hand sizes to ensure a secure and pleasant grip. Ensure Handle Strength and Durability: The connection point between the handle and the mug is a potential weak spot. Work with manufacturers to guarantee the handle is robustly attached and can withstand daily use and stress without breaking. Consider Manufacturing Limitations: Complex handle shapes can be challenging and costly to produce. Discuss your design with your manufacturer early on to understand any limitations in molding or 3D printing and adjust accordingly. Integrate Handle into the Artwork: The most successful designs are those where the handle is not just an add-on but an essential part of the overall illustration. For example, a mug with an octopus graphic could feature a handle shaped like one of its tentacles. A classic example is the "Fisticup," which features a metallic-finished handle shaped like a brass knuckle. This design is bold and memorable, instantly conveying an edgy attitude and transforming the simple act of drinking coffee into a statement. It perfectly marries a novelty concept with a functional object, creating an unforgettable product. 5. Seasonal and Holiday-Themed Mugs Tapping into the festive spirit and cyclical nature of consumer purchasing, seasonal and holiday-themed mugs are a time-tested and highly effective design idea. These mugs leverage the colors, symbols, and emotions associated with specific times of the year, from the cozy warmth of a Christmas design to the spooky fun of Halloween. This approach transforms a simple mug into a timely, relevant, and highly desirable item that captures the essence of a celebration. The core appeal of this strategy lies in its emotional connection and limited-time availability. A mug featuring a charming winter scene or a romantic Valentine’s Day motif becomes more than just a beverage holder; it's a keepsake that marks a special time of year. This sense of occasion creates urgency and makes the mug a perfect gift. For those looking to present something special, a beautifully designed mug can be the centerpiece of thoughtful and unique gift ideas for coffee lovers , especially when tied to a favorite holiday. Why Choose This Design? Seasonal mugs are powerful drivers of recurring sales, encouraging customers to build a collection over time. This collectible nature fosters brand loyalty and anticipation for the next release. Companies like Starbucks have mastered this, with their annual holiday mug collections becoming a cultural phenomenon. The limited availability turns each design into a must-have item, proving that aligning your product with seasonal marketing campaigns can significantly boost visibility and sales. It's a fantastic strategy for retail businesses, coffee shops, and anyone looking to capitalize on gift-giving holidays. Actionable Implementation Tips To successfully execute seasonal mug design ideas, timing and theme are everything. Plan and Produce Early: Begin the design and production process well in advance of the season. For Christmas merchandise, planning should start in the summer to ensure products are ready for the peak shopping period. Create Collectible Series: Design a new, unique mug for the same holiday each year. This encourages repeat purchases from customers who want to collect the entire set, building a loyal following. Balance Specificity with Broader Appeal: While a "Merry Christmas" mug is great, a design featuring a general winter wonderland or snowflake motif has a longer sales window, from November through February. Think Globally: If you have an international audience, consider seasons in the Southern Hemisphere. A "Summer Christmas" design with beach-themed Santa Claus could be a hit in markets like Australia or Brazil. A great example is a "Back to School" mug designed for teachers, featuring subtle academic motifs like apples, pencils, and chalk drawings. Releasing this in late summer captures the unique seasonal moment perfectly, making it a thoughtful gift that resonates with a specific, time-sensitive need. This seasonal approach can be just as effective as other targeted promotions, like those using printed door hangers to announce holiday sales. 6. Professional and Occupation-Specific Mugs Tapping into a person's professional identity or passionate hobby is a powerful way to create a resonant and highly sought-after product. Occupation-specific mugs are designed to celebrate a particular career or interest, featuring industry-relevant humor, specialized terminology, or motivational messages that speak directly to the target audience. This approach fosters an immediate sense of belonging and appreciation, making the mug feel like a personal badge of honor. The appeal lies in its specificity. A generic "World's Best Employee" mug is easily forgotten, but a mug that jokes about a software developer's endless debugging cycles or a nurse's caffeine-fueled shifts creates a strong, personal connection. This niche targeting transforms a simple drinkware item into a statement piece that reflects the user's expertise, passion, and daily experiences, making it one of the most effective mug design ideas for building a loyal customer base. Why Choose This Design? This design strategy excels at creating products with built-in market appeal. By focusing on a specific group, whether it's accountants, teachers, or dog lovers, you tap into a pre-existing community eager for products that validate their identity. These mugs are perfect for corporate gifting, professional association merchandise, and niche e-commerce stores. Sellers on platforms like Etsy have built entire businesses around this concept, demonstrating its high potential for commercial success. Actionable Implementation Tips To create an authentic and appealing occupation-specific mug, deep-dive into the culture of the target group. Research Niche Terminology and Humor: Use genuine inside jokes, acronyms, or symbols that only someone in that field would understand. For an engineer, this might be a formula; for a graphic designer, a joke about kerning. Focus on Positive Reinforcement: Celebrate the challenging but rewarding aspects of a profession. A mug for a teacher could feature an inspiring quote about shaping young minds, while a design for a firefighter could highlight their bravery. Avoid Negative Stereotypes: Ensure your design is appreciative and respectful. Steer clear of clichés that could be misinterpreted as offensive or demeaning to the profession. Segment by Experience Level: Consider creating variations for different career stages. A design for a medical student will have a different tone than one for a veteran surgeon, allowing for even greater personalization. A great example is a mug designed for writers that reads, "Be careful or you'll end up in my novel." This simple, witty phrase instantly connects with the creative process and mindset of an author. Similarly, businesses can extend this professional branding beyond mugs. For instance, creating complementary items like professionally designed business cards from 4over4.com can help individuals build a cohesive and memorable professional identity. 7. Textured and Material Innovation Mugs Moving beyond purely visual appeal, one of the most sophisticated mug design ideas involves innovating with textures and materials to create a unique tactile experience. These mugs engage the sense of touch, transforming a simple daily ritual into a more memorable and grounded moment. The focus is on the physical interaction, using materials like cork, bamboo, or specialized ceramic finishes to make the mug feel as good as it looks. The core appeal of this approach lies in its ability to convey quality and thoughtfulness. A smooth, soft-touch matte finish feels modern and luxurious, while a debossed geometric pattern provides an interesting grip and visual depth. This focus on the physical sensation makes the product stand out in a saturated market, offering a premium experience that connects with users on a deeper level than a standard printed design. Why Choose This Design? Textured and material-focused designs are perfect for brands that want to communicate sophistication, eco-consciousness, or artisanal quality. The choice of material itself can tell a story. A cork-wrapped base suggests natural warmth and sustainability, while a speckled, stoneware-inspired finish evokes a rustic, handcrafted feel. This makes it an excellent strategy for high-end coffee shops, design-forward lifestyle brands, and eco-conscious companies. Brands like Fellow and W&P have excelled in this area, creating products where the material choice is central to both function and aesthetic. Actionable Implementation Tips To execute this idea successfully, the key is to balance sensory appeal with everyday practicality. Prioritize Functionality: Ensure the chosen texture or material enhances the user experience rather than hindering it. For example, a texture should provide a secure grip and be comfortable to hold, not abrasive or awkward. Test Finish Durability: Specialty finishes like soft-touch coatings or metallic glazes must be tested for durability. Confirm with your manufacturer that they can withstand repeated washing and daily use without chipping, peeling, or fading. Align Material with Brand Values: Select materials that reflect your brand's identity. Use recycled composites or bamboo for an eco-friendly message, or sleek ceramic with a matte glaze for a minimalist, modern brand. Combine with Minimalist Graphics: Often, a unique texture is the star of the show. Pair it with a simple, elegant debossed logo or a minimalist print to avoid visual clutter and let the material's quality speak for itself. You can even extend this tactile branding to your packaging; for example, you can learn more about custom product tags on 4over4.com that can complement the mug's texture. A great example is a mug made from a matte black ceramic with a polished, smooth copper base. This design combines multiple textures and materials to create a product that is visually stunning, feels premium in the hand, and effectively communicates a modern, high-end brand identity. 8. Funny and Novelty Humor Mugs Humor is a universal language, and funny or novelty mugs leverage this to create an instant connection with the user. These mug design ideas feature witty sayings, clever puns, relatable memes, or amusing graphics designed to bring a smile to someone’s face during their daily coffee or tea ritual. They tap into shared experiences, inside jokes, and popular culture to offer a moment of lighthearted entertainment. The appeal lies in their relatability and personality. A mug that says, "I survived another meeting that should have been an email," instantly resonates with office workers, while a design featuring a cat knocking things over speaks directly to pet owners. This ability to capture a specific sentiment makes humor mugs incredibly popular for personal use, gifts, and even as lighthearted promotional products . Why Choose This Design? Funny and novelty mugs excel at showing personality and building a sense of community around a shared joke or interest. For businesses, they can make a brand appear more approachable and human. A tech company giving out mugs with coding humor, or a veterinary clinic with designs about pet antics, uses this strategy to strengthen client relationships. This approach is perfect for brands that want to be memorable, relatable, and spark conversation with their merchandise. Actionable Implementation Tips To create a genuinely funny mug that sells, the humor needs to be well-executed and targeted. Know Your Audience: Humor is subjective. A joke that lands perfectly with one demographic might fall flat with another. Research your target audience’s interests, pain points, and sense of humor to ensure your design resonates. Stay Culturally Relevant: Tap into current memes, viral trends, and pop culture references for timely appeal. However, be mindful that trends fade, so balance timely humor with evergreen jokes that have broader, lasting appeal. Prioritize Originality: While memes are popular, creating original witty phrases or unique illustrations will make your design stand out. Avoid simply copying overused jokes and aim for a fresh take on a relatable topic. Test Your Humor: Before committing to a large print run, test your designs with a small, diverse group. This helps you gauge reactions and avoid humor that could be misinterpreted or perceived as offensive. A great example is a mug designed for a writer that reads, "Be careful or you'll end up in my novel." This is a classic inside joke within the writing community that is both humorous and specific, making it a perfect gift and a highly effective novelty design. 8 Mug Design Ideas Comparison Table Mug Type Implementation Complexity 🔄 Resource Requirements ⚡ Expected Outcomes 📊 Ideal Use Cases 💡 Key Advantages ⭐ Color-Changing Heat-Sensitive Mugs Moderate - requires thermochromic ink technology Higher cost materials and careful handling Interactive user experience; strong surprise factor Brand marketing, novelty gifts High novelty; memorable; strong marketing potential Personalized Photo and Text Mugs Moderate - digital printing, customization steps High-quality printing materials and image prep Emotional connection; personalized gifts Commemorative gifts, custom orders High emotional value; strong profit margins Minimalist Typography Mugs Low - simple design, focus on typography Low - limited colors and simple printing Professional, timeless appearance Office use, minimalism trend followers Timeless appeal; lower production cost Interactive Handle Designs High - complex handle design and testing Higher production cost and material strength Distinctive feel and functionality Unique user experience; boutique or novelty markets Product differentiation; functional and artistic handles Seasonal and Holiday-Themed Mugs Low to Moderate - design seasonal artwork Moderate - requires timely production Seasonal sales boost; themed gift appeal Holiday gifting, seasonal promotions Strong seasonal sales; gift appeal Professional and Occupation-Specific Mugs Moderate - requires industry-specific design Moderate - printing plus research Strong identity connection; corporate gifting Profession-specific gifts, corporate giveaways Targeted audience; higher perceived value Textured and Material Innovation Mugs High - unique materials and surface treatments High - specialty materials and finishes Sensory and tactile appeal; premium positioning Luxury markets, sensory product lines Memorable tactile experience; premium pricing Funny and Novelty Humor Mugs Low to Moderate - text and graphic design Low to moderate - standard printing Broad appeal; high shareability Gifts, casual markets, viral marketing Broad market; social media shareability Bringing Your Vision to Life The journey from a spark of inspiration to a tangible, well-loved mug is one of creativity, strategy, and careful execution. Throughout this guide, we've explored a diverse range of mug design ideas , each offering a unique pathway to connect with an audience. From the magical reveal of color-changing heat-sensitive mugs to the clean, sophisticated impact of minimalist typography, the potential is vast. A great design does more than just decorate a ceramic surface; it creates a moment, sparks a memory, or provides a daily dose of humor. We've seen how personalized photo mugs transform a simple object into a cherished keepsake and how interactive handle designs can add a surprising and delightful twist to a familiar form. The key takeaway is that the most successful designs are born from a deep understanding of the end-user. Whether you're crafting a witty novelty mug or a professional, occupation-specific design, the goal is always to create something that feels intentional and resonant. A well-designed mug becomes part of a person's routine, a small but consistent presence in their daily life. Synthesizing Strategy and Creativity To truly master the art of mug design, it's crucial to move beyond aesthetics and think holistically about the user experience. This involves considering not just what the mug looks like, but how it feels and what it communicates. Emotional Connection: Designs like seasonal themes or personalized text tap directly into emotions, creating an instant bond. Ask yourself: what feeling do you want this mug to evoke? Joy, motivation, nostalgia, or a good laugh? Tactile Experience: Don't underestimate the power of touch. The innovative textures and materials we discussed, from matte finishes to embossed details, elevate the physical interaction with the product, making it feel more premium and thoughtful. Functional Purpose: While all mugs serve a basic function, your design can enhance it. A minimalist design might suit a modern office environment, while a bold, funny mug can be an icebreaker. The design should align with its intended environment and purpose. Brand Alignment: For businesses, every mug is a marketing tool. The design must be a seamless extension of your brand's voice, values, and visual identity. A mismatched design can confuse your audience, while a cohesive one reinforces brand loyalty. Ultimately, the best mug design ideas are those that are executed with precision and quality. A brilliant concept can be undermined by poor printing, mismatched colors, or a low-quality base product. The final production step is where your vision becomes reality, and it's critical that the finished item lives up to the creativity you invested in it. Your Next Steps: From Concept to Creation You are now equipped with a wealth of concepts and strategies to create standout mug designs. The next step is to take action. Begin by clearly defining your audience and objective. Are you creating promotional merchandise, a retail product line, or a personal gift? Sketch out your ideas, experiment with different styles, and gather feedback. Remember that the most impactful designs often blend different elements. Perhaps a minimalist typography design could be applied to a uniquely textured mug, or a professional-themed mug could incorporate a touch of subtle humor. The possibilities are truly limitless when you combine the ideas we've covered. As you move forward, focus on creating a product that isn't just a vessel for coffee or tea, but a meaningful object that builds connection and leaves a lasting, positive impression. Ready to turn your brilliant concepts into high-quality, professionally printed products? With an extensive range of customization options and a commitment to quality, 4OVER4 provides the perfect platform to bring your best mug design ideas to life. Explore their printing services today and ensure your final product is as impressive in hand as it was in your imagination by visiting 4OVER4 .
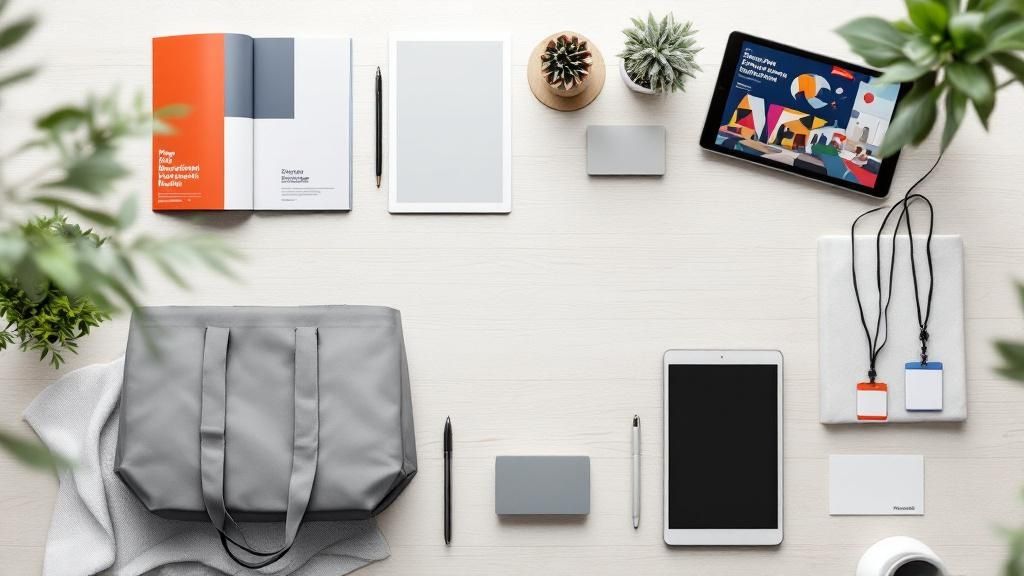 story
story 10 Essential Promotional Materials for Events in 2025
Planning an event is a monumental task, but the real challenge lies in cutting through the noise to attract and engage your target audience. The right promotional materials for events are not just accessories; they are the lifeblood of your marketing strategy. These materials shape perceptions, guide attendee experiences, and leave a lasting impact long after the doors close. A truly effective promotional plan integrates both tangible and virtual elements to create a comprehensive and immersive brand journey. This guide moves beyond generic checklists to provide a strategic deep-dive into the 10 most critical promotional assets. We will explore the 'why' behind each item, offering practical use cases, implementation tips, and honest assessments to help you invest your budget wisely. Think of this as your blueprint for promotional victory. Whether you're organizing a corporate conference, a bustling trade show, or a vibrant community festival, this curated toolkit will equip you to select the materials that make your next event not just successful, but truly memorable. Let's get started. 1. Banner Displays and Signage As the primary visual anchors of any event, high-quality banner displays and signage are non-negotiable promotional materials. They serve a dual purpose: establishing a strong brand presence and providing essential logistical information. From large-format backdrops at a trade show to simple, clear directional signs at a conference, these materials are often the first physical touchpoint an attendee has with your event, setting the professional tone from the moment they arrive. Why They Are Essential Effective signage directly impacts the attendee experience. A well-designed retractable banner at the entrance immediately communicates key branding, while consistent directional signs reduce confusion and improve attendee flow. This creates a seamless, positive environment, allowing guests to focus on the event's content rather than navigating the venue. Best Use Cases: Trade show booths, festival entrance archways, conference wayfinding, pop-up retail displays, and stage backdrops. Key Consideration: Placement is critical. Position banners and signs in high-foot-traffic areas like entrances, registration desks, and main halls for maximum visibility. Also, consider lighting to ensure your displays are vibrant and readable, especially indoors. Choosing the Right Banner Type Selecting the appropriate material is crucial for both appearance and longevity. Your choice depends on the event's environment, your budget, and how you plan to reuse the display. The following chart breaks down the key attributes of three popular banner options to guide your decision. This comparison highlights how retractable banners offer the best balance of portability and reusability, while traditional vinyl banners provide a highly cost-effective and durable solution, particularly for outdoor use. Explore a wide variety of material options, from weather-resistant vinyl to premium fabrics, to ensure your signage meets the specific demands of your event. For more details, you can explore custom banner printing options on 4OVER4.com. 2. Branded Promotional Swag and Giveaways Tangible branded items, or "swag," are powerful promotional materials for events because they create a lasting connection with attendees. Unlike digital ads or temporary signage, a well-chosen giveaway travels home with your audience, extending brand exposure long after the event concludes. These items transform attendees into brand ambassadors every time they use a branded pen, wear a custom t-shirt, or carry a logoed tote bag. Why They Are Essential Effective promotional swag fosters goodwill and reinforces brand messaging in a practical, physical form. A useful item, like a power bank from a tech conference or a reusable water bottle from a wellness retreat, integrates your brand into an attendee's daily life. This continuous, subtle exposure builds familiarity and positive associations, making your brand more memorable than competitors'. Best Use Cases: Conference welcome kits, trade show booth traffic drivers, VIP gift bags, contest prizes, and post-event thank you gifts. Key Consideration: Align the item with your brand and audience. A luxury brand might offer high-end leather keychains, while a sustainability-focused nonprofit could provide bamboo utensil sets. The goal is utility and relevance. Choosing the Right Giveaway Selecting a memorable giveaway requires balancing creativity, practicality, and budget. The most successful items are those that attendees genuinely want to keep and use. Consider your event's theme and your audience's lifestyle to ensure the item provides real value, which directly reflects on the perceived value of your brand. This approach ensures your investment generates long-term brand visibility rather than ending up forgotten in a drawer. Prioritizing quality over sheer quantity leaves a much stronger, more positive impression. For a comprehensive look at what's possible, you can explore a wide range of custom promotional products at 4OVER4.com. 3. Digital Displays and Interactive Screens In an increasingly digital world, static promotional materials are powerfully complemented by dynamic, electronic solutions. Digital displays, such as LED walls, interactive touch screens, and projection mapping, bring your event’s atmosphere to life with engaging, updatable content. These modern promotional tools move beyond simple information delivery, creating immersive experiences that capture attention and encourage audience participation, making your brand memorable and forward-thinking. Why They Are Essential Digital displays offer unparalleled flexibility. Unlike printed materials, content can be updated in real-time to reflect schedule changes, announce special guests, or display live social media feeds. Interactive screens transform passive viewing into active engagement, allowing attendees to explore product catalogs, play branded games, or provide instant feedback. This level of interaction not only enhances the attendee experience but also provides valuable data and analytics on audience behavior. Best Use Cases: Trade show interactive product demos, corporate conference digital agendas, festival projection mapping, and fan engagement walls at sports events. Key Consideration: Technical readiness is paramount. Ensure you have reliable power sources, stable internet connectivity, and on-site technical support to handle any issues. The success of these displays hinges on flawless execution. Implementing Digital Solutions Effectively Choosing the right digital display depends on your specific goals, from generating leads to enhancing brand ambiance. Your content strategy is as important as the hardware itself. The content must be visually compelling and designed for the specific screen format and interaction type, whether it’s a large-scale video wall or a small, responsive touch screen kiosk. Pre-event testing is crucial to guarantee a smooth and professional presentation. While 4OVER4.com specializes in premium print materials, these physical items can be designed to complement and drive traffic to your digital installations. For instance, you can use printed custom flyers or postcards to display QR codes that link attendees to an interactive online experience or a digital contest, seamlessly blending your traditional and modern promotional materials for events. 4. Printed Marketing Collateral In an increasingly digital world, tangible promotional materials for events like brochures, flyers, and programs offer a powerful way to connect with attendees. This printed collateral provides detailed information in a professional, take-home format. From comprehensive conference programs to sleek product catalogs at a trade show, these materials give attendees a physical reference point, reinforcing your brand message and providing lasting value long after the event concludes. Why They Are Essential Printed marketing collateral solidifies your event’s credibility and ensures key information is easily accessible. A well-designed event program or informational flyer allows guests to navigate schedules, speaker bios, and sponsor details without relying on Wi-Fi or battery life. This hands-on experience creates a more memorable connection and provides a professional touchpoint that reflects the quality of your event. Best Use Cases: Conference program booklets, trade show product catalogs, festival maps and schedules, corporate event welcome packets, and non-profit fundraiser leaflets. Key Consideration: Design for scannability. Use clear headings, bullet points, and high-quality visuals to break up text. Integrating QR codes can bridge the gap between print and digital, linking attendees to websites, videos, or social media pages. Choosing the Right Collateral The type of collateral you choose should directly support your event’s goals and your audience’s needs. A detailed catalog is ideal for a sales-focused trade show, while a simple, visually appealing flyer works best for a music festival. The quality of the paper and printing significantly impacts perception, so investing in a professional finish is crucial. Consider how the material will be used during and after the event to select the most effective format. For instance, a durable, pocket-sized schedule is more practical for a multi-day festival than a large, cumbersome brochure. For more guidance on creating effective print materials, you can explore custom flyer printing options on 4OVER4.com. 5. Social Media Integration Tools In today's hyper-connected world, bridging the gap between your physical event and the digital landscape is crucial for maximizing reach. Social media integration tools are the key promotional materials for events that achieve this, transforming attendees into active brand ambassadors. These tools range from interactive photo booths and live social walls to branded props and scannable QR codes, all designed to encourage real-time online engagement. Why They Are Essential Integrating social media directly into your event extends its lifespan far beyond the venue walls. When attendees share photos, posts, and stories using a designated event hashtag, they amplify your message to their own networks, creating organic buzz and valuable user-generated content. This digital footprint serves as a powerful testament to your event's success and helps attract future participants. Best Use Cases: Conferences with live-tweet walls, festivals with Instagram-worthy art installations, product launches with branded photo booths, and corporate galas with networking QR codes. Key Consideration: Make participation effortless and rewarding. Clearly display your unique event hashtag on all materials, from banners to name badges. Offer small incentives, like a prize for the best photo or a shout-out from the main stage, to encourage attendees to post. Choosing the Right Integration Strategy Your approach should align with your event's atmosphere and your audience's preferred social platforms. A professional conference might benefit from a LinkedIn QR code exchange, while a music festival thrives on visually stunning backdrops perfect for Instagram and TikTok. The goal is to create authentic, shareable moments that feel like a natural part of the event experience. To make your social media stations stand out, consider incorporating professionally printed elements like custom selfie frames or step-and-repeat backdrops . These physical items provide a branded, high-quality canvas for photos, ensuring your logo and message are front and center in every shared image. You can explore custom backdrop options at 4OVER4.com to create a professional photo opportunity. 6. Email Marketing Campaigns In the digital age, email marketing remains one of the most direct and effective promotional materials for events. This channel allows you to build a continuous relationship with your audience, delivering timely information directly to their inboxes. A strategic email campaign guides potential attendees from initial awareness to post-event engagement, serving as a powerful tool for driving registrations and fostering loyalty. Why They Are Essential Email campaigns provide a direct line of communication that is both personal and scalable. Unlike social media, where algorithms dictate visibility, emails land directly in a user’s personal space. This allows for targeted messaging, from early bird announcements to last-minute reminders, ensuring your communications are relevant and impactful. Effective campaigns build anticipation and keep your event top-of-mind. Best Use Cases: Conference registration drives, festival lineup announcements, webinar reminder series, and corporate event invitations. Key Consideration: Audience segmentation is crucial. Tailor your messages to different groups (e.g., past attendees, new leads, VIPs) to increase relevance and engagement. Your subject line is the most critical element; make it compelling enough to stand out in a crowded inbox. Crafting an Effective Campaign A successful email strategy involves more than just a single announcement. It's a carefully sequenced series of communications designed to nurture interest and drive action. Each email should have a clear purpose, a strong call-to-action (CTA), and a design that reflects your event's branding. Testing different send times and analyzing open rates will help you optimize your approach for maximum impact. Your campaign's design and messaging are vital for making a professional impression and encouraging clicks. For those looking to streamline this process, you can find professional support to manage your event’s email marketing campaigns with 4OVER4.com. 7. Experiential Marketing Installations Beyond traditional handouts, experiential marketing installations transform your brand presence into a memorable, interactive event. These are not just promotional materials; they are immersive brand worlds designed to engage attendees on a deeper, multi-sensory level. By creating a hands-on activity, a unique photo opportunity, or a captivating demonstration, you shift from passive advertising to active brand participation, fostering strong emotional connections and generating genuine buzz. Why They Are Essential Experiential installations cut through the noise of a crowded event floor by offering something truly unique. A well-executed experience, like a virtual reality zone or a personalized product station, becomes a destination, drawing attendees in and encouraging them to spend more time with your brand. This direct engagement generates powerful, lasting brand recall and encourages social sharing, turning your attendees into organic brand advocates. Best Use Cases: Product launch events, major trade shows, music festivals, brand activation tours, and pop-up shops. Key Consideration: The experience must be seamlessly connected to your brand's core message. Staffing is also crucial; well-trained brand ambassadors are needed to guide attendees, facilitate the experience, and ensure every interaction is positive and on-brand. Designing a Shareable Experience The goal of an experiential installation is to create a moment so compelling that attendees feel an urge to capture and share it. This requires careful planning around visual appeal, interactivity, and emotional impact. From high-tech challenges to simple, personalized keepsakes, the focus should be on creating an authentic brand story that attendees can step into and make their own. Effective management of these high-traffic zones is key. Using custom-printed event badges can help manage access to exclusive experiences or track participation, adding a layer of professionalism and organization. For more details on managing attendee flow, you can explore custom event badge options on 4OVER4.com. 8. Mobile Event Apps and Digital Platforms In today's digitally connected world, mobile event apps have transitioned from a luxury to a fundamental component of modern event management. These platforms act as a central hub in the palm of every attendee's hand, offering everything from real-time schedule updates and interactive venue maps to speaker bios and networking tools. By consolidating critical information and engagement features into a single, accessible interface, they streamline the event experience and extend your brand's reach beyond physical promotional materials. Why They Are Essential A dedicated event app significantly enhances attendee engagement and provides organizers with invaluable data. It facilitates direct communication through push notifications for last-minute changes, gathers live feedback via polls, and fosters community through built-in messaging features. This creates a dynamic, interactive environment that keeps attendees informed and involved, ultimately boosting their overall satisfaction and providing you with measurable analytics on session popularity and engagement. Best Use Cases: Large-scale conferences like SXSW, corporate summits, multi-stage music festivals, and trade shows with extensive exhibitor lists. Key Consideration: Promote app downloads well before the event begins. Incentivize early adoption by offering exclusive app-only content, such as early access to session registration or special networking opportunities. Ensure the user interface is intuitive and provide on-site technical support to assist attendees. Choosing the Right Platform Selecting the right digital platform depends on your event's scale, complexity, and specific goals. Some events may only require a simple web-based schedule, while others benefit from a full-featured native app with advanced networking and gamification. Your choice should balance functionality with your budget and technical resources. For those looking to integrate their physical and digital strategies, exploring how these platforms can complement your printed materials is a great starting point. You can learn more about how Mobile Event Apps and Digital Platforms can elevate your event on 4OVER4.com. 9. Influencer and Speaker Partnerships While not traditional printed items, strategic partnerships are powerful promotional materials for events that leverage human capital instead of physical collateral. These collaborations involve enlisting industry thought leaders, social media influencers, or keynote speakers to act as brand ambassadors. They use their established credibility and audience reach to promote the event, dramatically enhancing its perceived value and extending its marketing footprint far beyond your own channels. Why They Are Essential Influencer and speaker endorsements provide social proof and authenticity that traditional advertising often lacks. When a respected figure in a niche promotes your event, their followers see it as a vetted opportunity, driving higher-quality registrations and engagement. This approach taps into pre-built communities, creating buzz and establishing your event as a must-attend gathering for that specific industry or interest group. Best Use Cases: Tech conferences featuring industry pioneers, fashion shows with style influencers, wellness retreats led by fitness gurus, and business seminars with C-suite executives. Key Consideration: Authenticity is paramount. Select partners whose personal brand and audience demographics align perfectly with your event's theme and target attendees. A mismatch can feel forced and damage the credibility of both your event and the influencer. Building an Effective Partnership A successful collaboration is built on clear communication, mutual benefit, and measurable goals. It's not just about paying for a post; it's about co-creating value. Your agreement should outline specific deliverables, from pre-event social media mentions to live event coverage, ensuring both parties understand the expectations. Provide your partners with a professional media kit, including key messaging, approved graphics, and custom tracking links to monitor their impact. While these partnerships are digital-first, you can support them with physical materials like custom-designed VIP passes or exclusive branded merchandise that make your partners feel valued. This thoughtful approach helps transform a one-time transaction into a long-term, mutually beneficial relationship that can serve future events. 10. Traditional Advertising and PR While digital marketing dominates modern promotion, traditional advertising and public relations (PR) remain powerful tools for building credibility and reaching broad, diverse audiences. These conventional channels, including print ads, radio spots, press releases, and media partnerships, add a layer of legitimacy that digital-only campaigns sometimes lack. They are essential for anchoring an event in the public consciousness and reaching demographics that may not be hyper-active online. Why They Are Essential Traditional advertising provides broad reach, while PR offers third-party validation that can be invaluable. A feature in a respected industry magazine or a mention on a popular local radio station acts as an endorsement, building trust with potential attendees. These methods are excellent for establishing your event as a significant, can't-miss occasion, moving beyond niche online communities to capture mainstream attention. Best Use Cases: Major public festivals, industry-wide conferences, high-profile product launches, community fundraisers, and luxury brand experiences. Key Consideration: The key is targeted outreach. Don't just blanket the airwaves; instead, identify the specific newspapers, radio stations, and TV programs your target audience consumes. Building genuine relationships with journalists and media outlets will yield far better results than a one-off ad buy. Integrating Traditional and Digital Efforts The most effective strategies blend old and new media. Use a compelling press release to generate media buzz and then amplify that coverage across your social media channels. Similarly, a print advertisement in a trade journal can drive attendees to your website to register. This integrated approach ensures your message is consistent and reinforced across multiple touchpoints. For instance, a beautifully designed print ad can direct people to an online portal, much like a formal announcement sets the stage for a detailed follow-up. While a press release announces the big picture, the finer details are often best communicated through more personal means. For more on how to craft compelling physical touchpoints, you can explore high-quality invitation printing options on 4OVER4.com. Promotional Materials Comparison Matrix Item Core Features / Characteristics User Experience / Quality ★★☆☆☆ Value Proposition 💰 Target Audience 👥 Unique Selling Points ✨ Price Points 💰 Banner Displays and Signage Custom sizes, weather-resistant, reusable, high visibility Professional look, impactful for events Cost-effective large visibility Event planners, marketers Weather options, versatile placement 🏆 $$ Branded Promotional Swag & Giveaways Custom logos, wide variety, portable High perceived value, encourages sharing Long-term brand exposure Marketing teams, event attendees Tangible, memorable keepsakes ✨ $ - $$$ Digital Displays and Interactive Screens Dynamic content, real-time updates, interactive Highly engaging, tech-forward experience Flexible scheduling, measurable interaction Tech events, corporate events Interactive, social media integration ✨ $$$$ Printed Marketing Collateral Detailed info, tangible, no tech dependency Professional credibility, easy to share Cost-effective mass production Corporate events, conferences High info density, QR code integration ✨ $ - $$ Social Media Integration Tools Viral potential, real-time engagement, UGC Exponential reach, authentic promotion Cost-effective amplification Festivals, conferences, brands Cross-platform, hashtag campaigns ✨ $ Email Marketing Campaigns Personalization, automation, detailed analytics High ROI, direct communication Automated efficiency Event marketers, organizers Personalized messaging, segmentation ✨ $ Experiential Marketing Installations Multi-sensory, customizable, shareable Memorable, strong emotional engagement Unique brand differentiation Large brands, experiential marketers Immersive, high shareability 🏆 $$$$ Mobile Event Apps & Digital Platforms Event info hub, networking, real-time updates Enhanced attendee experience Data collection, reduced print needs Conferences, festivals Comprehensive digital platform ✨ $$$ Influencer and Speaker Partnerships Established reach, authentic endorsements Authentic promotion, viral potential Access to targeted audiences Event organizers, marketers Credibility, cross-promotion ✨ $$$ - $$$$ Traditional Advertising and PR Broad reach, media credibility, multi-channel Professional brand positioning Wide demographic exposure Mass market, mainstream audiences Established trust, professional media relations ✨ $$$$ Bringing It All Together: Your Strategic Event Promotion Blueprint Navigating the vast landscape of promotional materials for events can feel overwhelming, but the key to success lies not in using every single tool, but in strategically selecting and integrating the right ones. We have journeyed through ten distinct categories, from the foundational impact of physical items like banner displays and printed marketing collateral to the dynamic, real-time engagement offered by mobile apps and social media integration. The ultimate goal is to move beyond a simple checklist of items and instead architect a cohesive, multi-channel promotional ecosystem. Your strategy shouldn't treat these elements as isolated components. Instead, view them as interconnected threads in a larger tapestry. A well-placed QR code on a beautifully printed postcard can be the gateway to your interactive mobile event app. An experiential marketing installation is not just a physical structure; it is a content-generating machine designed for viral sharing across social media platforms. The success of your post-event email marketing campaign hinges directly on the quality of engagement and data you captured through these other touchpoints. The Power of Integration The true power of this blueprint is realized through thoughtful integration. Consider the attendee's journey from their first point of contact to their final post-event interaction. Pre-Event: An influencer partnership announces the event, driving traffic to a landing page where an email marketing campaign captures leads. This is supported by targeted digital ads and traditional PR placements to build broad awareness. During the Event: Attendees are greeted by impactful signage and banners that guide them. They interact with digital displays, receive valuable branded swag, and are encouraged to use the event app to navigate the schedule and connect with others. Post-Event: A thank you email, segmented based on attendee behavior tracked via the app, delivers a personalized message. Social media highlights and recaps keep the conversation going, extending the event's reach and impact long after the doors have closed. This holistic approach ensures that each promotional material for your event amplifies the others, creating a seamless and immersive brand experience. By weaving together the tangible and the digital, you craft a narrative that resonates deeply with your audience, transforming passive attendees into active participants and brand advocates. Your event becomes more than just a date on the calendar; it becomes a memorable experience that delivers measurable results and builds lasting community. Now it is your turn to take this framework, adapt it to your specific goals and audience, and build an event that doesn't just happen, but makes a powerful, lasting impression. Ready to bring your event vision to life with stunning, high-quality printed materials? From eye-catching banners and custom signage to unforgettable swag and professional marketing collateral, 4OVER4 is your trusted partner for all your event printing needs. Explore our extensive range of customizable promotional materials for events and start building your brand experience at 4OVER4 today.
 story
story 10 Creative Trade Show Giveaway Ideas for 2025
Trade shows are a battle for attention. While others hand out another branded pen, you have an opportunity to make a lasting impression. The right giveaway is not just a freebie; it is a strategic tool that extends your brand's reach long after the event ends, keeping your company top of mind. Forgetting this critical touchpoint is a missed opportunity to connect with potential customers in a tangible, memorable way. This guide moves beyond generic advice to provide 10 creative and actionable trade show giveaway ideas designed to resonate with attendees and deliver measurable return on investment. We will explore a curated collection of customizable products, focusing on how to match the perfect item to your audience, budget, and brand identity. This list is your blueprint for choosing items that people will actually want to keep and use, turning momentary interest into long-term brand loyalty. From high-utility tech gadgets like power banks to eco-conscious statements made with sustainable products, you will learn how to select and design promotional items that stand out. We will leverage insights from 4OVER4's extensive catalog to demonstrate how you can execute these ideas with high-quality, memorable products that reinforce your brand's value. 1. Branded Power Banks In a crowded trade show hall, a dying phone battery is a universal pain point. Offering a branded power bank as a giveaway instantly positions your company as a problem-solver, providing immediate, tangible value to attendees. This practical item ensures your brand remains visible long after the event, as recipients will repeatedly use the charger in their daily lives, creating countless brand impressions. Consider the success of Salesforce at its Dreamforce conference, where they distributed thousands of branded power banks, or Microsoft’s Surface team, which used slim, aesthetically-matched power banks to complement their premium devices. These examples highlight how power banks can align with brand identity, from tech giants to innovative startups. As one of the most effective trade show giveaway ideas, they offer high perceived value and utility, making them far more likely to be kept and used than a simple pen or keychain. Implementation Tips: Capacity Matters: Choose a capacity of at least 2,500mAh to provide a meaningful charge. For a more premium feel, opt for 5,000mAh or higher. Add Value: Include a multi-tip charging cable (USB-C, Lightning, Micro-USB) to maximize convenience for all users. Enhance Engagement: Print a QR code on the power bank that links directly to a product demo, a special landing page, or a contest entry form. The following quick reference summarizes the key metrics to consider when planning your power bank giveaway. These figures demonstrate that power banks offer a scalable and long-lasting promotional investment, with retention rates far exceeding typical trade show swag. 2. Custom Branded Tote Bags At any bustling trade show, attendees quickly accumulate brochures, samples, and other giveaways. A high-quality custom branded tote bag addresses this immediate need, transforming your brand into a walking billboard across the event floor. These eco-friendly and reusable bags offer sustained brand exposure, as they are frequently used for shopping, travel, and daily errands long after the trade show ends, making them one of the most practical trade show giveaway ideas. Successful examples range from Whole Foods' simple, iconic reusable bags that became collector's items to Adobe's creatively designed totes featuring stunning user-generated artwork from their community. Patagonia has also leveraged this effectively at outdoor industry shows by using bags made from recycled materials, reinforcing their commitment to sustainability. These cases show how tote bags can carry a brand’s message, showcase creativity, and communicate core values, all while providing immense utility. To explore various material and design options, you can see a full range of custom tote bags at 4OVER4.com . Implementation Tips: Invest in Quality: Choose durable materials like heavy canvas or thick non-woven polypropylene. A bag that tears easily reflects poorly on your brand. Go Bold with Design: Use eye-catching graphics and bold colors that stand out in a crowd. Ensure your logo and website are clearly visible. Add Functional Features: Consider adding an interior pocket for small items, a zipper closure, or a water bottle holder to increase the bag's perceived value and usability. Distribute Strategically: Hand out your bags early on the first day of the trade show. This ensures attendees will use your bag to carry everything else they collect, maximizing your brand’s visibility. 3. Branded Tech Accessories In our digitally-driven world, small tech accessories that solve everyday annoyances are incredibly valuable. Offering items like branded phone stands, cable organizers, or screen cleaners positions your company as a thoughtful and practical partner. These trade show giveaway ideas integrate directly into an attendee's daily workflow, keeping your brand visible on their desk or in their travel bag long after the event concludes. Think of Google distributing simple yet effective phone stands at developer conferences, keeping their brand front-and-center on desks. Similarly, Dropbox once offered USB drives cleverly shaped like their logo, reinforcing brand identity with a useful tool. While Apple's branded cleaning cloths are a retail product, they demonstrate the high perceived value of a simple, quality tech accessory. These examples show how such items offer consistent, low-cost brand exposure by becoming part of a professional’s essential toolkit. They are a smart choice for any business wanting to provide genuine utility. Implementation Tips: Solve a Problem: Focus on accessories that fix common tech issues, like tangled cables (organizers), dirty screens (cleaners), or hands-free viewing (phone stands). Create a Kit: Bundle several small items together, such as a screen cleaner, a cable tie, and a phone stand, into a small branded pouch to increase the perceived value. Prioritize Desk Real Estate: Choose items that are likely to live on a desk, like a phone stand or a branded USB hub, for maximum ongoing brand visibility. Ensure Universal Appeal: Select products that are compatible with a wide range of devices and operating systems to maximize their usefulness for every recipient. 4. Customized Notebooks and Journals In a digital-first world, the tactile experience of putting pen to paper remains a powerful tool for engagement and memory. Offering high-quality customized notebooks and journals positions your brand as thoughtful and professional, providing a giveaway that attendees will use for meetings, brainstorming, and daily planning. This traditional yet timeless item ensures lasting brand visibility, as it becomes an integral part of a professional’s toolkit long after the trade show ends. Consider the classic Moleskine notebooks, which are frequently co-branded for major conferences, or LinkedIn's use of professional journals at HR events to reinforce its brand as a hub for career development. These examples show how a simple notebook can be elevated into a premium, desirable item. As one of the most reliable trade show giveaway ideas, these journals offer high utility and a perception of quality, making them a welcome gift for any professional. Explore various options for customized notebooks and journals on 4over4.com to find the perfect fit for your brand. Implementation Tips: Prioritize Quality: Choose notebooks with quality paper and a durable binding to convey a premium feel and ensure a pleasant writing experience. Include Useful Content: Print useful reference information, inspirational quotes, or industry-specific tips on the inside covers to add extra value. Offer a Complete Set: Pair the notebook with a high-quality branded pen to create a complete and cohesive gift package that is ready to use. Consider Unique Formats: Differentiate your giveaway with specialized formats like weekly planners, project-specific journals, or dot-grid notebooks for creative professionals. 5. Branded Apparel Turning attendees into walking billboards is one of the most effective promotional strategies, and high-quality branded apparel achieves just that. Items like t-shirts, hoodies, or hats offer immense practical value, ensuring they are worn long after the trade show ends. This sustained visibility generates countless brand impressions in diverse environments, from coffee shops to industry events, transforming recipients into enthusiastic brand ambassadors. Think of the iconic Trailblazer hoodies from Salesforce, which have become a symbol of community and expertise, or Google's sought-after t-shirts at developer conferences that signal inclusion in a tech-savvy group. These examples show how apparel can transcend simple marketing to foster a sense of identity and loyalty. As one of the most powerful trade show giveaway ideas, well-designed apparel connects with people on a personal level, making your brand a part of their daily lives. Implementation Tips: Prioritize Quality: Choose soft, durable fabrics and high-quality printing or embroidery. A premium item is more likely to be worn regularly. Design with Style: Create a design that is visually appealing and subtle, not just a large, overt logo. People are more likely to wear apparel that looks good. Offer Inclusive Sizing: Provide a wide range of sizes, including unisex options, to ensure everyone can find a comfortable fit and simplify your inventory management. Include Care Instructions: Add a small tag or card with washing instructions to help maintain the apparel's quality and extend its lifespan. 6. Eco-Friendly Products In an era of heightened environmental awareness, offering sustainable giveaways demonstrates your brand's commitment to corporate social responsibility. Eco-friendly products, such as items made from bamboo, recycled materials, or biodegradable components, resonate deeply with eco-conscious attendees and align your company with positive values. This approach goes beyond simple promotion; it tells a story about your brand’s principles, making a powerful and lasting impression. Companies like Patagonia have effectively used this strategy by distributing seed packets at outdoor expos, directly connecting their brand to environmental preservation. Similarly, Starbucks has promoted its sustainability goals by offering reusable cups made from recycled materials. These examples show how eco-friendly products serve as excellent trade show giveaway ideas by creating an emotional connection and reinforcing a progressive brand identity. They are tangible symbols of your company's commitment to a healthier planet, making them highly valued and appreciated by recipients. Implementation Tips: Verify Certifications: Ensure your chosen products come with legitimate sustainability claims and certifications, such as FSC for wood or GOTS for organic cotton, to maintain brand integrity. Tell the Story: Use a small card or QR code to explain the item's positive environmental impact, detailing what it's made from or how it helps reduce waste. Focus on Utility: Select items with clear practical value, like reusable water bottles, bamboo utensil sets, or recycled tote bags, to ensure they are used regularly. Highlighting this utility is a key part of making these trade show giveaway ideas successful. Partner Wisely: Work with suppliers who can provide transparent documentation about their sustainable sourcing and manufacturing processes. 7. Custom Phone Cases and Accessories In a world where smartphones are extensions of our personalities, a custom phone case or accessory is a deeply personal and practical giveaway. By offering branded cases, PopSockets, or ring holders, your company provides a useful item that protects a user's most valuable device. This daily-use product keeps your logo front and center, turning every phone call, text, or social media scroll into a subtle brand endorsement. Consider how major brands leverage this strategy. Instagram has offered photographer-focused phone cases at industry events, reinforcing its visual-first identity. Similarly, Spotify has distributed music-themed phone accessories that resonate directly with its user base. These examples prove that phone accessories are powerful trade show giveaway ideas because they integrate your brand directly into the attendee's daily life, offering high visibility and perceived value. Implementation Tips: Target Popular Models: Research current market data to offer cases for the most popular phone models among your target audience (e.g., recent iPhone and Samsung Galaxy series). Opt for Universal Appeal: If offering cases is too complex, choose universal accessories like PopSockets or phone ring holders, which fit any device and have broad appeal. Design Matters: Create a sleek, minimalist design that people will actually want to use. A subtle logo is often more effective than a loud, overt advertisement. 8. Branded Drinkware In the bustling environment of a trade show, offering a high-quality piece of branded drinkware, like a reusable water bottle or a travel mug, provides a refreshing and practical solution for attendees. This giveaway addresses the simple need for hydration while giving your brand a mobile billboard that travels from the show floor to the office, gym, and home. Its sustained utility ensures your company logo remains a part of the recipient’s daily routine, generating consistent brand exposure long after the event concludes. Think of how premium brands like Yeti create custom corporate tumblers for industry events, or how Hydro Flask offers conference-specific bottles. These examples show how drinkware can reflect a brand's commitment to quality and sustainability. As one of the most popular trade show giveaway ideas, a well-designed mug or bottle has a high perceived value, making it a desirable item that attendees will be eager to keep and use, reinforcing a positive brand association with every sip. Implementation Tips: Quality First: Invest in durable materials like stainless steel or BPA-free Tritan. A quality item reflects positively on your brand and is more likely to be used regularly. Insulation Adds Value: Choose double-wall insulated designs for both hot and cold beverages. This premium feature significantly increases the item's perceived value and usability. Universal Appeal: Select a sleek, professional design and color scheme that appeals to a broad audience and fits well in a corporate setting. Durability is Key: Ensure the printed logo is dishwasher-safe to maintain brand integrity through repeated use and cleaning. For businesses looking to make a lasting impression, custom-printed drinkware is a powerful promotional tool. You can explore a variety of high-quality options, from ceramic mugs to travel tumblers. Learn more about Branded Drinkware options on 4over4.com to find the perfect fit for your next event. 9. Interactive and Gamified Giveaways Moving beyond static swag, interactive giveaways turn your booth into an experience, capturing attention and fostering genuine engagement. Items like branded puzzle cubes, fidget toys, or custom card games transform a simple handout into a memorable activity. This approach encourages attendees to spend more time with your brand, not just at the booth but long after the event, as they solve the puzzle or play the game. Consider how Salesforce uses Trailhead-themed card games to reinforce learning or how tech companies use branded Rubik’s Cubes to appeal to problem-solvers. These trade show giveaway ideas are effective because they create a fun, hands-on connection with your brand’s identity. When considering interactive elements, exploring creative lucky dip prizes for events can add another layer of excitement and immediate reward, further boosting engagement. For a cohesive experience, you can even tie these gamified elements to custom event badges that track participation or unlock rewards. Implementation Tips: Keep it Simple: Ensure games are quick to learn and play. Complex rules can deter participation at a busy trade show. Clear Instructions: Include a small card or print directly on the item with clear, concise instructions and rules. Create Shareable Moments: Design the game or puzzle to be visually appealing, encouraging winners or participants to post about their experience on social media with a specific hashtag. Test Thoroughly: Before placing a bulk order, get samples and test the game or toy to ensure it functions correctly and is enjoyable. 10. Premium Gift Sets and Bundles To make a lasting impression on high-value prospects or key partners, consider moving beyond single-item giveaways. A premium gift set, a curated collection of complementary items presented in a custom-branded box, elevates your brand from a simple vendor to a valued partner. This strategy communicates exclusivity and appreciation, creating a memorable unboxing experience that resonates far more deeply than standard swag. It's one of the most effective trade show giveaway ideas for nurturing VIP relationships. Major players like Oracle have used this approach to great effect, offering C-suite focused collections with high-end tech and executive accessories. Similarly, Salesforce has created executive gift boxes for top-tier clients, bundling premium items that align with their brand's sophisticated image. These examples show how a well-curated bundle can create a powerful statement, justifying a higher investment for a much greater return in client loyalty and engagement. Implementation Tips: Reserve for a Select Audience: Due to the higher cost, reserve these sets for qualified leads, guest speakers, or major clients to maximize ROI. Create a Theme: Build your bundle around a specific theme, such as “The Remote Work Essentials Kit” or a “Wellness and Productivity Pack.” Mix Practical with Premium: Combine everyday useful items like a high-quality notebook and pen with a more aspirational product like wireless earbuds or a smart water bottle. Focus on Presentation: Invest in high-quality, custom-printed presentation boxes or branded bags. The packaging is a critical part of the premium experience. Top 10 Trade Show Giveaway Ideas Comparison Item Implementation Complexity 🔄 Resource Requirements ⚡ Expected Outcomes 📊 Ideal Use Cases 💡 Key Advantages ⭐ Branded Power Banks Medium - requires safety certifications Moderate - sourcing quality electronics High brand visibility, long retention Tech events, conferences Practical daily use, long-term exposure Custom Branded Tote Bags Low - simple printing and assembly Low - inexpensive materials High visibility, eco-friendly appeal Trade shows, eco-focused campaigns Low cost, reusable, environmentally conscious Branded Tech Accessories Medium - variety of small items Moderate - multiple product sourcing Consistent brand exposure in offices Professional/tech audiences High usage frequency, practical problem-solving Customized Notebooks & Journals Medium - requires quality materials Moderate - variety in formats/material Long-term usage, professional image Corporate events, professional gifts High retention, sophisticated appeal Branded Apparel High - size/style/inventory management Moderate to high - varying materials Emotional brand connection, mobile ads Brand loyalists, events High visibility, emotional engagement Eco-Friendly Products Medium to High - sourcing sustainable Moderate - often higher cost Positive brand association, CSR alignment Sustainability-focused campaigns Memorable, appeals to eco-conscious Custom Phone Cases & Accessories High - device compatibility complexity Moderate - frequent updates needed Very high daily visibility, personal value Mobile-first demographics Personal connection, practical protection Branded Drinkware Medium - durable material sourcing Moderate to high - quality items Frequent daily use, long lifespan Office environments, health campaigns Practical value, durable and visible Interactive & Gamified Giveaways High - design and production complexity Moderate to high - specialized items Very high engagement and memorability Tech events, youth-focused marketing Unique, engaging, memorable Premium Gift Sets & Bundles Very High - coordination of multiple items High - premium materials & packaging High perceived value, VIP experience VIP clients, executive gifting Comprehensive brand experience, luxury feel From Giveaway to Growth: Putting Your Plan into Action Navigating the bustling floor of a trade show requires more than just a great product or service; it demands a memorable brand presence. We've explored a diverse range of trade show giveaway ideas , from practical tech accessories like branded power banks to stylish essentials like custom tote bags and apparel. The central theme connecting all these successful ideas is the transition from a simple handout to a strategic marketing tool. The most effective giveaways are not merely objects bearing your logo. They are thoughtfully chosen items that reflect your brand's identity, resonate with your target audience's lifestyle, and provide genuine, lasting value. A well-selected giveaway becomes a daily reminder of your brand, building familiarity and goodwill long after the event has concluded. Key Takeaways for Maximum Impact To transform your promotional product strategy from an expense into an investment, remember these core principles: Audience Alignment is Everything: The success of your giveaway hinges on how well it aligns with the needs and preferences of your ideal customer. A tech-focused audience will appreciate a power bank, while an eco-conscious demographic will value a sustainable product like a reusable water bottle or bamboo utensil set. Quality Over Quantity: A single, high-quality, durable item will leave a far better impression than a dozen cheap, disposable trinkets. Your giveaway is a direct reflection of your brand's standards, so invest in products that communicate excellence and reliability. Integrate and Measure: Your giveaway strategy shouldn't exist in a vacuum. Integrate it with your overall event marketing plan by promoting it beforehand to drive booth traffic. Afterward, measure its impact. To truly gauge the effectiveness of your trade show giveaways and overall marketing efforts, implementing robust tracking mechanisms is crucial. For those running e-commerce platforms alongside physical events, understanding pixel migration for marketing tracking can provide invaluable insights into how your event presence influences online behavior. Your Next Steps to Success With these concepts in mind, you are equipped to make strategic decisions for your next event. The journey from a promising idea to a tangible, brand-building asset is the final, crucial step. Begin by revisiting your audience personas and marketing objectives. Then, select a promotional item that not only captures attention but also seamlessly integrates into the lives of your prospects, creating consistent and positive brand touchpoints. By investing in thoughtful, high-quality trade show giveaway ideas , you turn a simple handout into a powerful catalyst for brand recognition and business growth. Ready to bring your vision to life and make a lasting impression at your next event? Explore the extensive collection of customizable promotional products at 4OVER4 . From premium drinkware and tech gadgets to eco-friendly tote bags, 4OVER4 provides the high-quality, professionally printed solutions you need to stand out from the crowd.