Content Hub
Stories, Ideas and Advice — Page 77
 story
story A Guide to the Essential Types of Signage
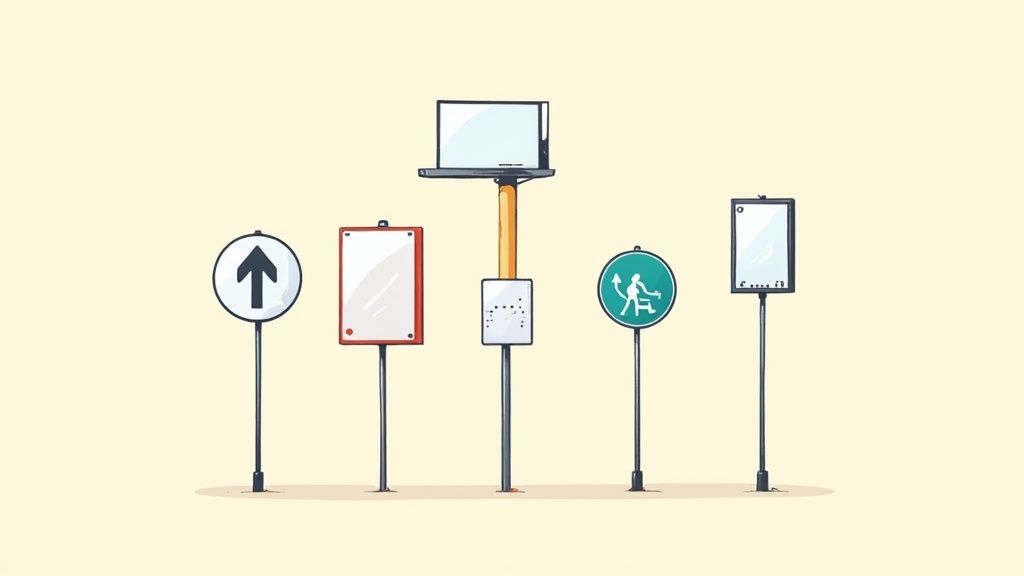
Think of your signs as your business's silent sales team. They’re out there 24/7 , grabbing attention, helping people find their way, and broadcasting who you are. From a bold sign on the street that pulls people in, to helpful directions inside that make their visit a breeze, every sign has a job to do. Getting a handle on the different types is the first step to making them work for you. Your Guide to Strategic Business Signage Stop thinking of signage as just an expense. It’s a powerful asset. Like players on a team, each sign has a specific role in hitting your business goals. One might be the flashy star player, drawing crowds from the street. Another works quietly in the background, making sure visitors feel welcome and know exactly where to go. This guide will walk you through the core categories of signage. We'll skip the dry definitions and focus on how you can use these tools to shape your customer's journey from the sidewalk to the sale. Let's break down the main groups you'll be working with: Outdoor Signage: This is your first handshake with the world. It’s all about visibility and getting feet in the door. Indoor Signage: Once they're inside, these signs take over. They guide, inform, and can even nudge customers toward a purchase. Digital Signage: The dynamic, modern option. Perfect for content that needs to be timely, engaging, and easy to change on the fly. Informational Signage: These are the unsung heroes. They cover the essentials like safety, accessibility, and legal must-haves. The diagram below gives you a great visual of how all these pieces fit together to create a complete signage strategy. As you can see, each type serves a unique but connected purpose, moving customers from that first glance to a deeper engagement with your brand. To give you a clearer picture, here’s a quick rundown of the major signage categories and what they're best used for. Overview of Major Signage Categories Signage Category Primary Purpose Common Examples Outdoor Signage Brand awareness and attracting foot traffic Pylon signs, monument signs, channel letters, awnings Indoor Signage Wayfinding, branding, and point-of-purchase promotion Wall graphics, lobby signs, directional signs, posters Digital Signage Dynamic content, advertising, and real-time information Digital menus, video walls, interactive kiosks Informational Signage Safety, compliance, and essential communication ADA signs, safety warnings, exit signs, directories This table should help you start thinking about which signs make the most sense for your business and where they'll have the biggest impact. By understanding the unique strengths of each category, you can build a system that works together to support your brand and make your customers' experience a great one. For a deeper dive, you can explore the many high-quality signs and banners available for any business goal. You can also get more ideas from this great resource on 10 Types of Commercial Signs to Elevate Your Brand . Making a Strong First Impression with Outdoor Signs Think of your outdoor sign as your business's handshake with the world. It’s often the very first thing a potential customer sees, and it works around the clock to announce who you are and invite people inside. This isn't just about putting your name on the building; it's a powerful tool for building brand visibility and driving real foot traffic. The numbers don't lie. The global signage market is projected to hit around USD 37.8 billion in 2025, and outdoor signs are the dominant force, making up roughly 63.4% of that massive share. That makes perfect sense when you think about it. A well-designed sign can easily turn a passing car into a new customer or a curious walker into a loyal regular. It sets the tone for the entire customer experience before they even step through the door. Key Types of Outdoor Signage Not all outdoor signs are created equal, and they definitely don't all serve the same purpose. Choosing the right one—or, more likely, the right combination—boils down to your location, your audience, and what you’re trying to achieve. Let's walk through some of the most effective options out there. Monument and Pylon Signs Think of these as the heavy hitters, the landmarks for your business. Monument signs are those low-profile structures you often see at eye level near an entrance, typically built from solid materials like brick or stone. They project an image of stability, permanence, and professionalism. Pylon signs are their much taller cousins, engineered to be seen from a serious distance. These towering signs are absolutely essential for businesses near a highway or tucked away in a crowded commercial center, grabbing attention from fast-moving traffic long before drivers reach your turn. Channel Letters and Banners Channel letters are the custom, three-dimensional letters you see mounted on storefronts everywhere. They can be illuminated from within for 24/7 visibility , making your brand name pop, day or night. This is your permanent, always-on brand ambassador. Banners , on the other hand, offer a versatile and budget-friendly way to get a temporary message across. They're perfect for shouting about: Grand openings or special events Limited-time sales and promotions "Now Hiring" messages to attract talent By pairing a permanent fixture like channel letters with temporary banners, you create a smart, layered signage strategy. You reinforce your core brand while keeping your storefront dynamic and relevant. Grabbing Attention at Street Level While the big signs capture attention from afar, it’s the smaller, ground-level signs that do the crucial work of engaging pedestrians and turning that sidewalk traffic into sales. This is where options like A-frame signs really shine. These portable, two-sided signs are a sidewalk classic for a reason. They're perfect for displaying daily specials, a witty message, or a simple arrow pointing customers right to your door. Because they're so easy to move and update, well-designed A-frame signs are a simple but incredibly effective tool for any business with a street presence. At the end of the day, your outdoor signage is much more than just a marker—it’s an invitation. By carefully choosing the right types of signs for your needs, you can create a powerful first impression that draws customers in and sets your business up for success. Guiding the Customer Journey with Indoor Signage Once a customer steps through your door, the conversation your outdoor signs started continues inside. This is where indoor signage takes over, acting as a personal guide that shapes their entire experience, from the moment they walk in until they leave. Think of these signs as your silent brand ambassadors—the helpful employees who answer questions before they're asked and make every visit smoother. Here's your chance to reinforce your brand identity and start guiding behavior. A bold, professional lobby sign immediately confirms they’re in the right place. From there, intuitive directional signs sweep away any potential for confusion or frustration. The goal is to create an environment that feels welcoming, efficient, and thoughtful. From Wayfinding to Wall Murals Interior signs are a team effort, all working together to create a seamless flow. Wayfinding signs are the most functional players on the team, acting like an internal GPS for your space. These are your overhead signs, directories, and room numbers that manage foot traffic and help people navigate even the most complex layouts with absolute ease. On the other end of the spectrum, wall murals and graphics are all about creating an atmosphere. They turn plain, boring walls into powerful branding statements that can tell your company’s story or create an immersive vibe that truly reflects who you are. For businesses aiming to make a huge impact, custom wall graphics are a fantastic way to completely define a space. Other key types of indoor signs include: Lobby and Reception Signs: This is your handshake. It makes that critical first impression, showcases your logo, and sets a professional tone from the get-go. Point-of-Purchase (POP) Displays: Placed strategically near checkout counters or right next to products, these signs are your closers, designed to drive last-minute sales and spotlight promotions. ADA Signs: Absolutely essential for accessibility, these signs ensure that every single person can navigate your space safely and independently. The best indoor signage systems feel almost invisible. They answer questions before they’re even asked, guiding customers so effortlessly that the journey feels completely intuitive. Materials That Shape the Mood The materials you choose for your indoor signs are just as important as the words on them. Every material carries its own distinct feeling, contributing to your brand’s aesthetic and the overall atmosphere you're trying to build. For instance, a sleek acrylic sign gives off a modern, clean look that's perfect for a tech company or a contemporary office. Warm wood signs can create a rustic, welcoming vibe that feels right at home in a cozy cafe or a boutique shop. Brushed metal? That communicates a sense of permanence and sophistication—ideal for a financial institution or a high-end law firm. By carefully selecting materials that align with your brand, you add another powerful layer of communication that reinforces your identity. It's this attention to detail that signals professionalism and helps build a cohesive, memorable experience from the inside out. Exploring the Power of Digital Signage Imagine being able to switch your storefront promotion, update a restaurant menu, or share urgent company-wide news across multiple locations, all with just a few clicks. That’s the magic of digital signage. This technology breaks free from static prints, offering a living, breathing way to communicate with your audience in real time. Digital signage is so much more than a TV screen bolted to a wall; it's a communication powerhouse that can adapt to any situation on the fly. It lets businesses roll out timely, visually stunning, and easily updatable content that grabs attention in a way traditional signs just can't match. A retailer, for instance, can launch a flash sale instantly, while a corporate office can broadcast live updates to keep every single employee in the loop. This kind of flexibility has fueled some serious growth. The global digital signage market was valued at around USD 28.83 billion in 2024 and is expected to rocket to USD 45.94 billion by 2030. It's no surprise that massive video walls are the biggest piece of that pie, making up over 25% of the revenue, as you can see in this digital signage statistics report . Core Components of Digital Signage To get started, it helps to know the three essential pieces that make any digital display tick. Think of it as a simple recipe with three key ingredients working together. Hardware: This is the physical screen itself. It could be a single monitor, a sprawling video wall, an interactive kiosk, or even specialized displays like the brilliantly illuminated screens you see in modern light boxes . Software: This is the brain of the whole operation. A content management system (CMS) is the software that lets you build, schedule, and push your content to all of your displays from one central computer. Content: This is what your audience actually sees. We're talking images, videos, live data feeds from the web, social media streams, or even fully interactive apps. Common Types of Digital Displays Digital signage comes in all shapes and sizes, with each one built for different spaces and different goals. One of the most common uses you'll see is for digital menu boards , which let restaurants change prices and daily specials in a heartbeat. This completely gets rid of the cost of reprinting and ensures customers are always looking at the most current menu. Another hugely popular format is the video wall . These are massive displays made from multiple screens all synced up to show one giant, seamless image or video. They create an immersive, high-impact experience that’s perfect for retail stores, big event venues, and corporate lobbies. The true power of digital signage lies in its ability to deliver the right message to the right person at the right time, creating a personalized and highly relevant experience. Finally, interactive kiosks take things to the next level by inviting people to engage directly. These touchscreen displays let users find their own way with digital maps, browse product catalogs, or check in for appointments. By giving people self-service options, businesses can boost their efficiency and seriously improve the customer experience. Ensuring Safety and Accessibility with Informational Signs While flashy marketing signs might get all the attention, it’s the informational signs that are the true workhorses of any well-run business. These are the unsung heroes working quietly in the background, guiding people, ensuring safety, and keeping your operations compliant with critical regulations. Their job isn’t to sell—it’s to protect and inform. Think of them as the essential framework of your physical space. Without clear exit signs, safety warnings, or parking rules, a building can feel confusing at best and downright dangerous at worst. When done right, these signs show a deep-seated commitment to the well-being and comfort of every customer and employee who walks through your doors. Navigating ADA Compliance For any public-facing business in the United States, getting a handle on the Americans with Disabilities Act (ADA) isn't just a good idea—it's the law. ADA-compliant signs are specifically designed to make sure people with disabilities can navigate a space independently and safely. And trust me, you don't want to mess this up; non-compliance can lead to some hefty fines. Key features you’ll almost always find on ADA signs include: Tactile Text: Letters and numbers are raised off the surface, so they can be read by touch. Grade 2 Braille: This is a non-negotiable for signs that identify permanent rooms and spaces. High Color Contrast: The text and its background need to be worlds apart visually, making it easy for people with low vision to read. Specific Mounting Guidelines: ADA signs must be installed at a consistent height and location so they’re easy for everyone to find and use. An environment that’s accessible to people with disabilities is ultimately more user-friendly for everyone. Clear, high-contrast signs don't just help the visually impaired; they also benefit older adults and even first-time visitors just trying to find their way. Beyond the Basics of Compliance While ADA signs are a huge piece of the puzzle, the world of informational signage goes much deeper. It covers all the practical instructions and warnings that keep a place running like a well-oiled machine. For instance, in tough environments like industrial zones or construction sites, you need warnings that are both clear and built to last. For those kinds of jobs, it's worth learning more about weather-resistant aluminum signs printing , which can take a beating from the elements. Other critical informational signs you'll see everywhere include: Safety Signs: These are your classic warnings about potential dangers, like "Wet Floor" or "High Voltage." Instructional Notices: Think of the little signs that explain how to operate a machine or follow a specific procedure. Regulatory Signs: This bucket includes everything from parking rules and no-smoking notices to other legally required postings. By investing in clear, thorough informational signage, you're doing more than just ticking off a legal requirement. You’re building trust and showing that you genuinely care about creating a secure, welcoming space for absolutely everyone. Choosing the Right Sign Materials and Design A killer sign idea is a great start, but it’s the materials and design that do the heavy lifting. Think of it like building a house: the materials are your foundation, providing strength and longevity, while the design is the curb appeal that makes people want to stop and look. Get both right, and you have a sign that truly works. Picking the right material is a balancing act between your budget, where the sign will live, and what you need it to do. An outdoor sign has to stand up to years of sun and rain, but a temporary indoor banner can be much more forgiving on the wallet. In the same way, a smart design ensures your message isn't just seen—it's understood in a heartbeat. Matching Materials to Your Mission Every sign material has its own personality. Choosing the right one is like picking the right tool for a job. This one decision impacts everything from your sign's lifespan to its overall vibe. The U.S. printed signage market is a massive industry, projected to hit USD 16.7 billion by 2025, which just goes to show how critical these physical assets are for businesses. If you're curious, you can explore more signage statistics and trends to see how the market is evolving. Let's break down some of the most common options: Aluminum: This is the go-to for outdoor signs. It’s lightweight, won't rust, and is incredibly durable, making it perfect for permanent fixtures like parking signs or storefront branding. Acrylic: Known for its sleek, modern look. You'll often see it used for high-end indoor signs, like lobby logos, because it gives off a glossy, professional sheen that just screams quality. Wood: Nothing beats wood for creating a rustic, warm, or traditional feel. It's a favorite for businesses like cafes, boutiques, and spas that want to cultivate a welcoming and natural atmosphere. Vinyl: The undisputed champion of versatility. It’s used for everything from temporary banners and window decals to full-blown vehicle wraps. It’s a flexible and budget-friendly workhorse. The material you choose sends a subtle message. Sleek acrylic whispers modernity and professionalism, while sturdy, classic wood communicates tradition and warmth. Aligning this choice with your brand identity is a small detail that makes a big impact. To make the choice a little easier, here's a quick look at how these materials stack up against each other. Comparison of Common Signage Materials Choosing the right material is one of the most important first steps. This table breaks down the most popular options to help you figure out which one is the best fit based on durability, cost, and where you plan to use it. Material Best For Pros Cons Aluminum Long-term outdoor signs, real estate signs, parking lots Extremely durable, rust-proof, lightweight, professional look Higher upfront cost, can dent upon impact Acrylic Indoor lobby signs, illuminated signs, high-end displays Sleek, modern, and professional appearance, durable, weather-resistant Can be expensive, prone to scratching if not handled carefully Wood Rustic or traditional branding, cafes, boutiques, spas Unique, natural look, high-end appeal, can be carved and customized Requires maintenance (sealing), can be heavy, susceptible to rot/insects if not treated Vinyl Banners, window graphics, vehicle wraps, temporary signs Very affordable, versatile, easy to install and remove, vibrant colors Less durable for long-term outdoor use, can fade or peel over time Ultimately, the "best" material depends entirely on your specific needs. An aluminum sign might be overkill for a one-day event, but a vinyl banner won't last a decade on the side of your building. Designing for Maximum Readability Once you've landed on a material, it's time to focus on the design. Here, the number one goal is simple: readability . If people can't process your message almost instantly, the sign isn't doing its job. Keep these three core principles in mind: Typography That Speaks Clearly: Stick with clean, simple fonts. Ditch the overly decorative or thin scripts that are a nightmare to read from a distance. Make sure your text is large enough to be legible from wherever your audience will be viewing it. High-Contrast Colors: Your text color needs to pop against the background. You can't go wrong with classic combinations like black on white, white on blue, or yellow on black. They work because they create a strong visual separation that the human eye can process quickly. Strategic Use of White Space: Don't cram every inch of your sign with text and graphics. That empty space—what designers call "white space"—is your friend. It gives your message room to breathe and helps the viewer's eye go straight to the important stuff. Frequently Asked Questions About Signage Even after you've got a handle on the different types of signs, a few practical questions always pop up before it’s time to invest. Here are some straightforward answers to the most common ones we hear, designed to help you move forward with confidence. What Sign Is Most Important for a New Business? If you're opening a new retail shop, your main exterior storefront sign is, without a doubt, the most critical investment you can make. Think of it as your 24/7 billboard. It’s what puts your brand on the map and makes it dead simple for new customers to find you. This sign is your number one tool for driving that all-important initial foot traffic. Once people are inside, the game changes. Your focus should shift to wayfinding signs and point-of-purchase (POP) displays. These are crucial for guiding shoppers through your space and nudging them toward a purchase at the checkout counter. How Do I Know if My Signs Need to Be ADA Compliant? Here's a good rule of thumb: any sign that identifies a permanent room or space accessible to the public needs to be ADA compliant. This absolutely includes signs for restrooms, exits, and rooms with specific numbers or names. Getting compliance right means meeting some very strict standards: Tactile (raised) letters and numbers Grade 2 Braille High color contrast between the text and the background Specific installation height and location Purely marketing signs are usually exempt, but you should never guess. Your best bet is always to consult with a professional sign company and double-check local regulations. It’s the only way to ensure you meet all legal requirements and create a space that’s truly accessible for everyone. A sign's lifespan depends entirely on two things: its material and the local climate. A durable monument sign or channel letters made from high-quality aluminum can easily last over a decade with just a little care. On the other hand, a temporary fabric banner might only survive a few months if it’s getting blasted by harsh sun and wind. Investing in weather-resistant materials from the start is the key to making your outdoor signage last and protecting your investment for years to come. Ready to create signs that actually get noticed? At 4OVER4 , we offer a huge selection of high-quality, customizable printing solutions for any business need. From durable outdoor banners to sleek indoor displays, we have the tools to bring your vision to life. Explore our options and start designing today .
 story
story Your Ultimate Guide to Typical Banner Sizes
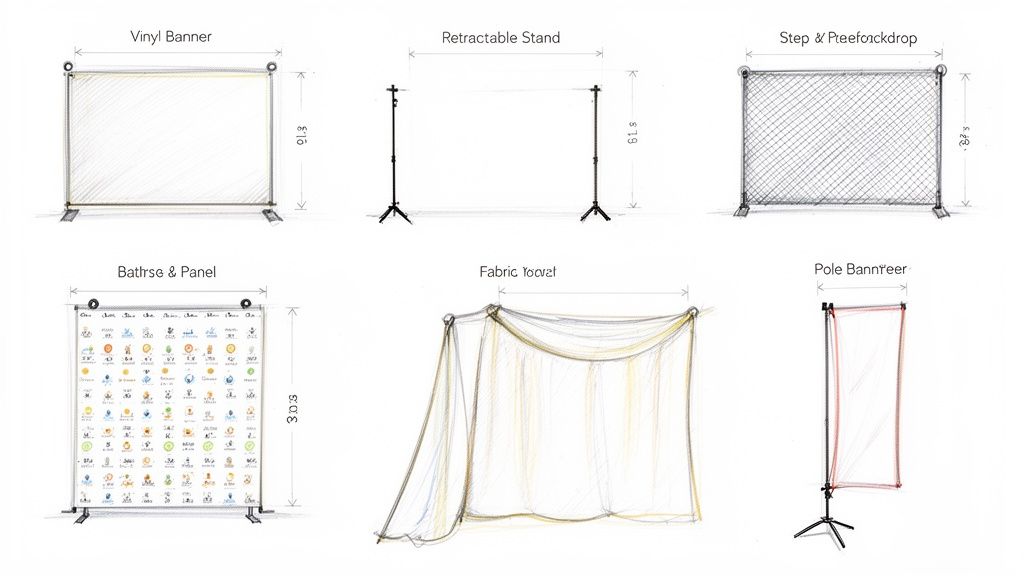
It's a classic question we get all the time: "What's a typical banner size?" The honest answer? There really isn't one universal standard. But after printing countless banners, we've definitely seen some popular sizes emerge as go-to choices for specific jobs. For instance, a 3' x 6' (36" x 72") vinyl banner is a workhorse for storefronts, while the larger 4' x 8' (48" x 96") is perfect for grabbing attention at bigger outdoor events. And when it comes to retractable banners, the industry sweet spot is around 33" x 81" —a size that’s become a staple for trade shows and conferences for good reason. Navigating Common Banner Sizes and Their Uses Picking the right banner size is one of the most critical decisions you'll make in your print marketing. It directly affects visibility, how well your message lands, and of course, your budget. The perfect dimensions hinge entirely on where the banner will live, its purpose, and how far away people will be when they see it. A small banner that looks great as an indoor point-of-sale display will completely vanish if you hang it on the side of a building. This guide is here to cut through the confusion. We'll break down the most common banner sizes by type and show you exactly where they shine. Knowing these standard dimensions helps ensure your design looks proportional, your text is readable, and you get the most bang for your buck. And it's an investment worth getting right. Physical advertising is more relevant than ever—in fact, the global flex banner market was valued at an impressive USD 7.69 billion in 2023 and is only expected to grow. This is driven by the need for high-impact promotional tools in our increasingly busy world. Quick Reference Chart of Common Banner Sizes and Uses To help you get started, we put together a simple chart that gives you a bird's-eye view of the most popular banner sizes and what they're best used for. This is your cheat sheet for quickly matching a banner type to its ideal application. Banner Type Common Size (Feet) Common Size (Inches) Primary Use-Case Vinyl Banner (Small) 2' x 4' 24" x 48" Local events, markets, promotions Vinyl Banner (Standard) 3' x 6' 36" x 72" Storefronts, grand openings Vinyl Banner (Large) 4' x 8' 48" x 96" Outdoor events, sponsorships Retractable Banner 2.75' x 6.75' 33" x 81" Trade shows, conferences, lobbies Step-and-Repeat 8' x 8' 96" x 96" Red carpet events, photo backdrops Whether you need something compact for a small booth or a large-format banner to make a major splash, this table should point you in the right direction. Ready to see these options up close? You can explore our wide variety of custom banners to find the perfect fit for your project. Choosing the Right Vinyl Banner Size When it comes to print advertising, vinyl banners are the undisputed workhorses. They're tough, they're affordable, and they get your message seen just about anywhere. The very first step to making a real impact, whether you're announcing a grand opening or promoting a weekend sale, is picking the right dimensions for the job. It's no surprise they're so popular. The banner and backdrop market is massive, accounting for a 30% share in 2023 and valued at a staggering USD 43.3 billion in 2024. That stat alone shows just how essential these tools are for businesses of all stripes. This widespread use means a few standard sizes have naturally emerged for specific applications. Knowing these common dimensions will help you make a smart, effective choice for your next project. Small Banners for Close-Quarters Impact Smaller vinyl banners are your best bet when your audience is up close and personal. Think indoor events, farmers' market stalls, or point-of-sale displays where you need to communicate key info without overwhelming the space. 2' x 4' (24" x 48") : This compact size is perfect for informational signs right at the checkout counter, simple directional signs at a local event, or for listing your services inside a trade show booth. Its small footprint makes it a breeze to hang anywhere. 3' x 5' (36" x 60") : Stepping up a bit in size, this banner gives you more room for compelling graphics and text. It's a fantastic option for promoting a specific product line in a retail store or as a proud team banner at little league games. Medium Banners The All-Around Champions When you need something that just works in a variety of settings, medium sizes offer the perfect blend of visibility and manageability. These are the go-to choices for storefronts, event promotions, and general business advertising for a reason. The 3' x 6' (36" x 72") banner is arguably the most versatile size you can get. It’s big enough to be easily read from the street, making it ideal for hanging over a doorway to shout "Grand Opening!" or "Now Hiring." At the same time, it’s not so big that one person can't hang it up themselves. It really strikes that sweet spot for most small businesses. Pro Tip: If your banner is going to live outside, seriously consider upgrading from the standard 13oz vinyl to our heavy-duty 18oz material. It's much thicker and built to withstand wind and weather, which means your investment will last a whole lot longer. Large Banners For Maximum Visibility For big outdoor events, music festivals, or major sponsorships where you absolutely have to command attention from a distance, going big isn't just an option—it's a necessity. These sizes guarantee your brand message won't get lost in the noise. 4' x 8' (48" x 96") : This is a fantastic large-format banner that gives you a ton of visual real estate to work with. You'll often see these used for event sponsorships, roadside advertising, or as a commanding backdrop for a large trade show booth. 5' x 10' (60" x 120") : When you need to make a serious statement, this is the size that delivers. It's perfect for hanging on the side of a building, stretching across a wide-open field at a festival, or serving as a stage backdrop for concerts and conferences. Ultimately, choosing the right size comes down to matching your message to your environment. Think about where it will be and how far away people will be when they see it. Once you have a plan, you're ready to bring that vision to life. You can explore a full range of options in our complete collection of high-quality vinyl banners . Selecting Your Retractable Banner Dimensions Retractable banners, which you’ll often hear called pull-up or roll-up banners, are a must-have for anyone hitting the trade show circuit, speaking at conferences, or running in-store promotions. Their real magic lies in just how portable and easy they are to set up, making them a favorite for marketing on the move. When you start looking at typical banner sizes , one dimension pops up again and again as the industry go-to. The most common and versatile size is 33 inches wide by 81 inches tall (sometimes rounded to 33" x 80"). This vertical layout gives you an amazing canvas for branding and key messages without totally overwhelming a standard 10-foot trade show booth. This size didn't become the standard by accident. It has a great human-scale presence, so it feels approachable to people walking by. It’s tall enough to catch eyes from across the room but slim enough to tuck into the corner of a booth, guiding traffic in without blocking the way. Standard Versus Wide-Base Models While the 33-inch width is a solid workhorse, you’ve got options if you need to make a bigger splash. Playing with different dimensions helps you match the display perfectly to your space and what you’re trying to achieve. Standard Banners (33” x 81”): This is your best bet for ultimate portability and a small footprint. They’re perfect for flanking an entryway, calling out a specific service, or just adding a professional touch to a lobby. Wide-Base Banners (47” x 81”): When you need more visual real estate, a wider banner can double as a compact, powerful backdrop. It gives you nearly 50% more design space, which is ideal for detailed graphics or a longer message. Tabletop Banners (11” x 17”): Don't sleep on these mini powerhouses. They're brilliant for reinforcing your brand message right on a registration desk, at a point-of-sale, or as part of a product display table. Making the Right Choice for Your Space Picking the right size really comes down to your environment and your goal. For instance, a standard 10’ x 10’ trade show booth can easily fit two 33” banners at the front corners. Or, you could use a single 47” banner pushed to the back as a central visual anchor. Think about viewing distance. If you want people to read your banner from 10-15 feet away , the bold graphics and sharp text on a 33” stand will do the trick beautifully. But if your display needs to feel more like a wall or backdrop, the wider format creates a much more immersive feel. Beyond the print itself, the stand's hardware is a huge deal. A sturdy, well-made base keeps your banner stable all day long, so you don't have to worry about embarrassing tips or leans. Investing in a quality stand protects your banner and keeps your setup looking sharp. When you're ready to find the perfect fit, exploring a range of high-quality banner stands printing options is the best next step to make sure your display is built to impress and to last. Getting to Know Fabric and Mesh Banner Sizes Stepping away from the world of vinyl and retractable displays, we enter the specialized territory of fabric and mesh banners. Each one offers a unique solution for very different environments. Picking the right one comes down to understanding their material properties, which is what really dictates their typical banner sizes and where they work best. Fabric is your go-to for a sophisticated indoor look, while mesh is the hands-down winner for windy outdoor spots. Fabric banners just have an elegant, high-end feel that elevates any indoor space. That's why you see them everywhere at trade shows, as retail backdrops, and at media events. Their lightweight, glare-free matte finish comes from a process called dye-sublimation. This technique infuses ink directly into the material, creating rich, vibrant colors that will never peel or crack. The result is a premium look that standard vinyl just can't touch. Common Fabric Banner Dimensions You'll often find fabric banners paired with pop-up display systems and backdrops, so their sizes are usually standardized to fit the hardware frames you'll be using. 8' x 8' (96" x 96"): This classic square format is a perfect match for a standard 10' x 10' trade show booth. It creates a seamless, professional backdrop that makes your space look polished. 10' x 8' (120" x 96"): If you want to go bigger, this slightly wider option fills the entire back wall of a 10-foot booth. You're maximizing every inch of branding real estate for a truly immersive display. Custom Sizes: The beauty of fabric is its versatility. It's fantastic for custom hanging displays, branded tablecloths, and unique architectural setups where a standard size just won't cut it. If you're aiming to create a stunning visual impact at your next event, you can dive deeper into the options in our complete fabric banner collection . Sizing Mesh Banners for the Great Outdoors When your banner has to face the elements, mesh is the only way to go. These banners are engineered with thousands of tiny holes that let wind pass right through. This drastically reduces the strain on the material and prevents that "sail effect" that can rip a standard vinyl banner to shreds. It’s no wonder they’re the top choice for any large-scale outdoor advertising. A huge advantage of mesh is its incredible wind resistance. Those perforations allow about 37% of the air to flow through, which seriously cuts down on the wind load. This makes it a much safer and more durable option for exposed locations like fences and the sides of buildings. Because they're built for visibility from afar, mesh banners are often produced in massive sizes to cover huge surface areas. Fence Banners (e.g., 4' x 10', 6' x 20'): Sized perfectly to fit standard construction or event fencing, these are great for concealing a worksite, promoting sponsors, or building buzz for a grand opening. Building Wraps and Facades (Custom Large Scale): For the ultimate impact, mesh banners can be printed in enormous custom sizes to cover entire building facades. They're ideal for major ad campaigns, music festivals, and concert stages. Ultimately, once you get a handle on these two materials, you can confidently pick a banner that not only looks incredible but also performs flawlessly wherever you put it. A Practical Guide to Print-Ready Banner Files Picking the perfect banner size is a great start, but getting a flawless final product all comes down to the quality of your digital file. Honestly, one of the most common reasons we see for production delays is artwork that isn't quite print-ready. This guide will walk you through the essential pre-press specs for large-format printing, making sure your design looks just as incredible in person as it does on your screen. Getting these technical details right is the secret to a smooth printing process. While digital ads have their place, a physical banner commands attention in a way screens just can't. With digital fatigue causing 35% of people to tune out online ads, a well-placed banner cuts right through the noise, especially at a busy event or storefront. To make that investment count, your file has to be perfect. Resolution: The Gold Standard for Clarity When you’re printing something as big as a banner, image resolution is everything. For most of our large-format projects, 150 dots per inch (DPI) at the final print size is the industry gold standard. It’s the sweet spot that gives you a crisp, clear image that looks sharp from a normal viewing distance. Whatever you do, avoid pulling low-resolution images from the web. They’re usually set at 72 DPI for screens and will look blurry and pixelated when blown up to banner size. Your best bet is to always start with high-quality source images and design your file at its intended final dimensions from the get-go. Color Mode and File Format Essentials The technical setup of your file is just as critical as the design itself. Getting this right from the start is the best way to prevent weird color shifts or compatibility headaches down the line. Color Mode (CMYK): Your design software, like Adobe Illustrator or Canva , might default to RGB (Red, Green, Blue), which is made for screens. Professional printing uses CMYK (Cyan, Magenta, Yellow, Black). You must design in CMYK to ensure the colors on your printed banner are true to what you see on screen. File Format (PDF): Always save your final, print-ready file as a high-quality PDF. This format is a lifesaver because it embeds all your fonts, images, and vector graphics into one locked package. Nothing will shift, go missing, or look different when we open it on our end. Key Takeaway: If you send us a file designed in RGB, it will be automatically converted to CMYK before printing. This often leads to dull or unexpected colors, especially with vibrant blues and greens. Always start your project in CMYK mode! To give you a head start, here is a quick checklist to follow. Getting these right is more than half the battle. Print File Specification Checklist for Banners This table breaks down the key specs you need for a print-ready banner file, showing you the right way to set things up versus the common mistakes we often see. Specification Recommended Setting Common Mistake to Avoid Resolution 150 DPI at full print size Using 72 DPI web images that pixelate when enlarged Color Mode CMYK Designing in RGB, causing color shifts during printing File Format High-Quality PDF Submitting open files (e.g., .AI, .PSD) or low-quality JPEGs Bleed Area 1 inch on all sides Forgetting to extend the background past the trim line Safe Zone Keep text/logos 2 inches from the edge Placing critical elements too close to the edge where they risk being trimmed Following this checklist is the surest way to get a banner that looks exactly how you envisioned it. For a deeper dive, we have a complete guide on how to prepare your files for online large format printing that covers these topics and more. Bleed and Safe Zones Explained Finally, let’s talk about bleed and safe zones. These are non-negotiable for a professional finish. Bleed is a small margin of your background design—usually 1 inch on all sides for big banners—that extends past the final trim line. This tiny bit of extra design ensures that no ugly white edges appear if the cutting blade is off by a hair. The safe zone is the area inside the trim line where all your critical text, logos, and images should live. We recommend keeping important elements at least 2 inches from the edge. This guarantees they won't get accidentally sliced off or have a grommet punched through them. It’s a simple step that makes all the difference. How to Choose the Perfect Banner Size for Your Goal Picking the right banner dimensions is more than just making sure it fits the space. It's a strategic move. The perfect size isn't just about the physical fit—it's about maximizing visibility, making sure every word is readable, and hitting a specific marketing goal. Every decision should boil down to three key factors: location, viewing distance, and the banner's main purpose. Think about it: a small tabletop retractable banner sitting on a checkout counter has a completely different job than a massive mesh banner stretched across a building. The tabletop banner needs to be compact but crystal clear for someone standing right in front of it. The building banner? It needs to be enormous to grab attention from hundreds of feet away. Getting this context right is the first step to making a smart choice. Factor in Viewing Distance and Text Size One of the most practical things to consider is how far away your audience will be. A banner's message is totally useless if no one can read it. A simple but incredibly effective rule of thumb is to allow for one inch of letter height for every 10 feet of viewing distance. What does that mean in practice? If you expect people to read your banner from 50 feet away, your main headline text should be at least five inches tall . This basic principle ensures your message is legible and has the impact you want, saving you from the mistake of ordering a banner that's too small for its environment. Match the Banner to Its Location and Goal Where you put the banner and what you want it to accomplish are tied at the hip. An indoor banner at a trade show is all about foot traffic, while an outdoor banner on a busy street needs to catch the eyes of drivers. Each scenario requires a different game plan. Here are a few real-world examples: Indoor Point-of-Sale: For a special offer right at the checkout counter, a small 2' x 4' vinyl banner or a tabletop retractable banner is perfect. The viewing distance is short, and the goal is to give timely info to a captive audience. Storefront Grand Opening: A 3' x 6' or 4' x 8' vinyl banner is a classic for a reason. It's big enough to be seen from the street by passing cars and pedestrians, clearly announcing your arrival without swallowing the whole building. Outdoor Festival Sponsorship: To stand out in a crowded field, you need to go big. A large 5' x 10' vinyl banner or an even larger mesh banner makes sure your brand is visible from clear across the event space. Here, the goal is all about broad brand awareness. Choosing the right banner size is a core part of many essential downtown marketing strategies , making sure your message actually gets noticed. Key Insight: Before you lock in a size, go to the spot where the banner will hang. Stand where your audience will be and visualize how big it needs to be to command attention and be easy to read. This one simple step can save you from a costly mistake. This flowchart walks through the key steps for prepping a print-ready file, zeroing in on resolution, color mode, and bleed. The graphic above reinforces a simple truth: a great banner starts with a solid technical foundation. It guides you through the non-negotiable pre-press decisions. By using this framework alongside the banner types we've discussed, you can confidently pick dimensions that will directly support—and achieve—your business goals. Got Banner Questions? We've Got Answers. When you're getting ready to print a banner, a few last-minute questions always seem to pop up. Is the file resolution high enough? Did I pick the right vinyl? Getting these details sorted out is the key to ordering with confidence and making sure the final product is exactly what you envisioned. We get these kinds of questions all the time, so we’ve put together some quick, straightforward answers to the most common ones. Think of this as your final check-in before you hit "print." What's the Best Resolution for a Big Banner File? For large format printing, the magic number is 150 DPI (dots per inch) at full size. This is our go-to recommendation and the industry standard. It’s the sweet spot that gives you sharp, clean graphics without making your file so huge it’s a pain to upload. Now, because banners are usually seen from a few feet away (or even further), you have some wiggle room. If you’re designing a massive banner that’s going to be viewed from across a parking lot or more than 10 feet away, you can often get away with a resolution as low as 100 DPI . Just remember to design in CMYK color mode and save your final file as a high-quality PDF. That’s how you get the best results every time. How Do I Figure Out the Right Banner Size for a Trade Show Booth? In a crowded convention hall, the right banner size can make all the difference. For a standard 10' x 10' booth, a 33" x 81" retractable banner is your best friend. Stick one at the front corner of your booth, and it becomes the perfect magnet for attendees walking the aisles. If you’re looking for a backdrop to really define your space, an 8' x 8' or a 10' x 8' step-and-repeat banner works beautifully. These sizes fill out the booth without overwhelming it, creating a polished, professional look. It's always smart to double-check the venue's specific height rules, but these dimensions are pretty standard and will work in most situations. Heads Up: Don't forget to account for the hardware! A retractable banner's base takes up floor space, and a hanging banner needs some clearance. Plan for this when you measure to avoid any day-of-show headaches. What's the Real Difference Between 13oz and 18oz Vinyl? The "oz" refers to the weight of the vinyl per square yard, which is really just a simple way to talk about its thickness and toughness. Knowing which one to pick is key to making sure your banner holds up. 13oz Vinyl: This is the workhorse of the banner world. It's our most popular option because it hits a great balance between durability, print quality, and price. It’s perfect for almost any indoor use and for short-term outdoor events. 18oz Heavy-Duty Vinyl: When your banner needs to live outdoors for a long time, this is the one you want. It's thicker, tougher, and built to withstand wind, rain, and whatever else the weather throws at it. If your banner will be hanging outside for months, the investment in 18oz vinyl is well worth it. Do I Actually Need Bleed and Grommets? Yes, and you'll be glad you have them. Think of them as essential finishing touches for a professional-looking banner. Bleed is the extra bit of your design that extends past the trim line. We recommend adding a 1-inch bleed on all four sides. This gives us room to trim the banner to its final size without leaving any accidental white edges. It ensures your background color or image goes right to the very edge for a clean finish. Grommets are the metal rings we punch along the edges that let you hang your banner easily with ropes, bungees, or zip ties. We usually place them every 2-3 feet to keep the banner hanging flat and secure. Most importantly, always keep your crucial text and logos inside the "safe zone"—at least two inches from the edges—so they don't get cut off or punched through by a grommet. Here at 4OVER4 , our goal is to make printing banners easy and effective. With these tips in hand, you’re ready to create and order the perfect banner for any event. Explore our full range of custom printing solutions today!
 story
story Master Visual Hierarchy in Design for Better UX
Ever had a design just click ? You knew exactly where to look, what to read first, and what to do next without even thinking about it. That's visual hierarchy at work. It's the silent director of your design, subtly telling your audience's eyes where to go and in what order. This principle is what transforms a jumbled mess of text and images into a clear, intuitive, and genuinely effective experience. What Is Visual Hierarchy and Why It Matters Imagine walking into a library where every single book has an identical, plain gray cover. Same font, same size, same color. Finding the one you need would be a nightmare. That's exactly how people feel when they land on a website or look at a flyer that lacks a clear visual hierarchy. It's the invisible force that brings order out of chaos, creating a path of least resistance for our brains. At its heart, visual hierarchy in design is all about communication. It uses simple visual cues—like size, color, contrast, and placement—to signal importance. A big, bold headline basically screams, "Read me first!" while smaller, lighter-colored text whispers, "I’m just extra details if you're interested." This isn't just about making things pretty; it's a core part of the user experience that directly shapes how well people understand and connect with your message. The Purpose of a Clear Structure A well-crafted hierarchy does more than just organize your content; it makes it work . Its main job is to create a frictionless journey for the user, slashing their cognitive load and making information incredibly easy to digest. When people can find what they’re looking for in seconds, they stick around, they engage, and they're far more likely to take action. Think of it this way: visual hierarchy arranges your design's information from most to least important. It establishes order, letting users navigate effortlessly to find exactly what they need. This all ties back to the bigger picture of why design matters in the first place. You can see this reflected in conversations about the importance of web design for business growth . A strong hierarchy is a non-negotiable ingredient for building a professional, trustworthy brand, whether it's on your homepage or a simple business card. The table below really breaks down how the goals of hierarchy deliver tangible benefits, showing just how critical this concept is for any successful design. Core Functions of Visual Hierarchy This table illustrates how specific visual hierarchy goals translate into measurable user experience benefits. Goal of Hierarchy Key Principle Applied Resulting User Benefit Establish a Focal Point Using a large, high-contrast element (e.g., a bold headline). The user immediately knows where to start, reducing confusion. Create Information Flow Guiding the eye with alignment and proximity. The user can easily scan and understand content in a logical sequence. Highlight Key Actions Making a call-to-action button visually distinct with color. The user knows exactly what action to take next, improving conversion rates. Improve Readability Using typographic scale (headings, subheadings, body text). The content is scannable and less intimidating to read. By mastering these functions, you move from simply placing elements on a page to strategically guiding your audience through a compelling visual story. The Building Blocks of Visual Hierarchy To really get a handle on visual hierarchy in design , you need to know the tools you're working with. I like to think of these core principles as ingredients in a recipe. Each one brings its own unique flavor, but they're most powerful when you combine them just right to create something truly satisfying. A great designer uses these building blocks to arrange content, guiding a person's eye from the most important message down to the supporting details in a way that feels totally effortless. So, let's break down these foundational elements. You'll see how simple tweaks to things like size, color, and spacing can turn a jumbled mess into a clear and compelling visual story. Nailing these principles is the key to creating designs that don't just look pretty, but communicate with razor-sharp clarity. This infographic gives you a great overview of the main categories and how they all lock together to form a solid design strategy. As the diagram shows, a strong visual hierarchy is built on three pillars: how you handle the scale of different elements, your use of color and contrast, and the smart organization of your text and space. Size and Scale Command Attention Of all the tools in your kit, size is the most direct and powerful. It’s a primal cue our brains are wired to notice. Big things feel important; small things fade into the background. It’s that simple. Think about designing a concert poster. The band's name is almost always the biggest thing on the page. Why? Because it’s the most critical piece of info. The date and venue come next in size, followed by smaller details like the ticket price. That's size and scale creating an instant order of importance, no explanation needed. By making an element larger, you're boosting its visual weight —the force it uses to pull the eye in. This is the simplest way to set up a main focal point. This idea translates directly to print materials from 4OVER4. On a business card, your name and logo should be noticeably bigger than your email or phone number. The recipient instantly knows who you are and what company you're with. Color and Contrast Create Focus Color is so much more than decoration. It’s a powerful tool for creating contrast and stirring up emotion. Bright, bold colors seem to jump right off the page, demanding your attention, while muted, neutral tones make for a quiet, steady backdrop. Picture a webpage showing dozens of products. If every "Add to Cart" button were a bland gray, they’d get lost in the noise. But make them a vibrant, contrasting color—like a punchy orange against a blue background—and they instantly become beacons, showing the user exactly what to do next. It's no secret that a high-contrast call-to-action can dramatically increase engagement. Here’s how color and contrast play together: High Contrast: Putting light elements on dark backgrounds (or vice-versa) creates a strong separation. This makes text easier to read and helps key elements pop. Color Temperature: Warm colors like red and orange feel energetic and tend to advance toward you. Cool colors like blue and green are calming and tend to recede. Saturation: In a design full of muted tones, a single, highly saturated color will immediately grab the eye. This makes it perfect for highlighting a key statistic on a flyer or a special offer on a postcard. Typography Guides the Reader Typography isn't just about picking a cool font. It's the art of arranging type to make your words legible, readable, and appealing. For any design that relies on text, a well-defined typographic hierarchy is absolutely essential. It works by using different font sizes, weights (like bold , regular, or light), and styles (like italics or all caps) to sort your content into clear levels. Primary Level (Headlines): This is your biggest, boldest text. It's there to grab attention and give a quick summary of what’s to come. Secondary Level (Subheadings): These break up longer chunks of text, making the whole thing easier to scan and digest. They're smaller than headlines but bigger than the main text. Tertiary Level (Body Copy): This is your main content. The goal here is a clean, legible font at a size that’s comfortable to read. Proximity and White Space Create Relationships The principle of proximity is simple: we see things that are placed close together as a related group. When you see a caption right next to a photo, your brain instantly assumes they belong together. Designers use this trick all the time to organize information without needing clunky boxes or lines. On an event invitation, for example, the date, time, and location are all grouped together because they form one cohesive block of information. Then there’s white space (or negative space)—the empty area around your design elements. It's anything but "wasted" space. In fact, it's an active and crucial part of your design. Generous white space gives your content room to breathe. It cuts down on clutter and can make your focal points feel much more impactful. It guides the eye by creating separation and emphasis. Think about a high-end art gallery. The paintings aren't all crammed onto the wall. They’re given plenty of space so you can appreciate each one individually. The same logic applies to your designs. Whether you're working on a brochure or a massive banner, giving your elements enough breathing room makes your message clearer and more professional. Where Design Hierarchy Comes From This whole idea of intentionally guiding a person’s eye isn't some new-fangled concept cooked up for the internet. The principles of visual hierarchy have deep roots, stretching back through centuries of art, typography, and good old-fashioned communication theory. What we now do on screens is really just an evolution of ideas that solved the same problems on paper a long, long time ago. If you want to get a real feel for visual hierarchy in design , it helps to look back at the game-changing movements of the 20th century. These weren't just passing artistic trends; they were very intentional efforts to bring order and clarity to an increasingly noisy world. The Rise of Modernist Principles The DNA of today’s visual hierarchy can be traced directly to movements that put function squarely before flourish. It started with the German Bauhaus school back in 1919, which championed the whole 'form follows function' philosophy. They stripped things back to simple geometric shapes and clean, uncluttered layouts, all in the name of clarity. This paved the way for the Swiss Design movement (also known as the International Typographic Style) that took hold in the 1950s. Designers from this era were all about grid systems, crisp sans-serif fonts, and asymmetrical layouts to create designs that were objective and incredibly easy to read. These pioneers weren't just picking what looked cool. They were diving into human perception, figuring out how people see and process information, and then systematically arranging things to make posters, books, and ads more intuitive. "The grid system is an aid, not a guarantee. It permits a number of possible uses and each designer can look for a solution appropriate to his personal style. But one must learn how to use the grid; it is an art that requires practice." – Josef Müller-Brockmann, a pioneer of the Swiss Style This methodical, almost scientific approach to arranging elements was a direct forerunner to the user experience (UX) design we obsess over today. The goal has always been the same: lead your audience through the content in a way that feels natural and makes sense. From Print to Pixels When design made the big leap from printed pages to digital screens, these foundational principles didn't just vanish—they adapted. The challenges were new, sure, with things like interactivity and different reading habits to consider. But the core solutions? Remarkably consistent. Think about it: the structured, grid-based thinking of Swiss Design is the direct ancestor of the frameworks we use to build websites. That clean, organized layout you see on most sites didn't come out of nowhere. It’s a legacy handed down from print designers who were chasing clarity and order. This historical backbone led straight to our modern understanding of how people scan digital content. Thanks to eye-tracking studies, we’ve uncovered some common behaviors that smart designers now use to their advantage. Common Digital Scanning Patterns By watching where people’s eyes actually go on a webpage, researchers found a few predictable paths that crop up again and again. Two of the most famous are: The F-Pattern: On pages with a lot of text, like a blog post or search results, people tend to scan in a shape that looks like the letter "F." They’ll read the headline across the top, then their eyes will drift down the left side, occasionally darting back into the content on a lower horizontal line. This is why we put our most important stuff—headlines, subheadings, and key points—along that natural path. The Z-Pattern: For simpler layouts with less text, like a landing page, the eye often moves in a "Z" shape. It goes from the top-left to the top-right, then cuts diagonally down to the bottom-left, and finishes by shooting across to the bottom-right. This makes the four corners of your design prime real estate for your logo, key message, and that all-important call-to-action button. These patterns are proof that effective visual hierarchy isn't just guesswork. It's about designing in harmony with how people are already wired to see the world—a timeless tradition that connects a vintage Bauhaus poster to the sleekest modern app. Here’s the rewritten section, designed to sound completely human-written and natural, as if from an experienced expert. How Visual Hierarchy Speaks to the Brain Ever wonder why your eyes jump straight to one part of a design, almost ignoring everything else? It’s not a random fluke. It’s psychology in action. The way our brains interpret visual information is hardwired, and a smart visual hierarchy taps directly into those instincts to make a design feel effortless. When a layout just feels right, it’s usually because the designer has done the heavy lifting for us. Instead of forcing your brain to decode a jumble of information, the design guides you. Think of it as a quiet conversation between the page and your mind, with the principles of visual hierarchy acting as the perfect translator. The Brain Craves Order At our core, we are pattern-seeking creatures. When faced with chaos, our brains immediately start trying to group things and create structure. This isn't just a quirk; it's explained by the Gestalt Principles , a fascinating set of ideas from psychology that reveal how we see whole patterns instead of just a bunch of separate parts. By understanding how the brain naturally organizes what it sees, designers can arrange elements in a way that feels intuitive. It’s less about artistic whim and more about aligning with deep-seated human psychology. Imagine walking into a messy, cluttered room. Your mind struggles to make sense of it all. Now picture a tidy, organized room where you can instantly spot the bed, the desk, and the closet. A good design is that tidy room—it makes sense at a glance. This image is a perfect example of a few Gestalt principles at work, showing how our brains naturally cluster dots based on how close they are, how similar they look, or if they’re connected. What you’re seeing is your brain automatically creating relationships. The dots grouped closely together feel like a single unit ( Proximity ), while the red dots stand out from the black ones as a distinct group ( Similarity ). Cognitive Shortcuts That Guide the Eye Designers use these psychological shortcuts to build a clear visual hierarchy in design . Here’s how some of those key Gestalt principles play out in the real world: Proximity: We see things placed close together as a related group. It’s why you’ll always find a photo caption snuggled up right next to its image, or why contact details are clustered together on a business card. Similarity: We naturally group things that look alike. By using the same font, color, or size for all your H2 headings, you’re sending a clear signal: "These all have the same level of importance." Figure-Ground: Our brains are masters at separating a focal point (the figure) from its background (the ground). High contrast is a powerful tool to make your key message the undeniable "figure." Focal Point: The brain is always drawn to what’s different. A pop of bright color in an otherwise muted design, or one giant photo among several smaller ones, creates an instant focal point that pulls the viewer in. When you apply these principles, you’re creating a visual language that people understand instinctively. You’re not just pushing pixels around; you’re speaking directly to the viewer’s subconscious. Data-Backed Design for Our Short Attention Spans In a world where attention is the ultimate currency, this psychological approach isn’t just a nice-to-have—it’s essential. Studies repeatedly show how vital a clear hierarchy is for keeping people engaged. Designs that follow natural scanning patterns, like the Z-pattern or F-pattern, don’t just feel easier to read; they can lead to a 25% increase in task efficiency. You can dig into more data on how visual hierarchy drives user interaction on Number Analytics . This proves that a strong visual hierarchy isn’t just about making things look pretty. It’s a science-backed method for making complex information digestible, compelling, and effective. It's the secret to grabbing attention and making sure your message isn’t just seen, but actually understood. Putting Visual Hierarchy into Practice Knowing the theory is one thing, but actually putting visual hierarchy in design to work is where the magic really happens. This is the moment you stop talking about abstract principles and start creating tangible results—whether that’s a business card people actually keep or a website that turns casual visitors into loyal customers. It all comes down to making deliberate, thoughtful choices. Let’s get practical. Say you're designing a flyer for a local concert. Your main goal? Get people to show up. A solid hierarchy makes this happen by grabbing their attention with a big, bold headline—the band's name. From there, you guide their eyes to the next crucial details, like the date and time, before they land on the smaller print with the venue address. Every choice, from the font size to the color, serves that single, clear purpose. The same logic works just as well in the digital world. Think about a landing page. The hero image and main headline are huge for a reason: they have seconds to hook you. The call-to-action button is almost always the brightest, most contrasting element on the page, making it an unmissable target for your cursor. From Static Print to Interactive Screens While the core ideas are the same, how you apply them shifts a bit when you move between print and digital. A printed piece, like a stunning brochure from 4OVER4, is static. Once it’s printed, the user’s journey is locked in by your layout. A digital interface, on the other hand, is alive and interactive. This difference is critical. With print, you get one shot to make your point. On a website, the hierarchy has to guide people through multiple steps, clicks, and actions. Mastering this is key, especially as new technologies like AI art generator tools give us even more ways to experiment with visual influence. The data backs this up, too. Eye-tracking studies have shown that size is king, with larger elements grabbing 65% more initial attention. Bright colors can boost focus by around 30% compared to muted ones. On the flip side, getting it wrong is costly; 75% of users admit they’ll bounce from a site if they can’t quickly find what they’re looking for. Visual Hierarchy Application Print vs Digital To truly make smart design choices, it helps to see how these principles adapt to different mediums. This table breaks down how the same core concepts are applied differently in print and on a screen. Principle Application in Print Design (e.g., Brochures, Posters) Application in Digital Design (e.g., Websites, Apps) Size & Scale A massive headline and a powerful image create one focal point that grabs attention, even from across a room. Hero banners and key value propositions are made large, while interactive elements like buttons are sized for easy clicking or tapping. Color & Contrast High contrast is your best friend for making key details—like dates or special offers—pop instantly off the page. Color is used to signal interactivity. A button changing color on hover, for example, gives the user immediate feedback. Typography A clear typographic scale (headings, subheadings, body text) walks the reader through a fixed story on the page. Typography must be readable on different screen sizes. Styles need to clearly distinguish between clickable links and static text. Spacing White space is used to group related info (like event details) and separate different sections to avoid a cluttered mess. Spacing not only groups content but also defines clickable areas and creates a breathable, scannable layout that prevents user fatigue. Seeing them side-by-side makes the distinction clear. In print, your hierarchy builds a path for the eyes. In digital, it must also build a path for action . Ultimately, putting visual hierarchy into practice means becoming a thoughtful decision-maker. It’s about asking "why" for every single element you place on the page or screen. Why is this headline so big? Why is this button bright red? Why is this text clustered together? When every choice has a clear purpose, you create designs that aren't just beautiful—they're powerfully effective, no matter where they live. Alright, let's tackle some of the lingering questions that pop up when you start moving visual hierarchy from theory to practice. It’s one thing to understand the principles, but it’s another thing entirely to know if your design is actually working in the wild. This is where the rubber meets the road. Getting these details right can be the difference between a design that feels intuitive and one that just falls flat. Let's dig into a few of the most common questions designers face. How Do I Know If My Visual Hierarchy Is Effective? The quickest way to see if you’ve nailed your hierarchy is to test it. You don't need fancy software for this, either. One of the oldest tricks in the book is the simple "squint test." Just take a step back from your screen or printed proof and squint your eyes until everything gets blurry. What jumps out? The shapes and elements that still pop are sitting at the top of your visual food chain. If those are your headline and main call-to-action, congratulations—you're on the right track. Another brilliant, low-tech method is the 5-second test . Grab a colleague or friend, show them your design for just five seconds, and then hide it. Ask them what they remember. Their gut reaction is a pure, unfiltered look at what your hierarchy is communicating. Did they catch the main offer and the "Buy Now" button? Fantastic. Did they get lost looking at a decorative swoosh? Time for a tweak. An effective visual hierarchy doesn't force someone to think. It's a silent guide, effortlessly leading the eye from the most important message down to the details without any friction. For digital work, you can get even more granular. Heatmaps are fantastic for this. They give you undeniable proof of where people are actually looking and clicking, showing you your design’s true focal points. A/B Testing is the ultimate tie-breaker. You can pit two layouts against each other and let the data tell you which hierarchy drives more clicks or conversions. At the end of the day, if people can instantly grasp what your design is for and find what they need, your hierarchy is doing its job. What Are the Most Common Mistakes in Visual Hierarchy? It's surprisingly easy to get visual hierarchy wrong, but most confusing layouts suffer from the same few slip-ups. The number one offender is having no clear focal point . When every element is yelling for attention, nothing gets heard. It’s a classic case of "design by committee" that just results in visual chaos. Another all-too-common problem is neglecting whitespace. Designs that are crammed and crowded feel claustrophobic and are a nightmare to scan. You have to remember that the empty space around your elements is just as crucial as the elements themselves. It gives your content room to breathe. Inconsistent styling is another major culprit. Using three different colors for your subheadings or four different button styles breaks the visual patterns you’re trying to establish. It confuses the user and makes your design feel untrustworthy and unprofessional. And finally, a surprisingly frequent mistake is just plain ignoring how people read. We've been trained since childhood to scan pages in predictable ways. Think of the F-Pattern for text-heavy content or the Z-Pattern for simpler, image-focused layouts. Fighting against these natural eye movements makes your design feel awkward and clunky. Can a Minimalist Design Still Have a Strong Hierarchy? Absolutely. In fact, minimalist designs often feature some of the most powerful and deliberate visual hierarchies you'll ever see. There’s a common myth that you need a whole toolkit of colors, fonts, and graphics to build a strong hierarchy. The truth is, sometimes less is so much more. When you have fewer elements to work with, every single choice carries more weight. Minimalism is all about precision. A design might be built around a single, striking piece of typography. Surrounded by a generous amount of whitespace, that one headline or quote becomes incredibly powerful and immediately draws the eye. Contrast becomes your best friend in minimalism. A single pop of bold color in an otherwise black-and-white layout is a massive hierarchical statement. It's an incredibly efficient way to point the user directly to a call-to-action or the single most important piece of information on the page. Minimalism proves that a strong hierarchy isn't about how much you throw on the page, but about the intentionality behind every element. It’s the art of subtraction, where each piece that remains has a crystal-clear job to do. Ready to put these principles into action? At 4OVER4 , we’re experts at translating thoughtful digital designs into high-quality printed materials that bring your visual hierarchy to life. From business cards that command attention to brochures that guide readers seamlessly, we’ve got the tools to make your work shine. Explore our printing services and see how a powerful design translates into real-world impact.
 story
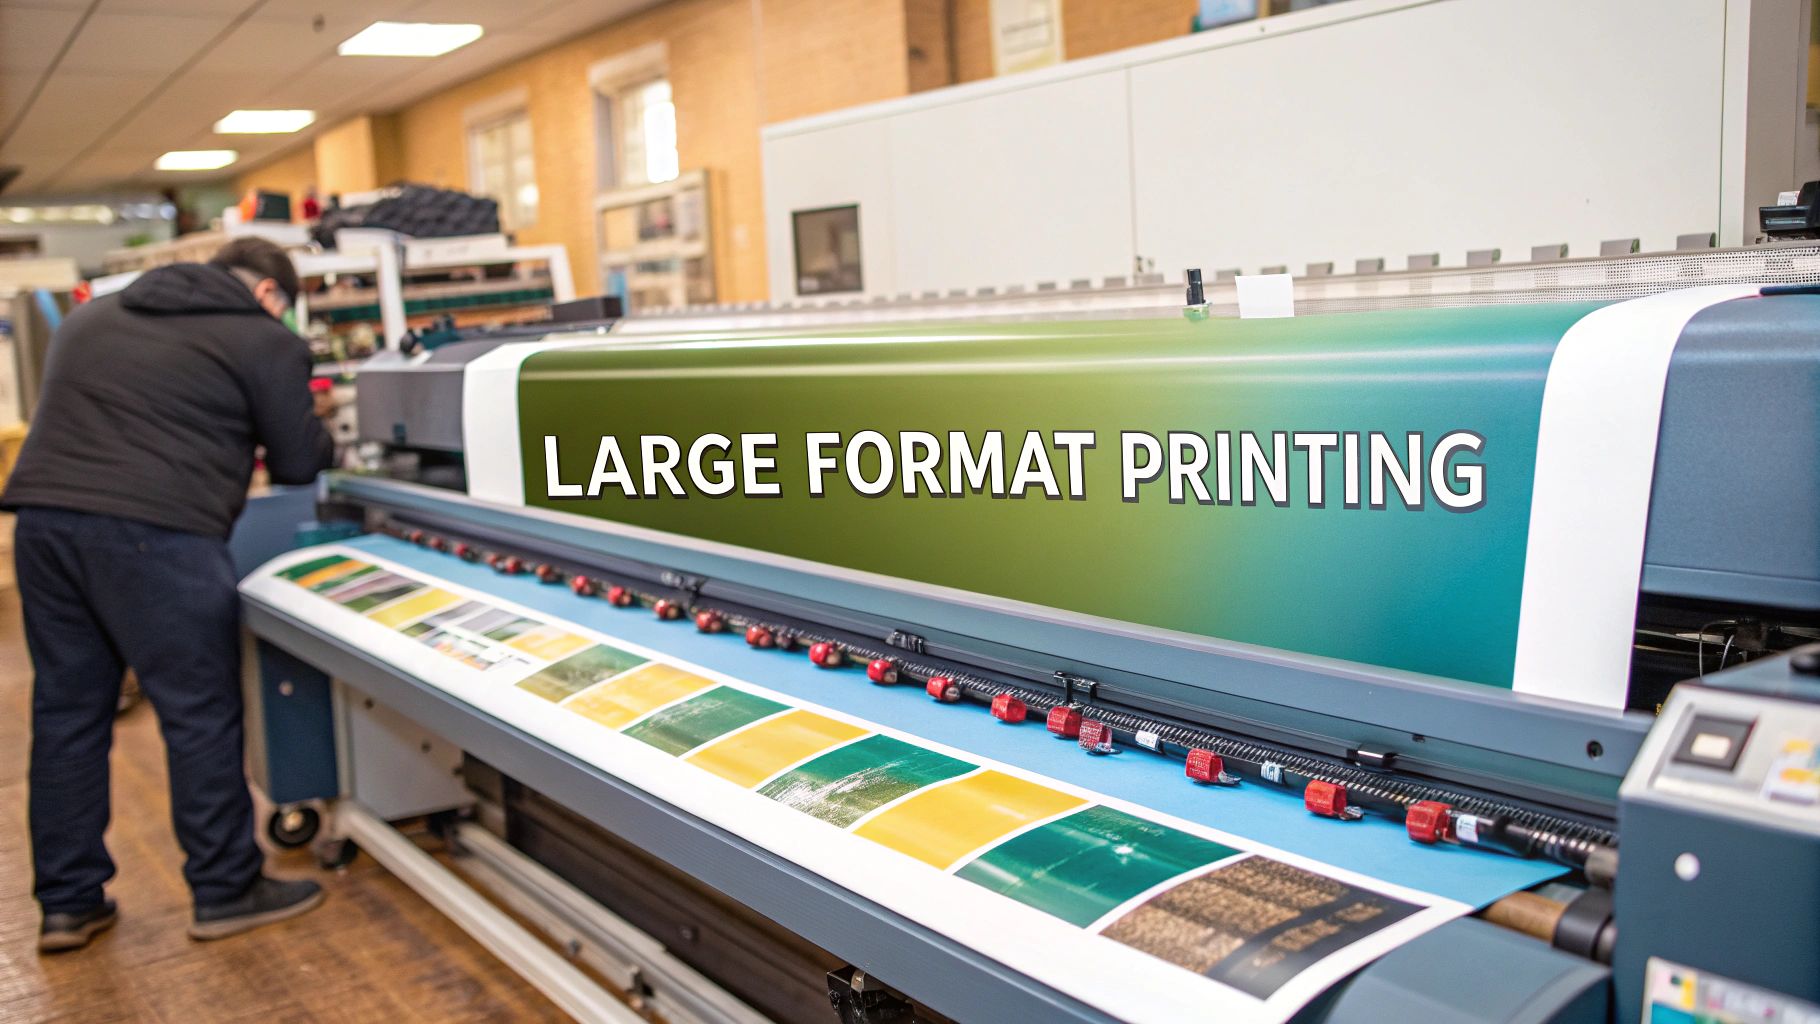
story What Is Large Format Printing Explained
Ever wondered how those massive, eye-catching billboards or the vibrant graphics wrapped around a city bus come to life? That’s the magic of large format printing . It’s the go-to technology for creating graphics on a scale that your standard office printer could only dream of, turning digital concepts into tangible, high-impact visuals. What Is Large Format Printing At its heart, large format printing is all about creating visuals designed to grab attention from a distance. Think of it like this: your desktop printer is perfect for an 8.5" x 11" document, but it's completely out of its league when you need a banner that stretches across a storefront. Large format printing is what bridges that gap, producing huge graphics that stay sharp, clear, and durable. Instead of feeding individual sheets of paper, these industrial-strength machines work with massive rolls of material or print directly onto thick, rigid surfaces like wood or acrylic. This is what makes those seamless, building-sized graphics possible. Beyond Standard Dimensions The real game-changer here is scale. A typical commercial printer hits a wall pretty quickly with size, but large format printing blows those limitations wide open, creating a ton of new possibilities for ambitious marketing and branding projects. This infographic really puts the difference into perspective, showing a standard office setup versus the sheer industrial scale of a large format printer and what it can produce. It’s pretty clear that one is made for documents, while the other is engineered for grand-scale communication. This leap in capability is why it's such a vital tool for any business trying to make a real-world splash. To get a clearer picture, let's break down the core differences in a quick table. Standard Printing vs Large Format Printing At a Glance Feature Standard Printing Large Format Printing Typical Size 8.5" x 11" to 11" x 17" 18" wide up to 100+ feet Materials Paper, cardstock Vinyl, fabric, canvas, metal, wood Equipment Desktop/office printers Flatbed or roll-to-roll printers Best For Documents, flyers, photos Billboards, wraps, trade show displays Volume High-volume, small prints Low-volume, large-scale projects While both have their place, large format printing operates in a completely different league, focusing on impact and presence over sheer quantity. Large format printing isn’t just about making things bigger; it's about transforming spaces and commanding attention in a crowded world. It gives brands a physical voice that can’t be ignored. The applications are incredibly diverse and pop up in just about every industry you can think of. Whether it's a bustling retail store or a massive corporate event, the mission is always the same: deliver a message that packs a serious visual punch. You'll see it used for things like: Banners and Posters: The classic choice for promotions, events, and big announcements. Trade Show Graphics: Essential for creating immersive, professional booth displays that draw a crowd. Vehicle Wraps: Turning company cars, trucks, and vans into moving advertisements. Wall Murals: Completely transforming interior spaces with custom, floor-to-ceiling artwork. For any business ready to think bigger, a professional online large format print service has the right gear and expertise to bring those huge ideas to life. The Technology That Powers Big Visuals The magic behind those massive, vibrant graphics isn't just one big invention. It's a smart combination of specialized inks and powerful, purpose-built machinery. At the heart of most large format printing is inkjet technology , but think of it on a supercharged, industrial scale. We're not talking about the little cartridge from your home office printer; this is a whole different world of advanced formulations designed for serious durability and pinpoint color accuracy. To really get how these printers work, you first have to understand the inks. Each type has a specific job, just like a painter uses different kinds of paint for different surfaces. The ink you choose directly controls how the final print looks, how long it lasts, and where it can be used. The Key Types of Ink In the world of large format printing, three primary ink systems do most of the heavy lifting. Each one brings something unique to the table. Aqueous Ink: This is a water-based ink celebrated for producing jaw-dropping, high-resolution images with incredible color. It's the go-to for indoor work like fine art prints, posters, and trade show graphics where visual pop is everything. The trade-off? It's not built for the outdoors unless you add a protective laminate. Solvent Ink: Think of this oil-based ink as the tough guy. It contains compounds that actually etch into the printing material, creating a super-durable, weather-resistant bond. This is what you need for outdoor banners, vehicle wraps, and billboards that have to stand up to sun, rain, and wind. UV-Curable Ink: Imagine a special liquid that hardens into a tough coating the instant it's hit with a specific kind of light. That’s exactly how UV-curable ink operates. It’s laid down on a surface and then instantly "cured" by powerful ultraviolet lamps, making it incredibly resilient and versatile enough for almost any material, from plastics to wood. UV-curable ink has been a true game-changer. It allows us to print directly on a massive variety of materials without needing any special coatings, opening up a whole universe of creative possibilities for custom signage and displays. The Workhorses: Flatbed and Roll-to-Roll Printers Just as crucial as the ink are the machines that put it on the material. Large format printers generally fall into two categories, each built for a different kind of job—either rigid or flexible. A flatbed printer is kind of like a high-tech art table. You lay the material—think acrylic, wood, or foam board—flat on the printer's bed. A gantry then zips across the surface, depositing ink with precision right onto the stiff substrate. This is the perfect method for creating sturdy signs, custom art pieces, and architectural displays. On the other hand, a roll-to-roll printer acts more like a giant tape dispenser. It pulls flexible materials like vinyl, canvas, or fabric from a huge roll, feeding it through the machine for continuous, high-volume printing. This process is incredibly efficient for churning out long banners, eye-catching vehicle wraps, and seamless wall murals. This core technology is a key reason the industry has seen such explosive growth. The global large format printing market was valued at USD 9.11 billion in 2023 and is on track to hit USD 12.70 billion by 2030 , driven by the endless demand for high-impact advertising. You can dig deeper into the numbers in this market research report . This growth is directly tied to constant improvements in both ink and machine technology, which keep making printing faster and more adaptable. If you're weighing different printing options, our guide on digital printing services offers some great context. Choosing the Right Canvas for Your Project A spectacular design is only half the battle. The material it’s printed on is what truly brings it to life. In the world of large format printing, we call this material a substrate , and picking the right one is like an artist selecting the perfect canvas. The substrate you choose determines everything—the final look, the feel, even how long your print will last, especially when it’s up against the elements outdoors. Every material has a job to do. Understanding the two main categories, flexible and rigid , is the first step. Think of flexible materials as things that can be rolled up, like a movie poster. Rigid materials, on the other hand, are solid and can support themselves, like a wooden sign. Your project's goal will point you to the right fit. Flexible Materials for Dynamic Displays Flexible substrates are the champions of versatility. They're easy to transport, store, and set up in countless ways, which makes them perfect for temporary promotions, big events, and any application that needs a little bit of give. Here are some of the most popular flexible options: Vinyl: This is the undisputed workhorse of the industry. It's incredibly durable, weather-resistant, and won't break the bank. That’s why it's the top choice for outdoor banners, billboards, and those vibrant vehicle wraps that need to look great for years. Canvas: Known for its textured, artistic feel, canvas adds a touch of class to any image. It’s perfect for high-quality photo reproductions, fine art prints, and sophisticated indoor displays aiming for a gallery-like vibe. If you want to create stunning visual art, you can learn more about producing beautiful canvas prints for your home or office. Textiles: Fabric materials like polyester and mesh are lightweight and offer a soft, elegant finish. They’re excellent for trade show backdrops, flags, and retail displays where a premium, non-glare look is essential. Mesh banners are especially handy in windy spots, since the tiny holes let air pass right through. Rigid Materials for Sturdy and Lasting Impressions When your project demands structure, durability, and a high-end finish, rigid substrates are the answer. These materials give your graphics a solid foundation, perfect for prints that need to stand on their own or be mounted for the long haul. They're the go-to for permanent signage, architectural displays, and premium marketing materials. A rigid substrate doesn’t just display a message; it gives it a sense of permanence and authority. It’s the difference between a temporary notice and a permanent landmark. Some common rigid materials include: Foam Board (Foamcore): Lightweight and affordable, foam board is a fantastic choice for indoor presentations, short-term event signs, and mounting photos. While it’s easy to cut and display, it’s definitely best for temporary, indoor use. Acrylic: For a sleek, modern, almost glass-like finish, acrylic is the premium choice. Its glossy surface makes colors absolutely pop, making it perfect for high-end office signs, lobby displays, and professional photo mounting. Metal (Aluminum): Offering unmatched durability and a sharp, industrial aesthetic, aluminum is built for long-term outdoor signage, directional signs, and architectural installations. It resists rust and wear, ensuring your message stays crisp for years to come. Bringing Big Ideas to Life in the Real World Large format printing isn’t just a production method; it’s the bridge between a designer’s screen and the physical world. It’s the tool that takes a brand’s message and puts it right in front of people, shaping how we experience everything from city streets to our favorite stores. You see its impact everywhere, from towering billboards that stop you in your tracks to the subtle floor graphics that guide your next step. These prints don’t just sit there—they create immersive experiences, share vital information, and turn ordinary spaces into powerful communication platforms. Advertising That Demands Attention In the impossibly crowded field of advertising, you have to be seen. Large format printing gives brands the power to create visuals that are simply too big to ignore. A campaign might start as a simple digital concept, but it comes to life as a massive, real-world presence that commands attention. Think about the last time a colorful bus wrap caught your eye or a building-sized banner announced a huge concert. These aren't just ads; they become temporary landmarks. That ability to dominate a visual space makes this technology an essential part of any campaign aiming to make a genuine, lasting impression. Creating Immersive Retail Experiences Retail is another world completely transformed by large format prints. We’re talking about much more than a simple "SALE" sign. This is about building a complete, branded environment that pulls customers in from the moment they walk past the window. Here’s how it all comes together to shape the shopping experience: Window Clings: Often the very first touchpoint, these turn glass storefronts into dynamic billboards that lure shoppers inside with promotions and eye-catching designs. Floor Graphics: Tough, non-slip graphics can lead shoppers through a store, point out special deals, or even create fun, interactive pathways. In-Store Displays: Everything from hanging banners to rigid point-of-purchase signs works together to build a cohesive atmosphere that reinforces the brand and drives sales. You can find a massive variety of displays for printing , with each one designed to serve a specific purpose in a retail setting. Large format printing is increasingly central to the personalization trend, allowing businesses to create tailored experiences for consumers. This move toward customization is a huge driver of market growth. This trend is a huge economic force. The market for personalized items, which leans heavily on wide format tech for things like custom wallpapers and vehicle wraps, is on track to hit USD 201 billion globally by 2026. That’s a jaw-dropping 49% increase from 2021, and it shows just how critical this technology has become. Beyond Marketing and Retail But the applications don't stop there. This technology is a quiet cornerstone in several other professional fields. Architecture and Construction: You can't build a skyscraper from a laptop screen. Architects and builders rely on precise, large-scale blueprints to visualize and execute complex plans with total accuracy. Events and Trade Shows: Walk into any convention center, and you’ll see it. Vibrant trade show booths, step-and-repeat backdrops, and clear directional signs are all crucial for creating a memorable and professional event. Interior Design: Why paint a wall when you can turn it into a piece of art? Custom wall murals can completely redefine a room, making a blank space the defining feature of a home or office. From a detailed architectural drawing to an inspiring office mural, the sheer versatility of large format printing makes it an invaluable tool for bringing ambitious ideas to life, no matter the industry. The Strategic Benefits of Going Big Investing in large format printing is a whole lot more than just making your logo bigger. It's a strategic move that delivers real, tangible returns. A digital ad might get a fleeting glance online, but a massive, well-placed graphic in the physical world? That commands attention and makes your brand impossible to ignore. This high-impact visibility is the first and most powerful advantage. A colossal banner stretched across a storefront or a vibrant vehicle wrap navigating city streets doesn't just inform—it captivates. By making your visuals larger than life, you grab the focus of anyone passing by and get your message across instantly. That immediate visual punch is how you build powerful brand awareness and cut through all the noise. Durability That Delivers Long-Term Value One of the most practical benefits is just how tough these prints are. Forget flimsy paper signs that fade, tear, or completely disintegrate at the first sign of bad weather. Materials like vinyl and aluminum are built to last, and that durability translates directly into better long-term value. Think about an annual street festival. A business could print cheap paper posters every single year, wasting time and money on reprinting and replacements. Or, they could invest just once in a high-quality, weather-resistant vinyl banner. This single banner can be stored and reused for years, promoting the event consistently while saving a ton of money over time. It becomes a smart, sustainable marketing asset. The true power of large format printing lies in its ability to turn a one-time expense into a long-term marketing tool that works for you season after season. Cost-Effectiveness at Scale Sure, a single large print might seem like a bigger upfront expense than a stack of small flyers, but it's remarkably cost-effective when you look at its reach and lifespan. A single billboard can be seen by thousands of people every day, which often means a lower cost-per-impression than many other forms of advertising. To really get a handle on the return, you have to know how to measure advertising effectiveness . On top of that, the technology in the large format industry has made production much more efficient. This lets businesses create high-impact, durable marketing materials without breaking the bank. For any company serious about boosting its physical presence, exploring ways to improve brand awareness with large-scale prints is a no-brainer. When you weigh the visibility, durability, and wide-reaching impact, going big is often the smartest financial move you can make for major campaigns. Your Questions, Answered Jumping into the world of large format printing can feel like a massive undertaking, but it doesn't have to be. Once you get the hang of a few key concepts, the whole process becomes much clearer. Let's tackle some of the most common questions that pop up. What File Type and Resolution Do I Need? The final quality of your print is a direct reflection of your source file. When you're printing big, the last thing you want is a blurry or pixelated mess, and getting that right starts with the file itself. File Type: Your best bet is always a vector file (think formats like .AI, .EPS, or .SVG). Unlike pixel-based images (.JPG or .PNG), vectors are built with math. That means you can scale them up to the size of a building, and they’ll stay perfectly crisp. If you have to use a pixel-based image, make sure it's saved at the absolute highest quality possible. Resolution: For anything viewed up close, 300 DPI (dots per inch) is the gold standard. But for big prints designed to be seen from a distance—like a billboard—you can often get away with 150 DPI at the final print size. When in doubt, always ask your print provider for their specific requirements to ensure a perfect result. How Much Will My Project Cost? The cost of a large format project isn't a one-size-fits-all number; it can swing quite a bit depending on what you need. Think of it less like a flat rate and more like a custom build, where every choice influences the final price. The final price of a large format project is a reflection of the materials, complexity, and scale required to bring your vision to life. It’s an investment in visibility and durability. Here are the main things that drive the cost: Material (Substrate): A standard vinyl banner will be much easier on the wallet than a high-end print on brushed aluminum or premium acrylic. Size: It's simple math—bigger prints need more material and more ink, which naturally bumps up the cost. Quantity: Ordering in bulk usually brings down the price per piece, though your total investment will obviously be higher. Finishing Options: Want your print laminated? Need custom cutting or special mounting hardware? These extra services will add to the final tally. How Long Will My Print Last? The lifespan of your print really comes down to one big question: where is it going to live? The materials and inks we use are chosen specifically for the environment they'll face, so there's a huge difference in durability between indoor and outdoor prints. An indoor print , like a canvas photo or a foam board display for a trade show, is shielded from the elements. Tucked away from harsh weather and direct UV rays, these prints can easily look great for many years, sometimes even decades , without fading. On the other hand, an outdoor print like a banner or vehicle wrap is in a constant battle with sun, wind, and rain. While they're built tough, you can generally expect them to last 3 to 5 years . Of course, using top-tier materials and adding a protective laminate can definitely help extend that lifespan. Ready to make a big impact? 4OVER4 has the technology and expertise to handle any large format printing project, from massive banners to custom displays. Explore our wide range of options and get an instant quote for your next big idea.
 story
story What is White Space in Design? Essential Tips to Enhance Your Layout
When you hear the term white space , you might picture the blank margins on a page. That's a good start, but in design, it’s so much more than that. Also called negative space , it's the unmarked area between all the elements on your page—the images, the text blocks, the headlines. Think of it as intentional breathing room. It’s not just empty background; it’s an active player that guides the eye, makes text easier to read, and gives the whole design a sense of focus and elegance. The Power of Nothing in Design It’s tempting to see empty areas as wasted potential. Why not fill that spot with more information, another graphic, or a call to action? But that mindset misses the point entirely. Much like the pauses in a speech or the silence between notes in a song, white space is what gives meaning and punch to the elements that are there. When used deliberately, white space becomes one of a designer’s most powerful tools. It can transform a cluttered, confusing layout into one that feels clean, professional, and dead simple to navigate. By giving your content room to breathe, you’re making it far more approachable and digestible for your audience. This principle is a game-changer in everything from web design to print. Why White Space Matters This intentional emptiness isn't just about looking good—it has a direct impact on user experience and how well people understand your message. A confident design uses white space thoughtfully. It guides the user’s eye. White space creates invisible pathways, leading a viewer from one element to the next in a logical, intuitive order. It improves legibility. Good spacing between lines and paragraphs of text makes it dramatically easier to read and absorb information. No one likes a wall of text. It creates focus. By surrounding a key element—like a button or a headline—with empty space, you’re essentially putting a spotlight on it. It naturally draws attention. It conveys sophistication. Luxury brands are masters of this. They use generous amounts of white space to create a feeling of elegance and premium quality. Take marketing materials, for example. The strategic use of white space on custom business cards can make a simple design feel impactful and memorable, leaving a much stronger impression. Understanding Macro and Micro White Space To really get a handle on white space, you need to look at it from two different perspectives: the big picture and the tiny details. We call these macro and micro white space, and they have to work together to create a design that feels balanced and just plain works . Think of them as two different tools in your designer toolkit, each with a specific job. Macro white space is all about the large, open areas between your major layout elements. This is the space in the margins, the gap between a sidebar and your main content, or the breathing room you leave between paragraphs. It’s a bit like the different rooms in a house; macro space defines the overall structure and guides people from one section to the next, preventing the whole design from feeling cramped and chaotic. The Finer Details Matter On the flip side, micro white space deals with the smaller, more subtle gaps that directly impact how easy your content is to read up close. We’re talking about the space between individual letters ( kerning ), between lines of text ( leading ), and between items in a list or menu. This is the fine-tuning that makes text feel inviting rather than like a dense, intimidating wall. You can have a great overall layout, but if the micro spacing is off, the design will still fall flat. A reader might not consciously register that the line height in a paragraph is perfect, but they’ll definitely feel it when it’s wrong—reading will suddenly feel like a chore. Paying attention to these details is what separates amateur from professional-looking designs, especially in print materials like well-designed brochures for your business . Good design is like a clear window; the user doesn't notice the window itself, only what's on the other side. Effective micro and macro white space create that invisible clarity. Take Google's homepage, for example. It's a masterclass in using macro white space. All that emptiness around the search bar immediately directs your focus and tells you exactly what to do. Then, when you get to the search results, the micro spacing between each link makes scanning for the right information a breeze. To give you a clearer idea, here's a quick comparison of how these two types of white space function. Macro vs Micro White Space at a Glance Attribute Macro White Space Micro White Space Purpose Guides the user's eye, creates structure, and separates content blocks. Improves readability, legibility, and visual hierarchy at a detailed level. Use Cases Margins, padding, gutters, space between paragraphs and major UI elements. Line height (leading), letter spacing (kerning/tracking), space between words. Impact Creates a clean, uncluttered, and organized feel. Prevents cognitive overload. Makes text easier to scan and read. Adds a polished, professional touch. Ultimately, both macro and micro white space are essential. Macro space provides the clean canvas and structure, while micro space ensures the content on that canvas is a pleasure to engage with. The infographic below really drives home the benefits you get when both types of white space are used effectively. As you can see, this isn't just about making things look "pretty." Intentional spacing has a direct and powerful impact on readability, user focus, and the overall quality of your design. How White Space Shaped Modern Design It's funny to think about, but the appreciation for white space didn't just happen overnight. Its journey from being seen as costly, wasted space to a hallmark of elegance marks a massive shift in how we think about design. Early on, especially in print media like newspapers, every single inch of paper was valuable real estate. The main goal was to cram as much information as possible onto a page. This led to those dense, cluttered layouts that can feel pretty overwhelming to look at now. Back then, empty space was just a missed opportunity, not a strategic design tool. All those unmarked areas—like margins and the gaps between columns—were kept as small as possible. The name "white space" actually comes from this print tradition, where the paper itself was the white background. You can dive deeper into its print origins on Wikipedia) to see how far we've come. The Rise of Minimalism Everything started to change with the arrival of modernist design movements, especially Swiss Design. The pioneers behind this style were all about minimalism and clarity. They were the ones who really showed the world that what you leave out is just as critical as what you put in. They proved that giving elements room to breathe with ample white space could guide the viewer's eye, create a clear hierarchy, and make information so much easier to digest. This new philosophy completely flipped visual communication on its head. Suddenly, white space wasn't just empty—it was an active element that could send a powerful message all on its own. White space transitioned from being a simple background to an intentional statement of confidence and focus. It signals that the content is so important, it deserves its own stage. Today, this principle is absolutely everywhere. Think about luxury brands; they use generous negative space to communicate a feeling of premium quality and sophistication. Clean, modern websites feel intuitive because strategic spacing guides you through the interface without you even noticing. This powerful legacy is visible in everything from high-end magazines to large-format designs, like stunning custom wall graphics that can completely transform a room. Understanding this evolution makes one thing clear: using white space isn't just a trend, it's a timeless strategy for effective, beautiful communication. What You Actually Gain From Using White Space Knowing what white space is doesn't really capture its power. The real magic is in what it does . When you learn to wield it effectively, white space stops being just "empty" and becomes one of your most powerful design tools. It's the silent partner that makes everything else on the page work better. The most obvious win is a huge boost in readability and comprehension . Nobody wants to read a wall of text. It's intimidating and exhausting. Strategic spacing gives our brains room to breathe, making information easier to process. It’s not just a feeling, either—the data backs it up. Research shows that simply increasing the space between lines of text can improve reading speed by up to 20% and make the content easier to understand. You can dig into the specifics in the Interaction Design Foundation's research . Creating Focus and a Touch of Class Beyond just making things readable, white space is a master of directing the eye. It works like a spotlight, creating a strong visual hierarchy without needing flashy graphics or loud colors. By surrounding a key element—like a call-to-action button or a critical piece of information—with negative space, you’re basically screaming, "Look here!" White space gives your most important elements the stage they deserve. It tells the user, "Pay attention. This part matters." Finally, generous white space adds an instant feeling of sophistication and professionalism. An uncluttered design feels calm, intentional, and confident, which subconsciously signals quality and builds trust with your audience. It’s no accident that premium brands lean heavily on minimalist layouts. This high-end feel can be applied to anything, from websites to professionally printed flyers that capture attention for your business. Pairing this with other foundational website design best practices creates a truly polished and effective user experience. How to Implement White Space in Your Designs Putting white space into practice isn't about mastering complex tools—it's about a shift in mindset. Instead of seeing empty areas as a void to fill, you need to view them as an active way to guide your audience's eye. The first step is often the hardest: resist the urge to fill every single pixel . You have to trust that the empty space is working just as hard as your content is. A great place to start is with your typography. Small tweaks to micro white space can dramatically improve how scannable your text is. Think about increasing the line height ( leading ) between lines of text and ensuring there’s enough space between your paragraphs. These simple changes stop text from feeling like a dense, intimidating wall. Practical Steps for a Cleaner Layout Once you’ve tackled your text, you can zoom out and focus on the larger structural elements, or macro white space. These adjustments are what define your layout’s rhythm and flow, telling users where to look and what to interact with next. Here are a few actionable techniques to get you started: Increase Padding and Margins: Give elements like buttons, images, and content blocks generous breathing room. This makes each one feel distinct and easier to focus on. Use Grids and Gutters: Laying out your design on a consistent grid system is a game-changer. The empty space between columns, known as gutters, creates a balanced and professional look almost automatically. Apply the Law of Proximity: Group related items closer together and use empty space to separate them from unrelated items. This simple principle creates intuitive visual relationships for the user without you having to say a word. The goal isn't just emptiness; it's clarity. White space is the silent organizer that brings order to your design, making the user's journey effortless and intuitive. In digital design, this clarity has a measurable impact. One recent study found that web pages with strategic white space around call-to-action buttons saw a 25% increase in click-through rates . The same research noted that users stay on well-spaced pages 15-30% longer , proving that thoughtful spacing directly influences engagement. These principles aren't just for screens, either. They apply just as much to physical designs. For a tangible example of how strategic spacing can grab attention in a physical setting, check out some of these captivating window display ideas . Likewise, when you're designing for print, generous spacing on custom online posters can make your message pop from a distance, capturing attention in a busy environment. A few small spacing adjustments can truly transform a cluttered design into a clear and effective one. Answering Your Questions About White Space As you start getting comfortable with negative space, a few questions always seem to come up. Let's tackle them head-on, so you can start using white space with a lot more confidence and a clear purpose. One of the biggest worries I hear is, "Can you have too much white space?" The short answer is yes, but it’s all about context. If the empty space pushes elements so far apart that they lose their relationship, or if the page just feels empty and unfinished, you’ve probably gone too far. It's a balancing act. You're aiming for a design that feels intentional, not just empty for the sake of it. The right amount of white space makes a design feel intentional and focused. Too much can make it feel disconnected and empty. The goal is always clarity, not emptiness. Another common point of confusion is the name itself. Does white space actually have to be, well, white? Not a chance. It’s Not Always White The name is really just a throwback to the old days of print design, when pretty much every page was white paper. In any modern design—digital or print— white space (or negative space ) is simply any unmarked area. It doesn't matter what color it is, if it has a texture, or even if it's part of a background image. It's the breathing room between your design elements. Color Backgrounds: Think of a solid blue background with a single, crisp line of text. All that blue area? That's your white space. Textured Surfaces: A design on a textured canvas or a digital background with a faint pattern still has negative space—it's all the empty parts that give the main elements room to shine. Photography: In a photograph, the soft, blurry background or the clear sky behind a person is also functioning as white space. It’s what pushes your eye directly to the subject. White Space on Mobile Is a Game-Changer Finally, what happens when we move to smaller screens? White space doesn't just matter on mobile; it becomes absolutely critical. On a phone, every single pixel counts. You don't have the luxury of wasted space, so smart spacing is what separates a clean, touch-friendly interface from a cluttered mess. Good negative space around buttons and links is what prevents those frustrating accidental taps. It also helps break up text and images into chunks that are easy to scan and digest, keeping the user from feeling overwhelmed. Without enough breathing room, a mobile design turns into a usability nightmare, fast. Ready to bring your perfectly spaced designs to life? At 4OVER4 , we offer high-quality printing for everything from business cards to large-format banners, ensuring your thoughtful layout makes a powerful impression. Explore our printing services at https://4over4.com .
 story
story Your Guide to Custom Bumper Stickers
Custom bumper stickers are one of the most effective, old-school ways to get a message out there. They turn any car into a moving billboard for your brand, your beliefs, or just a good laugh. They work because they're right in people's line of sight, surprisingly affordable, and—when done right—impossible to ignore. Designing Bumper Stickers That Get Noticed Let's be real for a second. Your bumper sticker has maybe three seconds to make an impression on someone driving behind you. This isn't about making something that looks pretty up close on your screen; it’s about designing for communication in motion. We're going to move past the generic templates and dig into what actually makes a design pop from a distance. The idea here is to give you the strategic thinking you need to create a sticker that doesn't just look good, but actually delivers a message, instantly and clearly. This isn't just a niche hobby, either. The global bumper sticker market was valued at around USD 2 billion back in 2022, and it's only projected to grow. People love personalizing their vehicles, and custom printing has never been more accessible. The Foundation of an Effective Design Before you even touch a color picker or scroll through fonts, you need to nail down your core message. What's the one single thing you want someone to remember after they see your sticker? Is it a website? A brand name? A political jab or a funny observation? Simplicity is your best friend here. A cluttered design is the enemy of readability on the road. Too much text or a bunch of busy images just turns into a frustrating blur at 60 MPH. Think of your sticker as a tiny billboard—the best ones have a single, powerful focal point and just a few words. The Three-Second Rule: Can your message be fully understood in three seconds flat? If not, it’s too complicated. One Core Idea: Don't try to cram your company's entire mission statement onto a 3" x 11" space. Pick one thing and stick to it. Action-Oriented Goal: What do you want the viewer to do ? Laugh? Visit a URL? Remember your name? Every design choice should serve that one goal. Choosing a High-Impact Color Palette Color is the very first thing that catches the eye, and for bumper stickers, high contrast is non-negotiable. This means pairing background and text colors from opposite ends of the spectrum. You have to design for real-world conditions. Your sticker needs to be legible in blinding sunlight, on a gray overcast day, and even through a rain-streaked windshield. Low-contrast combos like light gray on white or dark blue on black will just vanish. Pro Tip: When in doubt, go with the classics. There's a reason road signs and warning labels use them: black text on a yellow or white background is one of the most readable combinations known to man. Here are a few high-contrast pairings that always work: Black on Yellow Black on White Dark Blue on White Red on White White on Black Font Selection for Ultimate Readability Your font choice can single-handedly make or break your design's effectiveness on the road. You absolutely must avoid thin, script, or overly decorative fonts. They might look slick on your monitor, but from 20 feet away, they become an illegible smudge. You want bold, clean, sans-serif fonts . Think Helvetica, Arial, Franklin Gothic—typefaces built for pure clarity. Go as big with the font size as you can without making the design feel cramped. The text is your message; let it be the hero. And if you really want to stand out from the sea of rectangles, think about the shape. A custom die-cut sticker that follows the contour of your design can be a real head-turner. Check out our custom shape diecut collection for some inspiration on how to literally break the mold. By focusing on these fundamentals—a crystal-clear message, knockout color contrast, and a super-readable font—you'll create a bumper sticker that actually does its job. It'll get seen, it'll be understood, and it'll stick in someone's mind long after they've changed lanes. Choosing the Best Materials for Durability A killer design deserves to last. When you're creating custom bumper stickers, the material you pick is probably the single most important factor in how long it will survive out there on the road. It's the difference between a sticker that looks great for years and one that fades, peels, or cracks after just one harsh winter. Think of the material as the sticker's foundation. It has to stand up to everything—UV rays, rain, road salt, you name it. That's why not all sticker materials are created equal, and getting this right from the start is key to making a lasting impression. Why Vinyl Is the Undisputed Champion For anything that lives outdoors, vinyl is the undisputed champion . Forget paper-based stickers; they'd dissolve in the first downpour. Vinyl is a type of plastic, which makes it inherently waterproof and tough enough to handle whatever the road throws at it. Its durability is a big reason the car decal market, a huge slice of the bumper sticker world, keeps on growing. The global market was valued at USD 2.3 billion in 2023 and is expected to climb to USD 3.4 billion by 2032 . People want high-quality, long-lasting ways to personalize their vehicles, and vinyl delivers. This chart breaks down just how different materials hold up over time. As you can see, adding a UV laminate is the ultimate upgrade. It seriously extends the life of your sticker, giving it the best possible defense against the elements. Gloss vs. Matte Finish: A Practical Comparison Once you've landed on vinyl, your next choice is the finish. This is all about aesthetics and performance. Your main options are gloss and matte, and each has its own vibe. High-Gloss Finish: This is that classic, shiny look you probably picture when you think of bumper stickers. A gloss finish makes colors feel more vibrant and saturated, giving your design a real "pop." It's perfect for grabbing attention and making bold graphics stand out. The slick surface also adds a bit of extra protection and is a little easier to wipe clean. Matte Finish: A matte finish gives off a more modern, almost sophisticated feel. It has a non-reflective, satin-like surface that cuts down on glare, which can actually make text easier to read in direct sunlight. This finish is a great choice for designs going for a more understated or elegant look. Let's put it in context: Say you're designing stickers for a high-end car detailing shop. A matte finish would probably align perfectly with that premium brand image. On the flip side, if you’re promoting a loud, colorful summer music festival, a high-gloss finish is going to capture that energetic vibe much better. Bumper Sticker Material and Finish Comparison To help you decide, here's a quick look at how the different options stack up. This table compares the most common material and finish combinations, highlighting what makes each one unique so you can pick the best for your project's durability and visual goals. Feature Standard Vinyl (Gloss Finish) Standard Vinyl (Matte Finish) Reflective Vinyl Best For Bold, vibrant designs that need to pop Understated, modern, and elegant looks Safety, visibility, and 24/7 brand exposure Look & Feel Shiny, reflective, and slick Non-reflective, satin, and smooth Metallic sheen in daylight, brilliant at night Durability Excellent (approx. 3 years) Excellent (approx. 3 years) Superior (engineered for long-term use) Readability High, but can have glare in direct sun Excellent, no glare issues Exceptional, especially in low-light conditions Ultimately, the best choice depends entirely on your design and what you want to achieve. A gloss finish is a fantastic all-arounder, while matte offers a touch of class and reflective vinyl provides a powerful functional benefit. Specialty Materials for Unique Needs While standard vinyl gets the job done for most projects, sometimes you need something with a little extra punch. That's where specialty materials come in. One of the most effective is reflective vinyl . This stuff is engineered with tiny glass beads that bounce light back to its source. In daylight, it looks pretty normal, but at night, it lights up like a beacon when headlights hit it. This is a game-changer for visibility and safety, making it a perfect fit for: Emergency service vehicles Construction or utility company branding Delivery vans that operate after dark Any design where the message has to be seen, day or night If you're looking for versatile branding tools that go beyond just bumpers, it's worth checking out the full range of options. You can learn more about different adhesive vinyls and their applications to see what else is possible for your marketing. Choosing the right material ensures your message not only gets seen but also stands the test of time. How to Get Your Artwork Ready for Perfect Printing Even the most killer design for your custom bumper stickers can fall flat if the print file isn’t set up correctly. This is the single most important step bridging the gap between your digital idea and a real-world, high-quality product. Getting your artwork print-ready from the start saves you from common, costly mistakes that can totally tank the final result. Let's cut through some of the technical jargon so you can prep your files with total confidence. We'll walk through the essentials of resolution, color mode, and the all-important "bleed." Getting these right means the sticker you get in the mail will look exactly like the one you designed on screen. When you get to the 4OVER4 ordering page, you'll see a spot just like this to upload your final artwork file. Having a properly prepared file ready to go makes this part of the process a breeze and prevents any last-minute headaches or surprises. Mastering Resolution for Crisp Details Ever seen a printed image that looked fuzzy or just plain pixelated? Nine times out of ten, that's a resolution problem. Resolution is measured in DPI (Dots Per Inch) , which is exactly what it sounds like: the number of tiny ink dots a printer will lay down in a one-inch line. For websites and screens, a resolution of 72 DPI is perfectly fine, but for print, it’s nowhere near enough. The industry standard for high-quality, professional printing is 300 DPI . If you submit a file with a lower resolution, you're going to get a blurry, unprofessional-looking sticker—no matter how sharp it looks on your monitor. Key Takeaway: Always, always set up your design file at 300 DPI from the very beginning. You can't just increase the resolution of a low-quality image later; it has to be created at the proper resolution from the get-go. Why You Need to Use CMYK Color Mode Another common pitfall is designing in the wrong color mode. Your computer screen, phone, and digital camera all use the RGB (Red, Green, Blue) color model. It works by adding light together to create a huge spectrum of bright, vibrant colors. Here's the catch: professional printers don't use light, they use ink. They operate in the CMYK (Cyan, Magenta, Yellow, Black) color model, which creates colors by subtracting or absorbing light on paper. This is the main reason a design can look incredibly bright on your screen but appear a little more subdued when it's actually printed. To ensure your colors come out as you expect, you must design your artwork in CMYK mode. This gives you a much more realistic preview of the final printed colors and prevents those disappointing, unexpected shifts during production. RGB: Made for digital displays like websites and social media graphics. CMYK: The one and only choice for professional printing projects. Most design software, like Adobe Illustrator or Photoshop, lets you easily set your document's color mode to CMYK. Make this one of the very first things you do when starting a new project. The Secret to a Flawless Edge is Bleed If there's one concept to burn into your memory for perfect printing, it's the bleed . Picture your sticker design with a solid blue background that runs right to the very edge. During production, a massive, highly precise machine will cut each sticker out from a larger sheet of vinyl. But even the best machines have a tiny margin of error, sometimes shifting by a fraction of a millimeter. If your blue background stops exactly at that cut line, any tiny shift will leave an ugly, thin white border along one or more edges. It's a dead giveaway of an amateur setup. A bleed completely prevents this. It's simply an extra margin—we require 0.125 inches (or 1/8") —of your background color or image that extends beyond the final cut line. Think of it as a safety net for the cutting machine. This extra area guarantees that even if the cutter is off by a hair, it's still cutting through your design's color, giving you a clean, professional, full-color edge every single time. For anyone looking to create uniquely shaped stickers, understanding bleed is even more critical. You can see how this concept applies to more complex shapes in our guide to professional die-cutting services . Taking a minute to add a bleed makes a world of difference in the final quality of your custom bumper stickers. A Simple Guide to Ordering Your Stickers You’ve designed a fantastic sticker, picked the perfect material, and prepped your artwork like a pro. Now for the most exciting part: turning that digital file into a real, tangible product you can hold. This is where your vision truly comes to life. Navigating an online ordering system can feel a bit intimidating sometimes, but it doesn't have to be. We’ve designed the 4OVER4 process to be completely straightforward, giving you full control over every last detail of your custom bumper stickers without any guesswork. Selecting Your Sticker Specifications The first part of the process is all about locking in the physical properties of your sticker. This is where you finalize the decisions you made during the design and material selection phases. You'll kick things off by entering your desired dimensions. Whether you’re going for a classic 3" x 11" rectangle or a totally custom die-cut shape, getting this right is key to making sure the final product fits its intended space perfectly. Next up is your material. Here is where you’ll select that durable vinyl we talked about and specify if you want a vibrant high-gloss finish or a more modern, glare-free matte look. Just click on the option that best suits your design’s aesthetic and durability needs. Finally, you'll specify your quantity. Whether you need a small batch of 50 for a local event or thousands for a nationwide campaign, our system is ready to handle it. Remember, ordering in larger quantities often brings down the cost per sticker, so it’s worth planning ahead if you think you'll need more down the road. To make the process of getting your unique designs a breeze, consider optimizing the custom ordering experience . Uploading and Proofing Your Artwork With your specs set, it's time to upload the print-ready file you prepared. Think of this as a critical checkpoint to ensure everything looks exactly as you intended before it heads to the press. Our system accepts common file types like PDF, AI, and PSD. Once your file is uploaded, you’ll be directed to our online proofing tool. This is your chance to give the final green light with complete confidence. Don't rush this step! Take a moment to double-check everything: Confirm that your text is sharp, your colors look right (remembering the CMYK shift), and your bleed is correctly in place. This final review is your best defense against any potential printing errors. The proofing tool shows you a digital representation of your sticker, including the final cut line. This is especially important for custom shapes, as it lets you verify that the die-cut path perfectly follows the contours of your design. Finalizing Your Order with Confidence Once you’re happy with the digital proof, you’ll give your final approval. This sends your design right into our production queue, and your part of the creative process is officially done. The demand for personalized products is surging. The personalized stickers market was valued at USD 4.58 billion in 2024 and is projected to reach an impressive USD 7.99 billion by 2034 . The convenience of online platforms like ours has made it easier than ever for businesses and individuals to create high-quality, custom items. Here’s a quick recap of the key actions you'll take in the ordering process: Specify Dimensions: Enter the exact height and width for your sticker. Select Material & Finish: Choose between options like gloss or matte vinyl. Determine Quantity: Input the total number of stickers you need. Upload Your File: Add your print-ready artwork ( 300 DPI , CMYK, with bleed). Approve Your Proof: Carefully review the digital proof and confirm the cut lines. This streamlined system is designed to put you in control, removing the typical friction points of custom printing. The goal is a smooth transition from design to delivery, leaving you feeling fully informed and excited about the final product. For an even broader look at your options, you can explore the full range of custom sticker printing services we offer. You've got your custom bumper stickers, and they look fantastic. Now for the fun part: getting them on your car so the whole world can see your message. A good application is what makes a sticker go from a cool design to a professional-looking statement that lasts. It's tempting to just peel and stick, but trust me, a few extra minutes of prep work makes a world of difference. Getting it right the first time prevents annoying bubbles, crooked placement, and peeling edges, which helps your sticker stick around for the long haul. The Perfect Application Process Getting that smooth, bubble-free finish is way easier than you think. You don't need a bunch of fancy tools—just a little patience and a couple of things you probably already have at home. The whole point is to get a solid bond between the sticker and your car, with no air or dirt trapped underneath. First, scout out the perfect spot. Look for a smooth, flat, or just slightly curved part of your bumper or back window. Try to steer clear of deep grooves, heavily textured plastic, or any spots where the paint is already chipped or damaged. Those areas can mess with how well the sticker adheres. Here’s a tried-and-true method that works every time: Clean the surface like you mean it. Grab some rubbing alcohol or a simple mix of soap and water and give the area a good wipe-down. This gets rid of any wax, road grime, or oil that could stop the adhesive from working its magic. Just make sure the surface is completely dry before you move on. Use tape to create a hinge (optional, but a great trick). For bigger stickers, this is a lifesaver. Position the sticker exactly where you want it, then run a piece of masking tape along the top edge to hold it in place. This makes sure it doesn't shift around while you're applying it. Apply from the center out. If you used the hinge method, just flip the sticker up, peel off the backing paper, and then slowly lower it back down. For any sticker, the key is to start by pressing down in the middle and working your way out to the edges. Squeegee it down. Grab a credit card or a small plastic squeegee and use it to smooth the sticker onto the surface. Use firm, even pressure and push from the center outwards. This little step is what forces out any trapped air bubbles and guarantees a perfect, full-contact stick. Keeping Your Sticker Looking Vibrant Once your sticker is on, a little bit of care will keep its colors popping and its edges locked down for years. Our high-quality vinyl is built to be tough, but it's not totally invincible against the elements. The biggest thing to watch out for is how you wash your car. Try to avoid blasting the edges of the sticker with a high-pressure washer. That intense spray can get under the edge and cause it to start peeling over time. If you're handwashing, just a gentle wipe over the sticker with a soft cloth or sponge is all it needs. Pro Tip: Stay away from harsh chemical cleaners or abrasive waxes and polishes right on the sticker. They can dull the glossy finish or even start to break down the ink. Good old-fashioned car soap and water is the safest bet. When It’s Time for a Change Sooner or later, you might want to switch things up with a new design or get your car ready to sell. Taking an old sticker off the right way is key to avoiding any paint damage. The secret is to soften up the adhesive before you start pulling. Your best tool for this job is a hairdryer. Gently heat the sticker for about 30-60 seconds , moving the hairdryer back and forth so the warmth spreads out evenly. This will loosen the adhesive's grip just enough. Once the sticker feels warm, use a plastic scraper (or even just your fingernail) to carefully lift one of the corners. From there, peel the sticker back slowly and at a low angle—as close to 180 degrees as you can get. If you feel it fighting you, just hit it with a little more heat. For any sticky residue left behind, a bit of goo remover or rubbing alcohol on a soft cloth will take care of it in seconds. If you're looking for inspiration for your next sticker, you can explore our full range of custom decals and printing options . Got Questions? We’ve Got Answers Stepping into the world of custom bumper stickers for the first time? It's totally normal to have a few questions. From picking the right materials to making sense of some of the printing lingo, getting the details straight is what separates a good project from a great one. We’ve rounded up some of the most common questions we hear to give you clear, straightforward answers. Think of this as the final check-in before you hit "order," making sure you have all the info you need to create a sticker that looks awesome and holds up for years on the road. What Is the Most Durable Bumper Sticker Material? When it comes to durability, one material stands head and shoulders above the rest: vinyl . It's the undisputed champion for any sticker that needs to live outdoors and face the elements. Vinyl is basically a type of plastic, which makes it inherently waterproof, weatherproof, and tough against fading from harsh UV sunlight. This resilience is exactly why it's the industry standard. A well-made vinyl bumper sticker is built to handle years of rain, snow, and road grime without peeling, cracking, or turning into a faded mess. It ensures your message stays vibrant and intact, unlike paper-based stickers that would disintegrate after the first storm. How Can I Make Sure My Text Is Easy to Read? Readability is everything for a message that's literally on the move. To guarantee your custom bumper sticker is legible from a distance, you need to nail two things: font choice and color contrast . First up, go with a bold, clean font. Simple sans-serif typefaces like Helvetica, Arial, or Franklin Gothic are fantastic choices because they don’t have the little decorative strokes (serifs) that can blur together from afar. Steer clear of thin, delicate, or script-style fonts—they become nearly impossible to decipher when you're driving. Next, you need to maximize the contrast between your text and the background. The classic combinations are popular for a reason: they work. Black text on a white background Black text on a yellow background White text on a dark blue or black background These high-contrast pairings cut through visual noise and stay clear in all kinds of lighting, from bright sun to overcast days. Will a Custom Bumper Sticker Damage My Car's Paint? This is a common—and completely valid—concern. The short answer is no, a high-quality vinyl bumper sticker will not damage your car's paint when it's applied and removed the right way. The key is to start with a clean, healthy paint surface that isn't already chipped, peeling, or rusted. The modern adhesives we use are designed to be strong enough to last for years but are also formulated to be removable without taking the paint with them. When it’s time for a change, the process is simple and safe. The secret is to gently warm the sticker with a hairdryer for about 30-60 seconds . This heat softens the adhesive, allowing you to peel the sticker off slowly and cleanly without leaving a mess or harming the paint. What Is a Design Bleed and Why Do I Need It? A "bleed" is a small, extra margin of your design's background that extends beyond the sticker's final cut line. Think of it as a safety buffer for the printing and cutting process. We require a bleed of 0.125 inches (or 1/8") on all sides of your artwork. So, why is it so important? It’s all about preventing an unprofessional-looking white border from appearing on your final sticker. Even the most precise cutting machines can have tiny, microscopic shifts during production. Without that bleed area, any slight misalignment could leave a sliver of unprinted white vinyl showing along an edge. By extending your design into the bleed, you guarantee that the cutting blade slices through solid color, giving you a clean, professional, edge-to-edge finish every single time. It's a small step in file prep that makes a huge difference in quality. Ready to bring your vision to life? At 4OVER4 , we make creating high-quality, durable, and eye-catching custom bumper stickers simple. Explore our options and start your project today .
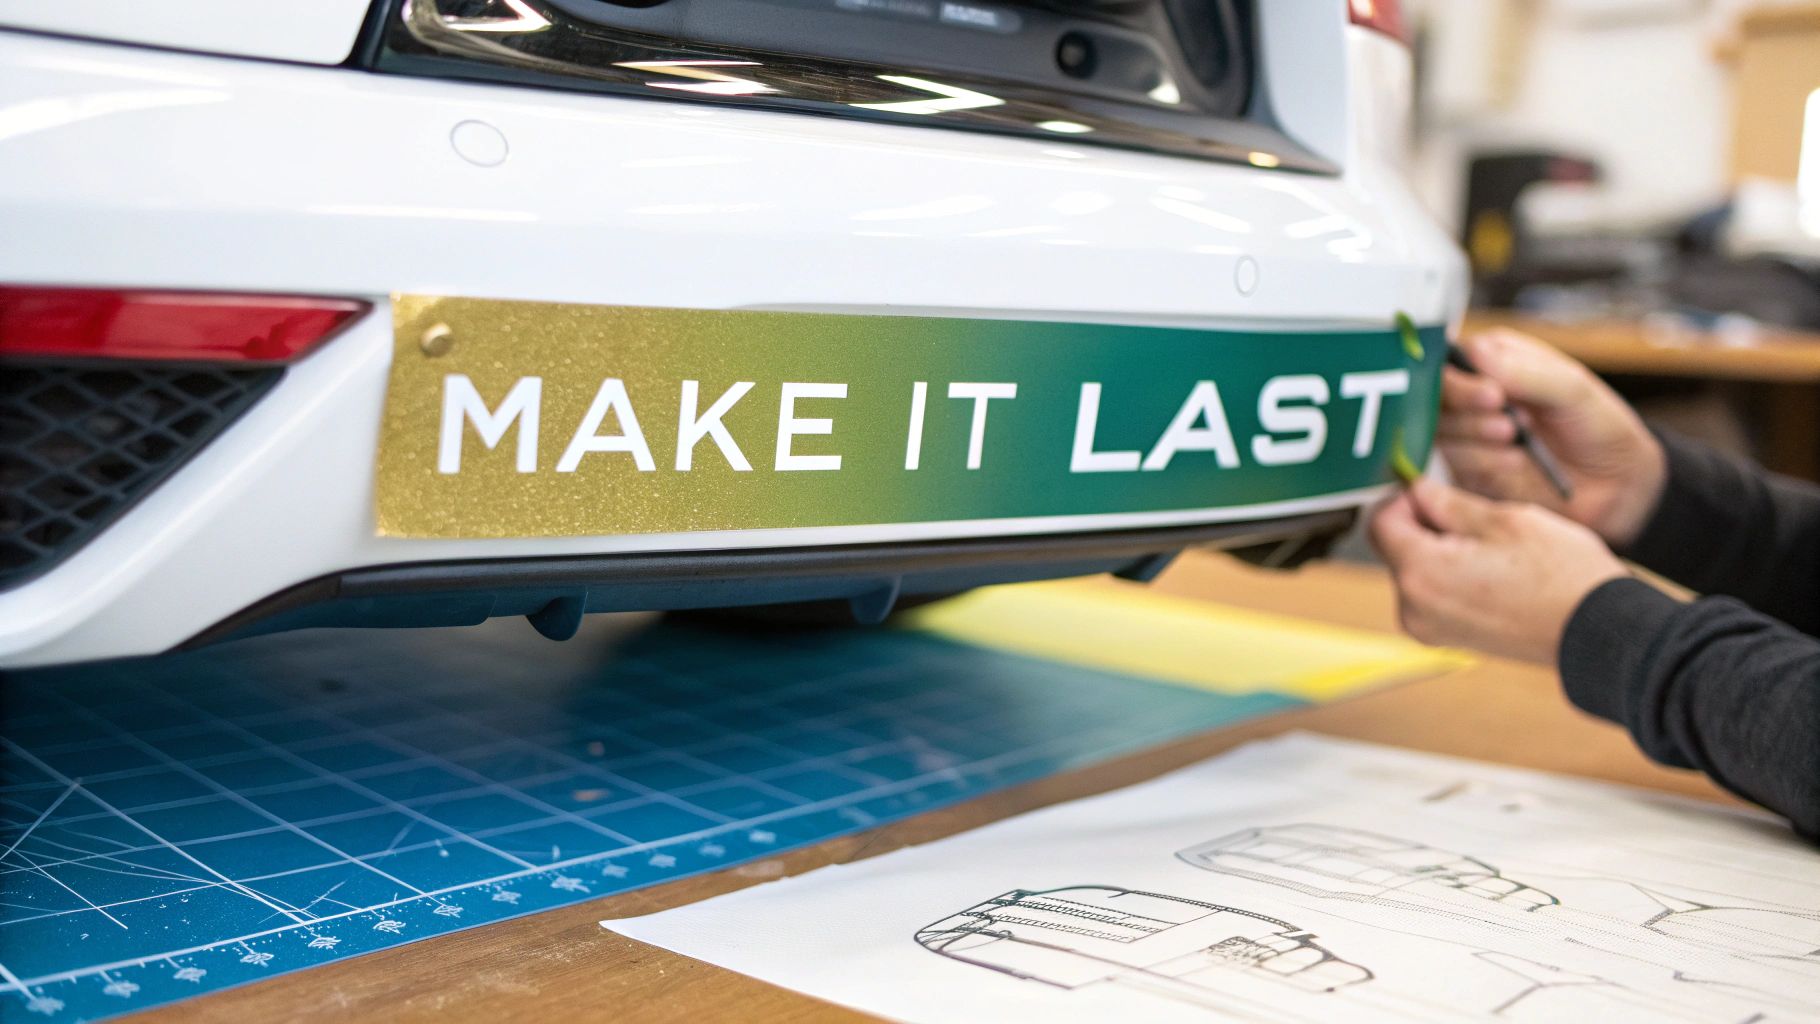 story
story How to Make Bumper Stickers That Last and Get Noticed
Making a bumper sticker comes down to three things: a killer design, a tough material like vinyl, and a solid printing job. You can tackle this at home or hand it off to a pro. The real trick is finding that sweet spot between a design that pops and a message people can actually read from their car. Your Guide to Creating Custom Bumper Stickers Ready to get your message on the road? This guide is your no-fluff playbook for making a bumper sticker that gets noticed for all the right reasons. We'll kick things off by weighing the pros and cons of going DIY versus letting a professional service like 4OVER4 handle the heavy lifting. Think of this as your step-by-step roadmap to success. We'll walk through everything you need to know. Nailing the Design: Learn how to craft a message that’s clear, concise, and commands attention on the highway. Choosing the Right Materials: We’ll explore the options that can stand up to sun, rain, and whatever else the road throws at them. Printing and Application: Get the final steps right for a smooth, bubble-free finish that lasts. Before we dive in, let's look at the two main paths you can take to bring your bumper sticker to life: doing it yourself or hiring a professional. Each has its perks, and the right choice really depends on what you're trying to achieve. DIY vs Professional Printing at a Glance Here’s a quick comparison to help you decide which bumper sticker creation method is right for your needs, budget, and desired quality. Factor DIY Method Professional Service (e.g., 4OVER4) Initial Cost Lower upfront cost (if you own a printer). Higher per-sticker cost, but often cheaper in bulk. Quality & Durability Varies greatly; typically less durable and prone to fading. High-quality, weatherproof vinyl built to last for years. Design Flexibility Limited by your software skills and home printer capabilities. Professional tools, expert assistance, and wider material options. Time Investment High. You handle design, printing, cutting, and application. Low. Just upload your design and place the order. Best For One-off personal projects, prototypes, or temporary use. Marketing campaigns, business branding, merchandise, and long-term use. Ultimately, if you're just making a single sticker for fun, the DIY route can be a great weekend project. But for anything that needs to look polished and endure the elements—like for a business or a campaign—going pro is almost always the better investment. Why Bumper Stickers Are More Popular Than Ever Bumper stickers are so much more than just sticky paper; they’re a classic, powerful way to share a message or show off some personality. And they’re not going anywhere. The global market is expected to jump from USD 1.2 billion to a whopping USD 2.0 billion by 2033. This boom is all about accessibility. Advances in printing have made it incredibly easy for anyone—from small business owners to political activists—to design and print high-quality, custom stickers. You can get more details on these market trends in this comprehensive report. The best bumper stickers are simple, bold, and instantly get their point across. If someone has to squint to read a wall of tiny text, you've already lost them. Aim for clarity at a glance, not a novel on a bumper. Whether you’re testing a new marketing idea for your business or just want to add a unique touch to your ride, knowing the process is half the battle. For those who want that professional finish, exploring the world of custom sticker printing can open up a ton of possibilities. This guide will set you on the right path, no matter which route you choose. Designing a Bumper Sticker That Gets Noticed A great bumper sticker is more than just vinyl and adhesive; it’s a tiny, mobile billboard fighting for attention. For it to do its job, the design has to broadcast its message instantly and clearly—often to someone zipping by at 60 miles per hour. This is where smart design choices really count. The name of the game is radical simplicity. A cluttered sticker is an ignored sticker. Your goal is to boil your message down to its absolute essence. Can someone get the point in three seconds or less? If not, it’s back to the drawing board. This starts with high-contrast color combinations that pop from a distance. Think bold, vibrant pairings like yellow on black, white on red, or a crisp blue on white. These combos are easy to see in all kinds of lighting conditions, from bright sun to a dreary, rainy day. Crafting a Legible Message Typography is your most powerful tool here. The font you pick has to be clean, bold, and incredibly easy to read at a glance. Steer clear of script, super-decorative, or thin fonts—they’ll just blur into an unreadable mess on the road. Stick to well-known, no-nonsense sans-serif fonts like Helvetica, Arial, or Impact. These were designed for maximum clarity, which is exactly what you need. And keep the text to a minimum. A short, punchy phrase will always beat a long sentence. Here's a quick look at the kind of options you'll see on a platform like 4OVER4 to get your project started. The choices you make here for size, material, and quantity are the foundation of your whole project and will directly impact your design's final look and feel. Setting Up Your Design File for Success Once you’ve got a solid concept, setting up your digital file correctly is what separates a professional-looking sticker from an amateur one. The industry standard for print quality is 300 DPI (dots per inch) . Anything less and you risk a blurry, pixelated sticker that just looks cheap. Most online design tools, including the one at 4OVER4, provide templates already set to the right specs. If you're uploading your own graphics or logo, make sure they are high-resolution vector files (.AI, .EPS, .SVG) or large raster images (.PNG, .JPG) to keep things sharp. Pro Tip: Always design in a CMYK (Cyan, Magenta, Yellow, Black) color profile, not RGB. Your screen uses RGB light to display colors, but printers use CMYK ink. Designing in the correct color mode from the start is the best way to prevent any nasty surprises or color shifts when your sticker comes off the press. Don’t forget to think about the shape, either. A standard rectangle is a classic for a reason, but a custom shape can make your design impossible to ignore. A local coffee shop, for instance, could create a sticker shaped like a steaming coffee cup. If you want to create a unique silhouette, you can learn more about how custom shapes are made through professional die-cutting services. It’s a simple choice that can take your design from standard to truly memorable. At the end of the day, a successful bumper sticker design comes down to a few core rules: Keep it simple: Less is always more. Be bold: Use high-contrast colors and clean, beefy fonts. Stay sharp: Always work in a 300 DPI resolution. Think big: Make sure your text is large enough to be read from a car length or two away. By focusing on these practical elements, you’ll create a sticker that not only looks great up close but also nails its delivery where it matters most—out on the road. Choosing the Right Materials for Durability A killer design won't matter if your bumper sticker fades, peels, or cracks after a few weeks on the road. The real secret to creating a statement piece that lasts is choosing the right materials from the get-go. This isn't just an afterthought; it’s a core part of making a bumper sticker that can actually survive out in the wild. The foundation of any quality bumper sticker is its base material, and not all are created equal. You need something that can take a beating from UV rays, rain, road salt, and whatever else the weather throws at it. This is where professional-grade vinyl comes into play. The Power of Weatherproof Vinyl First things first: forget about standard paper-based stickers. For a bumper sticker to have any chance of survival, it absolutely must be printed on weatherproof vinyl . This synthetic material is naturally resistant to moisture and tearing, giving your design a tough canvas to live on. When you're looking at your options, you'll see different finishes like gloss, matte, or even holographic. While those choices affect the final look, the most critical decision is making sure the base vinyl is specifically rated for outdoor use. That one choice is the difference between a sticker that lasts for years and one that turns into a faded, peeling mess after one bad winter. A "water-resistant" label is not the same as a truly weatherproof bumper sticker. A proper outdoor sticker is engineered to handle constant stress—from direct sun to high-pressure car washes—without falling apart. Investing in the right material upfront will save you a world of disappointment later on. Lamination: The Shield Against the Elements While weatherproof vinyl is the essential first layer, the real key to longevity is lamination. This is a clear, protective layer applied right over your printed design, acting as a powerful shield against the elements. Think of it like sunscreen for your sticker. It provides critical UV protection , which is what stops your vibrant colors from fading into a pale ghost of their former self. Lamination also adds a layer of scratch and chemical resistance, protecting the ink from flying road debris, cleaning agents, and minor scuffs. Most professional vinyl stickers are about 3-5 mils thick and have a strong, pressure-sensitive adhesive. Adding that protective laminate can keep the colors looking sharp and the sticker stuck for up to 5 years in outdoor conditions. Adhesives That Stick but Don’t Damage Finally, you have to think about the adhesive itself. You need a bond that's strong enough to hold on at highway speeds but not so aggressive that it strips the paint off when it's time for removal. Professional printers use specially formulated adhesives that strike this perfect balance. They create a secure, long-term bond while still allowing for a clean, residue-free removal down the road. If you want to get into the weeds on different material options, you can explore a wide variety of custom adhesive vinyls to find the perfect combination for your project. Turning Your Digital Design Into a Real-Deal Sticker Taking a design from your computer screen and turning it into a physical, high-quality bumper sticker might seem like a big leap, but with the right online tools, it's actually pretty simple. When you use a service like 4OVER4, the process is designed to be clear and give you total confidence in the final product. Let's walk through the key moments of the process to make sure what shows up at your door is exactly what you envisioned. From File Upload to Final Specs The first real step is getting your design file uploaded. This is where all your prep work—getting the colors and resolution just right—really pays off. For the best results, make sure your file is saved at 300 DPI and uses a CMYK color profile. This little check prevents any nasty surprises, like blurry images or colors that look completely different in print. Once your design is in the system, you'll move on to the fun part: choosing the physical details of your sticker. This isn't something to rush through. Each choice you make here directly impacts how your sticker looks, feels, and holds up over time. Size and Shape: You’ll pick the dimensions that work best for your art. Standard rectangles are always an option, but this is also your chance to get creative with custom die-cutting for a shape that truly pops. Material: Double-check that you've selected a weatherproof vinyl . This is the absolute must-have for any sticker that’s going to live on a bumper. Finish: Your last big choice is gloss or matte. A glossy finish gives your colors an extra bit of life and shine, while a matte finish provides a more subtle, modern look that cuts down on glare. These choices work together to create a sticker that can handle whatever the road throws at it. It’s that combination of durable vinyl, a powerful adhesive, and a protective top layer that gives your bumper sticker its staying power against sun, rain, and everything in between. Your Most Important Job: Reviewing the Digital Proof After you've locked in all your specifications, you’ll be prompted to review your digital proof. Pay attention here, because this is arguably the most critical step in the entire process. The proof is a final preview that shows you exactly how your sticker will look once it's printed—cut lines, colors, and all. Think of this as your last chance to catch anything that's out of place. Are there any typos? Is a critical part of your graphic too close to the edge? Do the colors look the way you expected? It is so much easier (and cheaper) to request a change now than it is after a full batch has been printed and shipped. Approving your digital proof is like signing off on the blueprint for a house. Once you give it the green light, the production process begins, and changes are no longer possible. Take your time and double-check everything. This proof is your ultimate safety net. It’s what ensures you're not met with any unwelcome surprises when you open the box. Placing Your Order To help you keep track of all the little details before you hit that "confirm order" button, I've put together a quick checklist. Run through this table to make sure you've covered all your bases. 4OVER4 Bumper Sticker Specification Checklist Specification What to Choose Pro Tip Resolution 300 DPI This is non-negotiable for a crisp, clear print. Anything lower will likely look pixelated. Color Profile CMYK Your screen uses RGB, but printers use CMYK. Designing in CMYK from the start prevents color shifts. Material Weatherproof Vinyl Select the white vinyl option for vibrant colors and maximum durability against the elements. Shape Standard or Die-Cut Die-cutting can add a huge "wow" factor, but make sure your cut line is clean and simple. Finish Gloss or Matte Gloss makes colors pop and adds protection. Matte offers a modern, glare-free appearance. Proof Approve Digital Proof Zoom in! Check every letter, every line, and every color before you click approve. This checklist is your final sanity check to ensure the sticker you get is the sticker you want. Finally, you’ll select your quantity and any finishing touches. Think about how many stickers you actually need. Ordering in bulk almost always brings down the cost per sticker, which is a huge advantage for businesses, bands, or political campaigns. For a personal project, a smaller run might be all you need. And don't forget about adding a protective layer. You can learn more about how different professional laminating services can shield your design from harsh UV rays and physical scratches. Following these steps carefully takes all the guesswork out of the equation, giving you a smooth path from a simple digital file to a professional-grade bumper sticker that’s ready for the open road. How to Apply Your Sticker for a Flawless Finish You’ve designed a killer sticker, picked the perfect durable materials, and now you’ve got the final product in your hands. This is the moment of truth. A good application is what makes all that effort pay off, but a sloppy job can lead to bubbles, wrinkles, and crooked placement that ruins the whole look. A pro-level finish starts long before the sticker ever touches the car. The absolute key is a spotless surface. Any dust, wax, or road grime will stop the adhesive from getting a solid, lasting grip. To get your vehicle ready, you’ll want to start with a pristine surface. Check out the best methods for a scratch-free car wash if you need a refresher. After it's clean and dry, give the spot a final wipe-down with a lint-free cloth and some isopropyl alcohol. This little extra step gets rid of any sneaky oils and gives your sticker the perfect canvas. Mastering the Hinge Method for Perfect Placement Let’s be honest, one of the biggest fears is slapping the sticker on crooked. The "hinge method" is a classic pro trick that takes all the guesswork out of it and guarantees perfect alignment. Trust me, it’s way more reliable than just trying to eyeball it. Here’s how you pull it off: Position It: With the backing still on, place your sticker exactly where you want it to live. Create the Hinge: Run a strip of masking tape vertically across the center of the sticker, making sure it sticks to both the sticker and the car's surface. This tape is now your hinge. Peel One Side: Lift one half of the sticker—say, the right side—and carefully peel the backing paper off until you get to the tape hinge. Then, just snip that loose backing paper away. Apply and Squeegee: Hold the peeled side away from the surface, keeping it taut. Now, grab a squeegee or even a credit card and start pressing the sticker down. Work from the center hinge outward using firm, overlapping strokes. This controlled approach is your best defense against trapping air bubbles and ensures your placement is dead-on. Pro Tip: Don't rush it. Applying a sticker in direct, hot sunlight can make the adhesive super sticky and tough to handle. Aim for a shady spot on a mild day for the best results. Achieving a Smooth, Bubble-Free Finish Once one side is securely down, you can gently remove the masking tape hinge. Now, lift the other half of the sticker and peel off the rest of the backing paper. Just like before, continue squeegeeing from the center outward. Use consistent pressure to push any air toward the edges. If a stubborn bubble pops up, don’t try to mash it flat. Instead, take a pin and poke a tiny, almost invisible hole right in the middle of the bubble. Then you can gently press the air out with your finger. It's a simple trick that makes a huge difference. And when it's time for a change? Don't just rip it off. Gently heat the sticker with a hairdryer to soften the adhesive. This will let you peel it away cleanly without leaving a sticky mess or damaging your car’s paint. A little patience at the beginning and the end makes all the difference. Got Questions About Making Bumper Stickers? We’ve Got Answers. Even the best-laid plans can hit a snag. When you're figuring out how to make a bumper sticker for the first time, a few questions always seem to pop up. Let's walk through some of the most common ones I hear, so you can move forward with confidence and make sure your project is a home run. "Do I Need Fancy Design Software?" This is probably the biggest hurdle for most people, but the answer is a resounding no. You absolutely do not need to be a graphic designer with a pricey Adobe Illustrator subscription to create a great-looking sticker. While the pros use tools like that, free and web-based platforms like Canva are incredibly powerful and user-friendly. Heck, even our own design tool here at 4OVER4 has templates and features to get you started in minutes. The software isn't the most important part. What really matters are the fundamentals: use a high-resolution file ( 300 DPI is the magic number), choose simple, bold fonts that are easy to read from a distance, and stick to a high-contrast color scheme. As long as you can export your file as a PNG, JPG, or PDF, you're golden. "What’s the Best Material for a Bumper Sticker?" This one’s a no-brainer: weatherproof vinyl . It’s the only real choice for something that’s going to live on the back of a car. This stuff is specifically engineered to take a beating from sunlight, rain, snow, and whatever else the road throws at it for years without cracking, fading, or peeling away. But here’s a pro tip: don’t just stop at the vinyl. Always opt for a protective laminate over the top. Think of it as sunscreen for your sticker. This clear layer provides a crucial shield against UV rays (which cause fading) and protects the ink from scratches, dirt, and road grime. It’s what separates a professional-grade sticker from one that looks ragged after a few months. If you’re interested in similar heavy-duty materials, check out our custom waterproof labels . They’re built with the same kind of durable tech to ensure they last. "Will a Bumper Sticker Mess Up My Car’s Paint?" It's a totally valid concern. The good news is, a professionally printed bumper sticker made with the right adhesive won't damage your car's factory paint. Reputable printers use adhesives that are strong enough to stay put but gentle enough to be removed cleanly. Where people run into trouble is with cheap, low-quality stickers not meant for vehicles, or by trying to just rip a sticker off in one go. Don't do that. The secret to a clean, safe removal is a little bit of heat. Grab a hairdryer and gently warm up the sticker. This softens the adhesive, letting you peel it back slowly and smoothly without leaving gunk behind or, worse, taking paint with it. "So, How Much Is This Going to Cost Me?" The cost can swing pretty widely, and it all comes down to a few key variables. There’s no single price tag, because your final cost depends on: Quantity: This is the biggest factor. The more you order, the cheaper each sticker becomes. Ordering 500 stickers will give you a much, much lower price-per-sticker than ordering just 25 . Size: Pretty straightforward—bigger stickers use more material and ink, so they cost a bit more. Shape: A standard rectangle or circle is the most affordable. If you want a custom die-cut shape that follows the outline of your design, it requires a unique cutting process, which adds to the cost. Material and Finish: Sticking with standard glossy vinyl is your most budget-friendly option. Premium finishes like a matte look or flashy holographic vinyl will bump up the price. For a small run of custom stickers, you might be looking at a few bucks per piece. But if you're ordering a large batch for a marketing campaign or an event, that cost can drop to mere pennies apiece, making them an unbelievably affordable way to get your message out there. Ready to get your own design on the road? At 4OVER4 , we make it simple to create durable, high-quality bumper stickers that look amazing and are built to last. Let’s get your message moving! Visit us at https://4over4.com to get started.
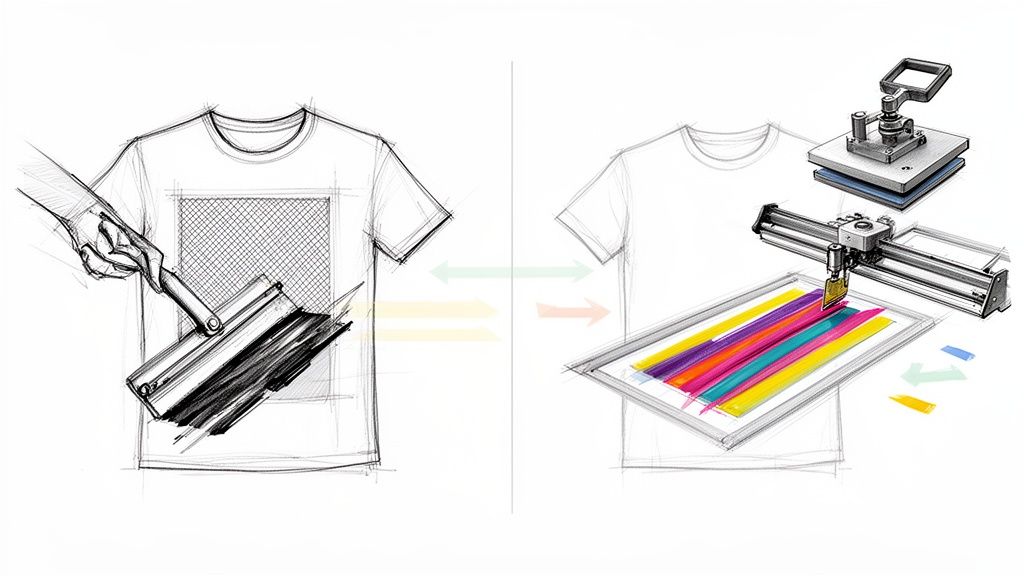 story
story Screen Print Vs Vinyl A Guide to the Best Printing Method
When you're trying to decide between screen printing and vinyl, the choice really boils down to two things: volume and design. If you're ordering a big batch of apparel with a simple, consistent look, screen printing is the undisputed winner for cost and durability . But for smaller, custom jobs or designs with tons of colors and personalization, vinyl's flexibility and speed are just unmatched. Choosing Your Printing Method: A Quick Comparison "Should I go with screen printing or vinyl?" This is one of the first questions people ask when ordering custom apparel or signage. Both methods produce fantastic results, but they're engineered for completely different jobs. Knowing their core strengths is the key to avoiding a costly mistake, like overpaying for a small run or getting a product that doesn't hold up. The main difference lies in the setup and production. Screen printing requires creating a stencil (or "screen") for each color in your design. This involves some upfront cost and labor, but it becomes incredibly efficient and cost-effective as your order size grows. Vinyl, on the other hand, is a digital process with almost no setup, making it perfect for one-offs or small batches. Quick Decision Matrix: Screen Print Vs Vinyl If you're in a hurry, this table will help you quickly match your project needs to the right printing method. Factor Choose Screen Printing If... Choose Vinyl If... Order Size You need 25+ identical items (like event shirts or staff uniforms). You need just 1-24 items or pieces with personalization (like prototypes or team jerseys). Design Complexity Your design has 1-4 solid colors and no gradients. Your design is full-color , photographic, or has intricate, fine details. Durability You need a long-lasting print that feels soft and can handle countless washes. Customization is the priority; the print sits on top of the fabric and may not last as long. Cost Your goal is the absolute lowest cost per item on a bulk order. Your priority is avoiding setup fees for a small, custom job . This practical divide is backed by market data. The global screen printing market is on track to hit around USD 11.92 billion by 2030 , with textiles making up a massive 48.16% of that in 2024. That growth is all about bulk orders for promotional custom t-shirts and uniforms . Meanwhile, the printed vinyl market is estimated at about USD 9.53 billion in 2024 , and it thrives on custom signage and smaller, more detailed garment jobs. If you want to dive deeper, you can explore more insights about the printed vinyl market growth on grandviewresearch.com . How Each Printing Process Actually Works To really get a handle on the screen print vs. vinyl debate, you have to understand how these two methods actually work. One is an old-school, hands-on craft that’s been perfected over centuries, while the other is a child of modern digital tech. The way they’re made is the reason for the big differences in cost, feel, and what jobs they’re best suited for. This fundamental split is why screen printing absolutely dominates bulk orders and vinyl is the go-to for custom, small-batch jobs. When you see the labor involved, it starts to make sense why a quote for the same design can be worlds apart between the two. The Screen Printing Workflow Screen printing is a classic, analog process where ink is pushed through a stenciled mesh screen right onto the product. Think of it like a highly refined stencil. It takes a good bit of prep work to get started, but once you’re set up, you can crank out prints incredibly fast. If you want to see just how much craft goes into it, you can explore the step-by-step process of screen printing at home and get a feel for the details. Here's the rundown of the basic steps: Creating the Screen: First, a mesh screen gets coated with a light-sensitive emulsion. Your design is printed in solid black on a clear film, placed on the screen, and then blasted with bright light. Washing Out the Stencil: The light hardens the emulsion everywhere except where your black design blocked it. You take the screen to a washout booth, and the soft, unexposed emulsion rinses away, leaving a perfect stencil of your design in the mesh. Printing and Curing: The screen is laid over the t-shirt (or whatever you're printing on), and a squeegee is used to pull a layer of ink across it, pushing the ink through the stencil. If your design has multiple colors, you need a separate screen for each one. Afterward, the item goes through a big conveyor dryer to cure the ink and make it permanent. The Vinyl Application Process Vinyl is a completely different ballgame—it’s a digital process that’s much more agile for one-offs or designs with a ton of complexity. You’ll mainly see two types: Heat Transfer Vinyl (HTV) for apparel and fabrics, and self-adhesive vinyl for hard goods like signs, windows, and cars. Key Takeaway: At its core, vinyl application is a high-tech sticker process. The design isn't printed onto the item. It’s cut from a sheet of colored material and then applied to the surface. The typical workflow for a vinyl job looks like this: Cutting: You send your digital design file from a computer to a vinyl cutter (also called a plotter). This machine has a tiny, precise blade that zips around and cuts your design into a sheet of colored vinyl, but not through the backing paper. Weeding: This is the manual part. You have to peel away all the excess vinyl that isn't part of your design. For intricate designs, this can be painstaking work, which is why it's called "weeding." Application: For HTV on a shirt, the weeded design is placed on the garment and pressed with a heat press, which activates the adhesive and bonds it to the fabric. For signs or decals, you might want to look into the versatility of different adhesive vinyls that are applied directly to hard surfaces. Comparing Cost, Durability, And Final Appearance The real heart of the screen print vs. vinyl debate comes down to three things that directly impact your budget and brand: cost, how long the design will last, and what the final product actually looks and feels like. These are the pillars that should guide your decision, ensuring you get the best value and quality for your project. One method is built for economies of scale, while the other shines with predictable pricing on smaller, more custom jobs. This isn't just about which one is cheaper overall, but when each becomes the smarter financial choice. Getting this right is key to maximizing your investment, whether you're ordering five custom jerseys or 500 t-shirts for a big event. The Economics Of Scale Screen printing comes with a higher upfront setup cost. There’s no getting around the fact that creating and aligning screens for each color in your design takes time and resources. This makes it a tough sell for just a single shirt. However, once that setup is done, the cost per shirt plummets with every additional piece you print. It’s what makes screen printing incredibly cost-effective for bulk orders. On the flip side, vinyl—specifically heat transfer vinyl (HTV)—has almost zero setup cost but a steady material and labor expense for every single item. This makes it the undisputed winner for small runs, one-off prototypes, or personalized apparel. When you look at the cost-per-impression, screen printing holds a clear advantage once you get above a few dozen items. The initial setup cost can make up 40–60% of the total job labor on an order under 25 pieces. But that same cost drops to less than 10% of the unit cost once you're printing over 250–300 garments. Heat transfer vinyl has a nearly flat cost-per-unit, making screen printing 20–40% cheaper on any run of 100+ identical items. Durability And The Test Of Time How long will your design hold up? This is a major point of difference, and for apparel, screen printing generally takes the crown. The plastisol ink used in screen printing actually soaks into the fabric's fibers a bit during the heat-curing process. It essentially becomes part of the shirt, giving you a finish that can handle dozens—if not hundreds—of washes without cracking or fading away. Vinyl is a different animal. It's a layer of material that sits on top of the fabric, held on by a heat-activated glue. While high-quality vinyl is certainly tough, it’s more likely to peel or crack over time, especially if it's not cared for properly or gets blasted with high heat in the wash. For items that aren't laundered often, like signage, adhesive vinyl is exceptionally durable. For more on creating signage that lasts, take a look at our guide on printing vinyl banners . Final Look And Feel The final appearance is about more than just what you see; it’s about the tactile experience and how the design feels on the product. Screen Printing: This method gives you a soft, breathable finish that you can barely feel on the shirt. The ink stretches and moves with the fabric, so the garment keeps its natural comfort and drape. It's the go-to for any retail-quality apparel where a "soft hand feel" is a top priority. Vinyl: This produces a sharper, often bolder look with incredibly crisp edges. However, it also creates a distinct, less breathable layer sitting on the fabric. While it’s perfect for the clean, sharp look of athletic jerseys or vibrant, multi-layered graphics, it can sometimes feel stiffer and heavier than a screen-printed design. Navigating Design Complexity And Color Options Your creative vision is a huge factor in the screen print vs. vinyl debate. One method is built for bold, punchy colors, while the other handles endless detail and photos with ease. For designers and brand managers, this is a make-or-break comparison. Screen printing is the undisputed champ of spot color printing . The process uses pre-mixed inks to nail specific Pantone colors, giving you incredibly vibrant, solid, and accurate shades that really pop, especially on dark fabrics. The catch? Each color needs its own screen. This setup makes screen printing perfect for designs with one to four solid colors. Once you start adding more, the setup costs and labor stack up fast, making it a poor choice for photorealistic images or designs with subtle color fades. Handling Intricate Details And Full-Color Graphics This is where vinyl, especially modern printable vinyl, really comes into its own. Since it's a digital process, vinyl can reproduce just about any design you can cook up on a computer. We're talking everything from complex logos with fine lines to full-color photographs with seamless gradients. When your design needs photographic realism or intricate, multi-color elements, vinyl is almost always the way to go. It completely skips the color separation and screen setup of screen printing, giving you total design freedom without paying a penalty for complexity. This makes it ideal for small runs of highly detailed merch or one-off custom pieces. While screen printing can manage some detail, tiny text or thin lines can get lost as the ink bleeds slightly into the fabric—a little quirk known as "dot gain." Vinyl, being a precision-cut material, holds a crisp, sharp edge for even the most delicate designs. Here's a quick guide for designers: Choose Screen Printing for: Bold logos, text-heavy designs, and graphics with a limited, solid color palette. Think classic band tees or corporate logos. Choose Vinyl for: Full-color photos, artwork with gradients and shading, and designs with extremely fine, detailed linework. This is your go-to for custom photo gifts or intricate branding. Basically, if your design can be broken down into a few distinct color layers, screen printing delivers unmatched vibrancy and longevity. But if your artwork depends on a full spectrum of color and detail, the power of modern digital printing through vinyl is unbeatable. Let your design's complexity be your guide, and you'll end up with a final product that perfectly captures your original vision. Matching The Method To Your Project Use Case Knowing the technical specs of screen printing and vinyl is one thing, but figuring out which one actually works for your project is where it really counts. The best choice always comes down to the specifics. Once you look at a few real-world situations, you can move from theory to practice and pick the method that nails your goals for cost, look, and longevity. Let's walk through a few common business scenarios. This will help clear up any guesswork and make sure what you get is exactly what you wanted. Large-Scale Event Merchandise Picture this: you need 500 t-shirts for a big corporate event or a music festival. Every single shirt gets the same two-color logo on the front. In this case, screen printing is the undisputed champion . Yes, there's an initial setup cost to create the two screens, but when you spread that cost across hundreds of shirts, it becomes tiny. The cost per shirt drops way below what you'd pay for vinyl, and once the press is running, production is incredibly fast. Plus, the ink becomes part of the fabric, giving you a durable, soft-to-the-touch print that holds up wash after wash—a total must for quality merch. Custom Team Jerseys And Prototypes Now, let's flip the script. You're outfitting a local basketball team and need 15 jerseys . They all need the team logo on the front, but each one also needs a unique player name and number on the back. This is a textbook job for Heat Transfer Vinyl (HTV) . Trying to make a separate screen for every player's name and number would be outrageously expensive and slow. With vinyl, each personalization is just a different file sent to the cutter. It's a nimble, cost-effective process for small batches and perfect for handling unique details on every item. The bold, sharp look of vinyl is also a great fit for athletic gear. Getting the hang of different printing techniques is key when you're designing unique apparel, like these popular graphic cat tees . Key Insight: The real difference isn't just the tech—it's scalability. Screen printing is built for volume and repetition. Vinyl shines when it comes to customization and small-run flexibility. Your order size and need for personalization are the two biggest factors in your decision. Durable Vehicle Graphics And Signage But what if you're not making apparel at all? Let's say you need to brand a fleet of company vehicles with your logo or create a vibrant storefront display. When you put screen print vs vinyl head-to-head for things that aren't fabric, adhesive vinyl wins by a landslide. Adhesive vinyl is engineered for exactly this. It’s made to be weather-resistant, UV-stable, and tough enough to handle years of sun and rain without fading or peeling. It produces brilliant, full-color graphics with crisp edges that look sharp and professional on surfaces like metal, glass, and plastic. For businesses aiming to make a big visual splash, custom window graphics can open up a world of new marketing avenues. Screen printing just isn't built for these kinds of one-off, large-format jobs on hard surfaces. When you match your project's needs to the right method's strengths, you're guaranteed to get the best result every time. How To Make Your Final Decision So, you've seen how screen printing and vinyl stack up on cost, durability, and design. Choosing between them really just boils down to the specific needs of your project. The best way to land on the right choice is to ask a few straightforward questions about what you're trying to accomplish. Your answers will point you directly to the smartest, most cost-effective solution. Before you pull the trigger on an order, run through this quick mental checklist. It will clear up any confusion and ensure your investment is a wise one. Your Final Project Checklist What's my total quantity? If you need more than 25 identical pieces , screen printing is almost always the way to go. Its economy of scale really starts to pay off. For anything less than that, vinyl is going to be your most cost-effective friend. How complex is the design? Got a bold, simple graphic with one to four solid colors? Screen printing will deliver an unmatched vibrancy. But for full-color photos, smooth gradients, or designs with tiny, intricate details, vinyl is the clear winner. What's my top priority? If maximum durability and a soft, breathable feel are non-negotiable, you want screen printing. If you need a super-fast turnaround, easy personalization for names or numbers, or cool special effects like glitter, then vinyl's flexibility is what you need. What fabric am I printing on? Screen printing is the gold standard for cotton and cotton blends. Vinyl, on the other hand, is much more versatile and works great on a wider range of materials, including polyester, nylon, and those tricky heat-sensitive performance fabrics. Final Recommendation: Honestly, it almost always comes down to two things: your order size and your design's complexity. A large batch of simple, identical shirts screams screen printing. A small run of detailed or personalized gear is a perfect job for vinyl. This decision tree helps visualize the main questions that will guide you to the right decoration method for your project. The flowchart just reinforces the core idea: big, simple orders are built for screen printing, while personalized or complex designs are a job for vinyl. Frequently Asked Questions When you're trying to decide between screen printing and vinyl, a few practical questions always seem to pop up about ordering, materials, and how long everything takes. Getting straight answers is the key to picking the right method for your project and avoiding any expensive do-overs. Here are some of the most common queries we hear. Which Method Is Better For Different Fabric Types? Screen printing really shines on natural fibers. Think 100% cotton and cotton blends. The ink sinks into the material and bonds with it, creating a design that's soft, breathable, and feels like it’s part of the shirt itself. On the flip side, Heat Transfer Vinyl (HTV) is usually the better bet for synthetic fabrics like polyester and nylon. Certain types of vinyl are specifically made to stretch and stick to these technical fabrics, which is why HTV is the go-to for performance wear and athletic apparel where you need that flexibility. How Should I Care For Printed Garments? Screen-printed apparel is tough. You can generally wash and dry it with the rest of your laundry without much fuss. For the absolute best results and longevity, we recommend washing your items inside out in cool water. Vinyl-printed garments need a little more TLC. Always wash them inside out in cold water, and either tumble dry on a low setting or hang them up to air dry. High heat from a dryer is vinyl's enemy—it can weaken the adhesive over time and lead to cracking or peeling. Pro Tip: Never, ever iron directly on a vinyl graphic. If you need to get wrinkles out, turn the garment inside out and use a low heat setting to keep the design looking sharp. What Is The Turnaround Time For Each Method? For smaller orders, vinyl is almost always faster. The setup is completely digital, so a printer can get a design cut and pressed in a remarkably short amount of time. Screen printing has a more involved setup process—you have to create the screens, mix the inks, and get the press ready. But once it's up and running, it's incredibly fast for printing large quantities. That initial time investment pays off big time on bulk orders, making it far more efficient. At 4OVER4 , we offer a huge range of custom printing solutions to bring any brand's vision to life. Whether you need thousands of vibrant, screen-printed shirts for a big event or a few highly detailed vinyl graphics for a special project, we have the expertise and equipment to deliver incredible quality every single time. Explore our full range of printing services at https://4over4.com and let's get started.
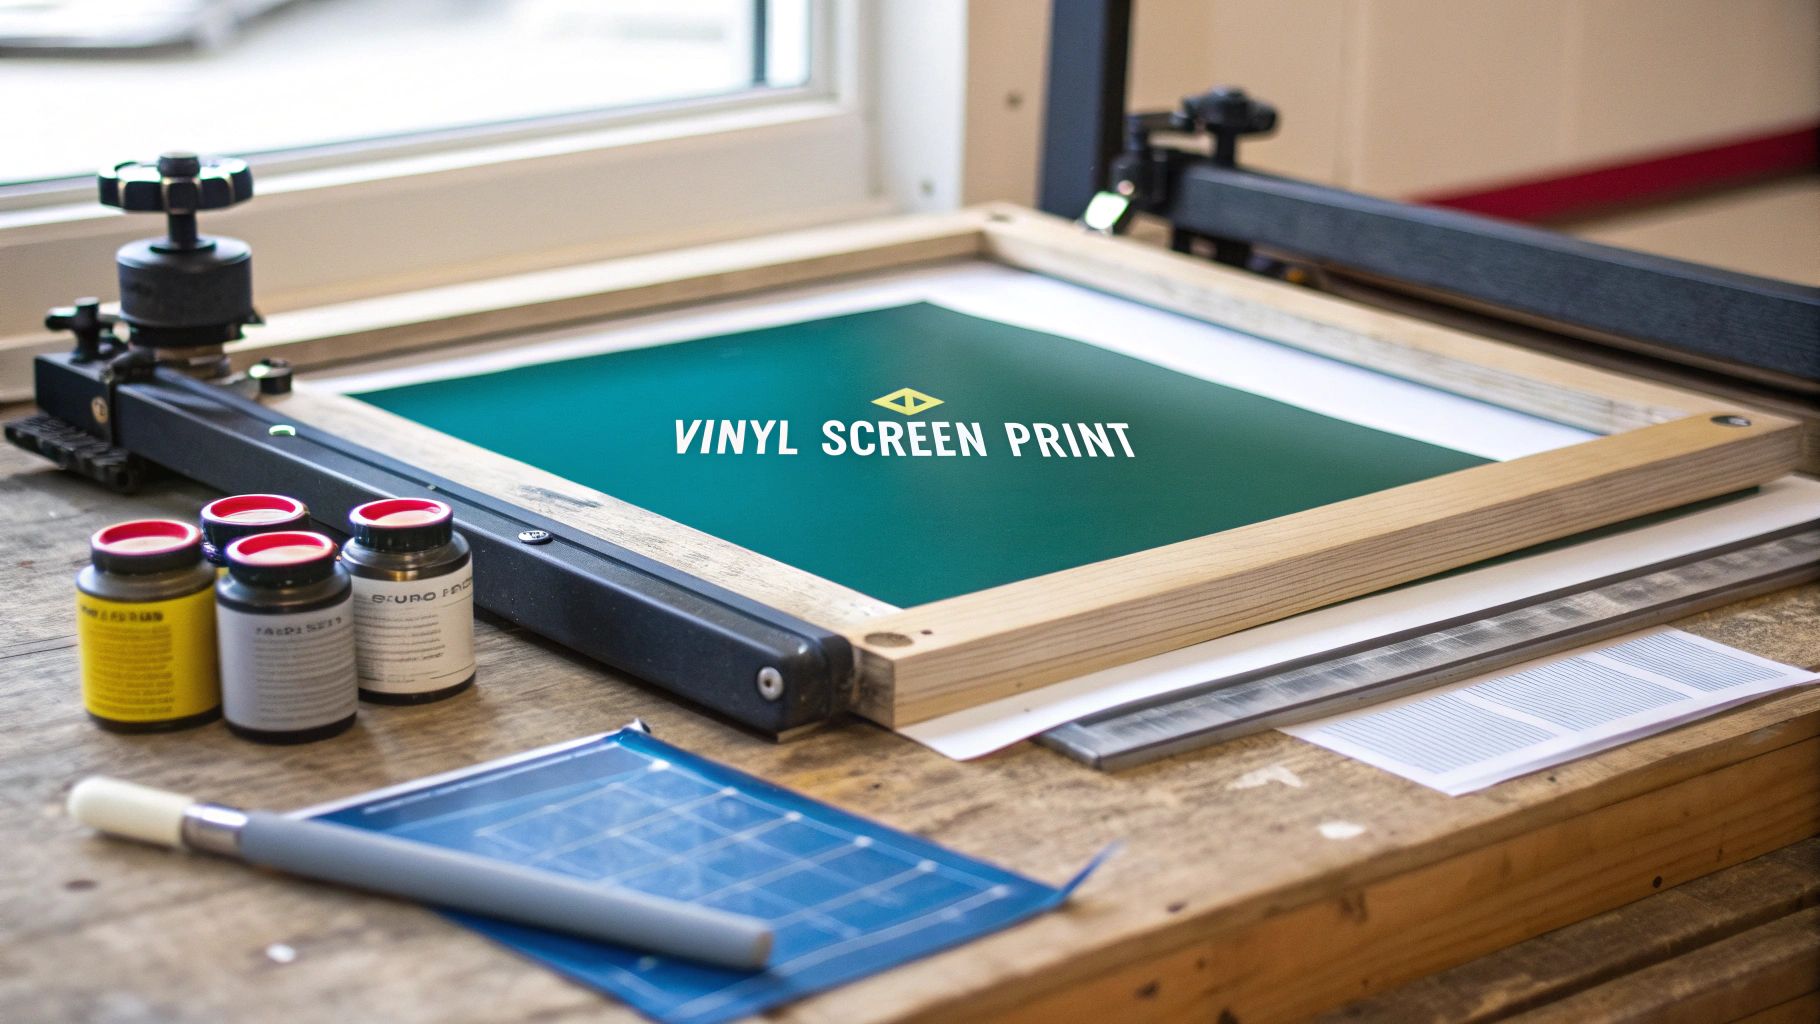 story
story Screen Printing Using Vinyl Your Complete DIY Guide
If you've ever found the idea of traditional screen printing a bit much, you're definitely not alone. The whole process of coating screens with photo emulsion, burning designs in a darkroom, and washing it all out with special chemicals can feel like a huge hurdle. Screen printing with vinyl is the perfect workaround. It’s a straightforward method that swaps out the messy, chemical-based photo emulsion for an adhesive vinyl stencil cut by a machine like a Cricut or Silhouette . This approach is fast, affordable, and incredibly accessible , making it a fantastic option for hobbyists and small businesses looking to create pro-quality gear without a dedicated darkroom. Why Vinyl Is Your Secret Weapon for Screen Printing The vinyl method completely sidesteps all the complex parts of traditional screen printing, giving you a much more direct path from a digital design to a finished print. For anyone already comfortable with a craft cutter, this is a total game-changer. Instead of a multi-step chemical process, you just cut your design from adhesive vinyl, stick it onto your screen, and you're ready to print. It’s the perfect setup for small-batch projects—think custom t-shirts for a family reunion, tote bags for a local event, or launching your first apparel brand right from your home studio. So, What Are the Real Advantages? The appeal of using vinyl stencils really boils down to a few key benefits that resonate with both crafters and entrepreneurs: Speed and Simplicity: You can go from a finished design file to a print-ready screen in less than an hour. There’s no waiting for emulsion to dry or dealing with exposure times. Cost-Effectiveness: Forget about buying emulsion, scoop coaters, exposure units, and washout chemicals. Your main costs are the screen, ink, and a sheet of adhesive vinyl. Precision and Detail: A good vinyl cutter can produce incredibly sharp, crisp lines that result in professional-looking prints. This is great for detailed text and intricate graphics that would be a real challenge for a beginner using traditional methods. This accessible approach is opening the door for more creators to jump into the custom apparel market. And it’s a big market. The custom screen printing industry is a powerhouse, projected to hit a market size of $9.2 billion by 2025 , with garment printing making up more than half of that. Vinyl Stencil Method vs Traditional Emulsion To put it in perspective, let's break down the key differences between the two methods. While traditional emulsion is the industry standard for large-scale production, vinyl offers a level of flexibility and ease that's hard to beat for smaller projects. Attribute Screen Printing with Vinyl Traditional Emulsion Method Setup Time Very fast (under 1 hour) Slow (several hours, includes drying) Equipment Screen, vinyl cutter, vinyl, ink Screen, emulsion, exposure unit, ink Best For Small batches, prototypes, one-offs Large production runs (50+ items) Detail Level High, limited by cutter precision Very high, can capture fine details Reusability Stencil is typically single-use Screen can be reused hundreds of times Cost Low initial investment Higher initial investment Learning Curve Easy, especially with cutter experience Moderate to difficult Each method has its place, but for getting started quickly and affordably, the vinyl stencil technique is a clear winner. When Does Vinyl Really Shine? This technique is at its best in situations where you need flexibility and a quick turnaround. It's the perfect choice for one-off prototypes, limited edition runs, and projects where designs change often. For example, if you're testing new t-shirt designs for your online store, using vinyl lets you create a few samples without committing to a permanent, emulsion-coated screen for each one. It's also a fantastic way to learn the fundamentals of screen printing—like squeegee pressure, ink consistency, and registration—without the added variables of emulsion. Once you've nailed the printing process itself, making the jump to traditional methods for larger production runs feels like a much smaller step. You can find everything you need to get started, including a wide variety of material options, by exploring a comprehensive vinyl collection. Getting Your Screen Printing Gear Together Jumping into screen printing with vinyl doesn’t mean you need to rent out a warehouse or drain your bank account. Your starting toolkit is actually pretty lean, focusing on a few core pieces that do all the heavy lifting. Think of it like gathering ingredients before you start cooking—having the right stuff on hand makes everything go smoother. We'll break down the essentials into four key areas: the screen, the vinyl for your stencil, the ink, and the squeegee you'll use to pull the print. My goal here is to help you pick the right gear from the get-go, so you can sidestep those classic beginner mistakes and invest in tools that will serve you well. The Foundation: Your Screen and Frame The screen is the absolute heart of your setup. It's simply a fine mesh fabric stretched super-tight over a frame, which is usually made of wood or aluminum. Even though the old-school term is 'silkscreen printing' because they used to be made of silk, today's screens are almost always made from durable polyester threads. If you're curious about how this all got started, the history of screen printing on Wikipedia is a great rabbit hole to go down. The most important decision you'll make here is the mesh count , which is just a fancy way of saying how many threads there are per inch. 110 Mesh Count: This is your workhorse for printing on apparel. The openings in the mesh are bigger, which lets more ink flow through. That's exactly what you want for a nice, bold, opaque print on t-shirts and hoodies. 160 Mesh Count: A solid all-rounder. It strikes a great balance, holding more detail than a 110 screen but still letting enough standard apparel ink through to get good coverage. 230 Mesh Count or Higher: Save these screens for printing on smooth, flat surfaces like paper, cardboard, or wood. The super-fine mesh lays down a thinner, crisper layer of ink and can capture really sharp details. Trying to push thick t-shirt ink through this can be a real struggle, though. For your first screen, you can't go wrong with a 110 mesh count aluminum frame . They're durable and perfect for starting out. The Stencil Makers: Vinyl and Transfer Tape This is where the magic of the vinyl stencil method really shines. You'll need a good quality adhesive vinyl to cut your design and some transfer tape to get it from the vinyl backing onto your screen. Pro Tip: Go for permanent adhesive vinyl every time (think Oracal 651 ). Don't even bother with the removable stuff. The stronger glue on permanent vinyl creates a much better seal against the screen mesh, which is your number one defense against ink bleeding under the stencil and giving you fuzzy, ruined prints. The transfer tape is just as crucial. You want a medium-tack tape—strong enough to lift your design cleanly off its paper backing but not so sticky that it refuses to let go when you're trying to apply it to the screen mesh. Choosing Your Color: The Right Ink In the screen printing world, you'll mainly hear about two types of ink: water-based and plastisol. They each have their own quirks and benefits. Ink Type Best For Feel on Fabric Curing Method Water-Based Beginners, paper, light-colored fabric Soft, breathable, soaks into the fibers Air-dries or can be heat set with an iron Plastisol Dark fabrics, pro-level apparel Thicker, vibrant, sits on top of fabric Must be heat cured ( 320°F / 160°C ) If you're just starting, water-based ink is way more forgiving . It's a breeze to clean up with just water and is generally less of a headache. Plastisol, on the other hand, gives you incredibly bright, opaque colors, especially on dark shirts, but it absolutely must be heated to the right temperature to cure properly. The Final Pieces: Squeegee and Substrate The squeegee is what you'll use to push the ink through your stencil and onto your item. Find one with a sharp, flat edge for the cleanest prints. The hardness of the rubber blade, measured in durometers, is also important. A 70-durometer squeegee is the versatile industry standard and will work perfectly for almost any project you can dream up. And finally, you need a substrate—that's just the item you're printing on! It could be a blank cotton tee, a stack of posters, or a canvas tote bag. As you get more adventurous, you might even explore specialized techniques like custom die-cutting for unique shapes to really make your products stand out. Creating and Applying Your Perfect Vinyl Stencil This is where the magic happens—turning your digital design into a physical stencil that will define your print. Getting the artwork prepped, cut, and applied to your screen flawlessly is the absolute foundation of this entire method. Nail this part, and you're setting yourself up for a sharp, professional-looking final product. The whole process is pretty straightforward once you get the hang of it. We'll walk through it step-by-step, and I’ll share a few hard-won tips to help you skip the common frustrations and get a perfect stencil every single time. Prepping Your Design for a Vinyl Cut Before you even touch your Cricut or Silhouette, stop and take a hard look at your design. Not all graphics are vinyl-friendly right out of the gate. Designs with super-fine lines or tiny, floating details can be a nightmare to weed and might not hold up against the ink. Think bold and connected . If your design has any "islands"—those isolated pieces inside larger shapes, like the center of an 'O' or an 'A'—you'll need to add bridges . These are just tiny connector lines that keep those inner pieces attached to the main stencil. Forget to add them, and the centers will fall right out when you weed the vinyl, leaving you with a solid blob instead of a letter. The other non-negotiable step is to mirror your image in your design software. This feels backward at first, but it's crucial. Here’s why: You're applying the vinyl stencil to the bottom of the screen (the side that touches the fabric). You're pushing ink through from the top of the screen (the well side). By mirroring the design on the bottom, it prints right-side-up on your shirt or paper. Trust me, forgetting to mirror your design is one of the most common (and frustrating) beginner mistakes. It’s a single click that saves you from a whole lot of wasted materials. This diagram shows how the key players—the screen, vinyl, and ink—work together in this process. As you can see, the vinyl is what does all the heavy lifting, creating that crisp barrier that controls exactly where the ink can pass through the screen mesh. Cutting and Weeding Your Vinyl Stencil Once your design is prepped and mirrored, it’s cutting time. Fire up your machine's software (like Cricut Design Space) and choose the right material setting. For a workhorse vinyl like Oracal 651 , the "Premium Vinyl" setting usually does the trick. Just make sure your blade is clean and sharp to get the cleanest cuts possible. After the machine works its magic, you'll start weeding —the process of removing all the vinyl you don't want to print. You're creating a negative space for the ink to pass through, so you'll be pulling away the parts of your actual design. A Game-Changing Weeding Tip: Instead of weeding the design on its flimsy paper backing, try weeding it after it’s on the screen. Intricate designs are notorious for tearing when you weed them on the backing. Applying the entire cut sheet to your screen first gives you a super stable surface to work from. Here's how that works: Apply transfer tape over your entire cut vinyl sheet. Peel the vinyl and transfer tape combo away from the paper backing and stick the whole thing onto your screen. Then, you can use your weeding tool to pick out the design pieces directly on the mesh. The key is to be gentle—pull across the vinyl, not down into the screen. Flawless Stencil Application on Your Screen Your final mission is to get that vinyl onto your screen without any bubbles or wrinkles. A smooth, perfectly adhered stencil is what stands between you and a blurry, ink-bled mess. Start with a screen that’s completely clean and dry. Position your vinyl (with the transfer tape still on) onto the bottom side of the screen mesh—the flat side. Once you like the placement, start pressing it down from the center and working your way out. This helps push any trapped air to the edges instead of getting it stuck in the middle. Next, grab a squeegee or scraper tool and burnish the vinyl firmly onto the mesh. Don't be shy here. This step is what creates that tight seal. Application Process Checklist Place the Design: Position your vinyl and transfer tape on the flat, bottom side of the screen. Burnish from the Center Out: Use a squeegee to firmly press the vinyl into the screen mesh, forcing out any air pockets. Focus on the Edges: Pay extra attention to all the tiny inside and outside edges of your design. This is prime real estate for ink bleeds. Slowly Remove Transfer Tape: Peel the transfer tape back at a sharp, low angle, almost flat against itself. If any vinyl starts to lift, just lay the tape back down and burnish that spot again before continuing. Once the transfer tape is off, give the vinyl one last press with your fingers to make sure everything is sealed down tight. If you need a reliable material for the job, you can find a great selection of adhesive vinyls designed for durability and clean application. Your screen is now officially ready to print. Pulling Your First Professional Print Alright, your screen is prepped with a perfectly applied vinyl stencil, and now you’re at the most exciting part of the whole process. This is the moment your digital design becomes a real, tangible print. Don't rush this stage—a little careful setup here makes a world of difference in the final quality. First thing's first: get your printing station stable. Lay your t-shirt or whatever you're printing on flat. To keep the fabric from shifting mid-print (a classic cause of blurry images), give a piece of cardboard a light tack of spray adhesive and slide it inside the shirt. This gives it just enough grip to stay put. Now, gently lay your screen down, making sure the vinyl side is in direct contact with the fabric. Where you place it is totally up to you, but for a standard chest print, a good starting point is about three to four inches down from the collar. Mastering the Flood and Pull Technique Before you even think about pulling the squeegee across, you need to load the screen with ink. This is called the flood stroke , and it's a simple move that ensures the entire design is evenly filled with ink, setting you up for a perfect print in one go. Pour a decent line of ink along the top edge of your design, right inside the screen. Grab your squeegee, hold it at a low angle (around 45 degrees), and lightly pull the ink down over the whole design. Use almost no pressure. You're not trying to push ink onto the shirt yet, just filling the mesh. With the screen flooded, you’re ready for the print stroke. This is the move that actually presses the ink through the mesh and onto your material. The key here is consistent pressure and the right angle. Hold your squeegee with both hands, but this time at a much steeper angle—think 70 to 80 degrees . Use firm, even pressure to pull it down across the design in one smooth, continuous motion. Let the tool do the work; no need to muscle it. One solid pass is usually all it takes. Lifting the squeegee for a second pass often deposits too much ink, which can cause your design to bleed. After the pull, carefully lift the screen straight up to see your work. Pro Tips for Consistently Crisp Prints Getting those sharp, clean lines is what separates a good print from a great one. It really just comes down to controlling a few key things. If you've ever dealt with fuzzy edges, these tips will be a game-changer. Squeegee Choice Matters: A sharp-edged squeegee is absolutely non-negotiable for crisp prints. A rounded or worn-down edge will just push too much ink through and blur your design. One and Done: Seriously, resist the urge to do multiple passes. A single, confident pull with a properly flooded screen almost always gives you the best result. Off-Contact Printing: For even sharper results, you can create a tiny gap (about the thickness of a coin) between the screen and the shirt. Just tape a few coins to the bottom corners of your screen frame. This "off-contact" setup ensures the mesh only touches the shirt right where the squeegee passes over, preventing any ink smudge. Once you nail this technique, you can start thinking about all the other things you can print on. For really durable outdoor stuff, you might look into materials like Coroplast. You can learn more about the specifics of printing on Coroplast to branch out into signage. Tackling Multi-Color Designs Printing a design with more than one color seems tricky, but the core process is identical. The real challenge is registration —making sure each color layer lines up perfectly. For a two-color design, you'll need two separate screens, one for each color's stencil. The secret is to build registration marks into your design file. These are just small, identical shapes (crosses or triangles work well) placed in the same spot on each color layer. You'll print your first color, cure it just enough so it's dry to the touch (this is called "flash curing"), and then line up the registration marks on your second screen with the marks you just printed. Once they're aligned, you print the second color. This simple method ensures every part of your design lands exactly where it's supposed to, opening up a whole new world of creative possibilities for your apparel. If you're looking to create small batches of custom gear, checking out options for professional https://www.4over4.com/printing/category/t-shirts-printing can give you some great ideas and quality benchmarks to aim for. How to Cure Your Prints for Lasting Results Pulling a perfect print is an amazing feeling, but your job isn't quite done yet. A beautiful design that peels, cracks, or washes out after one cycle in the laundry is a heartbreaking waste of effort. Properly curing the ink is the final, non-negotiable step that transforms your print from a temporary design into a durable, professional-quality product that lasts. Curing is just the process of using heat to permanently fuse the ink to the fabric fibers. For plastisol inks, this is especially critical. The ink absolutely must reach a specific temperature (usually around 320°F / 160°C ) to solidify and become wash-proof. Water-based inks are a bit more forgiving but still benefit greatly from a good heat set to maximize their lifespan. The Best Method: A Heat Press Using a heat press is hands-down the most reliable and consistent way to cure your screen prints. It provides perfectly even temperature and pressure across the entire design, which guarantees a complete cure every single time. First, let the ink air-dry until it's just tacky or dry to the touch. Then, place a sheet of parchment paper or a Teflon sheet over the design to keep the ink from sticking to your press. For most standard plastisol inks on a cotton t-shirt, a great starting point is 320°F for about 40 seconds . Always double-check the ink manufacturer's specific recommendations, though, as times and temps can vary. Getting this step right is crucial for anyone looking to produce high-quality, sellable goods. After all, the global demand for durable printed products is huge; projections show the screen printing market expanding to $15,151.59 million by 2032 , with the U.S. holding a 20.1% share thanks to strong consumer demand. Curing Without a Heat Press Don't have a heat press? No problem. You can still get a solid cure with tools you probably already have lying around. Household Iron: Set your iron to its highest setting with no steam . Place parchment paper over the print and press down firmly on each section of the design for at least 60-90 seconds . The key is to keep the iron moving constantly to avoid scorching the fabric. Heat Gun: A heat gun gives you more control than an iron. Hold it about six inches above the print and move it continuously in a sweeping motion until the entire design is cured. You'll often see a slight puff of steam or a change in the ink's sheen, which is a good sign it has reached the right temperature. The Stretch Test: Your Secret Weapon The easiest way to check if your print is fully cured is the stretch test. Gently stretch the printed area of the fabric. If the ink stretches with the fabric and bounces back without cracking, you're golden—it's cured. If you see any cracks or splits in the design, it needs more heat. Once your prints are perfectly cured, you'll want to dive deeper into ensuring overall print quality for future projects. This final step is also the perfect time to add finishing touches like custom neck tags or other branded details, which you can create with custom vinyl labels printing . Got Questions About Vinyl Screen Printing? Once you start using vinyl for screen printing, you're bound to have some questions. It’s totally normal. Whether you're trying to figure out a print that went wrong or you're just curious about how to make the process smoother, getting good answers is how you build skill and confidence. Let's walk through some of the most common questions and hurdles you'll likely face. Can I Reuse a Vinyl Stencil? The short answer is no, not really. A vinyl stencil is designed to be a one-shot deal for a single, continuous printing session. While the stencil is more than tough enough to handle dozens of prints in one go, the cleanup process is its kryptonite. The water and cleaning solvents you use to remove the ink will break down the adhesive, making it useless for another session. You'll lose those crisp, clean edges you worked so hard to get. It's best to get into the habit of cutting a fresh stencil for each new batch of prints. This is the only way to guarantee sharp lines every single time, without the headache of a stencil peeling up mid-print. The real power of the vinyl method isn't in reusing one stencil over multiple days. It’s in how incredibly fast you can create a brand new, absolutely perfect stencil exactly when you need it. What Is the Best Vinyl for Stencils? Not all vinyl is created equal for this job, and using the right kind is a game-changer. For screen printing, permanent adhesive vinyl is the undisputed champion. A crowd favorite for a reason is Oracal 651 . Its aggressive adhesive creates a powerful, watertight seal against the screen mesh. This tight bond is what prevents ink from sneaking under the edges of your stencil—the number one cause of blurry, fuzzy prints. You might be tempted to use that roll of removable vinyl you already have, but it’s almost guaranteed to start peeling up after just a few passes of the squeegee. Stick with permanent vinyl for professional, consistent results. Why Is My Ink Bleeding Under the Stencil? Ink bleed is probably the most common frustration for anyone new to this technique. But don't worry, it's almost always a simple fix related to a weak seal between your vinyl and the screen. It usually boils down to one of these three things: Burnish the Vinyl Firmly: Before you even think about adding ink, take a scraper or an old gift card and really rub that vinyl down onto the screen. Give extra attention to the tiny, intricate edges of your design—that's where weak spots love to hide. Use Less Squeegee Pressure: It’s easy to think more pressure is better, but it's not. Pushing down too hard can actually force ink under the stencil's edge. Instead, focus on a firm, consistent pull at a steep angle. Let the sharp edge of the squeegee do the work for you. Check Your Off-Contact: "Off-contact" is the tiny gap (about the thickness of a coin) between your screen and the shirt. If the screen is lying completely flat on the fabric, the ink can smudge. This little gap allows the mesh to snap back up cleanly right after the squeegee passes over, leaving a crisp print behind. How Do I Clean My Screen After Printing? A good cleanup routine will make your screens last longer and set you up for a much easier start on your next project. Once your last shirt is printed, the first thing to do is carefully peel off the entire vinyl stencil and toss it. Don't try to clean the screen with it still on—it just makes a huge mess. Next, grab a spatula or a piece of cardboard and scrape all the excess ink off the screen. You can put it right back in the container, which saves ink and money. Then, take the screen to your washout sink. Use plain water for water-based inks or a dedicated press wash for plastisol to clean the rest of the ink out of the mesh. A soft-bristled brush can help with any stubborn spots, but be gentle so you don't damage the screen. At 4OVER4 , we're dedicated to providing the high-quality materials you need to bring your creative projects to life. Explore our extensive collection of custom printing solutions and find the perfect fit for your brand at https://4over4.com .
 story
story Screen Printing vs Vinyl Printing: Which Is Best for Your Needs?
When you're looking to get custom apparel made, two of the most popular options you'll come across are screen printing and heat transfer vinyl (HTV). On the surface, they might seem similar—both put a design on a shirt, right? But the reality is they are fundamentally different processes, each with its own strengths and ideal use cases. Think of screen printing as the workhorse for large batches . It's an age-old craft perfected for mass production, where efficiency and low per-item costs are king. In contrast, heat transfer vinyl (HTV) is the go-to for small orders , highly detailed graphics, and one-of-a-kind personalizations like team jerseys. Choosing Your Print Method: A Quick Comparison So, how do you know which one is right for your project? Let's break down how each method actually works. Screen printing is a hands-on process. A mesh stencil (the "screen") is created for every single color in your design. Ink is then pushed through these screens directly into the fabric of the garment. This process takes a fair bit of setup, which is why it's not very practical for a single shirt but becomes incredibly cost-effective for large runs. Because the ink becomes part of the fabric, the final print feels soft and is extremely durable. Heat transfer vinyl, on the other hand, is a digital process. Your design is precision-cut from a sheet of colored vinyl, and then a heat press is used to apply it to the surface of the garment. The setup is minimal, making it perfect for producing one-off items or small batches with vibrant, multi-color, and even textured designs. The vinyl sits on top of the fabric, giving it a distinct feel that stands out. Screen Printing Vs Vinyl Printing At a Glance To make the decision a little easier, we've put together a simple table that lays out the key differences. This is your cheat sheet for figuring out which method aligns best with your needs, whether you're ordering custom t-shirts printing for a big event or just creating a single prototype for a new design idea. Attribute Screen Printing Heat Transfer Vinyl (HTV) Ideal Order Size Large batches (typically 25+ items ) Small batches, single items, and prototypes Cost Per Item Very low for bulk orders, high for small runs Consistent per-item cost, great for small quantities Design Complexity Best for simple designs with limited solid colors Excellent for complex, multi-color, and detailed graphics Durability Extremely high; ink fuses with fabric and lasts for years Good to excellent, but may crack or peel over time with heavy wear Feel on Fabric Soft and breathable, as ink soaks into the fibers Slightly thicker layer that sits on top of the fabric Color Options Colors are mixed to match, but each adds setup cost Wide variety of colors and special effects (glitter, metallic) Setup Time High; requires screen creation for each color Low; a digital process with minimal preparation Turnaround Time Slower for initial orders, faster for reprints Fast, ideal for quick-turnaround and on-demand projects Ultimately, the right choice comes down to your project's specific needs: quantity, complexity, and budget. For a large event with a simple logo, screen printing is almost always the winner. For a handful of custom jerseys with individual names, HTV is the only way to go. How Each Printing Process Actually Works To really get to the heart of the screen printing vs. vinyl debate, you have to look at how each design actually makes its way onto the fabric. The "how" is what explains why one method is perfect for big bulk orders and the other is a rockstar for one-off custom pieces. These aren't just two different paths to the same destination—they are fundamentally different techniques from the ground up. Knowing the basics here gives you the context for all the practical differences you'll see later in cost, durability, and what you can (and can't) do with your design. The Screen Printing Method Explained Screen printing is a classic, hands-on technique where ink is pushed directly into the fibers of the material. The best way to think of it is as a highly refined stenciling process. Here’s a quick look at the steps involved: Screen Creation: It all starts with a fine mesh screen stretched tightly over a frame. This screen gets coated with a light-sensitive emulsion. Burning the Stencil: Your design is printed onto a transparent film. That film is placed on the coated screen and blasted with a powerful light. The light hardens the emulsion everywhere except where your design blocks it, creating an incredibly precise stencil. Applying the Ink: The screen is laid on top of the garment. A thick layer of plastisol ink is spread across the screen, and a squeegee presses it through the open mesh of your stencil, directly onto the fabric. Layering Colors: Got more than one color in your design? The entire process has to be repeated with a brand-new screen for each individual color . Curing: Once all the colors are down, the garment takes a trip through a large conveyor dryer. This cures the ink, making sure it becomes a permanent, durable part of the fabric. This meticulous, multi-step setup is exactly why screen printing has higher initial costs but becomes amazingly efficient and cheap for large batches. How Heat Transfer Vinyl (HTV) Works Heat transfer vinyl (or HTV) is a totally different beast. It’s a modern, digital process that applies a design to the surface of a garment instead of soaking ink into it. Think of it more like a high-tech, permanent sticker application. While some projects use adhesive vinyls for hard surfaces, HTV is specifically engineered for textiles. Key Takeaway: The fundamental difference is application. Screen printing pushes ink into the fabric, while HTV bonds a layer of material onto the fabric. This single distinction influences the final look, feel, and longevity of the print. The HTV process is much simpler and requires way less manual prep: Digital Cutting: Your design is sent from a computer straight to a vinyl cutter. This machine uses a tiny blade to precisely cut the design out of a sheet of colored vinyl. Weeding: All the excess vinyl around and inside your cut design is removed by hand—a process known in the biz as "weeding." Heat Pressing: The weeded design is placed on the garment. A heat press clamps down, applying both high temperature and intense pressure. This activates the adhesive on the back of the vinyl and bonds it securely to the fabric. Since there are no screens to create, HTV is the go-to for knocking out single items or small orders with complex, multi-color designs quickly and affordably. Comparing Final Print Quality and Long-Term Durability When you're weighing screen printing against vinyl, the final look, feel, and lifespan of the design are probably at the top of your list. These two methods create wildly different results. One gives you a soft, integrated feel, while the other delivers a sharp, layered look. The choice you make here really shapes how people will experience the final garment. Screen printing has built its reputation on creating a product that feels soft and lets the fabric breathe. The process involves pushing ink through a screen directly into the fibers, so the design literally becomes part of the shirt. This results in a finish you can barely feel, especially after that first wash. Durability is where screen printing truly shines. Because the ink bonds so strongly with the fabric, the design can stretch and move without cracking. We’re talking about garments that can handle dozens—even hundreds—of washes without much fading. That’s why it's the industry standard for retail apparel, band merch, and company uniforms that need to go the distance. The Tactile and Visual Appeal of Screen Printing Visually, a screen print is all about rich, vibrant colors. Since each color is applied as its own thick layer of ink, the saturation is fantastic, even on dark fabrics. It’s a classic, professional look that stays consistent across huge orders. The catch? The process works best for designs with a handful of solid colors. While you can do complex prints, every new color means another screen, which adds to the setup time and cost. For bold, graphic designs, though, the result is a crisp, high-quality print with longevity that's hard to beat. This reliability is a huge reason why screen printing commands a 41% share of the custom t-shirt market. The Crisp and Dimensional Finish of Vinyl Heat transfer vinyl (HTV) is a completely different animal. Here, the design is cut from a sheet of vinyl and then heat-pressed onto the surface of the fabric. This means the design sits on top of the garment instead of soaking in, creating a distinct, slightly raised layer you can feel. This on-the-surface application gives vinyl prints a super sharp, crisp look with perfectly clean edges. It's fantastic for reproducing intricate details or complex, multi-color logos that would be a headache with screen printing. The colors pop—they're incredibly bright and opaque, creating a bold statement. Key Differentiator: Screen printing is about integration—the ink becomes one with the fabric for a soft, lasting finish. Vinyl is about application—the design is a distinct layer on top of the fabric, offering sharp detail and unique textures. The durability of vinyl really comes down to two things: the quality of the material and how well it was applied. High-quality HTV can look great for years if you take care of it, resisting fading and staying vibrant. But, if you use lower-grade vinyl or the heat press job was sloppy, you might see peeling, cracking, or lifting edges over time. That's why following the care instructions—like washing inside-out and never ironing directly on the design—is so important. When Quality and Durability Matter Most So, which one is right for you? It almost always boils down to how the garment will be used. Here’s a quick guide to help you decide: For Staff Uniforms and Workwear: Go with screen printing . It’s built to withstand constant wear and tear, including industrial laundering. For Custom Sports Jerseys: Vinyl is the champ here. It’s perfect for adding individual names and numbers, and it sticks beautifully to the polyester fabrics used in athletic wear. This is also where specialized vinyl labels printing comes in handy for other branding elements. For Retail Fashion Lines: Screen printing is generally the way to go. Its soft feel and professional finish are what customers expect from high-quality clothing. For Promotional Event T-Shirts: For big batches that need to look good and last, screen printing is the most durable and cost-effective choice. For One-Off Gifts or Specialty Items: Vinyl is perfect. You can tackle complex, one-of-a-kind designs and even use specialty finishes like glitter or metallic foils. Breaking Down Costs and Speed When you’re weighing screen printing against vinyl, your budget and deadline are probably the two biggest things on your mind. The way each method is priced is fundamentally different, and that difference trickles down to everything from setup fees to what you pay per shirt. Getting a handle on these financial and time dynamics is the key to making a smart call for your project. Screen printing is all about economies of scale. Think of it as a high initial investment that pays off big on large orders. The main upfront cost comes from creating the screens—you need a separate, carefully prepped stencil for every single color in your design. This process takes time and skill, which is why ordering just a handful of shirts can feel surprisingly expensive. But once those screens are ready? The printing itself is incredibly fast. The cost of ink and the time it takes to print each shirt drops to almost nothing, so the price per piece plummets as your order size goes up. This makes screen printing the undisputed champ for big batches. The Upfront Investment of Screen Printing The setup costs for screen printing are tied directly to how complex your design is. A simple one-color logo needs just one screen. A vibrant, four-color graphic? That means four different screens, and your setup fee just quadrupled. This is why we usually recommend keeping designs to four colors or fewer for screen printing projects. Let's look at a real-world example: Order A (10 Shirts, 2-Color Design): The setup for two screens might be around $50 , with printing at $8 per shirt. Your total is $130 , which breaks down to $13 per shirt . Order B (200 Shirts, 2-Color Design): You have the same $50 setup fee, but the cost to print each shirt could drop to just $4 . Now your total is $850 , making each shirt only $4.25 . That's the magic of screen printing in a nutshell. The more you print, the more that initial setup cost gets spread out, making each individual item much, much cheaper. The Consistent Costs of Vinyl Printing Heat transfer vinyl (HTV) operates on a totally different financial model. With vinyl, there are basically zero setup costs . The machine digitally cuts your design from a sheet of vinyl, which is then heat-pressed onto the garment. It's the perfect system for one-offs, samples, or very small runs. The cost per shirt stays pretty much the same whether you order one or one hundred. Pricing is based on the amount and type of vinyl used, plus the hands-on time it takes to cut, "weed" (remove the excess vinyl), and press the design. This makes it a fantastic, budget-friendly choice for a single custom jersey, but that consistency means it's not the most economical path for large-scale production. The Bottom Line on Cost: Go with screen printing when your number one goal is the absolute lowest cost-per-item on a big order. Choose vinyl when you need the flexibility of small quantities, personalization, or prototypes without a big upfront investment. Production Speed and Turnaround Times Because of all that prep work, screen printing has a longer initial turnaround. Getting screens prepped and aligned can take hours, sometimes even a full day. Once the press is rolling, though, the shirts come flying off. Reprints are even quicker because the screens are already good to go. Vinyl printing is the sprinter here. A design can go from a file on a computer to a finished shirt in less than an hour, which is perfect for on-demand jobs and those last-minute emergencies. That speed is a huge plus for businesses needing to be nimble. This same advantage of speed and versatility holds true for other vinyl products, like when businesses need to get the word out fast with printing vinyl banners . It's also helpful to look at the bigger picture. Understanding the costs and operations of other apparel customization methods, like starting an embroidery business , gives you a broader perspective. Every technique has its own economic quirks that fit different business goals and production sizes. Design Possibilities and What Fabrics Work Best Beyond the numbers, the real creative choice between screen printing and vinyl comes down to your design and the fabric you want to print on. Honestly, these two factors will often make the decision for you, pushing you toward one method simply because it’s a better technical fit. It's all about matching the process to the product you envision. Screen printing is, and always has been, the king of bold, solid-color graphics. Because it lays down a thick, vibrant layer of ink, it’s unbeatable for designs that need to pop, especially on dark fabrics. Just think of your favorite band t-shirt or a classic company logo—those rich, opaque colors are the hallmark of a great screen print. But that strength is also its biggest limitation. Every single color in your design needs its own screen. That means more setup time and more cost. A simple one or two-color job is a breeze and super cost-effective. But start adding five or six colors, and the project can get expensive fast. The Creative Edge of Vinyl Printing This is exactly where heat transfer vinyl (HTV) shines. Since vinyl designs are cut digitally from a sheet, the complexity of the art has almost zero impact on the cost. This opens up a whole world of creative options that would be way too pricey for most screen printing projects. Vinyl is your go-to for: Intricate, Multi-Color Designs: Got a detailed logo with a bunch of colors or super fine lines? Vinyl handles it without breaking a sweat. Gradients and Photos: Screen printing really struggles with smooth color fades, but certain printable vinyls can reproduce them beautifully. Specialty Finishes: This is vinyl’s superpower. You can get wild with eye-catching effects like glitter, holographic, metallic, flock (which has a fuzzy texture), or even puff vinyl for a cool 3D look. Heat transfer vinyl (HTV) has seriously changed the game for custom apparel. It now accounts for a massive 47% of all textile-related applications. The market is booming, expected to jump from USD 1.6 billion to over USD 2.27 billion , which just shows how popular it's become for everyone from small creators to big brands. Matching the Method to the Material Fabric compatibility is the last piece of the puzzle. Screen printing ink is formulated to chemically bond with natural fibers, making it the perfect match for 100% cotton, canvas, and high-cotton blends . While you can find specialty inks for synthetics, you'll always get the softest feel and best durability on cotton. That’s why it's such a great choice for classic t-shirts and promotional gear like quality custom cotton tote bags . On the other hand, vinyl's adhesive-based application makes it far more versatile. It sticks incredibly well to a bunch of different fabrics that are often a nightmare for screen printers. Vinyl works great on: Cotton and Cotton Blends Polyester (the standard for most athletic wear) Nylon (think jackets and tracksuits) Spandex/Lycra Blends (for stretchy performance gear) This flexibility makes vinyl the undisputed champ for modern sportswear, performance apparel, and specialty items like waterproof jackets or nylon bags where screen printing ink just wouldn’t hold up. If your project involves a mix of natural and synthetic materials, vinyl has the clear advantage. Alright, let's get down to brass tacks. You know the technical differences, but when the rubber meets the road, which printing method do you actually choose? It really boils down to your specific project, and a little expert guidance can help you skip the guesswork. Making the right call means balancing four key things: your order size, how complex your design is, your budget, and what you’re printing on. Each method has its own sweet spot, and picking the right one is the difference between a good result and a great one. When Screen Printing Is the Clear Winner Screen printing is built for big jobs. The whole process is fine-tuned for cranking out large batches of the same design with perfect consistency and a crazy-low cost per shirt. If your project sounds like any of these, screen printing is almost always the answer. You'll want to go with screen printing for projects like: Large Corporate Events: Need 200+ t-shirts with a two-color company logo for a trade show or company picnic? The per-unit price at this scale is just too good to pass up. School Uniforms or Spirit Wear: When you’re outfitting an entire school or sports team, you need every single shirt to look identical and last. Screen printing delivers that consistency and will easily hold up through a full year of wear and tear. Band Merchandise: Selling merch on tour means you need professional, retail-quality shirts that fans will actually want to wear again and again. Screen printing gives you that durable, classic finish that feels legit. Promotional Giveaways: If you're a business ordering a ton of branded tees or tote bags for a marketing campaign, screen printing is the most cost-effective way to get it done right. Key Insight: Screen printing is all about simplicity and scale. For any order over 25-50 pieces with a fairly straightforward design, it’s an unbeatable mix of quality, durability, and low cost. When Vinyl Printing Is the Perfect Fit Heat transfer vinyl (HTV) shines exactly where screen printing can’t: small orders, tons of detail, and total personalization. Because it's a digital process, there are no screen setup costs, making it perfect for one-of-a-kind creations or small test runs where you need flexibility. The versatility of vinyl is a big reason why its market is booming. The global printed vinyl market was valued at USD 9.53 billion and is only expected to grow, driven by the demand for high-quality promotional gear. You can read more about the growth of the printed vinyl market to see just how popular it's become. Opt for vinyl printing when you need: Personalized Team Jerseys: Putting a unique name and number on every single jersey is a nightmare for screen printing but a piece of cake for HTV. Small Business Startups: Got a cool new t-shirt idea? Vinyl lets you make a small batch of 5-10 shirts to see if people like it, all without a huge upfront investment. Complex or Full-Color Logos: If your logo has gradients, fine lines, or a bunch of different colors, vinyl can capture that detail perfectly, even on a small order. One-of-a-Kind Custom Gifts: Making a single, personalized shirt for a birthday or bachelorette party is exactly what vinyl was made for. Specialty Finishes: Want your design to pop with glitter, metallic foil, or even a holographic effect? Vinyl is the only way to get those awesome, eye-catching textures. Frequently Asked Questions Even after a side-by-side comparison, you probably have a few specific questions about picking between screen printing and vinyl. Let's tackle the most common ones to clear up any confusion before you place an order. This decision tree gives you a quick visual guide. It breaks down the choice by looking at the key factors—quantity, design, and fabric—that point you toward the best method for your job. As you can see, the path is pretty clear: big orders with simple graphics are a job for screen printing. Small batches or one-off custom designs? Vinyl is your winner. Which Method Is Better for Full-Color Photos? Honestly, neither screen printing nor vinyl printing is the best tool for the job when it comes to photorealistic images. Screen printing would need a ridiculous number of screens, making it wildly impractical and expensive. While you can use some printable vinyl for photos, the go-to method for this is Direct-to-Garment (DTG) printing . It works just like a high-end inkjet printer but for fabric, so it’s fantastic at capturing tiny details, gradients, and a huge range of colors. Can You Iron Over Screen Printed and Vinyl Designs? You should never put a hot iron directly on either type of print. It's a quick way to ruin the design. Screen Print: The plastisol ink can easily melt and smear, wrecking your shirt and your iron. Vinyl Print: The heat can reactivate the adhesive underneath, causing the vinyl to warp, peel off, or even melt. For best results, always wash your custom gear inside out with cold water and either tumble dry on low or let it hang dry. If you absolutely have to iron the garment, turn it inside out first. That way, you're only heating the fabric, not the print itself. Care Tip: Keeping your custom print looking great is simple—just avoid high heat. Gentle washing, drying, and ironing will help the design stay vibrant and intact for years. How Does the Feel of Screen Printing Compare to Vinyl? The way they feel to the touch is one of the biggest differences. A screen print feels soft and breathable because the ink actually soaks into the fabric fibers. After a couple of washes, you can barely feel it’s there. Vinyl, on the other hand, sits right on top of the fabric. This creates a distinct, slightly raised layer that has a smooth, sometimes plastic-like feel. It’s much more noticeable to the touch than a screen print. Ready to turn your ideas into wearable art? Whether you need the volume and efficiency of screen printing or the bespoke flexibility of vinyl, 4OVER4 has the high-quality solutions to make it happen. Explore our custom apparel options and get an instant quote today.
 story
story 9 Fresh Sticker Design Ideas to Try in 2025
Stickers are more than just adhesive pieces of paper; they are miniature canvases for brand expression, personal style, and powerful messaging. In a world saturated with visual content, a well-designed sticker can cut through the noise, create a lasting impression, and foster a sense of community. However, moving beyond generic circles and squares requires a spark of creativity and an understanding of what is possible. This guide is your launchpad for exploring innovative sticker design ideas that captivate audiences and add tangible value. We will delve into nine distinct concepts, providing practical implementation advice, real-world examples, and expert tips to transform your vision into a high-quality, memorable sticker. To further spark your imagination, exploring various forms of creative design ideas for visual art can open new possibilities for your next project. This curated collection is designed to be a definitive resource, offering actionable insights for a wide range of applications and materials. From eye-catching holographic finishes and unique die-cut shapes to the subtle sophistication of clear vinyl and the timeless appeal of retro aesthetics, we cover it all. Whether you are a business owner looking to enhance your packaging, an artist expanding your merchandise line, or a hobbyist personalizing your gear, these ideas will equip you to create designs that truly stick. Prepare to explore a comprehensive roundup that moves past the obvious and gives you the specific tools needed to produce exceptional stickers. We will cover: Holographic and Iridescent Stickers Die-Cut Custom Shape Stickers Transparent and Clear Stickers Vintage and Retro-Inspired Designs Minimalist and Geometric Designs Hand-Drawn and Illustrated Artwork Typography and Quote-Based Designs Pop Culture and Meme References Eco-Friendly and Sustainable Materials 1. Holographic and Iridescent Stickers Holographic and iridescent stickers offer a dynamic and high-impact visual experience that instantly elevates any design. Unlike standard stickers, these use a special foil or material that diffracts light, creating a shimmering, rainbow-like effect. The design’s appearance shifts and changes depending on the viewing angle and lighting conditions, making it an incredibly effective tool for capturing attention. This technique transforms a simple adhesive into a premium, memorable keepsake. This type of sticker design idea is perfect for brands wanting to convey quality, exclusivity, or a touch of futuristic flair. Think of the iconic holographic stickers on Pokémon cards or Supreme's coveted box logo stickers; they create a sense of value and collectibility. Apple also uses subtle iridescent stickers for product authentication, associating the effect with genuine, high-tech products. How to Implement This Idea To make your holographic sticker design successful, focus on contrast and simplicity. The holographic effect is the star of the show, so a complex background design can make it look cluttered and chaotic. Bold, Simple Graphics: Use clean lines, bold typography, or simple logos. The effect works best when applied to specific elements rather than the entire sticker, creating a powerful focal point. Negative Space is Key: Allow the holographic material to shine by incorporating ample negative space in your design. This prevents visual overload and makes the shifting colors more impactful. Test for Readability: Before committing to a large print run, test your design under various lighting conditions. Ensure that any text remains legible as the colors shift. A font that is too thin or ornate may become difficult to read. Consider the Finish: You can often choose between different holographic patterns, such as rainbow, sequins, or cracked ice. Select a pattern that complements your brand's aesthetic. Key Insight: The primary benefit of holographic stickers is their perceived value. This effect makes products feel more premium and can turn a simple promotional item into a desirable piece of merchandise. For businesses looking to stand out in a crowded market, creating a custom holographic sticker can be a game-changer. It's an excellent choice for limited edition products, event giveaways, or packaging seals that need to make a lasting impression. If you're ready to explore this eye-catching option, you can find more information about the process. Learn more about holographic and iridescent sticker options on 4over4.com . 2. Die-Cut Custom Shape Stickers Die-cut stickers break free from standard squares and circles by being cut precisely to the shape of your design. This technique uses a custom-made die to cut through the sticker vinyl and backing paper, following the exact contour of your artwork. The result is a highly professional and integrated look that makes the sticker feel like a bespoke object rather than a simple label, significantly boosting its visual appeal and memorability. This sticker design idea is exceptionally effective for brand logos, characters, and unique icons. Think of the instantly recognizable Starbucks logo sticker, which is always cut to its circular siren shape, or silhouette stickers of Disney characters. Independent artists on Etsy and gaming companies also use this method extensively to create collectible stickers of their mascots and artwork, making the merchandise itself a piece of art. How to Implement This Idea Success with die-cut stickers hinges on designing with the physical cutting process in mind. The shape is the main feature, so the design must be optimized for a clean, durable cut. Maintain Minimum Line Weights: Ensure your design’s outer edge is thick enough for the cutting blade to follow accurately. Avoid overly thin or intricate lines that are prone to tearing or inconsistent cuts. Avoid Sharp, Complex Angles: Very sharp corners or extremely detailed edges can be difficult to cut cleanly and may break or peel easily once applied. Opt for slightly rounded corners and smoother curves for a more durable sticker. Add a Border or "Offset": Consider adding a small white or colored border around your design. This creates a buffer zone that ensures no part of the artwork is accidentally trimmed off and gives the sticker a clean, finished outline. Prototype Your Design: Before placing a large order, get a sample. This allows you to test the final product's durability, feel, and how easily it peels from the backing. Key Insight: The power of a die-cut sticker lies in its unique silhouette. By removing distracting background material, the design itself becomes the focal point, creating a stronger and more immediate connection with the viewer. For brands, artists, or anyone looking to produce high-quality merchandise, die-cut stickers offer a polished and premium finish. They are perfect for turning a logo or piece of art into a desirable item that people are proud to display. To get started with creating your own unique shapes, you can explore the process further. Learn more about custom die-cutting options on 4over4.com . 3. Transparent and Clear Stickers Transparent and clear stickers offer a clean, sophisticated aesthetic by allowing the surface beneath to show through. Printed on transparent vinyl or polypropylene, these designs make graphics and text appear as if they are directly printed onto the object, creating a sleek, “no-label” look. This minimalist approach is perfect for applications where you want the design to integrate seamlessly with the product or surface, rather than cover it up. It’s a modern sticker design idea that exudes professionalism and subtlety. This style is famously used by companies that value clean design, such as Apple, for window displays and product branding. It’s also prevalent in the automotive industry for window decals and in retail for displaying store hours on glass doors. The effect makes logos and information look professionally applied and built-in, rather than like a simple sticker. It’s an ideal choice for branding on products with their own unique texture or color, like glass jars, laptops, or water bottles. How to Implement This Idea Success with transparent stickers hinges on visibility and careful planning for the application surface. Since there is no background, the design elements themselves must stand out. Prioritize High Contrast: Use bold, vibrant colors that will pop against a variety of potential backgrounds. A dark-colored design might disappear on a dark surface, so consider your brand colors and where the sticker will most likely be used. Leverage White Ink Underprinting: To ensure colors remain opaque and vibrant on any surface, request a white ink underlayer beneath your colored graphics. Without it, colors can appear translucent and washed out, especially on darker backgrounds. Design for the Surface: Think about where the sticker will be placed. A design intended for a clear glass window will have different needs than one for a metallic laptop. Test mockups on various surfaces to check readability and impact. Consider Reverse Printing: For application on the inside of a window to be viewed from the outside (like a car decal or storefront hours), use reverse or "face-adhesive" printing. This protects the design from weather and wear. Key Insight: The power of a clear sticker is its ability to integrate flawlessly with a surface. This creates a high-end, custom-painted look that makes your branding feel more intentional and less like an afterthought. For businesses aiming for a premium, understated branding solution, clear stickers are an excellent investment. They are perfect for product labeling, corporate branding on electronics, and creating elegant window displays. To see how this could work for your brand, you can explore the different materials and printing techniques. Learn more about transparent and clear sticker options on 4over4.com . 4. Vintage and Retro-Inspired Designs Vintage and retro-inspired designs tap into the power of nostalgia, creating an immediate emotional connection with audiences. These designs borrow aesthetics from past decades, from the groovy psychedelia of the 1960s to the bold neon and pixel art of the 1980s and 90s. By using familiar color palettes, typography, and imagery, these sticker design ideas evoke a sense of comfort, authenticity, and timeless cool, making them highly effective for building a relatable brand identity. This approach is highly versatile and has been popularized by major cultural hits like Netflix's Stranger Things , which masterfully uses 80s aesthetics in its promotional materials. It's also a staple for independent clothing brands, retro gaming communities, and music merchandise that channels a classic rock or pop vibe. These designs work because they feel curated and thoughtful, suggesting a deep appreciation for history and culture. How to Implement This Idea To create a successful retro sticker, you need to do more than just use an old-looking font. Authenticity is crucial for making the design feel genuine rather than like a cheap imitation. Research the Era: Deeply investigate the design trends of your chosen decade. Look at old advertisements, posters, and packaging to understand the specific color schemes, typographic styles, and illustration techniques that defined the period. Use Distressing Techniques: Apply subtle textures, such as film grain, light leaks, or faded print effects, to give your sticker a weathered, authentic look. This can be done digitally with textures and filters to mimic the aging process. Balance Nostalgia and Clarity: While authenticity is key, your design must remain functional and modern. Ensure that your text is readable and the overall message is clear. A vintage look should enhance your brand, not obscure it. Choose the Right Finish: A matte finish often complements vintage designs better than a high-gloss one, as it reduces glare and contributes to a more classic, paper-like feel. Key Insight: Retro designs succeed by connecting a brand to a positive collective memory. This nostalgic link can make a new product feel familiar and trustworthy, fostering an instant bond with the consumer. This sticker design idea is perfect for brands that want to convey a sense of craftsmanship, heritage, or counter-culture appeal. Whether you are launching a coffee shop with an artisanal feel or a tech brand with a playful, geek-chic identity, a well-executed vintage sticker can tell a powerful story before a single word is read. 5. Minimalist and Geometric Designs Minimalist and geometric sticker design ideas leverage simplicity, precision, and negative space to create a sophisticated and modern aesthetic. This approach strips away non-essential elements, focusing on clean lines, basic shapes, and limited color palettes. The result is a design that communicates its message with clarity and elegance, appealing to a contemporary audience that values uncluttered visuals and intentionality. It's a style that feels both timeless and distinctly current. This sticker design idea is ideal for brands aiming to project professionalism, intelligence, and modernism. Think of Apple's iconic logo sticker included with every product; its simplicity conveys confidence and high-tech elegance. This aesthetic is also prevalent in Scandinavian design brands, tech startups, and modern architecture firms, where form and function are paramount. The clean look easily integrates with premium packaging and professional correspondence. How to Implement This Idea Success in minimalist design hinges on precision and thoughtful composition. Every element must be perfectly placed and serve a purpose, as there are no complex graphics to hide imperfections. Prioritize Proportions and Spacing: The relationship between elements and the surrounding negative space is critical. Use grids and alignment tools to ensure perfect balance and harmony in your composition. Use a Deliberate Color Palette: A limited color palette, often monochromatic or with one or two accent colors, strengthens the design's impact. Each color choice should be intentional and contribute to the overall mood. Focus on High-Quality Materials: Because the design is simple, the quality of the sticker material itself becomes a key feature. A premium matte or soft-touch vinyl finish can enhance the sophisticated feel. Ensure Scalability: A great minimalist design works just as well on a tiny 1-inch sticker as it does on a larger surface. Test your design at various sizes to ensure its lines and text remain crisp and legible. Key Insight: Minimalist designs command attention not through loudness, but through quiet confidence. Their effectiveness lies in what is left out, allowing the core message or brand identity to stand out with powerful clarity. For businesses in the tech, design, or professional services industries, a minimalist sticker is an excellent tool for branding. It communicates a sense of order, quality, and forward-thinking, making it perfect for laptops, product packaging, and corporate swag. If you're looking to create a clean, impactful design, you can explore various material options. Find out more about custom stickers on Sticker Mule. 6. Hand-Drawn and Illustrated Artwork Hand-drawn and illustrated artwork infuses stickers with a unique personality and human touch that digital designs often struggle to replicate. These designs leverage organic lines, custom characters, and a distinct artistic style to create something truly original. By moving away from templates and stock graphics, this approach emphasizes craftsmanship and authenticity, making the sticker feel less like a corporate handout and more like a small piece of art. This sticker design idea is exceptionally popular among independent artists, local coffee shops, and brands that cultivate a community-focused or creative identity. Think of the unique character stickers found in skateboard culture or the bespoke illustrations that adorn products from small businesses on Etsy. These designs build a strong connection with an audience that values originality and supports creators, turning a simple sticker into a statement of personal taste. How to Implement This Idea To successfully translate hand-drawn art into a sticker, the focus must be on preserving the integrity and quality of the original illustration throughout the production process. Develop a Signature Style: Consistency is crucial for brand recognition. Whether your style is whimsical, minimalist, or grunge, maintain it across a series of designs to create a cohesive and collectible set. High-Resolution Scanning: Digitize your physical artwork using a high-resolution scanner (at least 300 DPI, preferably 600 DPI). This ensures that the fine details, textures, and subtle line variations are captured clearly and won't appear pixelated when printed. Consider Reproduction Quality: When creating the artwork, think about how it will look at a small scale. Intricate details might get lost, so opt for bold lines and clear shapes that remain impactful even when sized down for a sticker. Vectorize for Scalability: For cleaner lines and infinite scalability, consider tracing your scanned illustration in a vector program like Adobe Illustrator. This is especially useful for designs that may be used on larger merchandise in the future. Key Insight: The core appeal of hand-drawn stickers is their authenticity. They communicate that a real person with a unique vision is behind the brand, fostering a deeper, more personal connection with customers. This approach is perfect for businesses aiming to build a loyal following and stand out with a distinct, non-corporate aesthetic. It’s a powerful tool for artists, cafes, bands, and any brand that wants its merchandise to feel special and curated. The same artistic approach can elevate other promotional items. Learn more about applying custom illustrations to print products on 4over4.com . 7. Typography and Quote-Based Designs Typography-driven sticker design ideas leverage the power of words to make a statement. These designs place text, quotes, or powerful sayings at the forefront, using creative font choices and layouts to convey a specific mood, message, or brand identity. The focus shifts from complex imagery to the artistry of lettering, making the sticker’s meaning direct and impactful. This approach turns a simple phrase into a piece of portable art that resonates with a specific audience. This style is extremely popular within planner and journaling communities, where motivational quotes are used for daily inspiration. Lifestyle and wellness brands also use them to reinforce positive messaging on products like water bottles. For a creative twist on quote-based designs, consider the clever use of text on products like Jackpot Candles' 'Trim Yo Wicks' sticker , which uses witty wordplay to communicate a product instruction in a memorable way. How to Implement This Idea Success with typography-based stickers hinges on balancing readability with artistic expression. The font itself becomes the primary visual element, so your choices are critical. Match Font to Tone: Select a font that embodies the emotion of the quote. A playful, handwritten script works well for a lighthearted saying, while a bold, sans-serif font is better suited for a powerful, motivational statement. Establish Visual Hierarchy: Not all words are created equal. Use size, weight (boldness), and color to emphasize the most important words in your phrase. This guides the viewer's eye and makes the message more scannable. Prioritize Readability: Ensure the text is legible at the sticker's intended size. Test thin or highly decorative fonts to make sure they don’t become unreadable when printed small. Also, check the contrast against potential background surfaces. Consider the Audience: A quote that resonates with one demographic might not connect with another. Understand your target audience's language, humor, and cultural references to ensure your message lands effectively. Key Insight: Typography designs create an immediate emotional or intellectual connection. The right quote can make someone feel understood, inspired, or amused, turning the sticker into a personal badge of identity. These sticker design ideas are ideal for brands wanting to build a community around shared values or a particular sense of humor. They are highly shareable and serve as excellent conversation starters, making them perfect for merchandise, event giveaways, and packaging that speaks directly to the customer. 8. Pop Culture and Meme References Stickers that tap into pop culture and memes create an immediate bond with a specific audience by referencing shared cultural moments. These designs leverage the viral nature of internet trends, movie quotes, or gaming inside jokes to foster a sense of belonging and recognition. By using a visual language that a target demographic already understands and loves, these stickers become more than just branding; they are a nod to being part of an in-group, making them highly shareable and desirable. This approach is highly effective for brands targeting niche communities like gamers, anime fans, or dedicated followers of a specific TV show. For example, countless unofficial stickers reference shows like The Office or Stranger Things . Similarly, Reddit and TikTok communities often popularize memes that quickly become recognizable sticker designs, demonstrating how powerful these cultural touchstones can be in creating relatable merchandise. How to Implement This Idea Success with this type of sticker design idea hinges on authenticity and timeliness. Your reference must be genuine and current enough to resonate, or it risks feeling forced. Stay Culturally Fluent: Actively monitor platforms like Reddit, TikTok, and X (formerly Twitter) to stay on top of emerging memes and trends. What's popular today may be outdated tomorrow. Respect Intellectual Property: Be extremely careful with copyrighted material. Instead of using a direct image from a movie, create a design inspired by a quote, color scheme, or an iconic object. Parody and commentary often fall under fair use, but it's a legal gray area, so proceed with caution. Know Your Niche: A generic pop culture reference will have less impact than a deep cut that a specific community will appreciate. Understand the inside jokes and specific language of your target audience. Balance Trendiness and Longevity: While timely memes can generate quick buzz, they have a short shelf life. Consider creating designs that reference more timeless pop culture icons to ensure your stickers remain relevant for longer. Key Insight: The value of meme and pop culture stickers lies in their ability to signal identity. When a customer uses your sticker, they are telling the world something about their interests, personality, and the communities they belong to. This strategy is perfect for businesses that want to connect with a younger, digitally native audience on a more personal level. It's an excellent way to generate organic social media engagement and build a loyal community around your brand. If you’re looking for ideas on how to print your own custom designs, you can explore die-cut sticker options. Learn more about die-cut sticker printing on Sticker Mule . 9. Eco-Friendly and Sustainable Materials Choosing eco-friendly and sustainable materials is a sticker design idea that communicates brand values beyond just aesthetics. These stickers are made from environmentally conscious substrates like recycled paper, biodegradable films, or sustainably sourced vinyl. By opting for these materials, brands can offer the same vibrant, durable stickers their customers love while significantly reducing their environmental footprint, a powerful statement in today's market. This approach is highly effective for companies that want to attract environmentally aware consumers and authentically reflect their sustainability commitments. Patagonia has long used stickers made from recycled materials to promote its environmental advocacy, reinforcing its core mission. Similarly, organic food brands use biodegradable labels on their packaging to align the product with its natural, earth-friendly promise, creating a cohesive brand experience from the inside out. How to Implement This Idea Success with eco-friendly stickers depends on both the material choice and the message. The design itself should amplify the sticker’s sustainable nature. Communicate the Benefit: Use a small icon (like a recycling symbol or a leaf) or a short line of text directly on the sticker, such as "Printed on Recycled Paper" or "Compostable Sticker." This ensures your audience recognizes and appreciates your sustainable choice. Match Material to Use Case: Research the performance of different eco-materials. A biodegradable film might be perfect for product packaging that will be discarded, while a durable, sustainably sourced vinyl is better for a car bumper or water bottle. Consider the Entire Lifecycle: Think beyond the material itself. Use non-toxic, vegetable-based inks and ensure the sticker's backing paper is also recyclable. A truly sustainable approach considers every component from production to disposal. Align Design with Values: Use earthy color palettes, nature-inspired graphics, or minimalist designs to visually complement the eco-friendly material. This creates a harmonious and authentic message. Key Insight: Sustainable stickers do more than reduce waste; they build brand trust. By investing in eco-friendly materials, you demonstrate a genuine commitment to your values, which resonates deeply with modern consumers and can foster powerful loyalty. For businesses looking to build a brand identity centered on responsibility and authenticity, sustainable stickers are a must. They are an excellent choice for organic product labels, environmental organization promotions, or any company wanting to make a positive impact. To explore responsible material options, you can find more information about different adhesive solutions. Learn more about eco-friendly adhesive vinyls on 4over4.com . Sticker Design Ideas Comparison Matrix Sticker Type Implementation Complexity 🔄 Resource Requirements ⚡ Expected Outcomes 📊 Ideal Use Cases 💡 Key Advantages ⭐ Holographic and Iridescent High – needs specialized printing equipment High – specialty materials and processes Premium, eye-catching, dynamic visuals Premium branding, collectors, limited runs Difficult to counterfeit; highly memorable Die-Cut Custom Shape Moderate to high – precision cutting required Moderate – custom dies and finishing Professional, clean, maximized design area Logos, characters, branded merchandise Maximizes design impact; versatile shapes Transparent and Clear Moderate – requires careful ink and substrate Moderate – clear/translucent materials Sophisticated, modern, floating effect Glass/windows, minimalist branding Maintains surface visibility; versatile Vintage and Retro-Inspired Moderate – requires authentic design knowledge Moderate – standard printing materials Nostalgic, emotional connection Nostalgia marketing, themed merchandise Strong emotional appeal; timeless design Minimalist and Geometric Low to moderate – simple shapes and colors Low – fewer colors, simple production Clean, modern, versatile appearance Professional branding, modern aesthetics Cost-effective; timeless and sophisticated Hand-Drawn and Illustrated High – skilled artistic creation needed High – time-intensive and custom printing Unique, authentic, highly distinctive Artist merchandise, handcrafted products Authenticity and uniqueness; premium feel Typography and Quote-Based Low – text-focused design Low – simple print runs Clear messaging, broad emotional appeal Motivational, lifestyle, promotional items Direct communication; easy customization Pop Culture and Meme References Low to moderate – fast design turnover Low to moderate – frequent updates Viral, trendy, community engagement Social media, youth markets, limited editions High shareability; culturally relevant Eco-Friendly and Sustainable Moderate – sourcing specialized materials Moderate to high – sustainable inputs Positive brand image, eco-conscious appeal Green brands, sustainability campaigns Aligns with eco-values; growing demand From Idea to Reality: Bringing Your Sticker Designs to Life We've journeyed through a diverse landscape of creative sticker design ideas , from the captivating shimmer of holographic finishes to the sophisticated simplicity of minimalist aesthetics. The power of a well-designed sticker cannot be overstated; it’s a compact yet potent tool for brand expression, personal creativity, and audience engagement. Whether you’re a small business owner aiming to create memorable packaging, a marketer orchestrating a guerilla campaign, or a designer building a personal brand, the concepts we've explored provide a robust foundation for creating something truly special. The key takeaway is that the most effective sticker is not just a random piece of art. It is a strategic decision. It’s the result of aligning a specific design concept with a clear objective. The ideas presented, such as vintage-inspired artwork, bold typography, or custom die-cut shapes, are not mutually exclusive. In fact, the most innovative designs often arise from a thoughtful fusion of these elements. Synthesizing Your Sticker Strategy Think of each design idea as a building block. Your final creation becomes stronger when you combine these blocks with purpose. Combine Form and Finish: Imagine a hand-drawn illustration (Idea #6) brought to life as a die-cut custom shape sticker (Idea #2). The unique outline accentuates the bespoke nature of the artwork, making it feel more like a miniature art piece than a simple label. Merge Message and Material: A powerful quote-based design (Idea #7) printed on an eco-friendly, recycled paper sticker (Idea #9) does more than share a message; it embodies a value system. The sustainable material reinforces the thoughtful nature of the words. Blend Style and Subtlety: Consider a minimalist geometric pattern (Idea #5) printed on a transparent sticker (Idea #3). This approach is perfect for subtle branding on product packaging or storefront windows, allowing the design to integrate seamlessly with the surface it's applied to. The goal is to move beyond simply picking a single idea and instead, orchestrate a combination that tells a cohesive story. Your sticker should be a deliberate reflection of your brand's identity and a direct appeal to your target audience's sensibilities. Actionable Next Steps: Your Path to a Perfect Sticker Translating your vision from a digital file to a tangible, high-quality sticker requires precision and expertise. This is where the process can seem daunting, but it’s also where your creativity truly takes physical form. Finalize Your Concept: Revisit the sticker design ideas and select the combination that best serves your purpose. Does your brand benefit from the futuristic glow of a holographic sticker or the nostalgic charm of a retro design? Refine Your Artwork: Ensure your design files are prepared for printing. This means using high-resolution images (300 DPI is standard), converting text to outlines to avoid font issues, and setting up your artwork with the correct bleed and trim lines, especially for die-cut shapes. Choose Your Partner: The final quality of your sticker is directly tied to the capabilities of your printing partner. Look for a service that not only offers a wide range of materials and finishes but also provides tools and support to ensure your design is executed flawlessly. Mastering these concepts is invaluable. A well-executed sticker can transform a customer into a brand ambassador, turn a plain package into a delightful unboxing experience, and leave a lasting impression long after an event has ended. They are a low-cost, high-impact marketing asset. By investing thought and creativity into your sticker design ideas , you are investing in a powerful connection with your audience. Don't just create a sticker that sticks to a surface; create one that sticks in the mind. Ready to turn your brilliant sticker design ideas into a vibrant reality? 4OVER4 specializes in premium sticker printing, offering everything from custom die-cutting and holographic foils to a vast selection of sustainable materials. Use our intuitive online designer and expert support to ensure your vision is printed with professional precision and unmatched quality. Explore Custom Sticker Printing on 4OVER4
 story
story sticker sizes chart: Find Your Perfect Sticker Dimensions
Ready to pick the perfect sticker size? A good sticker sizes chart is your best friend here. These charts usually break things down into simple categories: small ( 1-2 inches ), medium ( 3-4 inches ), and large ( 5+ inches ). This makes it super easy to match a size, like a 2" x 2" square, to its best use, say, for branding a laptop. It's all about making a quick, smart choice without the guesswork. Your Quick Reference Sticker Sizes Chart Choosing the right sticker size can feel like a shot in the dark, but it really doesn't have to be. A well-organized sticker sizes chart is the most practical tool you can have for picturing how your design will look out in the wild. Forget guessing—you can just reference common dimensions and see what they're typically used for. It’s the best way to get your project started on the right foot. To make things even simpler, let's break sticker sizes into three general buckets: Small Sizes (1" to 2"): These are perfect for those subtle branding moments or adding a little finishing touch. Think sealing an envelope, labeling small products like lip balm tubes, or sticking a discreet logo on the back of a phone. They pack a surprising punch without taking over the whole surface. Medium Sizes (3" to 4"): This range is the sweet spot for a great mix of versatility and visibility. A 3" x 3" sticker is a classic choice for laptop decals, water bottle branding, and making your packaging pop. It's big enough for detailed artwork and text to be clear and readable from a close distance. Large Sizes (5" and up): When you absolutely need to make a statement, you go big. These sizes are made for car bumpers, storefront windows, or slapping on large shipping boxes. They’re designed to grab attention from far away and are almost always printed on tough, weatherproof materials to last. This visual guide gives you a quick idea of how these size categories translate to real-world uses, from personalizing your gear to branding a whole vehicle. Ultimately, the sticker's job dictates its size. Are you going for a subtle product accent or a high-impact promo piece? This quick-reference approach is designed to help you zero in on the best option in no time. If you want to dive deeper into the huge variety of options out there, you can explore our full range of custom stickers and labels . Think of this chart as your starting point, pointing you toward more detailed info when you need it. Standard Sticker Dimensions by Shape While a quick reference chart is handy, diving into a detailed sticker sizes chart organized by shape is the best way to guarantee precision. The shape you choose dramatically influences where and how your sticker will be used, and knowing the standard dimensions helps you perfectly visualize the final product. Let's break down the most popular shapes and their go-to sizes. In this section, you'll find the exact dimensions in both inches and millimeters for total clarity, along with some practical examples to steer your decision-making. Round Sticker Sizes Round stickers are a classic for a good reason. Their symmetrical shape is perfect for logos, seals, and minimalist designs, making them incredibly versatile for just about any surface. If you're looking to get specific, take a look at our options for printing custom round labels . Here are the most common round sticker dimensions we see: 1" x 1" (25.4mm x 25.4mm): These are excellent for tiny branding touches. Think envelope seals, small product labels on cosmetic jars, or a subtle accent on a thank-you card. 2" x 2" (50.8mm x 50.8mm): A super popular and well-balanced size. It's large enough for a clear logo and is often slapped on product packaging, coffee cups, and given away as a freebie. 3" x 3" (76.2mm x 76.2mm): This is the go-to size for laptop decals and water bottle stickers. It gives you plenty of room for detailed artwork and text, making sure your brand gets noticed. Square Sticker Sizes Square stickers deliver a modern, clean look with defined edges that frame your design beautifully. They work especially well for QR codes, social media icons, and bold, graphic-heavy artwork where symmetry is key. Consider these standard square sticker sizes: 2" x 2" (50.8mm x 50.8mm): A compact but effective size for product packaging, especially on small boxes or bags. It’s a favorite for adding a professional touch to handmade goods. 3" x 3" (76.2mm x 76.2mm): Just like its round cousin, this is a prime choice for promotional giveaways and branding personal items like notebooks and phone cases. 4" x 4" (101.6mm x 101.6mm): A larger square sticker that really makes a statement. This size is great for event promotions, informational labels, or decorating bigger surfaces like takeout containers. Pro Tip: For square stickers, think about adding a 0.125-inch rounded corner. This small tweak not only gives it a softer look but also helps prevent the corners from peeling up over time, which makes the sticker way more durable. Comprehensive Dimensions for Standard Sticker Shapes To make things even easier, we've compiled the most common sizes for all standard shapes into one comprehensive table. This chart lays out the exact dimensions in both inches and millimeters, complete with practical use cases to help you pinpoint the perfect fit for your project. Shape Dimension (Inches) Dimension (Millimeters) Practical Use Case Rectangle 2" x 3.5" 50.8mm x 88.9mm Standard business card size; perfect for name tags. Rectangle 3" x 4" 76.2mm x 101.6mm Product labels for bottles, jars, and boxes. Rectangle 4" x 6" 101.6mm x 152.4mm A popular choice for shipping and mailing labels. Oval 1.5" x 2.5" 38.1mm x 63.5mm Ideal for candle labels or sealing food packaging. Oval 2" x 3" 50.8mm x 76.2mm Great for branding products with a logo and text. Oval 3" x 5" 76.2mm x 127mm Often used for vehicle decals or on larger containers. This table serves as your quick-glance guide, ensuring you can match the right shape and size to the job at hand without any guesswork. Oval Sticker Sizes Oval stickers offer a unique and elegant alternative to the traditional round and square shapes. Their elongated form is especially well-suited for logos with wide text or designs that benefit from a softer, more dynamic frame. You'll often see them on curved surfaces like bottles and jars, where they just fit better. Common oval sticker dimensions include: 1.5" x 2.5" (38.1mm x 63.5mm): A small but distinctive size, ideal for candle labels, coffee cup branding, or sealing food packaging. 2" x 3" (50.8mm x 76.2mm): This versatile size provides enough real estate for both a logo and a line of text, making it great for branding products or as a decorative touch. 3" x 5" (76.2mm x 127mm): A larger oval that commands attention. This one is often used for vehicle decals, promotional event stickers, or labeling on bigger containers. Why Your Sticker Size is a Bigger Deal Than You Think Picking the right sticker size isn't just about making sure your design fits. It's a critical business decision. Think of stickers as tiny, portable billboards for your brand. They’re a key part of your packaging, promotions, and product labeling, and the size you choose has a direct line to your visibility, cost, and how well your message actually lands with people. In a world crowded with brands, the little things make all the difference. A sticker that’s too big for the spot it’s meant for looks amateur and peels off easily. One that's too small? It might as well be invisible. The first step to making a real impact is thinking about where and how that sticker will be used. The Sticker Economy is Booming This isn't just a fad; the demand for stickers is a massive, growing industry. In 2024 , the global sticker market hit a value of about USD 4.61 billion . It’s projected to climb to roughly USD 7.67 billion by 2033 , which is a steady growth rate of around 5.81% each year. What’s driving this? A huge part of it is the demand for classic paper stickers, which grabbed 41.5% of the market share in 2024. You can read the full breakdown of the growing global sticker market on marketdataforecast.com . This explosion shows just how much businesses rely on stickers for everything from marketing to logistics. As the market gets more crowded, having a smart sticker strategy is your secret weapon to get noticed. Sizing for Business and Legal Needs Beyond just looking good, sticker sizing often comes down to practical—and sometimes legal—needs. For things like product packaging and shipping, labels have to meet certain standards to be clear and compliant. Think about these common commercial situations: Product Labeling: Food and drinks need labels with enough room for ingredients, nutrition facts, and barcodes. A tiny, cute sticker won’t cut it. You need a size that fits all the required info without looking like a cluttered mess. Shipping and Logistics: There's a reason shipping labels are a standard 4" x 6" . They're designed to fit carrier requirements and make addresses and tracking info easy to read at a glance. Warning and Safety Labels: For industrial equipment or chemical products, safety warnings have to be legible from a certain distance. This directly dictates the minimum size of the sticker and the font. When you line up your design choices with both market trends and real-world uses, your sticker stops being just a piece of sticky paper and becomes a powerful tool. It’s about more than looks; it’s about function, compliance, and making a real impact in a booming market. That’s how a simple sticker becomes a true business asset. Sizing and Designing Custom Die-Cut Stickers Sometimes, a standard circle or square just doesn't cut it. When you need a sticker that truly captures your brand’s personality, custom die-cut stickers are the way to go. Unlike traditional shapes, these stickers are trimmed to the exact outline of your design, giving your artwork a unique and professional look that really makes it the star of the show. This is the perfect method for intricate logos, brand mascots, or any design that needs to break the mold. This level of customization is a huge driver in the market. In fact, the custom printing segment for stickers hit a value of around USD 1.6 billion in 2024 and is projected to climb to nearly USD 2.9 billion by 2030. That growth shows just how much businesses are relying on unique shapes and sizes to meet all kinds of commercial needs. You can see more data on the rise of the custom sticker printing market on grandviewresearch.com. Preparing Your Custom Shape Creating a die-cut sticker all starts with a special vector path in your design file known as a die-line . This line is mission-critical—it tells our cutting machine precisely where to trim the sticker, acting as the blueprint for its final shape. Here are the key steps to get your artwork ready: Define the Outline: First, create a solid line around your design in a vector program like Adobe Illustrator. This line becomes the cut path. Set a Margin: For a clean, professional finish, your die-line should be slightly offset from your artwork. We recommend about 1/8th of an inch (3mm) . This creates a small, uniform border that looks great. Simplify Your Paths: Try to avoid overly complex die-lines with tons of sharp points or tiny, intricate details. Smoother curves and simpler shapes always produce a cleaner cut and a more durable sticker. Important Note: Always place your die-line on a separate layer in your design file and label it clearly (e.g., "Die-Line" or "Cut Path"). This is a huge help for our prepress team, allowing them to identify and process your custom shape accurately for a perfect result. From Concept to Cut Once your artwork is good to go, the die-cutting process begins. We use digital cutting technology that follows the die-line you provided to guide a super-precise blade, flawlessly trimming each sticker into its unique shape. This advanced process allows us to produce even the most intricate designs without needing expensive traditional dies, which makes custom shapes accessible for any order size. This flexibility lets brands create promotional items that are truly memorable. Think about it—a sticker shaped like your company mascot or one that perfectly mimics your product's silhouette. The possibilities are pretty much endless. If you're ready to see how this technology can bring your own unique ideas to life, you can learn more about our custom die-cutting services and see just how easy it is to get started. Preparing Your Artwork for Flawless Printing A killer sticker starts long before it hits the press. Getting your design file prepped correctly is the single most important thing you can do to make sure your final product looks sharp, vibrant, and professional. Think of it as the bridge between your digital vision and a flawless physical sticker. If you're designing custom stickers, making sure your artwork is print-ready is non-negotiable. The core principles are pretty universal for most print projects, as this detailed guide to making your own custom graphics explains. Let's walk through the key technical specs you need to get right. Understanding Bleed, Trim, and Safe Zone These three concepts are the bedrock of professional print design. Getting them wrong is the fastest way to end up with stickers that have awkward white borders or, even worse, chopped-off text. Trim Line: This is the finish line—the exact edge where your sticker will be physically cut. It represents the final dimensions you chose, like a 3" x 3" square. Bleed Area: Think of this as a safety net. It's a small buffer, usually 0.125 inches (or 1/8") , that extends beyond the trim line. Any background color or image needs to fill this entire area to prevent ugly white slivers if the cutting machine shifts even a tiny bit. Safe Zone: This is your VIP section, located just inside the trim line. All your critical elements—your logo, text, and key parts of the graphic—must stay within this zone. Keeping them 0.125 inches away from the trim line guarantees they won't get clipped during cutting. It’s like painting a room. You use painter's tape (the safe zone) to protect the woodwork, you might slop a little paint on the drop cloth (the bleed), but the wall itself (your core design) ends up looking perfect. Setting Up Your File Correctly A brilliant design can be totally undone by the wrong file settings. To get maximum clarity and spot-on color, you'll want to stick to these industry standards. For a deeper dive, you can always check out our full list of expert printing tips . Resolution and Color Mode Your file's resolution dictates how sharp it will be, while the color mode ensures what you see on screen is what you get on paper. Resolution Must Be 300 DPI: Dots Per Inch (DPI) is the key to print quality. Images on the web are often just 72 DPI , which looks great on a screen but will come out blurry and pixelated in print. For crisp, high-quality stickers, your artwork must be created and saved at 300 DPI . Use CMYK Color Mode: Your monitor displays colors in RGB (Red, Green, Blue), but professional printers use CMYK (Cyan, Magenta, Yellow, Black). Designing in CMYK from the get-go prevents nasty surprises and color shifts during printing, so your brand colors stay true. Key Takeaway: Always, always start your design project with a 300 DPI resolution and CMYK color mode. Trying to "upscale" a low-res RGB file later just doesn't work and usually leads to disappointment. The Best File Formats The format you save your file in matters, too. Some preserve quality and editability way better than others. PDF (Preferred): A high-quality PDF is the gold standard for a reason. It locks in your fonts, images, and vector paths, making sure nothing moves or changes when we open it on our end. AI (Adobe Illustrator): If you built your design in Illustrator, sending the native AI file is a fantastic option. This is especially true for custom die-cut stickers because it keeps all the vector paths perfectly intact. EPS: This is another solid vector format that maintains scalability and quality without any loss. Try to avoid sending formats like JPG or PNG unless they are saved at a very high resolution. Nailing these setup steps guarantees that the sticker size you carefully picked from the chart will be matched by a perfectly printed, professional-grade product. Every single time. Choosing the Right Sticker Material and Finish Getting the dimensions right on a sticker size chart is a huge first step, but the material and finish you pick are what really bring your sticker to life. It’s what determines the final look, feel, and how long it'll last. The right combo can turn a simple design into a serious branding tool. The wrong one? You’re looking at peeling, fading, and a totally missed opportunity. This decision is a big deal—it impacts everything from visual pop to where the sticker can actually be used. Core Sticker Materials Explained Think of the material as the sticker's foundation. It dictates durability, weather resistance, and where you can stick it. A sticker destined for a car bumper needs a much tougher base than one sealing a paper gift bag. The most important question to ask is: where will this sticker live? Indoor use gives you more flexibility, but anything going outside or in a high-contact spot needs a tougher, more specialized option. Here’s a rundown of the most common materials and what they’re best for: Weatherproof Vinyl: This is the undisputed champ for durability. Vinyl is waterproof, scratch-resistant, and won't fade in the sun. It's the go-to for anything outdoorsy like car decals, window graphics, and equipment labels. Classic Paper: A budget-friendly and super popular choice for anything staying indoors. Paper stickers are perfect for product packaging, shipping labels, and promotional giveaways where you don't need to worry about the weather. They have that classic, tactile feel. Transparent Polyester: When you want your design to stand out without a distracting background, clear polyester is your answer. It creates that slick, "no-label" look that’s awesome for branding on glass, water bottles, or product containers where you want the surface to show through. For projects that need to withstand some serious abuse, exploring a full range of durable adhesive vinyls will open up even more possibilities for those heavy-duty applications. Each material has its own unique personality that affects how the sticker performs. Selecting the Perfect Finish If the material is the foundation, the finish is the final coat of paint. It protects and enhances your design, adding a specific texture and visual punch that can completely change the sticker's vibe. Pro Tip: Your finish choice can actually change how your colors look. A gloss finish makes colors appear more vibrant and saturated, while a matte finish gives off a softer, more subdued, and modern feel. Take a look at how these popular finishes can complement your artwork: Gloss Finish: This high-shine coating makes colors pop and gives your sticker a vibrant, reflective look. It’s great for grabbing attention and has the added bonus of being easy to wipe clean, offering a bit of extra protection from moisture and scuffs. Matte Finish: For a more modern and understated look, you can't go wrong with matte. It has a non-glare, satin-like surface that feels smooth to the touch. This finish is perfect for sophisticated branding and designs with a softer color palette. UV Coating: Think of a UV coating as sunscreen for your sticker. It's a clear, glossy liquid applied over the ink and then zapped with ultraviolet light to cure it. This process gives it superior protection against fading from sun exposure, making it a must-have for any sticker that’s going to live outdoors for a long time. Frequently Asked Questions About Sticker Sizes Getting into the world of sticker printing can feel a bit overwhelming, especially when you're aiming for that perfect final product. From figuring out the best dimensions on a sticker sizes chart to making sense of industry lingo, getting clear answers is key to a smooth project. Think of this section as your cheat sheet. We've gathered the most common questions we get and laid out the answers in a straightforward way, so you can move forward with total confidence. What Is the Most Popular Sticker Size? While there's a sticker size for just about everything, the sweet spot for versatility and popularity is definitely in the 2 to 4-inch range. If we had to pick one, a 3" x 3" square or a 3" circle is the undisputed champion. This size is big enough to show off a detailed logo or cool piece of art, but it's still compact enough to fit on everyday items without looking awkward. It's become the go-to for branding laptops, water bottles, notebooks, and even product packaging. If you’re not sure where to start, you really can’t go wrong with this one. How Do I Choose the Right Sticker Size for My Product? Choosing the right size always comes down to context. The very first thing you should do is measure the surface where the sticker is going to live. You want your sticker to complement the item, not overpower it or get lost in the shuffle. Here’s what to think about: Viewing Distance: Where will people see this sticker? A design for a big storefront window needs to be much, much larger than one for a tiny lip balm tube. Design Complexity: If your art has a lot of fine detail or small text, you’ll need a bigger sticker to keep it legible. A simple, bold icon can get away with being much smaller. Surface Shape: For curved surfaces like bottles or candles, an oval sticker or one made from flexible vinyl will hug the shape much better. A rigid square might have corners that peel up over time. For example, a 1" x 2" rectangle is perfect for small items like essential oil bottles, whereas a larger 4" x 6" sticker is a great fit for branding shipping boxes. A good rule of thumb is to always leave a little bit of a clean margin around the sticker—it just looks more professional. What Is the Difference Between Kiss Cut and Die Cut Stickers? They might look the same once they’re stuck on something, but the real difference is all about how they’re cut from the backing paper. A die-cut sticker is cut straight through both the vinyl and the paper backing, following the exact outline of your design. This gives you a really striking, custom-shaped sticker with no extra white space around the edges. A kiss-cut sticker , on the other hand, is only cut through the vinyl layer. The paper backing stays intact, usually as a square or rectangle, creating a border around your sticker. This makes peeling a breeze, especially for complex shapes, and the extra backing acts as a protective bumper for the sticker's edges before you use it. Ready to bring your vision to life? At 4OVER4 , we offer a huge selection of high-quality, fully customizable stickers in any size, shape, or finish you can imagine. Explore our custom sticker options and start creating today.