Content Hub
Stories, Ideas and Advice — Page 74
 story
story How to Order Business Cards A Practical Guide
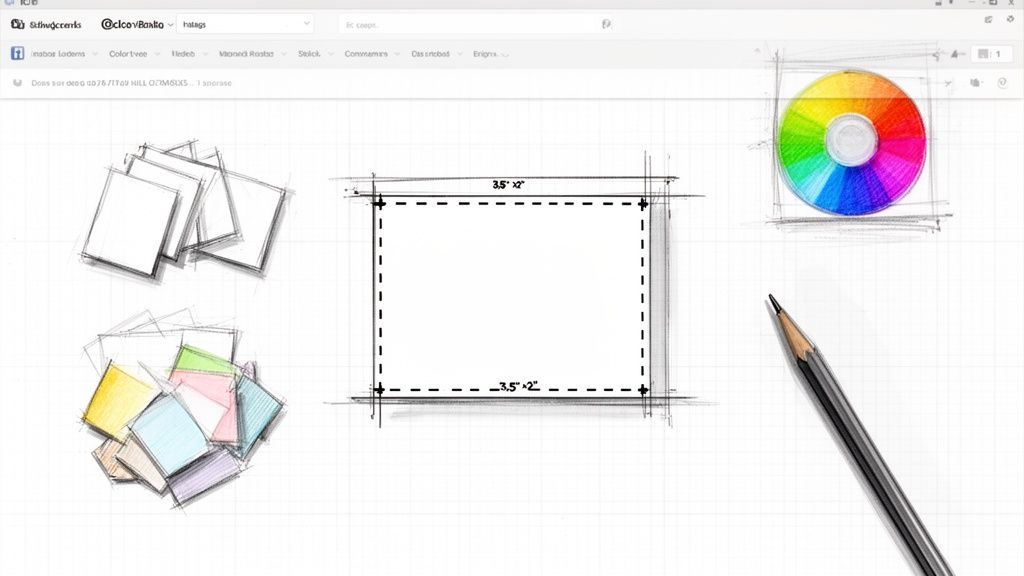
Ordering a business card really comes down to three main stages: nailing down the design and info, picking your card stock and finishes, and finally, uploading a print-ready file to an online printer. If you get these early decisions right, you’ll end up with a powerful branding tool, not just another piece of paper with your contact details. Laying the Groundwork for Your Perfect Business Card Before you start messing around with colors or fonts, let's pump the brakes. The very first thing to figure out is the purpose of your card. Is it just a quick way to swap contact info? A mini-portfolio for your creative work? Or maybe a functional appointment reminder? Your answer here is going to shape every single choice you make from this point on. A freelance graphic designer, for instance, needs a card that screams creativity, while a financial advisor should aim for a look that feels clean, trustworthy, and professional. This initial thinking phase is all about getting your essential brand assets in order—it’s the foundation of your card's entire message. Assemble Your Core Information Think of this as your pre-flight checklist. Having everything ready to go will save you from frustrating delays and last-minute panic. Here’s what you absolutely need: A High-Resolution Logo: This is completely non-negotiable. A blurry, pixelated logo makes your brand look cheap, period. Make sure you have a vector file (like an AI, EPS, or SVG) or, at the very least, a high-resolution PNG or JPG that's 300 DPI . Essential Contact Details: Don't just stop at your name. Include your title, company name, phone number, email address, and website. Social Media Handles: Be selective. A B2B consultant should probably feature their LinkedIn profile, while a retail brand would get more mileage out of Instagram. Define Your Target Audience Who are you actually trying to connect with? A business card designed for a corporate lawyer is going to have a wildly different feel than one for an Etsy shop owner selling handmade jewelry. Before you get attached to any design elements, you have to understand your audience. A great first step is to create effective buyer personas that truly capture your ideal client. This insight dictates everything, from the tone of your text to the feel of the paper. Key Takeaway: Your business card is a conversation starter. It needs to speak directly to the person receiving it, making them feel like you get their world. Choose the Right Size and Shape Sure, the standard US size ( 3.5" x 2" ) is a safe, universally recognized choice. It fits perfectly in any wallet. But don't be afraid to think outside the box if it fits your brand. A square card can feel modern and creative, and a mini card is often a unique, memorable option that people hang onto. If you're looking for inspiration for classic and effective designs, browsing a printer's business basics collection can be a great starting point. Getting these fundamentals locked in before you jump into the design makes the whole process so much smoother. It turns a simple printing order into a strategic branding exercise, ensuring the final card is something you're genuinely proud to hand out. Choosing the Right Paper and Card Stock The moment you hand someone your business card, the conversation becomes tactile. The weight, texture, and overall feel of that card says something about your brand long before they even read your name. Honestly, getting this physical part right is just as critical as your logo or color palette. When you're new to ordering business cards, the jargon around paper can feel a little overwhelming. Let's start with the most important factor: paper weight. Understanding Paper Weight and Thickness Paper weight is measured in points (pt), where one point equals one-thousandth of an inch. Simply put, a higher point value means a thicker, sturdier card. This isn't just a technical spec; it's a statement. 14pt Card Stock: This is your professional-grade workhorse. It’s solid, durable, and a far cry from flimsy, making it a reliable choice for everyday networking or stocking up for a big event. 16pt Card Stock: You can feel the difference here. This slightly thicker stock adds a premium touch, suggesting stability and a commitment to quality without a huge jump in cost. 32pt and Thicker: Now you’re in luxury territory. A card this thick is impossible to ignore. It feels substantial and important, which is perfect for executives, high-end consultants, or anyone aiming to make a seriously powerful first impression. You can check out a variety of ultra-thick card options to find a style that really commands attention. Think about it: a flimsy card can subconsciously signal a brand that cuts corners. A card with a satisfying heft, on the other hand, tells a story of durability and confidence. Coated Versus Uncoated Stocks After thickness, your next big decision is the paper's finish. This choice impacts both how your card looks and how it can be used. A coated stock has a sealant that gives it a smooth, finished surface. It can be glossy—which makes colors pop and images look incredibly sharp—or it can have a more subtle satin/silk finish. Glossy cards are a fantastic choice for photographers or any brand with a vibrant, image-heavy design. On the flip side, an uncoated stock has a natural, porous paper feel. It doesn't have that reflective shine, giving it a more understated, organic, and elegant look. The big practical advantage? It's super easy to write on, making it the go-to for appointment cards or for anyone who likes to add a personal note. Pro Tip: If your brand identity is minimalist, earthy, or sophisticated, an uncoated or matte stock is often the perfect match. For brands that are bold, loud, and energetic, a glossy finish can really amplify that vibe. Exploring Specialty and Eco-Friendly Papers Beyond the basics, specialty papers can add a whole new layer of character. Textured linen stock, for example, has a classic, woven feel that’s perfect for traditional professions like law or finance. Kraft paper gives off a rustic, handmade vibe that’s ideal for artisans and eco-conscious brands. Speaking of sustainability, it's easier than ever to make an environmentally friendly choice. The global online business card printing market, valued at around $280 million in 2023 , has seen a major shift. Now, 42% of online printers offer recycled paper and sustainable inks as standard options. Choosing a recycled stock isn't just a paper choice; it's a silent communicator of your company's values. Nailing the Design and Adding Special Finishes Once you have the perfect paper picked out, it's time for the fun part: bringing your brand's personality to life. This is where your business card goes from an idea to something tangible someone can hold in their hand. Whether you’re customizing a template or uploading your own artwork, the goal is a clean, memorable design that instantly shows people what you’re all about. The basics of good design are everything here. Think about visual hierarchy —what's the very first thing you want someone to see? It should probably be your logo, then your name, and then your contact info. Use size, color, and smart spacing to guide their eye naturally. Whatever you do, avoid clutter. A card crammed with too much text or too many graphics is just overwhelming and won't get a second look. Taking Your Design to the Next Level with Special Finishes A great design is the foundation, but special finishes are what make a business card truly unforgettable. These are the tactile and visual upgrades that add a layer of sophistication that plain ink just can't match. They turn a simple piece of paper into a memorable experience with your brand. Let’s get into some of the most popular options that can elevate your card from standard to standout. Spot UV Coating: This finish adds a super high-gloss varnish to specific parts of your card, creating a beautiful contrast against a matte background. Picture your logo catching the light while the rest of the card has an elegant, muted finish. It’s subtle, but it's a powerful way to add depth and draw attention right where you want it. Embossing and Debossing: Embossing raises a design element—like your logo or initials—up from the card's surface. Debossing presses it in. Both create this really cool three-dimensional texture that just begs to be touched. This tactile feel makes a card feel more premium and works wonders for minimalist designs where the texture does all the talking. The Wow Factor of Metallic Foil Stamping For a touch of pure luxury, nothing beats metallic foil. Foil stamping is a process where a heated die presses a super-thin sheet of metallic foil onto the paper. The result is a crisp, opaque, and seriously reflective design. It’s the go-to choice for high-end brands, creatives, and anyone who wants to make a bold, confident statement. This technique is also incredibly versatile. A real estate agent might use gold foil for their name on a thick, black card to project success and prestige. A graphic designer could go with a vibrant holographic foil to show off their creative, modern style. The possibilities are endless, and you can explore all the different colors and ways to use foil stamping services to find the perfect fit for your vision. Real-World Scenario: Imagine a new tech startup that wants to look both innovative and trustworthy. They go with a thick, 32pt matte card stock in a deep navy blue. They have their logo stamped in a sharp silver foil, and their tagline is subtly highlighted with a spot UV finish. The final card feels modern, substantial, and incredibly professional—it makes an impression before they even say a word. Combining Finishes for Maximum Impact Here's a pro tip: you don’t have to pick just one. The real magic happens when you thoughtfully combine different finishes. A card can easily feature an embossed logo and a foil-stamped name, creating multiple layers of texture and visual appeal that work together. Think about a wedding planner whose brand is all about elegance and fine details. They might choose a soft, cotton-textured paper. Their name could be debossed into the card for a subtle, letterpress feel, while the little wedding bells in their logo are accented with a delicate rose gold foil. This combination tells a compelling story about their brand's quality and style before a single word is even read. When you're deciding on finishes, always bring it back to your brand identity. Is your look minimalist? A single, subtle enhancement might be all you need. If your brand is more lavish or creative, you can definitely handle more complex combinations. The key is making sure the finishes support your design, not overpower it. By carefully choosing these details, you can create a business card that does more than just share your info—it leaves a lasting, positive impression. Getting Your Artwork Ready for a Flawless Print A brilliant design can totally fall flat if the digital file isn't set up correctly for a commercial press. Think of your artwork file as the blueprint for your business card; any mistake in that blueprint is going to show up in the final product. Nailing just a few key technical details is the secret to making sure what you see on your screen is exactly what you get in your hands. This little bit of prep work prevents some of the most common—and costly—mistakes, like seeing your phone number get trimmed right off the edge. It all starts with understanding your card's "safe zone." Setting Up Your Bleed, Trim, and Safety Margins Every professional print job has three invisible lines that are absolutely crucial for your design file, even though only one of them—the trim line—will actually be on the finished card. Trim Line: This is simple: it's the actual edge where your business card will be cut. For a standard card, that’s the 3.5" x 2" perimeter. Bleed Area: This is a 1/8th inch (0.125") border that goes beyond the trim line. If you have a background color or an image that's meant to go right to the edge, it absolutely must extend all the way into this bleed area. It gives the cutting machine a tiny bit of wiggle room and prevents those ugly little white slivers from showing up if the cut is a hair off. Safety Margin: This is an area 1/8th inch (0.125") inside the trim line. All your critical info—your logo, name, phone number, and email—has to stay tucked safely inside this zone. Anything you place outside of it is flirting with disaster and risks getting chopped off. Even if you're getting creative with custom shapes, these principles still apply. If you're thinking about a unique shape, check out some die cutting services for inspiration. You'll see how you can make a design stand out while still playing by the print-safe rules. This infographic breaks down how to prep your files for special finishes to get that clean, professional look. As you can see, a well-organized layout is the foundation you need before you can start adding stunning touches like Spot UV or foil stamping. Mastering Your Colors and Resolution Here's something a lot of people don't realize: your computer screen and a printing press speak two completely different color languages. Getting them to translate correctly is absolutely essential for your branding. Screens create color by mixing Red, Green, and Blue light, which is known as RGB . It's perfect for looking at things on a screen, but it’s useless for ink on paper. Printers use a different model called CMYK , which stands for Cyan, Magenta, Yellow, and Key (black). If you send a file in RGB, the printer’s software has to guess at the conversion, and that can lead to some seriously disappointing color shifts. Always, always, always design and export your final print file in CMYK mode from the very beginning. Key Takeaway: To stop your brand's vibrant blue from turning into a sad, dull purple, set your design software's color mode to CMYK before you even place the first element on the artboard. Image quality is the other non-negotiable. For any photos or logos on your card to look sharp and professional, they must have a resolution of at least 300 DPI (dots per inch) . Anything lower is going to look blurry or pixelated when it's printed, and that instantly cheapens the entire feel of your card. Prepping Your Files for Print Before you hit "export," let's go over a checklist of the final technical details. Getting these right is the difference between a smooth process and a frustrating back-and-forth with your printer. This table breaks down exactly what you need to check. Print-Ready File Checklist Checklist Item Specification Why It's Important Color Mode CMYK Ensures the colors on paper match what you intended on screen, avoiding unexpected shifts. Resolution 300 DPI Guarantees that all images and logos will print sharp and clear, not blurry or pixelated. File Format High-Quality PDF The industry standard that embeds all fonts, images, and vectors into a single reliable file. Bleed 0.125" on all sides Prevents white edges on your final card by giving the cutter a margin of error. Safety Margin 0.125" from trim Protects all your important text and logos from being accidentally trimmed off. Fonts Outlined (Converted to Curves) Turns text into vector shapes, so your typography prints perfectly even if the printer doesn't have your font. Paying attention to these details might seem tedious, but it's what separates an amateur-looking card from a truly professional one. It ensures a fast, error-free printing process and a final product you'll be proud to hand out. Finalizing Your Order and Choosing Shipping You've done the hard work—navigating the design, picking the perfect paper, and adding those killer finishes. Now you're at the final checkpoint before your cards hit the press. This last stage is all about a careful review and making smart logistical choices to get your finished product in hand, looking perfect and arriving on time. The first thing you’ll get from the printer is a digital proof . Don't just give it a quick glance. Seriously, this is your last chance to catch any mistakes. Treat it like a final exam, and check every single detail before you hit "approve." A tiny error that seems insignificant on a screen can become a massive headache on a stack of 500 printed cards. The Art of the Proofing Process When that proof lands in your inbox, zoom in and get critical. It's so easy to get "design blindness" after staring at the same file for hours, so a methodical check is your best friend here. Here’s a quick mental checklist I run through: Typos and Grammar: Read every single word out loud. I can't stress this enough—triple-check names, titles, phone numbers, and email addresses. Element Alignment: Make sure your logo, text blocks, and social icons are perfectly lined up and aren't hugging the safety margins too closely. Color Consistency: Remember, the colors you see on screen (RGB) often look a bit different when printed (CMYK). This proof is your closest preview of that final CMYK output. Image Resolution: Give all your images and logos a close look. They should be crisp and sharp, with no pixelation in sight. Your digital proof is basically your contract with the printer. When you approve it, you're saying, "Yes, this is 100% correct." Take your time, and if anything looks even slightly off, ask for a revision right away. Deciding on Your Order Quantity So, how many cards should you actually get? This is a balancing act between what you need right now and what will save you money in the long run. With most online printers, the cost-per-card drops significantly as your order size goes up. Ordering 1,000 cards is almost always cheaper per piece than ordering four separate batches of 250 . Think about your specific situation. An Etsy seller who slips a card into every package might find it smart to order 2,500 to last the year. On the other hand, if you're a consultant who might get a promotion and a new title soon, sticking with a smaller run of 500 is the safer bet to avoid waste. Navigating Turnaround and Shipping Options The last piece of the puzzle is getting the cards from the print shop to your doorstep. This involves two different timelines you need to understand: production turnaround and shipping speed . Production turnaround is simply how long it takes to print, cut, and finish your order. A standard timeline might be 3-5 business days , but you can usually find an expedited "rush" option that gets it done in 24 hours for an extra fee. Once they're printed, you'll pick a shipping method. This choice is key. If you want to get a better handle on delivery logistics in general, it can be helpful to read up on selecting a cost-effective courier service for other shipping needs. This will help you weigh options like standard ground shipping versus overnight delivery based on your budget and deadline. And while you're at it, make sure all your packages look professional with custom shipping and mailing labels . Should You Consider a Digital Business Card? In a world where connections happen in an instant, the classic paper business card is getting a tech-savvy counterpart. The digital business card, usually shared with a quick QR code scan or a tap of a phone, is definitely picking up steam as a serious networking tool. But does that mean it's right for you? This isn't really an "either/or" situation. It's less about ditching your beautifully printed cards and more about seeing a digital card as a powerful sidekick to your physical ones. It offers a different kind of flexibility and immediacy that can be a game-changer for tech-forward professionals, regular conference-goers, or anyone who wants a more dynamic way to share their info. The shift is happening faster than you might think. Back in 2020, only about 12% of businesses globally were using them. Fast forward to 2024, and that number has shot up to 37% , with North America leading the charge. If you want to dive deeper into the numbers, digitalbusinesscard.com has some great insights on this trend. The Upside of Going Digital Digital cards have some compelling perks that traditional cards just can't touch. The biggest wins are convenience and the ability to adapt on the fly. Instant Sharing, No Typos: A simple QR scan or NFC tap beams your entire contact profile straight to someone's phone. No more fumbling with manual entry or realizing later you typed a number wrong. A Greener Footprint: It’s a small thing, but going digital cuts down on paper waste, which can subtly align your brand with more sustainable practices. Always Up-to-Date: Just got a promotion or a new phone number? You can update your digital card in seconds, making sure everyone you connect with has your latest, most accurate information. Think of it this way: a digital card is always working for you. It can link directly to your portfolio, your booking calendar, or your latest project, turning a simple contact exchange into a genuinely interactive experience with your brand. The Drawbacks to Keep in Mind Of course, it's not a perfect system. The biggest hurdle with the digital approach is its total reliance on technology. If someone's phone is dead, they're in a poor service area, or they just aren't comfortable scanning QR codes, the exchange can grind to a halt. There's also something to be said for the tangible quality of a well-designed physical card. You lose that memorable, tactile moment—the feel of a unique paper stock or the flash of a foil finish. For many, handing over a physical card still feels more personal and makes a more lasting impression. Ultimately, the smartest strategy for most modern professionals is probably a hybrid one. Carry your stunning physical cards for those high-impact, personal connections, but have your digital card ready to go for quick, efficient sharing in any situation. A Few Final Questions Before You Order Even after you've nailed down the big picture for your new business cards, a few specific questions always seem to pop up right at the finish line. Getting these details sorted helps you click "order" with total confidence, knowing you’re getting exactly what you envisioned. Let’s walk through some of the most common questions we hear from clients. What’s the Real Difference Between 14pt and 16pt Card Stock? The "pt" (or point) is simply a measure of the paper's thickness. While a 14pt stock is a solid, professional standard you can't go wrong with, upgrading to 16pt gives your card a noticeably more rigid and substantial feel. It's a subtle difference, but it's one people feel the moment they take your card. If you want to communicate durability and a premium quality without saying a word, that extra thickness of a 16pt stock is a small investment that makes a big impact. It just feels more impressive. Should I Go with a Glossy or a Matte Finish? This really comes down to your brand's personality and how you plan to use the cards. A glossy finish makes colors pop. It’s vibrant, eye-catching, and perfect for designs that are heavy on photography or bold graphics. If your brand is energetic and visual, gloss is a fantastic choice. The only trade-off is that it can show fingerprints and has a bit of a glare. On the other hand, a matte finish has a smooth, non-reflective surface that feels modern and sophisticated. It’s the go-to for minimalist designs, elegant branding, and any card you might want to write on—think appointment cards or a spot to jot down a personal note. What Exactly Is a Bleed, and Do I Actually Need It? A bleed is absolutely essential for a professional-looking card. It’s a small border—usually 1/8th of an inch —that extends your background design beyond the final trim line of the card. Think about it: printers cut massive stacks of cards all at once, and even with the best equipment, tiny shifts are inevitable. That bleed acts as a safety net. It ensures that even if the cut is a hair off-center, you won't get a jarring and unprofessional white sliver along the edge. Your background color or image will go perfectly from edge to edge, every time. How Many Business Cards Should I Really Order? This is a classic "it depends" situation, but we can break it down. If you're a new founder or your contact info might change in the near future, starting with a smaller run of 250 or 500 is the smart play. It keeps you flexible and avoids waste. But if you're hitting trade shows, running a retail store, or constantly networking, ordering 1,000 or more is where you’ll see serious savings. The cost-per-card drops dramatically with larger quantities. An Etsy seller including a card with every shipment might need 2,500 a year, while a consultant might only go through 400. Take a quick look at your own business habits to find that perfect balance between bulk pricing and practicality. Ready to create a business card that feels just right? At 4OVER4 , we offer a huge selection of paper stocks, special finishes, and design tools to bring your vision to life. Order your custom business cards today
 story
story How to Print Business Cards That Actually Get Noticed
Printing a business card might seem straightforward, but a handful of small details are what separate a truly memorable card from one that gets tossed aside. The whole game is about nailing the design file, picking the right paper and finish, and then successfully navigating your online printer’s system. Honestly, getting these technical bits right from the start is the secret to a professional result. Your Guide to Flawless Business Card Printing A great business card does more than just share your contact info; it’s a physical piece of your brand that speaks volumes about your quality and attention to detail. In a world full of fleeting digital pings, a well-made card makes a tangible, lasting impression. It's a powerhouse networking tool that can kickstart conversations and build credibility in an instant. Don't just take my word for it—the numbers are pretty staggering. Around 27 million business cards are printed every single day worldwide, which tells you they’re far from obsolete. Research even shows that for every 2,000 cards you hand out, sales can jump by 2.5% . What's more, a solid 72% of people admit they judge a company based on the quality of its card. A flimsy, poorly printed card can be a dealbreaker for nearly 39% of potential clients, making your choices here absolutely critical. Before You Even Think About Designing To make sure the design you see on your screen translates perfectly to paper, you need to build it on the right technical foundation. Getting these specs correct from the get-go will save you from the headache of costly reprints and frustrating delays. Think of it as your pre-flight checklist for a perfect print run. This guide will demystify the essential jargon—like bleed, resolution, and color modes—and give you a clear roadmap to follow. We’ll kick things off with a quick-reference table that summarizes the key specs you need before you even open your design software. This helps ensure the card you hold in your hand looks exactly as you pictured it. Of course, small business owners often have to juggle various printing tasks; for example, you might also need to learn how to efficiently print postage labels for shipping products. A business card is your brand’s first handshake. Investing in quality printing ensures it’s a firm one, communicating professionalism and trustworthiness before you even say a word. Our goal is to arm you with the confidence to handle the entire process. Whether you’re a startup founder creating your very first set of cards or a seasoned pro looking for a refresh, understanding these fundamentals is key. For those just starting out, checking out a curated selection of proven designs can be a great source of inspiration. You might want to explore our business basics collection for professional, print-ready templates that take the guesswork out of it. Quick Reference for Print-Ready Business Card Files Before you dive into your design software, it's a good idea to know the lingo and the required settings. Getting these right from the start will prevent a lot of headaches later on. Here's a cheat sheet with the essential technical specs. Specification Recommended Setting Why It Matters Dimensions 3.5" x 2" (US Standard) This is the most common size, ensuring your card fits perfectly in standard wallets and cardholders. Bleed 0.125" (or 1/8") on all sides Bleed extends your design beyond the final trim edge, preventing ugly white borders if the cutting is slightly off. Safety Margin 0.125" inside the trim line This "safe zone" ensures no critical text or logos get accidentally chopped off during the trimming process. Resolution 300 DPI (Dots Per Inch) A high resolution is crucial for ensuring your text and images are sharp and crisp, not blurry or pixelated. Color Mode CMYK (Cyan, Magenta, Yellow, Key/Black) This is the standard for professional printing. Designing in RGB (for screens) can cause colors to look dull or shift unexpectedly. File Format PDF , AI , or PSD These formats preserve layers and quality. A high-quality PDF is usually the safest bet for uploading to a printer. Think of this table as your blueprint. If you set your design file up with these specifications, you're already 90% of the way to a perfect print job. It's the foundation upon which a great card is built. Setting Up Your Design File for Success Before your business card ever hits a printing press, the digital file needs to be technically perfect. I like to think of the design file as the blueprint for the final product—any tiny flaw in that blueprint will absolutely show up in the finished card. Getting this stage right is probably the single most important step to printing business cards that look sharp and professional. This whole prep process is about making sure the vibrant colors on your screen translate accurately to paper and that no critical info gets accidentally chopped off. It’s a game of precision, and even a small mistake can mean a costly and frustrating reprint. Here's a quick look at the core workflow you'll follow before sending anything off to the printer. As you can see, designing is just the first part. That technical check in the middle is what guarantees you’ll love the final result. Mastering Dimensions and Bleed In the U.S., the standard business card size is 3.5 inches by 2 inches . When you fire up your design software and create a new document, these are the final trim dimensions you're aiming for. But professional printing needs a little something extra called a bleed . So, what is it? A bleed is just a small margin of your background color or image that extends beyond the final trim line. Industrial paper cutters are incredibly fast and powerful, but they aren't always perfect down to the micrometer. Without that extra bleed, any tiny shift during the cutting process could leave a hideous little white sliver along the edge of your card. To prevent this, you absolutely must add a 0.125-inch (or 1/8-inch) bleed on all four sides. This means your total file dimensions should actually be 3.75 inches by 2.25 inches . All you have to do is stretch your background elements—colors, photos, patterns—out to this new, larger edge. This gives the printer a small margin for error and ensures your background goes right to the very edge of the final card. Resolution and Color Mode Are Non-Negotiable Ever seen a printed flyer with a blurry, pixelated logo? That’s almost always a resolution problem. For anything you print, your file’s resolution needs to be at least 300 DPI (Dots Per Inch) . While 72 DPI is fine for websites and screens, it looks fuzzy and amateurish on paper. Just as critical is the color mode. Your monitor and phone screen create colors using the RGB (Red, Green, Blue) light-based model. Professional printing presses, on the other hand, use the CMYK (Cyan, Magenta, Yellow, Key/Black) ink-based model. If you send an RGB file to a printer, their software will have to convert it to CMYK on the fly. This automatic conversion can cause some nasty color shifts—your bright, electric blue might suddenly look like a dull purple. To keep control and get the colors you actually want, always set your document’s color mode to CMYK from the very start. The All-Important Safety Zone Just like the bleed extends outward, the safety zone (or safety margin) is an area inside the final trim line. You need to keep all your essential information, like text and logos, within this zone to guarantee it won't get trimmed off. A standard safety zone is 0.125 inches in from the trim line. For a 3.5" x 2" card, this means your critical content should sit comfortably inside a 3.25" x 2" rectangle right in the center. Background elements can go past it, but your name, phone number, and email address need to stay safely inside. For those curious about the large-scale printing techniques behind projects like business cards, exploring the world of offset printing offers a deeper look into how pros get such consistent quality. To make sure your files are print-ready and avoid common headaches, reviewing some basic artwork submission tips can be a huge help. Stick to these technical rules, and you're setting yourself up for a flawless print run. Choosing Paper and Finishes That Define Your Brand The design is only half the story. The real test comes the moment you hand your business card to someone. That’s when the tactile experience takes over—the weight, the texture, and the way light hits the surface. These physical qualities say just as much about your brand as your logo. A flimsy card can give off a vibe of a flimsy business, but a substantial, thoughtfully finished card screams quality and confidence. This is where you turn your brand’s personality into a physical object people will actually hold onto. Understanding Paper Weight and Thickness In the world of business cards, paper weight is usually measured in points ( pt ), where one point equals one-thousandth of an inch. It's simple: a higher point number means a thicker, more rigid card. That feeling of heft is immediately associated with quality in the recipient's mind. Here’s a quick rundown of the most common options: 14 pt: This is a solid, industry-standard choice. It's professional and durable enough for daily use without feeling cheap, making it a great budget-friendly starting point. 16 pt: You'll notice the difference here. The 16 pt stock feels more substantial and premium, offering a nice step up in quality without a huge price jump. 32 pt or Thicker: Often called "ultra-thick," these cards don't just make an impression; they make a statement. They have a commanding presence and are perfect for luxury brands, executives, or creatives who want a card that’s impossible to ignore. A thick card feels important. It's less likely to get bent, crumpled, or tossed aside. Investing in better material reinforces the idea that your brand is all about substance. Selecting the Right Surface Finish The finish is the coating applied to the paper after printing, and it completely changes the look and feel of your card. The three main choices each serve a different purpose and vibe. An uncoated stock has a natural, textured feel. It's fantastic for appointment cards because it's easy to write on, and it perfectly suits brands with a rustic or organic aesthetic. Think of a bespoke furniture maker—the material itself reflects their hands-on craftsmanship. A matte finish, on the other hand, is smooth and non-reflective. It feels modern and sophisticated while resisting fingerprints and glare. This is a go-to for tech companies or consultants wanting to project a clean, understated professionalism. Finally, a gloss finish is shiny and vibrant. It makes colors pop and images look razor-sharp. If you're a photographer, graphic designer, or any business using bold imagery, this finish will grab attention instantly. Your choice of paper and finish should be an extension of your brand story. A sleek, matte card whispers innovation, while a thick, uncoated card speaks of authenticity and tradition. The global market for custom business card printing is projected to hit USD 7,845.9 million by 2030 . That tells you just how much businesses still value these tangible branding tools. Professionals know that high-quality materials are key to making a memorable first impression. You can explore more about this growing market and its trends in detailed industry research . To help you visualize the options, here's a quick comparison of how different stocks and finishes align with different brand goals. Paper Stock and Finish Comparison for Business Cards A comparative look at common paper stocks and finishes to help you choose the best option for your brand. Feature Standard (e.g., 14 pt Gloss) Premium (e.g., 32 pt Uncoated) Specialty (e.g., Spot UV on Matte) Best For Everyday networking, high-volume orders, budget-conscious brands. Luxury brands, executives, creative professionals making a bold statement. Brands wanting to highlight specific design elements and create a tactile experience. Feel & Vibe Professional and functional. The gloss finish makes colors pop. Substantial, weighty, and organic. Feels artisanal and high-end. Sophisticated and modern. The contrast between matte and gloss is eye-catching. Durability Good for general use. Extremely durable and resistant to bending or creasing. High, with the matte finish resisting fingerprints and smudges. Cost Most affordable option. Higher price point, reflecting the premium material. Mid-to-high range, depending on the complexity of the UV coating. Choosing the right combination depends entirely on the message you want your brand to send the moment someone holds your card. Elevating Your Card with Specialty Finishes Ready to go beyond the basics? Specialty finishes can add a layer of sophistication and intrigue that makes your card truly unforgettable. These are the details people notice, touch, and talk about. One of the most popular premium options is Spot UV . This technique applies a glossy, clear coating to specific areas of your card—like a logo or graphic—while the rest remains matte. The subtle contrast creates a dynamic visual and tactile experience that just begs to be touched. For a touch of pure elegance, foil stamping is a fantastic choice. This process uses heat and pressure to apply a thin layer of metallic foil, resulting in a brilliant, reflective accent. Gold and silver are classics, but foils are available in a huge range of colors, from copper to holographic. You can learn more about crafting stunning designs with our guide to foil stamping services . Finally, if you want a card that truly engages the sense of touch, look into raised ink or embossing . Raised ink (also known as thermography) creates a slightly elevated, glossy texture on text or logos. Embossing physically raises a part of the paper itself. Both methods add a three-dimensional quality that invites people to run their fingers over the design, creating a memorable physical connection to your brand. Bringing Your Design to Life: The Online Ordering Workflow With your design file polished and your paper choices locked in, you’re on the home stretch. Now it's time to turn that digital blueprint into a physical stack of business cards. This is where you hand everything over to a professional printer, and thankfully, online platforms have made this process smoother than ever. It all begins with getting your design into the right format. The gold standard for print is a high-resolution PDF . Think of a properly exported PDF as a sealed container for your design—it embeds all your fonts and flattens your images. This simple step prevents any nasty surprises, like your carefully chosen typeface being replaced with a generic default or layers shifting around when the printer opens the file. When you're ready to export from your design software (like Adobe Illustrator or InDesign), look for a preset labeled "Press Quality" or "High-Quality Print." This will automatically set you up for success with 300 DPI resolution and CMYK color. Most importantly, make sure you enable the option to include bleed and crop marks . These are the guides the printer needs for a perfect, edge-to-edge trim. Placing Your Order, Step by Step Once you have your print-ready PDF, you’re all set to upload it to an online printing service. The interface is usually very intuitive, walking you through each decision point. You'll kick things off by confirming the basic specs for your project. First, you’ll select the product—business cards. From there, you'll be prompted to enter the details you've already figured out: Size: Confirm the standard 3.5" x 2" dimensions. Paper Stock: Choose your paper weight (e.g., 16 pt ) and finish (e.g., Matte). Quantity: Select how many cards you need, from a small test run of 100 to a bulk order of 5,000 or more. Color: Specify if you’re printing on one side or both. This is also the point where you’d add specialty finishes like spot UV or foil stamping. As you make each selection, the price will typically update in real-time, giving you a clear cost estimate before you commit. For anyone needing smaller batches with a quick turnaround, looking into digital printing services is often a great cost-effective and speedy solution. The Make-or-Break Moment: The Digital Proof After configuring your order and uploading your artwork, you'll be presented with a digital proof . Whatever you do, do not skip this step. This is your absolute final chance to catch any errors before your cards hit the press, making it one of the most critical quality checks in the entire workflow. The digital proof is a final preview of what your printed card will look like, showing your design with the trim lines and safety zones overlaid. It lets you meticulously scan for any last-minute problems. Pay close attention to this proof. Double-check for typos, confirm all text is safely inside the margins, and make sure the colors look right. A five-minute review here can save you from the massive headache and expense of receiving a thousand flawed cards. Once you approve that proof, your job is sent into the production queue, and no further changes can be made. Your approval is the green light that tells the printer everything looks correct and they can start the presses. The estimated turnaround time is usually displayed at checkout, so you'll know exactly when to expect your brand-new, professionally printed business cards to arrive. Common Printing Problems and How to Fix Them There’s nothing quite like the feeling of unboxing a fresh batch of business cards… unless you immediately spot a glaring mistake. It's a frustrating moment that, believe it or not, is usually preventable. Most printing errors happen long before the file ever hits the press. They're born from a few common design oversights. The good news? Once you know what to look for, you can sidestep these issues entirely. Let's walk through the most frequent culprits and how to fix them before you approve that final proof. Why Your Colors Look Different on Paper This is probably the most common complaint we hear. That brilliant electric blue on your screen looks more like a dull navy on the printed card. This isn't a mistake by the printer; it's a fundamental difference between how screens and printers create color. Screens use the RGB (Red, Green, Blue) light-based model, which has a massive, vibrant color spectrum. Printers, on the other hand, use the CMYK (Cyan, Magenta, Yellow, Black) ink-based model. The CMYK gamut is naturally smaller, meaning it simply can't reproduce some of the ultra-bright tones you see on your monitor. The Fix: Always start your design in CMYK color mode . If you've already finished your design in RGB, convert it to CMYK yourself. This will give you a much more realistic preview of the final printed colors, allowing you to tweak any shades that look off before you send the file. The Blurry Logo or Pixelated Image Issue Your logo looked sharp and perfect on your computer, but on the card, it’s fuzzy and unprofessional. This is a dead giveaway of a low-resolution file. For professional printing, all your images and graphics need a resolution of at least 300 DPI (dots per inch). Images saved for the web are usually 72 DPI . They look fine on a screen, but they completely fall apart when printed. You can't just scale a 72 DPI image up, either; you have to start with a high-quality source file. The Fix: Use vector files (like .AI or .EPS ) for your logo whenever possible. Vectors can be scaled to any size—from a business card to a billboard—without ever losing quality. For photos, make sure the original image is large and high-resolution. A good rule of thumb: never, ever pull an image off a website and expect it to print well. A quick check of your file’s resolution before you upload can save you from the number one sign of an amateur design. High-quality printing starts with a high-quality source file. Critical Information Is Getting Cut Off You get your cards back, and on half the stack, the last digit of your phone number has been sliced off. This is what happens when you don’t respect the safety zone . This is an inner margin, usually 0.125 inches from the edge, where all your important content must live. Commercial printers use powerful cutters that trim stacks of paper at high speed. While they're incredibly precise, tiny shifts can happen. The safety zone acts as a buffer, ensuring that even if the cut is a hair off-center, your logo and contact info remain perfectly intact. The Fix: Do a final check before you export. Make sure every piece of text and every critical part of your logo is well inside the safety margins. Give your design some breathing room and pull everything away from the edge. Small Details and Subtle Mistakes to Avoid Beyond those big three, a few smaller details can trip you up and weaken your card's impact. Illegible Fonts: Tiny text (under 8pt ) or an overly decorative script font might look cool, but if people can't read your email address, the card has failed. Stick to clean, readable fonts for your contact details. Poor Contrast: That light gray text on a white background looked so chic on your backlit screen, but in print, it's nearly invisible. Always aim for strong contrast between your text and the background to ensure readability. Damaged Finishes: Dark, solid-color cards are notorious for showing scuffs and fingerprints. If your design features heavy ink coverage, consider adding a protective finish. Our durable laminating options can keep your cards looking sharp and professional, even after being passed around. Nailing these details isn't just about aesthetics; it also cuts down on waste. It's estimated that over 8 billion business cards are thrown away each year, many due to printing errors or poor quality. By perfecting your design file from the start, you ensure your investment creates a lasting, positive impression. Got Questions About Printing Business Cards? We’ve Got Answers. Even with a step-by-step guide, it’s normal to have a few last-minute questions before you hit that “order” button. Confidence is key, so let’s clear up some of the most common things people ask when it comes to printing business cards. What’s the Best File Format for Printing Business Cards? Hands down, the gold standard is a high-resolution PDF (Portable Document Format). Think of a PDF as a locked box for your design—it embeds all your fonts, images, and graphics so nothing shifts, changes, or breaks when the print shop opens it. It’s the single best way to ensure what you see on your screen is what comes off the press. When you’re ready to save your file, look for an export preset like “Press Quality” or “High-Quality Print.” These settings are your best friend, as they automatically handle the important stuff like setting the resolution to 300 DPI , converting colors to CMYK , and including your bleed. While some printers might accept other files like AI, EPS, or even a high-res JPG, sticking with a print-ready PDF is the professional move to avoid headaches. How Much Bleed Do I Really Need? The magic number here is 0.125 inches (or 1/8 of an inch ) on all four sides. It might not sound like much, but it’s absolutely essential. So, for a standard 3.5" x 2" business card, your actual design file needs to be 3.75" x 2.25" . That little extra margin gives the printer a buffer zone for the trimming process. Industrial cutters are precise, but not perfect. By extending your background colors and images all the way to the edge of the bleed, you guarantee a flawless, edge-to-edge finish with no awkward white slivers. Can I Print Cards I Made in Canva or Word? Absolutely. Tools like Canva and Microsoft Word are more powerful than ever, but the trick is in how you export your file. Both platforms offer an option to download your design as a “PDF Print.” When you see that option, make sure you also check the box for “crop marks and bleed.” This is crucial—it adds the little guides the printer needs to trim your cards accurately. Just be aware that these programs typically design in the RGB color space (for screens), so you might see some minor color shifts when the file is converted to CMYK for printing. For mission-critical color matching, dedicated design software like Adobe Illustrator or InDesign is still king. What Are Some Good Eco-Friendly Options? More and more businesses are looking for ways to be sustainable, and thankfully, the print world has some fantastic options. The easiest and most impactful choice is to opt for paper stocks made from recycled materials. A focus on sustainability is more than a trend; it's a reflection of your brand's values. Annually, around 100 billion business cards are printed, consuming an estimated 6 million trees . Opting for greener alternatives makes a real difference. Here are a few things to look for: FSC Certification: Paper with the FSC (Forest Stewardship Council) logo comes from forests that are managed responsibly. Uncoated Stock: Uncoated paper is much easier to recycle than cards with heavy gloss coatings or laminations. Soy-Based Inks: Some printers offer soy-based inks as a greener alternative to traditional petroleum-based ones. It's a small change that contributes to a healthier planet. At 4OVER4 , we're obsessed with helping you create business cards that not only look incredible but are printed to the highest professional standards. From a huge selection of paper stocks and specialty finishes to an easy-to-use ordering process, we provide the tools you need to make a lasting impression. Explore our full range of custom printing options today at https://4over4.com and bring your brand's vision to life.
 story
story 45+ Creative Ideas for the Back of a Business Card
Picture this: you're at a networking event, and someone hands you their business card. You do the usual glance—name, title, company—and then, out of habit, you flip it over. But instead of finding a blank white space, you see a compelling offer, a stunning photo, or even a direct link to book a meeting. That's the hidden superpower of your business card . It's the moment a simple piece of contact info transforms into a memorable brand experience. Why the Back of Your Business Card Matters All too often, the back of a business card is just... empty. It’s a huge missed opportunity to stand out, forge a real connection, or prompt someone to take action. In a world where first impressions are everything, that little patch of real estate can be your most effective networking tool. Don't think of it as just the other side of a card. Think of it as your second chance to tell your story, prove your value, and make sure you’re remembered long after the handshake is over. This guide is all about turning that blank canvas into a strategic asset. We’re going to dig into practical, creative, and tactical ideas for the back of a business card designed to hit specific goals. Whether you want to strengthen your brand, capture new leads, or just show off what you can do, the right design can turn a disposable item into a genuine conversation starter. Bridging Physical and Digital Worlds Today's business card should act as a physical key to your digital world. With nearly 93% of organizations now running on a digital-first strategy , connecting your printed materials to your online presence isn't just a good idea—it's essential. This is especially true when you realize that a staggering 88% of paper business cards are tossed out within a week . A thoughtfully designed back, especially one with a QR code, turns your card into a durable gateway, boosting both retention and lead generation. A business card is more than just contact information; it's a physical representation of your brand's attention to detail and creativity. Leaving the back blank is like ending a great story halfway through. We're going to cover everything you need, including: Creative branding and storytelling ideas Action-oriented strategies to capture leads Functional designs that add real-world value By the end, you’ll have a clear roadmap to create a card that doesn’t just share your contact details but actually makes a lasting impact. A great place to begin is with our guide on QR code business cards . Strengthen Your Brand Identity and Story Think of the back of your business card as a pocket-sized billboard. It’s the perfect spot to tell a bigger story, transforming a simple piece of cardstock into a powerful statement about who you are and what you stand for. This is your chance to move beyond just a logo and forge a real, memorable connection. This is where you can bring your brand’s core to life. You could feature a concise, powerful mission statement that gets right to the heart of your values. Or, a strong customer testimonial can do wonders, building instant trust and social proof before someone even thinks about visiting your website. Translate Your Brand Visually For visual-heavy brands—think photographers, designers, or artisans—nothing beats a full-bleed, high-quality image. Show off a signature product or a photo that perfectly captures your brand’s unique feel. It’s a classic case of showing, not just telling, what you’re all about. And don't forget the power of touch. The physical texture of your card can say a lot about your brand. A luxurious foil stamp or an elegant debossed finish from 4OVER4 makes the concept of "premium" a tangible feeling. That tactile experience turns a simple card into a memorable brand moment. To really nail this down, check out this comprehensive guide to brand identity design. Consistency across all your visual and tactile identity is everything. When you use these branding elements across all your materials, including your business cards, you can boost brand recognition by up to 80% . We take a much deeper look into this topic in our article on creating a brand identity . Use Key Data to Tell Your Story Here’s another powerful idea: feature a single, impactful statistic that proves your value. The right number can instantly communicate your effectiveness and set you light-years apart from the competition. For example: An marketing agency might state: "We help clients achieve a 35% average increase in organic traffic." A financial advisor could highlight: "Guiding clients toward 20% portfolio growth, year over year." This strategy isn't just about showing off numbers; it’s about building rock-solid credibility. In fact, firms that display key metrics on their marketing materials often see 15-20% higher conversion rates globally. It makes every inch of your card work that much harder for you. To give you a quick summary of these brand-focused ideas, we've put together a simple table. Brand-Building Ideas at a Glance Idea Best For Pro Tip from 4OVER4 Mission Statement Purpose-driven brands, consultants Keep it short and impactful—one powerful sentence is all you need. Customer Testimonial Service-based businesses, freelancers Choose a quote that highlights a key benefit or solves a common pain point. Full-Bleed Image Photographers, artists, designers Use a high-resolution photo that captures your brand's unique aesthetic. Powerful Statistic Agencies, financial advisors, tech Pick a single, impressive number that demonstrates clear value and results. Each of these approaches helps turn a simple introduction into a lasting impression. By dedicating the back of your card to your brand's narrative—whether through words, images, or data—you create a piece that people feel connected to, making it far less likely to be forgotten. It’s your story, make it count. Generate Leads and Drive Direct Action While great branding helps people remember you, a direct call to action (CTA) turns your business card into a tool that actively works for you. Instead of just sitting there with your contact info, the back of your card can spark a specific, valuable response. The goal is to make it almost impossible for someone not to take that next step. The absolute best way to do this? The QR code . Think of it as a magic portal, instantly connecting your physical card to your digital world. With one quick scan, a potential client lands exactly where you want them, skipping the hassle of typing in a website address. Turn a Handshake into a Conversion Your CTA needs to be crystal clear, simple, and offer something genuinely useful. Piling on multiple requests just creates confusion. Instead, zero in on the one single thing you want that person to do right after meeting you. Here are a few powerful ideas for the back of your business card that get people to act: Book a Consultation: Link a QR code straight to your Calendly or another booking page. A simple line like, "Scan to schedule your free 15-minute strategy session" is all you need. Download a Resource: Offer up a free ebook, a handy checklist, or an insightful white paper. The QR code can lead to a landing page where they pop in their email for the download, which is a fantastic way to add them to your newsletter. Claim an Exclusive Offer: This is a classic for retail or service businesses. "Bring this card for 10% off your first purchase" or "Scan for a secret discount code" creates a sense of urgency and can drive immediate foot traffic or clicks. Subscribe to a Newsletter: A friendly "Scan to join our community" can be a surprisingly effective way to build your email list with people who are already interested in what you do. By locking in on a single, compelling CTA, you transform a polite exchange into a measurable business opportunity. While QR codes are perfect for digital actions, you can find more tips on connecting to your social profiles in our guide on adding social media icons to business cards . Crafting an Irresistible Offer The secret to a card that drives action is making the offer too good to pass up. It needs to solve a problem, provide immediate value, or give someone an exclusive perk they can't get anywhere else. The easier you make it for them, the more likely they are to follow through. Think of your business card's call to action like a direct invitation. It's not just saying 'here's my information'; it's saying 'here's what we can do together, right now.' For instance, a marketing consultant could offer a "Free Website Audit" through a QR code. That's way more compelling than just listing "Web Design Services" on the back. One is a passive statement; the other is an active invitation to get something valuable. This approach makes sure your card doesn't just get stashed in a wallet—it gets used. Showcase Your Expertise and Portfolio For any creative, consultant, or skilled professional, a business card is so much more than a slip of paper with your contact info—it's the movie trailer for your talent. The back of your card is the perfect spot to give a tangible preview of what you do, turning a simple handshake into a real demonstration of your skills. It's all about giving potential clients a reason to believe in you before they even click over to your website. Think of it as your pocket-sized portfolio. A graphic designer might feature a small but striking logo they’re proud of. A photographer could use a stunning, high-contrast shot that perfectly captures their signature style. This kind of immediate visual proof is one of the most powerful ideas for the back of a business card because it changes the conversation from what you claim you can do to what you’ve actually done. Bridge to Your Full Body of Work While a single image is great, you can also use that space to guide people straight to your complete collection of projects. A clean, well-placed QR code is the perfect tool for this, creating an effortless link between your physical card and your digital world. Here are a few smart destinations for your QR code: Your Full Online Portfolio: Send them right to your Behance , Dribbble, or personal portfolio site. A Curated Project Gallery: Link to a page showing off your best and most recent work. A GitHub Repository: For developers, this gives them instant access to your code and contributions. Case Studies: Take them to a page that breaks down your process and the killer results you’ve delivered for past clients. This approach offers instant, undeniable proof of your abilities, giving potential clients a compelling reason to dig deeper and learn more about you. The back of your card should answer the unspoken question in every potential client's mind: "Are you actually good at what you do?" A mini-portfolio or a direct link to your work answers that with a confident "yes." Use Social Proof to Build Trust Your expertise isn't just shown through visuals; it’s also validated by what others have to say. A short, punchy client quote can speak volumes and build trust in seconds. Pick a testimonial that highlights a specific, impressive result or one of your key strengths. For instance, a copywriter could feature a quote like, "Her copy boosted our conversions by 30% ." This strategy brilliantly combines proof of your skills with powerful social proof, building credibility on the spot. You're giving them just enough to be impressed and curious, nudging them to take that all-important next step. Create Functional and Interactive Designs So, how do you design a business card that someone actually keeps? The secret is to give it a second job. This strategy is all about adding practical, real-world value to the back of your card, which skyrockets its chances of sticking around and keeping your brand visible day after day. When your card does more than just list your contact info, it earns a spot on a desk or in a wallet. It becomes a tool. The goal here is pure utility—transforming a simple piece of paper into something genuinely useful. Make Your Card Indispensable This approach is a game-changer, especially for service-based or retail businesses. A little bit of creativity can turn your card into a recurring touchpoint with your customers, encouraging them to come back and building a loyal following. Think about these functional design ideas: Appointment Reminder: This one’s a classic for a reason. If you run a salon, clinic, or consulting business, the back of your card can have simple fields for "Date" and "Time." Instantly, it’s an appointment keeper. Loyalty Punch Card: Cafes, boutiques, and local shops can easily add a grid for stamps or punches. It gamifies the customer experience and rewards them for sticking with you. Mini-Ruler or Conversion Chart: Are you a designer, architect, or engineer? Turn the edge of your card into a handy mini-ruler. A baker could add a kitchen conversion chart that saves someone a quick Google search. Add a Layer of Interactivity Beyond just physical usefulness, you can make your card interactive. This is where you connect your physical card to your digital world, creating a smooth, modern experience for potential clients. The most effective functional designs solve a small, everyday problem for the recipient. When your card becomes helpful, your brand becomes memorable. To turn your business card into a dynamic and functional tool, think about how to embed interactivity right onto it. For example, you can explore these actionable QR code marketing ideas to link people to exclusive content, tutorials, or online tools. This not only adds a ton of value but also lets you track who’s engaging with your card. If you're thinking about more complex designs that need unique shapes or folds, check out our guide on folding business cards to see how you can pack even more utility into that small space. By making your card genuinely helpful, you leave a positive impression that lasts. Choose the Right Design and Finish A brilliant idea for the back of your business card is only half the battle. How you bring that idea to life—the design, the paper, the finish—is what turns a good concept into an unforgettable first impression. This is where you match the physical object to your strategic goal, ensuring your card feels as professional and intentional as it looks. Think of it like this: your card's design sets the stage for your message. A few fundamentals are non-negotiable. Legible fonts are a must, obviously. You also need plenty of white space to prevent a cluttered, overwhelming look; it lets your key message breathe. And of course, strong color contrast makes everything pop. These aren’t just fussy design rules. They directly impact how easily and positively someone receives your message. A clean, professional layout is priority number one for any card that gets results. Matching The Finish To Your Function The material and finish of your card speak volumes before a single word is even read. It’s a subtle yet powerful piece of your brand's story. Choosing the right finish from 4OVER4 can seriously amplify the impact of whatever idea you’ve landed on for the back. Here are a few popular choices and how they sync up with different goals: Glossy Finish: That high-shine coating makes colors incredibly vibrant and images razor-sharp. It’s the perfect pick for photographers or designers using the back as a mini-portfolio. The gloss makes visuals truly leap off the card. Matte Finish: A smooth, non-reflective surface immediately gives off a modern, sophisticated vibe. This finish is ideal for corporate brands, consultants, or anyone aiming for an understated, elegant feel. It’s all class. Raised Spot UV: This is where things get interesting. This technique adds a clear, raised gloss to specific parts of your card. It’s fantastic for adding a tactile element that begs to be touched, whether it's on your logo, a call-to-action button, or making a QR code pop. To get a better sense of how your goal can guide your card’s function, check out this simple decision tree. As the graphic shows, if your main objective is to encourage brand loyalty, that naturally leads you to a functional design like a punch card. The goal dictates the execution. Here's a quick cheat sheet to connect your goal with the perfect finish. Matching Card Finish to Your Goal Finish Type (e.g., Glossy, Matte, Foil) Best For This Goal Why It Works Glossy Showcasing visuals, mini-portfolio Makes colors and photos pop with a vibrant, high-energy feel. Matte Professional, elegant branding Offers a sophisticated, non-reflective surface that feels modern and clean. Uncoated Writable surfaces (appointments, notes) The natural paper texture is easy to write on with any pen, perfect for loyalty cards. Raised Spot UV Highlighting a CTA or logo Adds a tactile, raised element that draws attention and invites touch. Foil Stamping Luxury branding, premium feel The metallic shine conveys exclusivity and high-end quality. Ultimately, the best ideas for the back of a business card are the ones where concept, design, and physical finish all work together in perfect harmony. To really dive deep into the world of textures and coatings, you can learn more about the various types of print finishes available and find the perfect match for your brand. This cohesive approach ensures your card doesn't just share information—it creates a memorable experience. Frequently Asked Questions Got questions about designing the back of your business card? You're not the only one. Let's walk through some of the most common ones to help you nail down the perfect design. What Is the Most Important Information To Put on the Back? Honestly, this completely depends on what you want the card to do . There's no single right answer. If your main goal is lead generation, nothing beats a QR code with a clear, direct call to action like "Scan to Book a Meeting." But if you're trying to build your brand, a short, punchy mission statement or a glowing customer testimonial can create an immediate connection. Trying to show off your work? A stunning portfolio image or a direct link to your gallery is the way to go. The trick is to pick the one action or feeling you want someone to walk away with and focus entirely on that. Should the Back of My Business Card Match the Front? Yes, absolutely. Brand consistency is key to looking professional and put-together. While the actual content on the back will obviously be different, the core design elements need to feel like part of the same family. That means using the same color palette, fonts, and general visual vibe. This cohesion is what makes your card feel polished and intentional, rather than like two separate ideas glued together. A unified design tells people you care about the details. A great business card feels like a single, cohesive brand experience from front to back. The back should complement the front, not compete with it. A focused design with plenty of white space is always more effective than a cluttered one. Is It Unprofessional to Have a Busy Design? A busy design can definitely come across as unprofessional if you're not careful. The biggest mistake people make is trying to cram too much onto that small space. Don't try to include a testimonial, a QR code, and a list of your services all at once. It just creates noise. Instead, pick one primary purpose and dedicate the entire back to making it shine. A minimalist approach almost always wins because it’s clear and confident. Using negative space (or "white space") effectively makes your chosen element pop and ensures your card is clean, modern, and easy to understand in a quick glance. Ready to bring your ideas for the back of a business card to life? At 4OVER4 , we offer a huge range of high-quality papers, unique finishes, and easy-to-use design templates to create a card that truly stands out. Start designing your perfect business card today!
 story
story Print Color Matching Tips: Your Professional Guide
Why Print Color Matching Changes Everything Imagine: you've spent weeks perfecting a client's logo. You finally landed on the perfect shade of teal—one that whispers tranquility and trust. But when the printed brochures arrive, that tranquil teal has become a screaming turquoise. Ouch. This common scenario highlights why print color matching is so vital. It's the bridge between your digital vision and the tangible, printed reality. And it's not just about aesthetics. Color mismatches directly impact your bottom line. Inconsistencies chip away at brand recognition. Think Coca-Cola's red or Tiffany's blue. These brands meticulously control their color reproduction. Why? Because accurate color strengthens brand identity and builds customer confidence. In fact, studies reveal that color consistency can boost brand recognition by up to 80% . That translates into loyal customers and higher sales. The Science and Psychology of Color Print color matching isn't superficial; it taps into the psychology of color. Colors evoke emotions and create associations. A vibrant red can signal energy, while a deep blue might convey trust. But if these colors aren't reproduced accurately, the message gets muddled. Our color perception is also shaped by things like lighting and surrounding colors. A color perfect on your monitor might look completely different under different lighting or printed on a different material. This is metamerism , a key challenge in print color matching. The journey of color matching in printing has been fascinating. In 1908, Toyo Ink Manufacturing Co., Ltd. created the first color catalog—a swatch book of ink colors—in Japan. A big step towards standardization! But the real game-changer came in 1963 with the Pantone Matching System . Pantone gave the printing industry a universal color language. Want to dive deeper into color matching history? Check out this article: Visual Culture: Color Matching Systems . Bridging the Gap: Screen to Print So, how do we bridge the gap between screen and print? By understanding color models . Your screen uses RGB (Red, Green, Blue), mixing light to create colors. Printers use CMYK (Cyan, Magenta, Yellow, Key/Black), which uses ink to absorb light. This fundamental difference is a major culprit in color discrepancies. Mastering print color matching blends technical know-how with artistic instinct. It involves understanding color theory, calibration techniques, and proofing strategies. By honing these skills, you can transform printing pitfalls into triumphs, ensuring your printed pieces reflect your vision and communicate your message effectively. Navigating Color Systems Like a Pro Think of color systems as different languages. Your computer screen speaks RGB, a vibrant language of light, while your printer uses CMYK, the more subdued language of ink. This difference can be a major source of frustration when you're trying to get your printed colors to match what you see on screen. Let's decode these languages and learn how to translate between them. RGB: The Language of Light RGB (Red, Green, Blue) is the language of screens. It's an additive color system, meaning colors are created by adding light. Imagine shining three spotlights – red, green, and blue – onto a white wall. Where the lights overlap, they create new colors: red and green make yellow, red and blue make magenta, and blue and green make cyan. RGB can create millions of colors, making it ideal for digital designs where vibrancy is key. This huge range of colors is perfect for the digital world, but it poses a challenge when it comes to printing. CMYK: The Language of Ink CMYK (Cyan, Magenta, Yellow, Key/Black) is the language of print. It's a subtractive system, meaning colors are created by absorbing light. Think of it like mixing paint. CMYK inks absorb specific wavelengths of light, reflecting back the colors we see. For example, cyan ink absorbs red light, reflecting blue and green – what we see as cyan. CMYK has a smaller range of colors than RGB, and can't reproduce all the vibrant colors you see on screen. This is a core challenge in print color matching. This limited color range is why a design can look vibrant on screen, but duller when printed. The infographic above illustrates how different factors influence the final printed color. It shows how the paper you choose, the specific ink formulation, and even the lighting in the room can affect the way the color looks. All these elements work together, highlighting the importance of considering every aspect of the printing process. Pantone: The Universal Translator Imagine trying to describe a specific shade of blue to someone. Difficult, isn't it? That's where Pantone comes in. Pantone is a standardized color matching system that uses pre-mixed inks called spot colors . Each Pantone color has a unique code, ensuring that "Pantone 185 C" is the same vibrant red, no matter who prints it or what material it's printed on. Pantone is a popular choice for brand colors, ensuring consistency across different media. Precise color matching is especially important for things like business card printing . To help you understand the differences between these color systems, take a look at the table below. It compares their primary uses, color ranges, and best applications. Color System Comparison Guide Comprehensive comparison of major color systems including their applications, color gamuts, and best use cases. Color System Primary Use Color Range Best For Industry Standard RGB Digital displays (screens, monitors) Millions of colors (additive) Web design, digital photography sRGB, Adobe RGB CMYK Print materials (magazines, brochures) Smaller range than RGB (subtractive) Print publications, marketing materials ISO Coated v2 (ECI), Fogra 39 Pantone Specific color matching Pre-mixed spot colors Branding, logo reproduction, consistent color across different print runs Pantone Matching System (PMS) This table summarizes the key differences between the three color systems and helps you choose the right one for your project. While RGB is ideal for digital, CMYK is the go-to for print. Pantone offers a way to achieve consistent color, especially for brand elements. Beyond Pantone, the Natural Colour System (NCS) provides another method for color matching. Launched in 1979 in Scandinavia, NCS describes millions of perceivable colors. It's commonly used in architecture and manufacturing. Discover more insights into color theory. Choosing the right color system depends on your project's specific needs and your budget. Calibration Secrets That Actually Work Let's be honest: the colors you see on your monitor aren't always what you get in print. That vibrant design might look dull, or even completely off, once it's on paper. That's where calibration comes in. It's the foundation of accurate print color matching, making sure your digital creation translates correctly into the physical world. Why Calibrate? The Monitor Deception Think of your monitor like a musical instrument. A tuned piano sounds beautiful, but an out-of-tune piano, well, it's a mess. A calibrated monitor displays true colors. An uncalibrated one can be misleading, resulting in prints that aren’t quite what you envisioned. This can be due to differences in screen technology, factory settings, or even just the age of your monitor. Even the finish of a surface can impact how color is perceived. For example, check out these tips on cabinet wood stain colors to see how finish choices influence the final look. The Calibration Toolkit: Software vs. Hardware You don't necessarily need fancy hardware to calibrate your monitor. Most operating systems have built-in tools that can drastically improve color accuracy. These tools guide you through adjustments for brightness, contrast, and color balance. It’s a great starting point, especially if you’re just beginning with print color matching. Taking Calibration Further With a Colorimeter For more precise color control, a colorimeter is your best friend. This device measures the colors your screen displays and creates a custom ICC profile . This profile is a file that tells your computer exactly how to display colors for your specific monitor. Think of it as a personalized language translator between your monitor and your computer. A colorimeter is a worthwhile investment for professional print color matching, especially when working with clients who need spot-on color accuracy. Printer Calibration: The Other Half of the Equation Calibrating your monitor is only half the battle. Your printer needs calibration too. This involves adjusting the printer’s settings to work perfectly with your chosen paper and ink. Many printers have built-in calibration routines that can really improve your color matching. Creating custom printer profiles for different paper types is also helpful. This optimizes color reproduction for each material. It also saves ink and money in the long run, preventing costly reprints and keeping clients happy. Just like advancements in color matching systems, technology has played a big role in color accuracy. For example, Benjamin Moore’s computerized color-matching system, introduced in 1982 , greatly expanded color options beyond traditional color chips. Maintaining Calibration: A Long-Term Commitment Calibration isn't a one-and-done deal. Monitors and printers change over time. Regular recalibration is essential, just like regular tune-ups for your car. It keeps things running smoothly and prevents surprises. Recalibrate your monitor every month or two. For printers, recalibrate when you switch to a new paper or if you notice the print quality dropping. This regular maintenance will keep your color matching on point, giving you accurate and predictable results every time. Proofing Strategies That Prevent Disasters Imagine a surgeon stepping into an operating room without first checking the X-rays. Sounds risky, right? Skipping the proofing process before sending a print job to press is just as dangerous. Let's explore the different kinds of proofs, how they fit into your workflow, and how they impact your bottom line. Soft Proofing: Your Dress Rehearsal Soft proofing is like a dress rehearsal on your computer screen. It simulates what your final printed piece will look like, letting you check for color accuracy and any potential problems. This is your first chance to catch glaring errors. But remember, soft proofing is only as good as your monitor’s calibration. If your monitor isn't correctly calibrated, you could still be misled. Desktop Proofing: Getting a Feel for It Desktop proofing takes it a step further by creating a quick physical sample on a color-managed printer using the intended paper stock. This lets you assess the color and feel directly, providing a tangible preview. It’s a cost-effective way to handle internal reviews and make minor tweaks. Contract Proofing: The Final Say For critical projects where color precision is paramount, contract proofing is non-negotiable. Think of it as the final word. This high-quality proof uses the exact same printing process, inks, and paper as your final production run. It's the closest you'll get to the finished product before the presses start rolling. Contract proofs serve as a critical reference point for you and your client, ensuring everyone's happy with the final look before you commit to a full print run. Proofing: More Than Just a Technical Check Proofs aren't just about catching technical glitches; they're a vital communication tool. Showing a proof to your client shows you’re professional and builds trust. It provides a clear visual of the end product, managing expectations and avoiding misunderstandings. This proactive approach strengthens client relationships and builds confidence in your expertise. You can even use this opportunity to showcase other offerings, like exploring options for printing vinyl banners . The Value of Proofing: Saving Money in the Long Run While proofing might seem like an extra expense upfront, it can save you a lot of money (and headaches) down the line. Imagine the cost of reprinting an entire job due to a color error, not to mention the damage to your client relationship. By including proofing costs in your initial pricing, it becomes a valuable investment, not a burden. Choosing the Right Proofing Method The best proofing strategy depends on the job’s complexity and your budget. For straightforward projects, soft or desktop proofing might be enough. But for complex projects with tight color requirements, contract proofing is essential. This balanced approach ensures you deliver excellent results without breaking the bank. It's about making smart choices that benefit both your client and your business. Remember, effective proofing and accurate print color matching aren't just about getting the colors right. They protect your reputation and ensure consistent, high-quality work. It's an investment in client satisfaction and your business's long-term success. Mastering Light and Environment Variables Ever bought a shirt that looked amazing in the store, only to discover it was a completely different color back home? That's metamerism in action – the tricky phenomenon where two colors look identical under one light source, but drastically different under another. It’s a major player in print color matching , making your workspace lighting incredibly important. This means the lighting you have during design, proofing, and even client sign-off can dramatically change how colors are perceived. The Science of Light and Color Perception Think of light as a messenger carrying information about color. Different light sources send out different wavelengths, and these wavelengths interact with the pigments in your ink and paper. Incandescent light, for example, is warm, emitting more red and yellow wavelengths. Fluorescent light, on the other hand, is cooler with more blue and green. It's why photographers are so picky about their lighting setups – they need to control how colors appear in their final images. The same principle applies to print color matching. This seemingly simple difference in lighting can have a huge impact. A print viewed under incandescent light might appear warmer and more yellow, while the same print under fluorescent light could look cooler and more blue. This inconsistency makes accurate color evaluation a real challenge. Creating Consistent Viewing Conditions You don't need a high-tech lab to get consistent viewing conditions. But aiming for standardized lighting is key for accurate print color matching. Standard viewing booths or light boxes , which often use D50 or D65 light sources to simulate daylight, offer a controlled lighting environment. These setups ensure consistent color evaluation across different locations and times of day. What if you don't have a viewing booth? Choose a dedicated workspace with consistent lighting. Avoid mixing different light sources in the same area. Neutral-colored walls and surfaces will also minimize color reflections that can skew your perception. For some real-world examples of creating a consistent viewing area, even with simple materials, check out our guide on printed door hangers . Communicating Lighting Requirements When it comes to client approvals, communicating your lighting requirements is essential. Make sure your client views proofs under the same lighting conditions you used. This prevents misunderstandings and ensures everyone agrees on what the final product will actually look like. Clearly documenting the lighting conditions used for approvals can also prevent issues down the line. Standard Lighting Conditions for Color Evaluation To get a better grasp of industry standards for lighting, take a look at the table below: Standard Lighting Conditions for Color Evaluation Comparison of different lighting standards and their applications in professional color matching workflows Light Source Color Temperature CRI Rating Best Use Case Industry Standard D50 5000K 90+ Graphic arts, printing, photography ISO 3664 D65 6500K 90+ Textile, paint, plastics ISO 10526 Incandescent 2700-3000K Low Not recommended for color-critical work N/A Fluorescent Varies Varies Can be suitable with high CRI bulbs N/A As you can see, standardized light sources like D50 or D65 are essential for reliable color evaluation, leading to more consistent print color matching. By understanding and controlling lighting variables, you take a significant step towards making your digital vision a printed reality. Remember, even small changes in your environment can have a big impact on your final results. Solving Print Color Matching Problems Fast Ever feel like you're wrestling with a particularly stubborn print job, where the colors on screen just won't translate to the page? We've all been there. Even seasoned print pros occasionally hit these color roadblocks. But don't worry, a systematic approach to troubleshooting can be your secret weapon. It's all about saving you time, reducing wasted materials, and keeping your clients smiling. Let's dive into some common color matching challenges and how to tackle them head-on. Identifying the Source of the Problem: Playing Detective The first step is figuring out where things are going wrong. Is the issue lurking in the original file? Maybe your monitor is playing tricks on you. Perhaps it's the printer itself, or even the materials you're using. Put on your detective hat and let's investigate. File Issues: Start with the basics. Double-check your file's color mode. Remember, it needs to be in CMYK for print. Also, check for any embedded color profiles that might be causing conflicts. Something this simple can easily throw your colors off. Monitor Calibration: Remember how we talked about the importance of monitor calibration? A miscalibrated monitor can make a file look perfect on screen, even if it's way off in reality. Recalibrating your monitor can be a quick fix that prevents major color headaches down the line. Printer Problems: Your printer needs some TLC too. Is it properly calibrated? Are the ink levels sufficient? Sometimes, a simple printer head cleaning can work wonders and resolve color inconsistencies. Material Mismatches: Think about it – different papers and substrates absorb ink differently. Make sure you're using the right paper type for your project. Consider creating custom printer profiles for different materials to really dial things in. For example, if you're working on packaging, you might want to check out the different options available from packaging products . Nightmare Scenarios: Out-of-Gamut Colors and Substrate Shifts Some color challenges are definitely trickier than others. Let's talk about out-of-gamut colors. These are colors that simply can't be reproduced using standard CMYK inks. They might look vibrant and dazzling on your screen, but they'll appear duller when printed. So, what's the solution? Try finding the closest possible CMYK match. If the color is absolutely crucial to the design, consider using spot colors. Another headache? Matching colors across different substrates. A color that pops on coated paper might look completely different on uncoated stock. The key here is testing. Create separate profiles for each substrate you regularly use. Managing Client Expectations: The Art of Communication Sometimes, a perfect color match is just not possible. That's where communication with your client becomes paramount. Explain the limitations of print color matching in simple terms – no technical jargon allowed. Offer alternative solutions or compromises. Showing your client several proof options and explaining the reasons behind any color variations can build trust and manage expectations. Real-World Troubleshooting: A Practical Example Imagine this: a client's logo is a vibrant, eye-catching orange. But when the business cards arrive, the logo looks dull and muddy. Yikes! After some digging, you discover the file was accidentally saved in RGB. A simple conversion to CMYK and a new proof saves the day (and the project). This kind of color detective work is what sets skilled print professionals apart. By developing a systematic troubleshooting approach and mastering clear communication, you can turn print color matching challenges into opportunities to showcase your expertise and build strong client relationships. It's all about problem-solving, managing expectations, and consistently delivering high-quality results, even when faced with tricky color puzzles. Building Your Print Color Matching Workflow Getting print colors to match perfectly isn't about mastering one technique; it's about building a solid workflow where each step supports the others. Think of it like building a house – a strong foundation is key. This section brings everything together into a practical, repeatable process for consistent, accurate results. We'll explore essential tools and software, from simple setups for smaller studios to robust systems for large-scale printing. Structuring Your Process: From Consultation to Delivery A clear workflow ensures both efficiency and accuracy, like a well-oiled machine. Here's a typical structure: Client Consultation: Start by truly understanding your client's vision and color expectations. Imagine trying to paint a room without knowing what color the client wants! Is it for indoor or outdoor display? Will it be seen under specific lighting? This initial consultation sets the stage for color accuracy from the outset. File Preparation: Make sure your design files are in the correct color mode (CMYK for print). It's like speaking the right language for your printer. Ensure any color conversions are done precisely. Proofing and Approval: This crucial stage is where you and your client confirm the color is spot-on before going into full production. It's like a test drive before buying a car. There are several proofing methods—from quick soft proofs on your monitor to more precise contract proofs. Production and Quality Control: During the actual printing, keep a close eye on things with regular quality checks to catch any color deviations early. Think of it as ongoing course correction during a long journey. Document everything for future reference and consistent results across projects. Final Delivery and Review: After printing, review the finished product with your client under the agreed lighting conditions. This is the final unveiling. Confirm they’re happy and address any last concerns. Essential Tools and Software Having the right tools is crucial for an efficient workflow. Check out this helpful resource: Essential Tools to Master Remote Work . While it focuses on remote work, the idea of having the right tools applies directly to print color matching. Software is essential, from design software like Adobe Photoshop and Illustrator , to specific color management software for calibration and profiling. For basic needs, free or built-in tools might suffice. For advanced control, consider investing in professional software and hardware like spectrophotometers. Workflow Examples: Learning from the Pros Let’s look at two different scenarios: Small Studio Workflow: A small design studio might use calibrated monitors, design software, and a desktop printer with color management for proofing. They work closely with their print provider, sharing detailed color specs and proofs. It's a collaborative approach. High-Volume Operation Workflow: A large printing company uses a more complex system with spectrophotometers for precise color measurement, advanced RIP software for color management, and standardized viewing booths for consistent color evaluation. Think of it as a finely tuned orchestra playing in perfect harmony. They follow strict quality control throughout. Documentation and Training: Building a Consistent System Documenting your workflow is essential, particularly when you have a team. Create a detailed process manual outlining each step. It's like having a recipe everyone can follow for consistent results. Regular training keeps everyone on the same page and up-to-date on best practices. Staying Current: Adapting to Evolving Technologies Print color matching is always evolving. Stay informed about new tech, software updates, and industry standards. It's like keeping your toolkit updated. Workshops, webinars, and industry events will keep your skills sharp and your results top-notch. Need fresh ideas for your next event? Check out these event marketing materials . By creating a well-defined workflow and staying current with industry changes, you guarantee color accuracy and consistency, delivering high-quality prints that meet client expectations every time. Ready to take your printing projects to the next level? Visit 4OVER4 today and explore our comprehensive printing solutions.
 story
story Top Printing Services for Small Business | High-Quality & Affordable
In a world overflowing with digital noise, printing services give small businesses a way to make a real, physical connection with customers. They’re the bridge that turns a design on a screen into something tangible—a sharp business card , a vibrant flyer , or an eye-catching banner . That physical touch builds trust and creates a brand experience that a screen just can't match, making professional printing a surprisingly powerful tool for growth. Why Print Still Matters in a Digital World Think about the difference between a personalized, handwritten note and a generic email blast. One feels special and valuable; the other is deleted in a second. In an era of fleeting digital ads, a well-designed print piece offers that same moment of genuine connection. It's something you can hold, feel, and keep. That tactile experience is exactly why print is still a core part of any smart marketing plan. And the market reflects this. The global online printing service market was valued at around $25.3 billion and is expected to climb to $46.9 billion by 2032 . This growth isn't coming from massive corporations; it's driven by small and medium-sized businesses looking for affordable ways to create professional-quality materials. If you want to dig into the numbers, you can check out the full report for more details. Matching Print Products to Your Business Goals Smart printing isn’t just about ordering a stack of flyers. It's about choosing the right tool for the job. Different print products are designed for specific goals, whether it’s making a killer first impression at a networking event or driving foot traffic for a weekend sale. When you match the product to the purpose, you invest your budget wisely and get results you can actually see. To help you get started, here's a quick guide to connecting common business needs with the right print solutions. Matching Print Products to Your Business Goals Business Need Recommended Print Product Primary Goal Increase Local Awareness Flyers & Postcards Attract foot traffic and promote local events or offers. Build Professional Credibility Business Cards & Letterheads Establish a polished, trustworthy brand identity. Enhance Customer Experience Custom Stickers & Branded Packaging Create a memorable unboxing experience and foster loyalty. Boost Event Engagement Banners & Posters Capture attention and direct attendees at trade shows or markets. This table is just a starting point, but it shows how a little strategic thinking can make your print marketing far more effective. The Tangible Advantage The biggest benefit of print is its physicality. It sticks around. A potential client might close a browser tab and forget your website, but they're much more likely to hold onto a sturdy business card or a beautifully designed brochure. This staying power gives your message more chances to be seen. It occupies real space on a desk or a counter, acting as a quiet, constant reminder of your brand. The right printing service acts as a silent salesperson for your brand. It communicates quality, attention to detail, and professionalism long after the initial interaction has ended. From networking events to direct mail campaigns, having a versatile set of marketing materials allows you to connect with customers in different ways. By weaving these physical assets into your overall strategy, you build a more memorable and resilient brand that truly stands out. How to Choose the Right Printing Partner Picking a printing service for your small business is a lot more than just another transaction. It’s about finding a partner you can count on to bring your brand’s vision to life, every single time. Get this choice right, and it will positively impact your marketing quality, your budget, and even how smoothly your operations run. A little thought upfront can save you a world of headaches from costly reprints, blown deadlines, and brand inconsistency down the road. The first big decision usually boils down to choosing between a local print shop and a national online printer. Your neighborhood shop often provides a personal, hands-on experience, which can be a lifesaver for really complex or custom jobs. On the flip side, online printers like 4OVER4 offer a massive product selection, competitive pricing, and ordering processes so simple you can do it in your sleep. The best fit really depends on what you need, how much you’re printing, and how you like to get things done. Key Factors in Your Decision It's easy to get lost in the weeds when you're comparing printing services. To keep your search on track, just focus on a few core things that truly matter for a successful partnership. These are the elements that separate an okay printer from a great one. Product Catalog Diversity: Can they handle everything you might throw at them? Think business cards, flyers, big banners, and maybe even custom boxes. A printer with a deep catalog saves you the hassle of juggling multiple vendors. Transparent and Competitive Pricing: Look for clear, upfront costs with no sneaky fees for setup, proofs, or shipping. Being able to get an instant online quote is a huge plus. Customer Support and Expertise: What happens when you have a question or run into an issue? You want a responsive, knowledgeable team that’s ready to help. That kind of support is the sign of a real partner. The demand for this kind of accessible, professional printing has sent the industry soaring. The commercial printing market was valued at around $709.2 billion and is expected to climb past $736 billion . A huge driver for this growth is the rise of online platforms that give small businesses access to top-tier materials without forcing them to place massive orders. You can dig into more of these market trends in the full industry report on GlobeNewswire.com . Vetting Quality and Reliability Once you have a shortlist of potential partners, it's time to do a little homework on their quality and dependability. Online reviews are a good place to start, but they don’t paint the whole picture. Look for patterns in what people are saying—are there repeated mentions of slow shipping, colors being off, or amazing customer service? Beyond reviews, the best way to judge quality is to see it with your own eyes. Don't be afraid to ask for a sample kit. Holding a physical product in your hands is the only way to truly assess paper stock, print clarity, and color vibrancy. A confident printer will be happy to show off their work. Getting samples lets you directly compare different paper weights and finishes. It’s a simple step that can save you a ton of disappointment later and ensure your final product is exactly what you envisioned. A small investment of time that pays off big time. Making the Final Choice Your final decision should be a balance of quality, cost, and convenience. Try making a simple checklist to compare your top choices side-by-side. Think about things like turnaround times, shipping costs, and whether they offer helpful design tools or templates. An online provider might be way faster for your standard jobs, while a local shop could be the hero for a unique, intricate project. For many small businesses, a platform that mixes a huge product range with modern, efficient technology is the perfect sweet spot. For instance, the accessibility of digital printing services lets you order small, cost-effective batches—ideal for testing out a new marketing idea. Ultimately, you want to pick a printing partner who aligns with your business’s goals, budget, and quality standards, ensuring they can support you not just today, but as your needs grow and change. Your Essential Small Business Print Toolkit Building a memorable brand takes more than just a slick website or a busy social media feed. Tangible, well-designed printed materials create a strategic toolkit that works together to build your identity, drive your marketing, and earn lasting customer loyalty. This isn't about just ordering a random list of items; it’s about building an arsenal where each piece has a specific, powerful role to play in your growth. Think of it like this: your print toolkit has foundational pieces , marketing workhorses , and loyalty builders . Each category serves a distinct purpose. When you bring them all together, you create a cohesive and professional brand image that customers can see, feel, and trust. Foundational Brand Builders You can't run a marathon without first learning to walk. The same idea applies to your print marketing. These foundational items are the absolute non-negotiables that establish your brand's core identity and professionalism from the very first handshake. Business Cards: A business card is your brand in someone's hand. In just a few square inches, it needs to communicate who you are, what you do, and why someone should remember you. A well-designed card on quality paper stock speaks volumes about your competence and attention to detail long after a meeting is over. For a closer look, you can explore the different types and finishes available when designing your own professional business cards printing project. Letterheads and Envelopes: When you send out proposals, invoices, or any official correspondence, a custom letterhead turns a simple document into a professional statement. It reinforces your brand identity and builds a subtle but powerful sense of legitimacy with clients and partners. These items are your brand's uniform. They make sure every official touchpoint is consistent, polished, and immediately recognizable. Marketing and Promotional Workhorses Once your foundation is solid, it's time to get out there and attract new customers. This is where your marketing workhorses come in. These materials are built to grab attention, communicate value, and drive specific actions—like getting someone to visit your store or use a coupon. Flyers and brochures are the classic go-tos here. Flyers are perfect for high-impact, short-term promotions, like announcing a grand opening, a big sale, or a local event you're sponsoring. Brochures, on the other hand, give you more room for storytelling, making them ideal for showcasing your services, products, or company history in a compelling, easy-to-digest format. The most effective promotional materials do more than just announce; they entice. They solve a problem for the reader, offer clear value, and provide a simple, direct call to action that makes the next step irresistible. Postcards are another powerful tool, especially for direct mail campaigns. Their compact format is perfect for targeting specific neighborhoods with special offers or reminders, delivering your message directly into the hands of potential customers. The infographic below breaks down the cost-effectiveness and brand recall rates for three popular print items every small business should consider. As the data shows, business cards hit a sweet spot with low cost and high brand recall, making them an incredibly efficient networking tool. Loyalty and Experience Enhancers Finally, the most successful businesses know that getting a customer is only half the battle. Keeping them is what really drives long-term success. Loyalty-building print materials are all about enhancing the customer experience and creating memorable moments that build a deeper connection with your brand. Custom Stickers: These are versatile, fun, and surprisingly effective. A branded sticker on a shopping bag, laptop, or water bottle turns your customers into walking brand ambassadors. They’re a low-cost way to add a playful touch that people genuinely enjoy. Branded Packaging: The unboxing experience is a huge marketing moment. Custom boxes, branded tissue paper, or even a simple thank-you note tucked into an order can elevate a routine transaction into something special and shareable. These thoughtful details show customers you care about more than just the sale. They create a delightful experience that encourages repeat business and positive word-of-mouth, turning one-time buyers into loyal advocates for your brand. By investing in this complete toolkit, you equip your business to make a strong impression at every stage of the customer journey. Decoding Print Jargon and Making Smart Choices Stepping into the world of professional printing can feel a lot like learning a new language. You’ll hear terms like "offset," "GSM," and "matte finish" thrown around, and it's easy for small business owners to feel a little lost. But getting a grip on these core concepts is the secret to making smart, cost-effective decisions that make your brand look incredible. Think of it this way: ordering prints without knowing the basics is like trying to bake a cake without knowing the difference between flour and sugar. You might end up with something , but it probably won’t be what you pictured. Nail down these fundamentals, and you’ll ensure your final product matches your vision perfectly. Digital vs. Offset: The Two Main Printing Methods At the heart of it all, there are really two main ways to print: digital and offset . Picking the right one boils down to your project's specific needs, especially how many you need and how fast you need them. Neither is universally "better," but one will almost always be the smarter choice for your situation. To get the most out of your budget, a key first step is understanding the differences between digital and offset printing so you can line up your project with the right technology. Here’s a simple way to think about it: Digital Printing is like using a seriously high-end office printer. It’s perfect for smaller batches, quick turnarounds, and projects where every single print needs to be different (like personalized direct mailers). It's fast, with almost no setup required. Offset Printing is more like a classic, industrial printing press. It’s a more involved process that uses custom plates. While the setup cost is higher, the price per piece plummets as you print more, making it a no-brainer for big jobs where every print needs to be identical. Choosing Between Digital and Offset Printing This table breaks down the core differences to help you decide which path to take for your next project. Factor Digital Printing Offset Printing Best For Small to medium quantities (e.g., 500 flyers) Large quantities (e.g., 5,000+ brochures) Turnaround Time Fast, often available for same-day or next-day shipping Slower due to the plate-making and setup process Cost Lower setup cost, higher cost per piece Higher setup cost, much lower cost per piece on large runs Customization Excellent for variable data printing (e.g., names, addresses) Not practical for personalizing individual prints Color Accuracy Very good, but can have minor variations between runs Exceptional, with precise color matching (Pantone colors) So, for a startup just testing a new flyer design, digital printing is the perfect fit. But for a restaurant chain printing 10,000 identical menus, offset printing delivers unbeatable value. Understanding Paper Weight and Finishes Beyond how it’s printed, the actual materials you choose have a massive impact on how customers see your brand. The two most important choices you’ll make here are paper weight and finish. Paper weight , usually measured in GSM (Grams per Square Meter) , tells you how dense and thick the paper is. A higher GSM number means a heavier, more substantial paper. For instance, standard office paper is around 80 GSM , but a premium business card is usually in the 350-400 GSM range. A thick, hefty business card just feels more professional and permanent, while a flimsy one can come across as cheap. Your choice of paper and finish is a non-verbal cue to your customers. It communicates the level of quality and professionalism they can expect from your business before they even read a single word. Finishes add that final touch, affecting both the look and feel of your printed piece. Gloss: This shiny, reflective finish makes colors pop. It’s great for photo-heavy designs like postcards or catalog covers. Matte: A smooth, non-reflective finish that gives off a more modern and sophisticated vibe. It's perfect for designs with a lot of text because it cuts down on glare. Uncoated: This is paper in its natural state. It has a slightly rougher texture and is often used for things like letterheads or notepads where you need to be able to write on it easily. By mastering these fundamental concepts, you go from being a passive buyer to an informed decision-maker. You can be confident that every dollar you spend on printing is a smart investment in your brand’s image. Preparing Your Designs for Flawless Printing A fantastic design on your screen can quickly become a disappointing and costly mistake on paper if it isn't set up correctly. This is one of the most common hurdles small businesses face, and it often leads to frustrating delays and unexpected reprints. Think of this section as your pre-flight checklist, ensuring your creative vision makes a perfect landing every single time. Getting these details right from the start saves you a world of headache. It empowers you to submit files to a platform like 4OVER4 with total confidence, knowing the final product will look exactly as you envisioned. So, let's walk through the essential steps to prepare a flawless, print-ready file. Setting Up Bleed and Safe Zones Have you ever seen a business card with a tiny, annoying sliver of white along the edge where the color should have been? That’s almost always caused by a lack of bleed . Bleed is simply extra design space you add around your artwork—typically about 1/8th of an inch (0.125") —that extends beyond the final trim line. During the printing process, the paper can shift ever so slightly when it's being cut. By extending your background colors or images into the bleed area, you create a buffer. This guarantees that even if the cut is a millimeter off, you won't see any unprinted white edges. It’s your safety net. On the flip side, you also need a safe zone . This is an inner margin where you should keep all your critical text, logos, and important details. Placing anything crucial too close to the edge risks it getting trimmed off entirely. Keeping everything inside that safe zone guarantees it remains intact and your design looks clean and balanced. Why Resolution Is So Important The crispness of your printed images comes down to one thing: resolution , which we measure in DPI (Dots Per Inch) . For a website or a social media post, a resolution of 72 DPI looks perfectly fine on a screen. But print is a different beast. It requires a much higher density of ink dots to create a sharp, clear image. Submitting a low-resolution file is a surefire recipe for blurry, pixelated results. For professional printing, the industry standard resolution is 300 DPI . This ensures every last detail in your photos and graphics is rendered with sharpness and clarity, giving your materials a polished, high-quality look. Before you even think about saving your file, double-check the resolution of your images. If you just pulled a logo off your website, it's almost certainly not high-res enough for print. Always track down the original, high-quality source files to avoid a fuzzy outcome. Choosing the Right File Format Finally, the way you save your file matters immensely. While you might work in all sorts of design programs, printers need a universal format that locks in all your design elements—fonts, colors, and images—exactly as you intended them to be. The absolute best and most universally accepted format for printing is a high-quality PDF (Portable Document Format) . Here’s why it’s the top choice: It’s Self-Contained: A PDF embeds your fonts and images directly into the file. No more worrying about whether the printer has the right font installed. It Preserves Layout: Your design will look the same on any computer, ensuring what you see on your screen is exactly what the printer gets. It’s Reliable: PDFs are built for professional print workflows and are far less prone to errors than other formats like JPG or PNG, especially for complex layouts. By mastering these three concepts—bleed, resolution, and file format—you take control of your printing projects. This prep work ensures that everything from a simple postcard to intricate custom shapes, which you can explore further with our die-cutting services , will be produced flawlessly. Putting It All Together with 4OVER4 Okay, we've broken down all the pieces of the printing puzzle, from picking the right paper to getting your files ready. That's one thing. But seeing how it all clicks into place with the right partner? That’s where the magic really happens. Let’s walk through a real-world scenario to see what a truly smooth printing process looks like for a new shop owner. Imagine "The Gilded Fern," a brand-new boutique specializing in handcrafted home goods, gearing up for its grand opening. The owner needs a whole suite of printed materials to make a splash—everything from pre-launch buzz to in-store branding and customer loyalty perks. This is where a comprehensive platform becomes a genuine business asset, not just another vendor. A Grand Opening Blueprint The first and most urgent need? Getting people in the door. Using 4OVER4’s online platform, the owner can manage her entire launch campaign from one central dashboard. Attracting Attention: First up, she orders a big, weather-resistant vinyl banner for the storefront. Then, she gets a set of vibrant flyers printed to hand out around the neighborhood. Building Credibility: Next on the list are premium, thick-stock business cards with a sophisticated matte finish. These are perfect for handing out at pre-launch networking events to make a solid first impression. Enhancing the In-Store Experience: She also needs branded touches for the shop itself, so she orders custom product tags and beautiful thank-you cards to slip into every customer's bag. This whole process is handled in one place, which means the brand colors and quality stay perfectly consistent across wildly different products. That consistency is absolutely crucial for building a professional, trustworthy brand image right from day one. A true printing partner doesn’t just fill orders; they give you a cohesive system that cuts through the complexity. This lets small business owners get back to what they do best, knowing their brand presentation is in expert hands. For The Gilded Fern, this means no more wasted time juggling multiple suppliers, re-uploading logos, or stressing about whether the colors will match. It just works. From Launch to Loyalty Once the grand opening is a success, the focus shifts to nurturing customer relationships and bringing people back. The owner logs back into the same platform to create materials designed to build loyalty. Loyalty Cards: She designs simple but effective punch cards to reward her regulars, giving them a great reason to return. Branded Packaging: To elevate the unboxing experience, she orders custom stickers with her logo to seal the tissue paper on every purchase. It's a small detail that leaves a memorable, personal touch. Follow-Up Marketing: A few weeks later, she prints a batch of postcards featuring new products to mail to her growing customer list. By using an all-in-one platform for printing services for small business , the owner of The Gilded Fern has everything she needs right at her fingertips. The platform’s huge catalog is ready to support her business as it grows from a launch-day idea into a beloved local shop. For even more ideas, 4OVER4 has dedicated resources for startups and small businesses ready to scale up. This integrated approach saves time, cuts down on stress, and makes sure every single printed piece works together to build a strong, unforgettable brand. Common Questions About Small Business Printing Even when you have a solid plan, a few practical questions always pop up right when you're about to hit "order." Let's be honest, navigating the world of professional printing can feel a bit overwhelming for a small business owner. But a few clear answers can make all the difference. This section tackles the most frequent questions we hear. Think of it as your quick-reference guide to printing with confidence and avoiding those rookie mistakes that cost time and money. How Much Should I Budget for Marketing Materials? Budgeting for print can feel like trying to hit a moving target. A good rule of thumb for many small businesses is to set aside 1-5% of total revenue for all marketing, and then dedicate a slice of that to print. A brand new business trying to make a splash might lean closer to 5% , while an established one could comfortably sit around 1-2% . But instead of pulling a number out of thin air, it's better to tie your budget directly to your goals. Goal: Attract 50 new customers at a local event. Need: 1,000 high-quality flyers and 200 premium business cards. Action: Get an instant quote for those specific items to build a realistic, project-based budget. The most effective print budgets aren't just a line item on a spreadsheet; they're strategic investments. Start small, measure your return (like how many people used a coupon from your flyer), and then double down on what works. What Is the Most Common Design Mistake to Avoid? The single most common—and costly—mistake we see is submitting designs with low-resolution images . It’s an easy trap to fall into. An image that looks perfectly sharp on your screen (which is typically 72 DPI ) will come out looking blurry and pixelated in print. Professional printing demands a much higher resolution of 300 DPI to get those crisp, clear results you're after. Always, always use the original, high-quality image files. Pulling your logo from your website or a photo from social media is a recipe for a disappointing final product and an expensive reprint. How Can I Ensure Brand Colors Are Consistent? Keeping your brand colors consistent across different products is a huge concern for business owners, and rightfully so. Your brand's signature red should look the same on a business card as it does on a massive trade show banner. The key is to design your files in CMYK (Cyan, Magenta, Yellow, Key/Black) color mode. This is the color model used for printing. RGB (Red, Green, Blue) is for screens, and if you send an RGB file, the colors will shift during conversion. For absolute, perfect color accuracy, especially for your logo, use Pantone (PMS) colors . A Pantone code is like a universal recipe for a specific color, telling any printer the exact shade to use. It's the ultimate guarantee that your brand identity stays strong and recognizable everywhere it appears. Ready to bring your brand to life with flawless, professional printing? 4OVER4 offers a massive selection of high-quality products, intuitive online tools, and expert support to make your vision a reality. Start your next project today at 4over4.com and see the difference a true printing partner can make.
 story
story 12 Best Professional Presentation Template Sources for 2025
In the world of business, a powerful message deserves an equally powerful delivery. A generic, text-heavy slideshow can undermine even the most groundbreaking ideas, causing your audience to disengage before you’ve made your point. This is where a high-quality professional presentation template becomes your most valuable asset, transforming complex data and compelling narratives into visually engaging experiences that resonate. It's not just about aesthetics; it's about building a framework for clarity, impact, and professional credibility. A well-designed template provides a structured, polished foundation that allows your core content to shine, ensuring your audience remains captivated from the first slide to the last. This comprehensive guide is designed to help you bypass endless searching and find the perfect platform for your specific needs. We will navigate you through the top 12 resources for acquiring a world-class professional presentation template , from comprehensive design marketplaces like Envato to AI-powered innovators like Beautiful.ai. For each resource, we’ll provide a direct link, a clear visual example, and an honest analysis of its unique strengths and ideal use cases. You'll gain practical insights to select the right tool, whether you're creating a sales pitch, a corporate training module, or a keynote address, and make your next presentation truly unforgettable. 1. Brochures Templates 4OVER4's Brochure Templates stand out as a premier resource for businesses seeking a professional presentation template that extends beyond the screen. While often associated with digital slideshows, a tangible, professionally printed brochure serves as a powerful physical asset in meetings, trade shows, and client pitches. This platform excels by merging high-caliber design with the practicalities of professional printing, offering an extensive library of templates that are both visually impressive and strategically crafted for business communication. The true strength of this platform lies in its deep integration of design and production. Users can select a template and immediately begin customizing it within 4OVER4’s intuitive online designer, a tool that simplifies the process without requiring advanced graphic design skills. This seamless workflow allows for rapid personalization of text, imagery, and branding elements, ensuring the final product aligns perfectly with your company's identity. Why It's a Top Choice What elevates 4OVER4 is its foundation in over two decades of printing expertise. Unlike purely digital template sites, every design is optimized for a premium print finish. This ensures that the colors, layout, and paper quality of your brochure will produce a polished, high-impact marketing tool. This focus on the final printed piece makes it an invaluable resource for creating materials that leave a lasting impression. Best For: Marketing teams, sales professionals, and small businesses needing high-quality physical leave-behinds for presentations and events. Standout Feature: The combination of a user-friendly online designer with guaranteed professional-grade printing transforms a great digital design into an exceptional physical brochure. Practical Tip: Use the instant pricing tool as you design to manage your budget effectively. Experiment with different paper stocks and finishes to see how they impact cost and the final look. For a cohesive presentation package, consider pairing your brochures with professionally designed folders. Explore options for full-color presentation folders on 4over4.com. Feature Analysis Assessment Customization Extensive options within the online designer, though highly specialized graphic needs may require external software. Ease of Use The interface is user-friendly, but new users may need a short period to familiarize themselves with all the tools. Quality Backed by 20+ years of printing experience, ensuring top-tier print results and material quality. Pricing Competitive, with transparent instant pricing and eco-friendly options available. Turnaround Excellent, with same-day shipping available for most orders, ideal for tight deadlines. 2. Envato Elements Envato Elements is a powerhouse resource for creatives, offering a comprehensive subscription service that goes far beyond just presentation templates. Its primary differentiator is the "all-you-can-eat" model. For a single monthly or annual fee, users gain unlimited access to a colossal library of over 100,000 professional presentation template designs for PowerPoint, Keynote, and Google Slides. This makes it an incredibly cost-effective solution for agencies, marketing teams, and freelancers who constantly need fresh, high-quality design assets. The platform isn't just about quantity; the quality is consistently high, with templates submitted by a global community of professional designers. The true value lies in the bundled assets. A subscription also includes stock photos, vector graphics, fonts, and even video templates, allowing you to create a cohesive and polished presentation without sourcing materials from multiple sites. Key Details & User Experience Navigating Envato Elements is straightforward. The search and filtering system is robust, letting you narrow down options by application (PowerPoint, etc.), style, and color. The user interface is clean, prioritizing asset discovery. Access Model: Subscription-based only. No individual template purchases are available. Unique Offering: The unlimited download model covers all creative assets, not just presentations. Best For: High-volume users like marketing agencies, corporate creative departments, and design freelancers. Pro Tip: Use the "Collections" feature to save and organize your favorite templates and supplementary assets for specific projects, streamlining your workflow significantly. Website: https://elements.envato.com 3. SlideModel SlideModel carves out a specific niche by focusing exclusively on high-quality, 100% editable presentation templates for business professionals. With a library of over 40,000 designs, it’s a dedicated resource for creating data-driven and visually compelling corporate presentations. Its main strength lies in providing complex, pre-built assets like business diagrams, data charts, and editable maps that save immense time. The platform is designed for users who need to communicate complex information clearly without deep design skills. Unlike all-in-one creative platforms, SlideModel’s laser focus on presentations ensures every template is optimized for business contexts. The templates are fully compatible with PowerPoint, Google Slides, Keynote, and OpenOffice, offering great flexibility. A unique feature is the personal concierge service, which provides users with assistance in finding or adapting templates, a valuable touch for those on a tight deadline. Once your digital design is finalized, you can complement it with professional presentation materials for a polished final product. Key Details & User Experience The user experience on SlideModel is exceptionally straightforward, with a clean interface that makes finding the right professional presentation template quick and easy. The search function is robust, allowing filtering by category, tags, and compatibility. Access Model: Subscription-based. Plans vary by download limits, from a 3-month basic plan to an annual unlimited plan. Unique Offering: The library is rich with specialized business diagrams, editable maps, and data visualization tools. Best For: Business consultants, project managers, and corporate teams who frequently create data-heavy or strategic presentations. Pro Tip: Take advantage of the 100% editable nature of the shapes and icons. You can deconstruct complex diagrams and reuse individual components across different presentations to maintain brand consistency. Website: https://www.slidemodel.com 4. Canva Canva has fundamentally democratized design, and its approach to presentations is no exception. It stands out as a supremely accessible, web-based platform that empowers users with little to no design experience to create a stunning professional presentation template . Its core strength is its intuitive drag-and-drop editor, which simplifies the entire design process, from selecting a layout to customizing fonts and colors. Canva offers thousands of templates across countless industries and styles, making it a go-to for quick turnarounds and collaborative projects. The platform integrates a massive library of stock photos, icons, charts, and fonts directly into the editor. This seamless integration means you can build a visually rich presentation without ever leaving the Canva ecosystem. Its real-time collaboration features are also a major draw for teams, allowing multiple users to edit and comment on a presentation simultaneously, streamlining feedback and ensuring brand consistency across the final product. Key Details & User Experience The user experience is Canva's crown jewel; the interface is clean, self-explanatory, and highly responsive. Finding and customizing a template is a friction-free process. Access Model: Freemium. A generous free plan offers substantial functionality, while the Pro subscription unlocks premium templates, an expanded asset library, and advanced tools. Unique Offering: The all-in-one, browser-based editor with built-in asset libraries and powerful real-time collaboration. Best For: Individuals, small businesses, students, and marketing teams needing a fast, easy-to-use solution for creating visually appealing presentations without a steep learning curve. Pro Tip: Use the "Brand Kit" feature (available in Pro) to preload your company's logos, color palettes, and fonts. This allows you to apply your branding to any template with a single click, saving immense time. Website: https://www.canva.com 5. Slidesgo Slidesgo has carved out a niche by offering a vast and visually vibrant collection of both free and premium templates, making professional design highly accessible. Its strength lies in its thematic diversity and a strong focus on fun, illustrative styles that stand out from typical corporate designs. The platform is incredibly user-friendly, offering direct compatibility with Google Slides and PowerPoint, which simplifies the editing process for users of all skill levels. This focus on accessibility makes it a go-to resource for educators, students, and businesses looking for a creative, high-quality professional presentation template without a significant investment. Unlike many platforms that require registration just to browse, Slidesgo allows instant downloads for its free offerings. The templates are known for including useful infographics, icons, and other editable visual aids, providing a comprehensive toolkit within a single download. While a premium subscription unlocks the full library and removes the attribution requirement, the free selection is robust enough for many projects. Key Details & User Experience Navigating Slidesgo is a breeze, with templates neatly categorized by style (e.g., minimalist, futuristic, cute) and topic (e.g., business, education, medical). The search function is effective, and each template page provides a clear preview of all included slide layouts. Access Model: Freemium. A large collection is free with attribution, while a premium subscription unlocks all assets and removes attribution requirements. Unique Offering: A massive library of creative, often illustrated, templates that are completely free to use. Best For: Educators, students, non-profits, and startups needing visually engaging presentations on a tight budget. Pro Tip: Pay close attention to the final slides in each template download; they often contain a full library of extra icons and graphic elements you can copy and paste throughout your presentation for a custom feel. Website: https://slidesgo.com 6. GraphicRiver A sibling site to Envato Elements, GraphicRiver operates on an entirely different model that caters to a different type of user. Instead of a subscription, it functions as a classic marketplace where you can purchase a professional presentation template individually. This pay-per-item approach is ideal for those who need a single, high-impact design for a specific project without committing to a recurring fee. The platform features thousands of unique templates for PowerPoint, Keynote, and Google Slides, all submitted by independent creators from around the world. This model provides immense flexibility and affordability for one-off needs. While you won't get the bundled extras like stock photos or fonts that come with a subscription service, the quality of the core presentation files is consistently high. The direct purchase system ensures you own the license for that specific template, making it a straightforward choice for project-based work. The platform’s vast selection ensures that you can find a design that perfectly complements your brand's aesthetic, much like choosing the right design for custom business cards . Key Details & User Experience The user interface is very search-centric, allowing you to filter by application, price, and even sales volume to find popular and proven designs. Finding what you need is quick, and the checkout process is simple. Access Model: Pay-per-item. You purchase and download individual templates as needed. Unique Offering: A la carte purchasing from a massive, diverse marketplace of designers. Best For: Individuals and small businesses with infrequent needs or those on a tight, project-specific budget. Pro Tip: Pay close attention to the "Included Files" section on a template's product page to see exactly what you get, as some creators include helpful documentation or bonus icons. Website: https://graphicriver.net 7. SlideBazaar SlideBazaar specializes in providing a rich collection of professional presentation template designs, with a strong focus on data visualization elements like infographics, charts, and diagrams. It caters primarily to business, academic, and professional users who need to convey complex information clearly and effectively. The platform distinguishes itself by offering highly specific and functional templates, such as SWOT analysis, customer journey maps, and timeline infographics, saving users significant design time. While many platforms offer general-purpose templates, SlideBazaar's strength lies in its library of purpose-built graphical assets compatible with PowerPoint and Google Slides. Their regularly updated catalog ensures that the designs remain modern and relevant for various business scenarios. This focused approach makes it a go-to resource for managers, analysts, and educators who need to build compelling, data-driven narratives without starting from scratch. For those managing physical marketing campaigns alongside digital ones, exploring custom printing options like door hangers can complement a comprehensive strategy. Key Details & User Experience Navigating SlideBazaar is straightforward due to its clean interface and well-organized categories. Users can easily find specific diagrams or templates through a simple search or by browsing categories like "Business," "Strategy," or "Charts." Access Model: Offers both individual template purchases and affordable subscription plans for unlimited access. Unique Offering: A deep library of specialized business diagrams, charts, and infographic templates. Best For: Business professionals, educators, and students who frequently need to visualize data and processes. Pro Tip: Before committing to a subscription, browse their extensive categories to see if their specialized diagrams align with your most common presentation needs. Website: https://slidebazaar.com 8. PresenterMedia PresenterMedia carves out a unique niche by specializing in animated and interactive PowerPoint templates. If your goal is to break away from static, traditional slides, this platform is a treasure trove of dynamic content. Its core strength lies in providing designs that capture audience attention through movement, including 3D graphics, animated characters, and video backgrounds. This makes it an excellent choice for educators, trainers, and marketers looking to create a more memorable and engaging professional presentation template that truly stands out. While some designs may feel too elaborate for highly conservative corporate settings, the vast majority offer a creative yet professional edge. The platform’s value is enhanced by its extensive library of supplementary assets, including animated clipart and customizable video elements, allowing you to build a cohesive and visually dynamic narrative from start to finish. The regular addition of new content ensures that the selection remains fresh and relevant. Key Details & User Experience The PresenterMedia website is straightforward, with clear categories for templates, animations, and videos. The customization tools are integrated directly into PowerPoint via an add-in, which simplifies the workflow for users familiar with that environment. Access Model: Subscription-based only. No individual template purchases are available. Unique Offering: A strong focus on animated templates, 3D graphics, and interactive elements. Best For: Educators, corporate trainers, and sales professionals who need to create highly engaging and dynamic presentations. Pro Tip: Use the PresenterMedia add-in for PowerPoint to directly search and insert animations and graphics without leaving your presentation, saving significant time. Website: https://www.presentermedia.com 9. SlideGenius SlideGenius operates in a different league, functioning as a full-service presentation design agency rather than a template marketplace. This platform is for organizations that require a completely bespoke, high-stakes presentation crafted by professional designers. Instead of downloading a pre-made professional presentation template, clients work directly with the SlideGenius team to build a presentation from the ground up, tailored to their specific brand, message, and audience. This service is ideal for major corporate keynotes, investor pitches, and critical sales meetings where an off-the-shelf solution won't suffice. The agency’s core strength is its expertise in visual storytelling and data visualization. They transform complex information and rough concepts into polished, compelling narratives. While they don't offer templates, their portfolio serves as a powerful source of inspiration, showcasing what's possible with high-end custom design. The process is consultative, ensuring the final PowerPoint or other format deliverable is perfectly aligned with strategic goals. Key Details & User Experience Engaging with SlideGenius is a project-based experience. You initiate contact through their website, followed by a consultation to define the scope, messaging, and design direction. It is a premium, hands-off service for the client. Access Model: Custom design service on a per-project basis. Pricing is quote-based. Unique Offering: A fully outsourced design process, resulting in a one-of-a-kind presentation. Best For: Corporations, executives, and marketing teams needing a flawless, high-impact presentation for a critical event. Pro Tip: Before engaging, prepare a detailed creative brief. Clearly outline your objectives, target audience, key messages, and any brand guidelines to ensure the design team can execute your vision efficiently. Website: https://www.slidegenius.com 10. Creative Market Creative Market operates as a bustling online marketplace for design assets, functioning as a hub for independent creators to sell their work directly to users. Its strength lies in its vast and diverse collection of unique presentation templates. Instead of a uniform corporate style, you'll find a professional presentation template for every niche, from minimalist and artistic to bold and corporate. The platform's model is built on one-time purchases, making it ideal for users who need a specific design for a single project without committing to a recurring subscription. This direct-from-creator approach results in a treasure trove of distinctive designs that you won't find on larger, more standardized platforms. Many templates come bundled with extras like custom icons, fonts, and even stock photos, providing significant value in a single purchase. Because you're buying from individual designers, the aesthetic variety is immense, offering a more handcrafted and less generic feel than many mass-market alternatives. Key Details & User Experience Navigating Creative Market is similar to browsing an e-commerce site, with robust search filters for application, style, and price. Since quality can vary between individual sellers, it's crucial to read user reviews and check the seller's ratings before purchasing. Access Model: One-time purchase per template. No subscription is required. Unique Offering: A highly diverse, creator-driven marketplace with unique and often niche designs. Best For: Individuals and businesses seeking a unique, one-off template with a specific aesthetic. Pro Tip: Pay close attention to the "What's Included" section on each product page. Many designers bundle valuable fonts and graphics, but file compatibility and included assets can differ significantly. Website: https://creativemarket.com 11. SlideTeam SlideTeam stands out due to the sheer scale of its library, positioning itself as one of the largest repositories for presentation assets on the web. Boasting a collection of over one million slides, it offers an exceptionally deep and diverse range of professional presentation template options. The platform specializes in highly specific business needs, providing everything from industry-focused pitch decks and marketing plans to complex data-driven diagrams and infographic templates. This makes it an invaluable resource for professionals looking for a nearly turnkey solution for a specific report or presentation. The platform's strength lies in its meticulous categorization. Users can easily find templates tailored for functions like finance, HR, or project management, as well as for industries like healthcare or real estate. This granularity saves significant time. A well-designed presentation can also be a powerful leave-behind; explore high-quality booklet and catalog printing to complement your digital slides with a physical asset. Key Details & User Experience Navigating SlideTeam is a search-driven experience. The interface is functional, designed to help users quickly drill down into its massive library to find the exact slide or template they need. Access Model: Freemium. A selection of templates is available for free, but full access requires a subscription plan. Unique Offering: The library's immense size and highly specific, niche-focused template categories. Best For: Business professionals, consultants, and academics who need specialized, data-centric, or industry-specific presentation content. Pro Tip: Use the search bar with very specific keywords like "supply chain process flow" or "5-year financial projection" to leverage the platform's extensive and well-tagged library effectively. Website: https://www.slideteam.net 12. Beautiful.ai Beautiful.ai positions itself as the anti-PowerPoint, focusing on "smart slides" that automatically adapt to your content. Its primary differentiator is an AI-powered design engine that enforces good design principles. As you add text or images, the layout reconfigures itself to maintain a professional, clean aesthetic. This unique approach makes it incredibly appealing to non-designers or professionals who need to create a stunning professional presentation template without spending hours tweaking alignments and font sizes. The platform offers a library of pre-built templates and a vast collection of free photos and icons to populate your slides. While it automates the design, it still allows for team collaboration, making it a viable tool for small teams working on pitches or reports. The trade-off for this simplicity is a reduction in granular control; you are working within the "rules" of the platform's design AI. Key Details & User Experience The user interface is minimalist and guided, focusing on content input rather than design tools. The experience is about speed and consistency. Access Model: Subscription-based. A limited free plan is available, but core features require a Pro or Team subscription. Unique Offering: The AI-driven design assistant that automatically formats slides for a polished look. Best For: Individuals and teams without design expertise who need to produce beautiful presentations quickly and consistently. Pro Tip: Trust the AI. Instead of fighting the automated layouts, focus on choosing the right "smart slide" template for your data and let the platform handle the visual arrangement. Website: https://www.beautiful.ai Top 12 Presentation Template Resources Comparison Item Core Features / Characteristics User Experience / Quality ★ Value Proposition 💰 Target Audience 👥 Unique Selling Points ✨ Brochures Templates (4OVER4) Customizable brochure templates, fast printing ★★★★☆ High-quality print, easy online design 💰 Competitive pricing + eco-friendly 👥 Businesses needing polished marketing collateral 🏆 20+ yrs print expertise, same-day shipping Envato Elements Unlimited downloads, vast asset library ★★★★☆ Professional, regularly updated 💰 Subscription cost-effective 👥 Frequent template users ✨ Includes fonts, graphics, stock photos SlideModel 40k+ editable PPT templates, multi-software support ★★★★☆ Professional + concierge service 💰 Subscription-based 👥 Business professionals ✨ Personal concierge, wide template variety Canva Drag & drop, thousands of free/premium templates ★★★☆☆ Beginner-friendly, versatile 💰 Free tier + paid upgrades 👥 Beginners to pros ✨ Collaboration & extensive design elements Slidesgo Free & premium PPT/Google Slides templates ★★★☆☆ Easy navigation, infographics included 💰 Free + subscription for premium 👥 Students, educators, professionals ✨ No registration for free templates GraphicRiver Individual template purchases, no subscription ★★★★☆ Unique, affordable designs 💰 Pay-per-template 👥 Casual buyers preferring no subs ✨ One-time purchase, global designer network SlideBazaar Infographics, charts, affordable subscriptions ★★★☆☆ Professional, user-friendly 💰 Affordable subscription options 👥 Business & education users ✨ Regularly updated, easy website PresenterMedia Animated & interactive templates ★★★★☆ Dynamic, engaging designs 💰 Subscription required 👥 Creative & dynamic presenters ✨ Animated & 3D graphics SlideGenius Custom presentation design services ★★★★★ High-quality, tailored output 💰 Premium custom pricing 👥 Corporates, high-profile clients 🏆 Visual storytelling expertise Creative Market One-time purchase templates & assets ★★★☆☆ Unique designs, varied quality 💰 Affordable individual purchases 👥 Designers & small businesses ✨ Marketplace with varied creator styles SlideTeam 1M+ slides, free & premium templates ★★★★☆ Extensive, regularly updated 💰 Subscription + free options 👥 Corporates & professionals ✨ Industry/function categorized templates Beautiful.ai AI-powered design, auto-adjusting layouts ★★★★☆ Simplifies design for non-designers 💰 Subscription required 👥 Non-designers & teams ✨ AI-driven smart layouts Choosing the Right Template for Maximum Impact Navigating the vast landscape of presentation resources can feel overwhelming, but as we've explored, the key is to move beyond a simple search for an aesthetically pleasing design. The most effective approach involves a strategic selection process, where the final choice of a professional presentation template is perfectly aligned with your specific communication goals, audience expectations, and brand identity. This guide has dissected a dozen leading platforms, from the expansive, all-you-can-download libraries like Envato Elements and SlideModel to the AI-powered design assistants like Beautiful.ai, each offering a unique value proposition. Your decision hinges on a clear understanding of your own priorities. Are you a data analyst needing to translate complex figures into clear, digestible charts? A platform like SlideBazaar, with its focus on business diagrams, might be your ideal partner. Are you a startup founder pitching to investors, where a polished, modern, and memorable narrative is paramount? Resources from Creative Market or SlideGenius can provide that unique, high-impact edge. The journey to a powerful presentation begins with this self-assessment. Synthesizing Your Options: A Strategic Recap To distill the information presented, consider these core decision-making factors when selecting your next professional presentation template : Brand Cohesion vs. Creative Variety: For established businesses, maintaining brand consistency across all touchpoints, both digital and physical, is non-negotiable. A solution that integrates with print materials is crucial. Conversely, creative agencies and freelancers might prioritize a vast, ever-growing library that fuels diverse client projects, making subscription services like Envato Elements or Slidesgo more attractive. Ease of Use vs. Customization Power: Platforms like Canva and Slidesgo are celebrated for their intuitive interfaces, allowing users with minimal design experience to create professional-looking slides in minutes. However, power users, such as graphic designers, may require the deep customization capabilities found in templates from GraphicRiver or SlideTeam, which offer granular control over every element within PowerPoint or Keynote. Specific Use Case vs. General Purpose: Don't just look for a "business" template. Get specific. If your presentation is for an academic conference, a financial report, a product launch, or a team training session, seek out platforms that specialize in or offer robust categories for that exact need. PresenterMedia, for example, excels with its animated elements, perfect for creating engaging educational content. From Template to Triumph: Final Considerations Ultimately, the best professional presentation template is not merely a background; it is a communication tool that empowers you. It should reduce your design workload, allowing you to focus on what truly matters: refining your message and connecting with your audience. As you implement your chosen template, remember to ruthlessly edit its content. A template provides the structure, but your clear, concise, and compelling narrative brings it to life. Use the features, such as master slides and pre-designed layouts, to maintain consistency, but never be afraid to adapt or remove elements that don't serve your core message. By investing the time to select the right resource, you are investing in your own credibility and the impact of your ideas. A well-chosen and thoughtfully customized template transforms your presentation from a mere series of slides into a persuasive, memorable, and professional experience that achieves its objectives and leaves a lasting positive impression. Ready to ensure your digital presentations and physical marketing materials speak the same language? 4OVER4 offers a comprehensive suite of professionally designed brochure templates and other print products that align perfectly with your presentation's aesthetic. Visit 4OVER4 today to create a cohesive brand experience that impresses your audience from the screen to the printed page.
 story
story Unlocking Networking with QR Code Business Cards
A QR code business card does more than just share your name and number; it cleverly merges your physical card with your digital world. Think of it as a direct bridge from a handshake to your website, portfolio, or social media, making it incredibly easy for new connections to engage with you right away. Your Quick Guide To QR Code Business Cards Putting a QR code on a business card isn't just about slapping a pixelated square onto the design. It’s about creating a functional, interactive networking tool that actually gets used. A great QR code card invites people to scan it and makes it effortless for them to learn more about you. The whole process involves a few key decisions, from picking the right kind of QR code to making sure the final print is perfect. This guide will walk you through the five essential actions you need to get right. Each one is crucial for turning a simple piece of cardstock into an experience that grabs attention and delivers real results. Follow these steps, and you'll have a card that’s not just visually appealing but also a reliable gateway to your online presence. And remember, beyond the tech, your business card is a cornerstone of your professional image. To really understand how it fits into your broader strategy, it’s worth exploring resources on creating a compelling brand identity . After all, it's one of the most powerful business marketing materials you'll ever have. Key Takeaway: A well-executed QR code business card does more than share contact info—it starts a conversation and provides an immediate, measurable call to action for every person you meet. To give you a clear roadmap, let's break down the core actions for making your QR code card effective. Core Actions For An Effective QR Code Card The table below summarizes the essential steps we'll be diving into. Think of this as your high-level checklist for planning, designing, and printing your next card. Focus Area Key Action Strategy Choose between a static or dynamic QR code based on your goals. Design Ensure proper sizing, placement, and contrast for easy scanning. Engagement Include a clear and compelling call-to-action (CTA) near the code. Printing Prepare print-ready files with correct bleed and color specs. Validation Test the QR code thoroughly with multiple devices before printing. Getting these five areas right is the difference between a card that gets tossed and one that gets scanned, saved, and remembered. Choosing Between Static and Dynamic QR Codes When you’re creating a business card with a QR code, one of the first calls you'll have to make is whether to go with a static or dynamic code. This isn’t just some minor technical detail—it completely changes what your card can do for you long after you’ve handed it over. The two types are fundamentally different, and the right choice really comes down to what you want to achieve with your networking. Static Codes: Set It and Forget It A static QR code is the simplest of the two. It directly embeds information—like a URL or your contact details—right into the black-and-white pattern. Think of it like printing text directly on the card; once it’s printed, it’s permanent. You can't change it. This makes it a super reliable, no-fuss option for information that’s not going to change. Maybe you’re a local baker who just wants to link people to your shop's location on Google Maps or a permanent "About Us" page. A static code is perfect for that. It’s free to generate, works forever, and requires zero ongoing management. You make it once, print it, and you're done. Dynamic Codes: The Flexible Powerhouse This is where things get interesting. A dynamic QR code is much more flexible. Instead of locking in your final destination, it encodes a short, unique URL that redirects to the content you want people to see. The magic is that you can change where that redirect points at any time, even after your cards are printed and in people's wallets. Imagine you're a sales professional. This quarter, your QR code can point to a digital brochure for a specific product you're promoting. Next quarter, when you’re pushing a new service, you just log into your QR code provider and update the link. No need to trash a whole box of business cards. This flexibility transforms your business card from a static piece of paper into a living document that adapts to your career, your marketing campaigns, or your latest project launch. Expert Insight: Dynamic QR codes turn a business card from a simple information exchange into an active marketing channel. Being able to update the content and track who's scanning gives you invaluable data for measuring your networking ROI. It's this adaptability that has caused QR code usage to explode. Global usage shot up by about 323% between 2021 and 2025, with dynamic codes grabbing 65% of the market share in 2024. This trend shows a clear move toward more interactive and measurable tools. You can dive deeper into these trends with these QR code statistics . If you’re still on the fence, this decision tree can help you visualize the choice. As you can see, if you need to track your scans or think you'll ever want to update the destination link, dynamic is the only way to go. Otherwise, a static code offers straightforward, permanent simplicity. To break it down even further, here’s a quick side-by-side comparison. Static vs Dynamic QR Codes At A Glance Feature Static QR Code Dynamic QR Code Link Editing No. The destination is permanent. Yes. You can change the destination URL anytime. Scan Tracking No tracking or analytics available. Yes. Tracks scans, location, time, and device. Cost Typically free to generate. Usually requires a subscription fee. Lifespan Works forever as long as the link is live. Requires an active subscription to function. Best For Permanent info like a website homepage or vCard. Marketing campaigns, portfolios, special offers. Ultimately, a dynamic QR code gives you control and insight that a static code just can't match. Track Engagement and See What’s Working The killer feature of dynamic QR codes is the ability to track analytics . Because every scan goes through that short redirect link, the service provider can collect incredibly useful data. You can see things like: How many people scanned your card: A clear metric of engagement. Where they scanned it: Find out if that conference in Chicago was more effective than the one in Miami. When they scanned it: Learn if people are checking out your info right away or days later. What device they used: See if your audience prefers iPhone or Android. For anyone serious about networking, this data is gold. It tells you which events are actually generating leads and which messages are landing with your audience. For marketers, it’s a must-have, providing clear metrics to justify the investment in print materials. As you think about your own design, take a look at some of the best business card ideas to see how others are blending sharp design with smart functionality. Designing Your Card For a Perfect Scan Let's be honest: a QR code that won't scan is just a useless, pixelated box. All that effort you put into choosing a dynamic code and a killer call-to-action is completely wasted if a phone camera can't actually read it. To make your qr code business cards work in the real world, the design has to put scannability first. This all comes down to the practical stuff—size, placement, and contrast. It's easy to overlook these details, but a small mistake can make your code fail when someone tries to scan it on the fly in a dimly lit conference hall. Let’s get into the core design rules that will guarantee a perfect scan, every single time. The Non-Negotiable Rules of Size and Space When it comes to QR codes, size really does matter. If the code is too small, a phone's camera will just see a blurry mess it can't focus on. There’s a bit of wiggle room, but our print experts have landed on a reliable minimum to prevent scanning failures. On a standard business card, your QR code should be at least 0.8 x 0.8 inches (which is about 2 x 2 cm ). This gives smartphone cameras enough visual data to lock on and read the code quickly. You can always go bigger, but shrinking it down is asking for trouble. Just as crucial is the empty space around the code. This buffer is called the quiet zone , and it stops other design elements—like text or logos—from confusing the scanner. The camera needs to clearly see the code's boundaries. Pro Tip: A safe quiet zone is a margin equal to at least four of the tiny squares (or modules) that make up your QR code. When in doubt, a buffer of roughly a quarter-inch of clear space around the entire code is a solid rule of thumb. Ignoring the quiet zone is probably the #1 reason QR codes fail to scan. It might feel like wasted real estate, but that little buffer is essential for performance. Contrast Is King There's a reason the classic black-and-white QR code is so common: it works. Scanners depend on high contrast between the dark squares and the light background to process the information. You can absolutely use brand colors, but you have to maintain a very strong contrast. A light gray code on a white background? It’ll probably fail. A dark blue code on a black background? Definitely won't work. The scanner needs a crisp, clear difference to read the pattern. Here’s how to use color without breaking your code: Always pair a dark color for the QR code itself with a much lighter color for the background . Avoid placing highly reflective or glossy finishes directly over the code. Glare is the enemy of scannability. Print a test copy and try scanning it with a few different phones in different lighting before you commit to a full print run. A good benchmark is to aim for a contrast ratio of at least 4:1 . If you're not sure your color combo will work, sticking with a black or dark-colored code on a white or pale background is always the safest bet. Smart Placement On Your Business Card Where you put the QR code is just as important as how it looks. You need it to be prominent enough to get noticed without wrecking your card's overall design. Tucking it away in a tiny corner is a surefire way to get zero scans. Think about these placement strategies: Dedicate the back of the card. This gives the code maximum space and lets you pair it with a bold, clear call-to-action like, "Scan to see my work." Group it with other digital links. Placing the QR code near your website or social media handles creates a natural, intuitive flow. We have a whole guide on how to best arrange business cards with social media icons that can give you some ideas. Make it the star of the show. For a minimalist design, a well-placed QR code can serve as the primary visual element, immediately drawing the eye. Whatever you do, don't place the code too close to the edge of the card. Print trimming isn't always perfect down to the micrometer, and even a tiny shift could slice into the quiet zone and render the code unscannable. Using Special Finishes Without Ruining the Scan Premium finishes like foil stamping or raised spot UV can make a business card feel incredible. But applying them directly on top of a QR code is a terrible idea. Shiny foil creates glare that blinds scanners, and the texture from raised UV can distort the flat pattern a camera needs to see. So, do you have to pick between a fancy card and a functional one? Not at all. The trick is to apply the finish around the code, not on it. Frame the QR code with a foil border. Add a spot UV gloss to your logo on the other side of the card. This way, you get that premium touch without sacrificing the scannability of your most powerful interactive tool. By following these design rules, you’ll end up with a card that’s both beautiful and brilliantly effective. Getting Your Files Ready for the Presses at 4OVER4 Alright, you’ve nailed the design and your QR code is scanning perfectly. The last hurdle is turning that digital file into a stack of crisp, professional business cards. This is where a lot of great concepts can fall flat—without the right file setup, colors might look off, or worse, important details get trimmed away. Don’t worry, though. Getting your files print-ready isn't nearly as complicated as it sounds. We’ll walk through the essentials of bleed, color, and resolution so your printed qr code business cards look exactly like they do on your screen. Mastering Bleed and the Safe Zone Ever gotten a print job back with a weird, thin white sliver along one edge? That’s what happens when a design file is missing a bleed . Paper can shift ever so slightly during the high-speed cutting process, and a bleed is your insurance against those annoying imperfections. Think of it as an extra margin of your background color or image that extends past the final trim line. For a standard 3.5" x 2" business card, you’ll want to add a 0.125-inch bleed on all four sides. This way, even if the cut is a hair off, the color still goes right to the very edge. Just as important is the safe zone . This is an inner margin where you need to keep all the important stuff—your name, your contact info, and especially your QR code. Keeping everything at least 0.125 inches inside the trim line guarantees nothing critical gets accidentally sliced off. Your Print-Ready Checklist: Bleed: Make sure your background extends 0.125 inches beyond the final card dimensions. Safe Zone: Keep all text, logos, and the QR code at least 0.125 inches inside the final trim line. File Format: Save your final design as a high-resolution PDF, JPG, or TIFF. It’s the best way to lock everything in place. The Right Stuff: Color Mode and Resolution Here’s a classic print mistake: designing in the wrong color mode. Your screen displays color using RGB (Red, Green, Blue) light, but our professional presses print with CMYK (Cyan, Magenta, Yellow, Key/Black) ink. If you send us an RGB file, the automatic conversion can make your vibrant colors look dull and muddy. To keep your colors true, always design and export your files in CMYK color mode from the very beginning. Resolution is the other piece of the puzzle. For a print to be sharp and clear, your file needs to be 300 DPI (dots per inch) at its final size. Anything lower will result in a blurry, pixelated card that just looks unprofessional. If you need a hand setting this up, our guide to business card dimensions in Photoshop breaks it down step-by-step. Choosing Your Paper and Finish The way a business card feels in someone's hand is just as crucial as how it looks. The paper stock and finish you choose says a lot about your brand, and at 4OVER4, we’ve got options for every vibe. Matte Finish: This is a classic for a reason. It’s non-reflective, easy to write on, and gives off a sophisticated, clean feel. Glossy Finish: Want your colors to pop? Glossy is your go-to. It's shiny, modern, and adds a high-impact look that grabs attention. Uncoated Stock: If your brand is more organic, crafty, or down-to-earth, the natural, textured feel of uncoated paper is a perfect match. This is also a great time to think about sustainability. Did you know that over 8 billion business cards are printed each year, and a staggering 88% of them are thrown out in under a week? That’s a mountain of waste. QR code cards are already a step in the right direction, and pairing them with our eco-friendly paper options sends an even stronger message. Once your files are prepped and you’ve picked your stock, uploading to 4OVER4 is a breeze. Our system gives you an instant price quote and lets you choose options like same-day shipping, so you can get your new networking tools in hand and ready to go. Getting Your QR Code Performance Just Right Before you send your design off for a full print run, you have to be 100% sure that QR code works perfectly. Trust me, nothing kills a networking opportunity faster than a failed scan in front of a potential client. It just looks unprofessional. The best way to dodge this bullet is with a solid, real-world testing plan. This isn't just about a quick scan with your own phone. To really know if it's ready, you need to mimic all the different ways people will actually scan your card out in the wild. This step ensures your QR code is tough, reliable, and ready to make connections. The Real-World Testing Protocol To properly vet your QR code, you've got to think like your audience. They're using different phones, standing in different rooms, and have varying levels of tech comfort. Your job is to make scanning your card a seamless, no-brainer experience for every single person. Here’s a practical checklist I use: Test Across Multiple Devices: Don't just rely on your own phone. Grab an iPhone and an Android—ideally one newer model and one that’s a few years old—to cover your bases on compatibility. Vary the Scanning Apps: While most modern phones have a built-in camera scanner, some people still use third-party QR reader apps. It's smart to test with a couple of popular ones from the app store, just to be safe. Check Different Lighting Conditions: Scan a test print everywhere you can think of. Try it in bright, direct light, under normal office lighting, and even in a dimly lit space like a restaurant or conference hall. Glare and shadows are the biggest enemies of scannability. Scan from Different Angles and Distances: People won't always hold the card perfectly flat or at the ideal distance. Try scanning it from a slight angle, up close, and from a bit further away to see how forgiving it is. Key Insight: The most common point of failure for QR codes isn't the code itself, but the context in which it's scanned. Testing for lighting, distance, and device variability is what separates a good QR code from a great one. Unlocking Performance with Dynamic QR Codes If you went with a dynamic QR code , testing is just the starting line. The real magic comes from optimizing its performance using the analytics your provider offers. This data turns your business card from a simple piece of paper into a powerful feedback tool. You can find some serious insights by connecting this data to your other business systems. Many dynamic QR code platforms let you integrate with tools like Google Analytics . This lets you see not just that someone scanned your card, but what they did on your website after they scanned it. Did they check out your portfolio? Fill out your contact form? This is invaluable for measuring your networking ROI. Troubleshooting Common Scanning Failures If your QR code sputters out during testing, don't panic. The fix is usually pretty simple and falls into one of a few common categories. Running through these troubleshooting steps will solve the problem over 90% of the time. One critical factor that often gets missed is the resolution of the QR code image itself. A low-resolution, pixelated code is going to have a hard time scanning cleanly. For a deeper dive on how this impacts your final print, you can learn more about what print resolution is and why it's so important for sharp, scannable results. Here are the usual suspects and how to fix them: Low Contrast: The colors of your code and its background are too similar. You need to increase the contrast. A dark code on a light background is always the safest bet. Insufficient Quiet Zone: Text or other design elements are creeping too close to the code. Add more empty space around all four sides of the QR code to give it some breathing room. Code is Too Small: The physical size of the printed code is smaller than the recommended minimum of 0.8 x 0.8 inches . Make it larger in your design file. Complex Code: You've packed too much data into the code (this is especially an issue with static codes), making the pattern dense and hard for cameras to read. Simplify your destination URL or, better yet, switch to a dynamic code. By systematically testing and troubleshooting, you ensure every card you hand out is a perfect reflection of your brand's quality and attention to detail. Putting QR Codes to Work: Real-World Examples Theory is one thing, but the real magic happens when you see how professionals are actually using QR code business cards to get results. These aren't just a gimmick; they are practical tools that solve real problems, from drumming up new leads to making client onboarding a breeze. Let's look past the "what ifs" and dive into a few scenarios where a quick scan turns a simple handshake into a genuine business opportunity. These examples show just how adaptable this technology is across different industries. The numbers don't lie, either. The global market for digital business cards, which heavily relies on QR codes, was valued at $159.4 million in 2022. It's expected to balloon to $505.2 million by 2032, growing at a steady clip of 12.6% annually. That kind of growth only happens when something truly works. The Always-Current Real Estate Agent Picture a real estate agent holding a busy open house. Instead of passing out a standard card that’s outdated the moment a property sells, she hands out one with a dynamic QR code. The call to action is simple: "Scan to See My Latest Listings." A potential buyer scans it and instantly lands on a mobile-friendly page with all her active properties. The next week, when one house is sold and another hits the market, she just updates the link in her QR code dashboard. Every card she's already handed out now points to fresh, relevant content—no reprints needed. The Photographer’s Living Portfolio A freelance photographer uses their business card as a direct gateway to their portfolio. When they're at a networking event or meeting a potential client, a scan of the QR code takes people straight to a gallery of their latest work. This is a game-changer for a few reasons: Instant Proof: Clients see the quality of their work on the spot. No need to follow up with a link later. Always Fresh: They can swap out the destination URL anytime to showcase a recent project or a specific style relevant to the conversation. Drives Website Traffic: It funnels interested, high-value visitors directly to their online portfolio, boosting engagement. The card is no longer just a piece of paper; it’s an interactive showcase. A smart QR code strategy eliminates the friction between meeting someone and having them experience what you do. It closes the gap from "nice to meet you" to "wow, I need to hire you." The Consultant Who Books Meetings Instantly For a busy consultant, time is everything. Their QR code business card is designed to save it. When they meet a promising lead, a quick scan takes that person directly to their Calendly or booking page. No more back-and-forth emails trying to nail down a meeting time. The prospect sees the consultant's availability and can book a discovery call right then and there. This simple function removes a major hurdle, making it incredibly easy for an interested person to take that next step. If you're looking for the right places to make these connections, your QR code business card can be a powerful tool at the top private members clubs for networking in Dubai . As you can see, with a bit of foresight, a simple QR code can turn your business card into your most effective marketing asset. Got Questions About QR Code Business Cards? Even though QR code business cards are everywhere now, we still get a ton of questions from people figuring them out for the first time. Let's tackle some of the most common ones so you can feel completely confident before you send your design to print. A lot of people ask how these really differ from a classic business card. Think of it this way: a standard card tells people who you are, but a QR code card shows them. It’s no longer a passive piece of paper; it’s an active, digital handshake that invites people to connect with you on the spot. Can I Update The Link After My Cards Are Printed? This is a huge one, and the answer is a definite yes —but with a catch. You have to use a dynamic QR code . Like we touched on earlier, dynamic codes are brilliant because they use a special redirect link that you control. That means you can change where the QR code on your printed card points anytime you want. A year from now, that same card could send people to a new portfolio, a special offer, or your latest project. Just remember, if you opt for a static QR code, that link is baked in forever. No changes allowed. The Bottom Line: For total flexibility, always go with a dynamic QR code. It transforms your business card from a static object into a living marketing tool that can change as your business does. How Do I Make Sure My Code Actually Scans Every Time? A QR code that doesn't scan is worse than no QR code at all. It's a dead end for a potential connection. Fortunately, ensuring your code works perfectly is simple if you stick to three core rules: Make It Big Enough: Your code needs to be at least 0.8 x 0.8 inches . Anything smaller is a gamble. Contrast is Key: Always place a dark code on a light, non-shiny background. Aim for a contrast ratio of at least 4:1 to be safe. Black on white is the gold standard for a reason. Give It Some Space: Don't crowd your code. Leave a clear, empty margin—what we call a "quiet zone"—of at least a quarter-inch around all four sides. Nail these three things, and you'll sidestep the most common scanning fails. You'll give every new contact a smooth, professional experience from the very first scan. Ready to create a business card that does more than just share your name? The expert team at 4OVER4 can help you print flawless QR code business cards that make a lasting impression. Design and order your cards today!
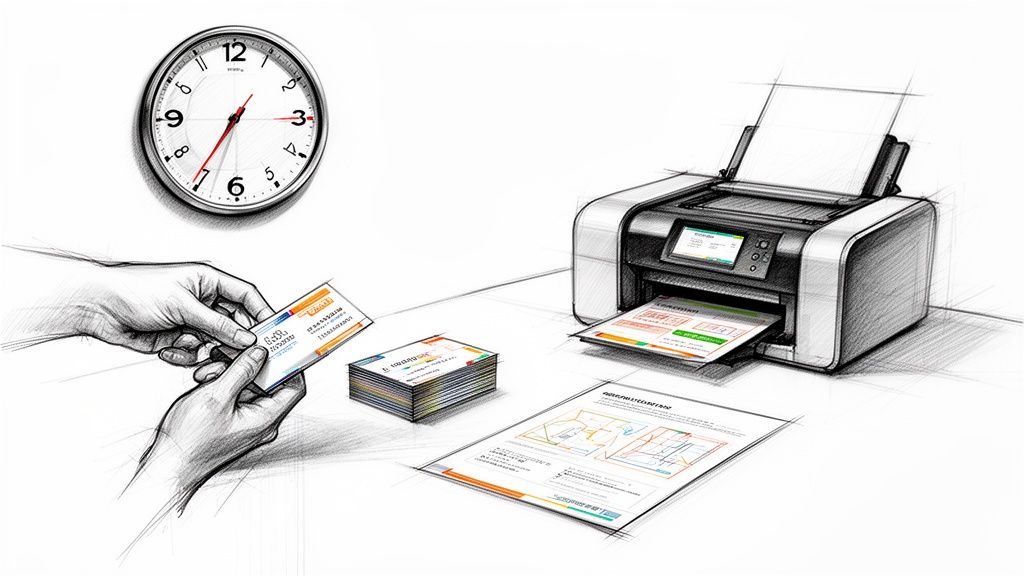 story
story Same Day Business Card Printing Your Guide to Fast Quality Cards
Absolutely, you can get professionally printed business cards the same day you order them. This service is a genuine lifesaver for last-minute meetings, surprise networking events, or those times you just plain run out. The trick is finding a printer that offers same day business card printing and getting your print-ready file submitted before their daily cutoff time. Why Same Day Business Cards Are a Lifesaver We've all been there. A sudden flight for a client meeting, an unexpected invitation to a can't-miss industry conference, or a rebrand that goes live way faster than you planned. In those moments, being without a business card feels like showing up to a race without running shoes. It’s not just about having your contact info ready; it’s about projecting preparedness and professionalism. Same-day printing services are designed to bridge that gap between opportunity and readiness. They’re built for the speed of modern business, where plans can change in an instant. Seizing Unexpected Opportunities Imagine a startup founder who lands a last-minute spot at a major tech conference. Their old cards are completely outdated, showing off a business model they pivoted from months ago. Hours before the flight, they finalize a new design, upload it, and grab a fresh stack of 500 cards on the way to the airport. At the event, they bump into a key investor. The crisp, professional card they hand over makes an incredible first impression, reflecting their agility and seriousness. That single interaction, made possible by a quick print run, leads to a follow-up meeting and, eventually, a crucial partnership. This isn't just about convenience; it’s a strategic tool. Having a high-quality card in hand does more than just share your details—it provides a psychological advantage. It boosts your confidence, allowing you to focus on the conversation and connection, not on apologizing for being unprepared. Beyond the Emergency Scenario While emergency printing is a huge driver, the benefits go much further. Sometimes, you just need a small, specialized batch of cards for a very specific purpose. Think about these situations: Event-Specific Cards: Creating cards with a unique QR code for a trade show to track lead generation. Testing New Designs: Printing a small run of a new brand identity before you commit to a massive order. Temporary Contact Info: Making cards for a contractor or temporary team member hired for a single project. In every case, same-day service gives you the flexibility to act fast without the commitment of a huge bulk order. It allows you to be nimble and responsive to immediate business needs. When you need to explore various options, you can browse a wide selection of business cards printing choices to find the perfect fit for any situation. Ultimately, this service transforms the business card from a static piece of collateral into a dynamic asset you can deploy on demand. Choosing the Right Paper and Finish Under Pressure A great design gets your business card noticed, but the feel of the card is what makes someone remember you. When you’re in a rush for same-day business cards, it’s easy to think your options are limited. But making a quick, smart choice on paper and finish is critical—it’s a direct reflection of your brand's quality, even when you're short on time. The material you pick sends a powerful, non-verbal message. Think about it: a sleek tech startup might go for a sturdy 16pt matte stock . It feels modern, clean, and confident. On the flip side, a graphic designer or artist would probably lean toward a high-gloss finish to make their vibrant, colorful portfolio pop right off the card. Decoding Your Finish Options When speed is the name of the game, your main choices will boil down to gloss, matte, or uncoated stocks. Each one has a distinct personality that can either align with your brand or work against it. Gloss Finish: This is your shiny, reflective option. It makes colors look deeper and more saturated, so it’s a killer choice for designs that are heavy on photos or graphics. It also offers a bit of protection from smudges and moisture. Matte Finish: A matte card has a smooth, glare-free surface that feels modern and sophisticated. It’s perfect for minimalist designs where the focus is on typography and clean lines. Big practical plus: you can easily write on it. Uncoated Stock: This paper feels natural and slightly textured because it has no extra coating. Ink soaks into it a bit more, giving colors a softer, more muted look. It’s the go-to for brands aiming for an organic, classic, or rustic vibe. The demand for on-demand printing is exploding, with the custom printing market expected to hit $33.84 billion . A huge driver is the understanding that a premium card stock isn't just a cost—it’s an investment. Quality cards can boost retention by 25% because they signal value and professionalism from the first handshake. Making the Right Choice Quickly To sidestep decision paralysis, just ask yourself one question: what is my brand’s core identity? Is it slick and modern, or is it warm and traditional? Your card stock should be a natural extension of that. If you want to add an extra touch of durability and a more premium feel, it's also worth seeing what laminating and coating options are available for a rush job. They can elevate the final product significantly. To make things even easier, here’s a quick-glance table to help you choose the best paper and finish for your urgent business card needs. Same-Day Business Card Stock and Finish Comparison Material/Finish Best For Feel & Appearance Same-Day Availability 14pt Gloss Coated Vibrant, photo-heavy designs Slick, shiny, and smooth Very High 16pt Matte Coated Minimalist or text-focused brands Non-reflective, modern, and elegant High 14pt Uncoated Eco-friendly or classic brands Natural, porous, and writable Moderate to High High Gloss UV Maximum color pop and durability Extremely shiny, thick, and protective High Ultimately, picking the paper for your same-day business cards is more of a strategic move than an aesthetic one. By quickly aligning the material with your brand’s message, you ensure your last-minute cards still make a powerful and memorable impact. Getting Your Design File Print-Ready Nothing kills the momentum of a same-day business card printing order faster than a file error. When you're in a rush, the last thing you want is a rejection email that brings everything to a grinding halt. That's why prepping your artwork correctly is the single most important thing you can do to make sure the process is smooth and lightning-fast. Don't worry, you don't need to be a design guru. It's really just about knowing a few technical specs that all printers need to get a sharp, professional-looking card out the door without a hitch. The Make-or-Break Print Checklist Before you even think about hitting that "upload" button, take a minute to run through this list. Getting these three things right will solve 90% of the most common printing headaches and save you from that dreaded "file on hold" email. Resolution: Lock it in at 300 DPI. DPI means "dots per inch." A 300 DPI file guarantees your text and images look crisp and clean. Anything lower—like the 72 DPI standard for web images—is going to come out looking blurry and pixelated. Color Mode: It has to be CMYK. Your computer screen shows colors in RGB (Red, Green, Blue), but professional printing presses run on CMYK (Cyan, Magenta, Yellow, Black). If you send an RGB file, the printer's software will convert it, often leading to weird color shifts. Convert it to CMYK yourself to avoid any surprises. Bleed: Add a 0.125" buffer. A "bleed" is a little extra image area that goes past the final trim line of your card. Paper can shift ever so slightly during the cutting process. That bleed ensures that if the cut is off by a hair, you won't get an ugly white sliver along the edge. If you're using an online design tool, you'll often see built-in templates like this one. They automatically set up the bleed and safe zones for you, taking out all the guesswork and helping you keep important info away from the edges. Common Mistakes That Can Stall Your Order Beyond the big three technical specs, a couple of simple design oversights can trip you up. Keep an eye out for these common slip-ups—they're easy to fix before you submit your file. First, don’t cram important details like names, phone numbers, or email addresses right up against the edge. You need to respect the "safe zone," which is usually 0.125 inches inside the final trim line. This keeps anything critical from getting chopped off during trimming. Another classic mistake is using a low-resolution logo, often one you've just pulled from a website. For a sharp, professional look, always use the original vector file (like an .AI or .EPS) or, at the very least, a high-DPI raster file (.PNG or .JPG). A flawless print file is your ticket to the fast lane. Printers' automated systems are designed to process perfect files instantly. An error-free submission gets your job on the press faster, keeping your same-day promise on track. The rise of on-demand services is directly linked to the booming custom printing industry, where small and medium businesses now hold a 53.8% market share. This accessibility is reflected in pricing; for example, a run of 500 cards on durable 14pt stock can cost as little as 18¢ per card, making professional quality highly attainable. Finally, remember that these principles apply to more than just business cards. If you're curious, you can check out this handy guide to flawless printing on various materials to learn more. And for those moments when you're relying on modern presses for a rush job, understanding the ins and outs of professional digital printing can help you get the absolute best results. Navigating Cutoff Times, Pickup, and Delivery When you’re in a pinch and need same-day business card printing , the design is only half the story. The real challenge? Beating the clock. Every printer has a daily cutoff time , and it’s the most critical piece of the puzzle. Think of it as the last call for the day's print run. If the cutoff is 10 AM , getting your file in at 10:01 AM means you've missed your shot for that day. Your order will automatically get bumped to the next day's production schedule. Printers are incredibly strict about this because their entire workflow is a tightly choreographed dance of hundreds of jobs, and one late file can throw everything off. Pickup or Delivery: Which is Faster? Once your file is approved and in the queue, you have to decide how you’ll get your cards. You’ve got two choices: local pickup or delivery. For pure, unadulterated speed, local pickup is almost always the winner . If you’re close enough to the print shop, you can often swing by in the late afternoon and grab your cards fresh off the press. This completely sidesteps any potential shipping hiccups. This is a lifesaver when you’re grabbing cards on your way to a conference or a last-minute networking event. Having a solid strategy for your event marketing business cards in these moments can be a game-changer. Delivery is your best bet if you can't make it to a physical location. Just be sure to plan for it. Even with same-day production , the cards still need to be packaged and handed off to a courier. In most cases, this means they’ll arrive the next business day, so always double-check the estimated delivery date before you hit "confirm." A clean, print-ready file is your golden ticket to meeting the cutoff. Flawless files sail through automated checks instantly. Files with problems? They get flagged for manual review, and that eats up precious minutes you just don’t have. This diagram shows you exactly what a perfect print file looks like, so you can avoid those last-second headaches. Making sure your design has proper bleed, respects the safe zone, and is in CMYK color mode is non-negotiable for a fast, smooth process. So, You Missed the Deadline. Now What? It happens. You missed the cutoff. The first thing to do is take a breath. Your order isn't gone; it just gets rolled over to the next business day's print run. Most online printers will update your estimated completion time automatically. You'll still get your cards fast—just not quite same-day fast. Here’s a quick rundown of your options to help you choose wisely: Option Speed & Reliability Best For What to Keep in Mind Local Pickup Highest True emergencies when you’re located near the printer. Always confirm the pickup hours and location address. Courier Delivery Moderate Convenience when you can’t get to the print shop yourself. Make sure next-day delivery is available for your zip code. Once you get the hang of these logistics, you'll be able to navigate the rush printing process like a seasoned pro and get your cards exactly when you need them. Breaking Down the Cost of Same-Day Service Let's be real: speed costs money. But it doesn't have to be a confusing line item on your invoice. When you opt for same-day business card printing, you're essentially buying a VIP pass to the front of the print queue. That rush fee is built into the price you see, but a few other choices you make will also nudge the final total up or down. The biggest factor, as you might guess, is quantity . It's a classic economy of scale situation. While ordering more cards brings down the price per card , a bigger print run will always have a higher total cost. For example, a quick batch of 50 cards might run you about $30 , but bumping that up to 500 cards could land closer to $90 . The savings per card is obvious, so it’s always smart to think ahead and order as many as you’ll realistically need. Your choice of paper stock also plays a role. A solid, standard 14pt cardstock is going to be your most budget-friendly option. Stepping up to a thicker, more premium 16pt stock will feel more substantial in hand, but it will also add a few dollars to your order. It all adds up. How Finishes and Features Affect Your Budget This is where the costs can start to climb a bit more. A simple gloss or matte coating is often a low-cost add-on or even included, but the more specialized options will definitely impact your bottom line. UV Coating: This gives your cards a super high-gloss, durable finish that really makes colors pop. But, it's an extra step in the production process, adding time and material costs. Double-Sided Printing: Using both sides of the card is a no-brainer for maximizing your real estate. Just remember, it requires a second run through the press, which naturally increases the price. The price gap between a basic, single-sided card on standard stock and a premium, double-sided card with a special finish can be pretty wide. Your best friend here is the instant online price calculator—play around with the options and watch how they affect the total in real-time before you lock anything in. Think of it this way: ordering 500 cards on standard 14pt stock with a gloss finish is your baseline. If you upgrade to a heftier 16pt matte stock and add printing to the back, you could see the cost jump by 20-30% . If you want to add a touch of class without going all-out on a rush order, you can explore some other fantastic finishes that make a big impression. By making small, informed choices on these details, you can easily control your budget. It’s totally possible to get a professional-looking card, fast, without any surprise expenses. Your Questions on Same Day Printing, Answered When you’re in a tight spot, you need answers, not guesswork. The world of same day business card printing can feel like a maze, especially when the clock is your enemy. Let's cut through the noise and tackle the most common questions you probably have right now. Can I Really Get Business Cards the Same Day I Order Them? You absolutely can, but it all comes down to timing. The single most critical piece of the puzzle is getting your print-ready file submitted before the printer's daily cutoff. This is usually sometime mid-morning. Make that deadline, and your order gets bumped to the front of the line, ready for pickup later that afternoon. Miss it by even a few minutes, and your job will almost certainly get pushed to the next business day. Always, always double-check the cutoff time before you start. What’s the Best File Format for a Rush Job? Hands down, a high-resolution PDF is the gold standard. When time is of the essence, you want a file format that sails through the pre-press checks without any hiccups. A properly set-up PDF is your best bet to avoid getting your job flagged for a manual review, which is a guaranteed delay. To keep things moving smoothly, make sure your PDF checks these three boxes: Resolution: Your file should be saved at 300 DPI to keep text and images looking sharp. Bleed: Don't forget to include a 0.125" bleed on all four sides. This is what prevents those ugly white slivers at the edge of your cards after trimming. Color Mode: Make sure you're working in CMYK. Submitting an RGB file will lead to color shifts when it's converted for print. Does "Same Day" Mean I'm Sacrificing Quality? Not even a little bit. A reputable printer uses the exact same professional-grade digital presses, premium card stocks, and quality checks for rush orders as they do for standard jobs. You’re not getting a watered-down product. You’re paying a premium to jump the production queue, not for them to cut corners. You should expect the same crisp, vibrant, and professional quality you need to make a solid first impression. What Happens If I Miss the Cutoff Time? Don't sweat it. If you miss the same-day window, your order simply rolls over into the next available production slot. In most cases, this just means it will be printed the following business day and ready for pickup or shipping that afternoon. Most online ordering systems are smart enough to update your estimated completion date in real-time before you even checkout. That way, you know exactly when your cards will be ready, even if you were a little late to the party. Ready to get started? 4OVER4 offers fast, reliable same day business card printing to help you seize every opportunity. Design your cards now and get them when you need them .
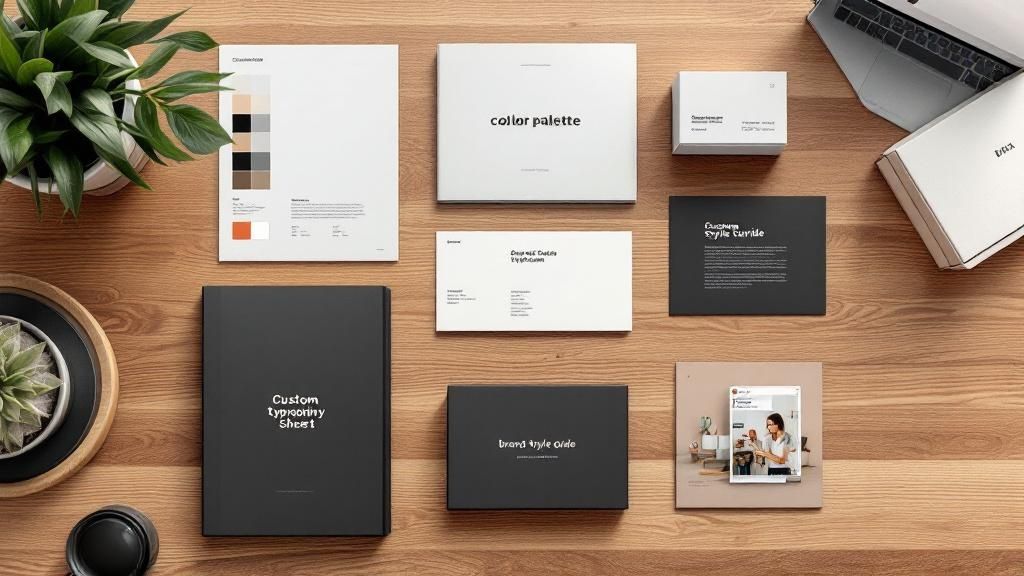 story
story 7 Essential Small Business Branding Tips for 2025
In a crowded market, simply having a great product is not enough. Your brand is your promise to your customer; it is what sets you apart and turns one-time buyers into lifelong fans. For a small business, branding is not a luxury reserved for massive corporations; it is a fundamental strategy for survival and growth. It's the story you tell, the impression you make, and the loyalty you build. Effective branding creates an identity that resonates, builds trust, and commands attention even with a limited budget. A strong brand becomes your ultimate competitive advantage, influencing everything from customer perception to employee morale. This guide moves beyond generic advice to deliver practical small business branding tips designed to be actionable and impactful. We will explore how to build a powerful brand identity that connects with your audience on a deeper level. You will learn specific strategies for defining your core message, crafting a compelling visual system, and leveraging tangible assets. We'll show you how high-quality printed materials, from business cards to custom packaging, can bring your brand to life in your customers' hands, making your presence unforgettable. Get ready to transform your business with these essential branding techniques. 1. Develop a Consistent Visual Identity System Your visual identity is the face of your brand. It’s the collection of visual elements, like your logo, colors, and fonts, that your customers see. A consistent visual identity system ensures that these elements are used uniformly across all your brand materials, creating a cohesive and instantly recognizable presence. This system is one of the most fundamental small business branding tips because it builds professionalism and trust. Think of it as your brand's official uniform; it should look the same on a business card, a social media post, or a large-format banner. A strong visual system ensures every piece of communication reinforces the same professional image, from a simple thank you card to a complex trade show display. For example, Mailchimp's consistent use of its signature yellow and mascot, Freddie, makes its brand instantly familiar. Similarly, Warby Parker's clean, minimalist aesthetic is applied everywhere from its website to its retail stores, conveying a modern and sophisticated brand personality. This level of consistency makes a small business appear established and reliable. How to Implement a Visual System Getting started doesn't require a massive budget. The key is to make deliberate choices and document them. Establish Core Elements: Start by defining your primary logo, a secondary logo variation (like a simplified icon), a color palette (2-3 main colors is best), and primary and secondary fonts. Create a Style Guide: Document these rules in a simple one-page PDF. This guide should specify your official color codes (HEX, RGB, CMYK), font names, and rules for logo placement, like minimum size and clear space. This document becomes your brand's rulebook. Use Templates: To maintain consistency with ease, create templates for common marketing materials. This can be done with free tools like Canva or more advanced applications. When developing your visual identity, exploring various design and prototyping tools can be beneficial; for instance, consider leveraging resources like Framer's design and prototyping tools to experiment with different layouts and user interface concepts before finalizing your templates. By applying this system to all your printed collateral, from letterheads and business cards to posters and flyers from a printer like 4OVER4, you ensure every touchpoint reinforces your brand's unique identity. This consistency is not just about looking good; it's about building equity and recognition in a crowded market. 2. Define Your Unique Value Proposition (UVP) While a visual identity is the face of your brand, your Unique Value Proposition (UVP) is its soul. A UVP is a clear, concise statement that explains what makes your business different, how you solve a customer's problem, and why they should choose you over the competition. For small businesses, a powerful UVP is a critical tool for cutting through market noise. It answers the most fundamental question a potential customer has: "What's in it for me?" This is one of the most essential small business branding tips because it directly addresses customer needs and sets you apart from even the largest competitors. A strong UVP focuses on tangible benefits and outcomes. Consider classic examples like FedEx: "When it absolutely, positively has to be there overnight." This promise isn't about their planes or logistics; it's about reliability and peace of mind for the customer. Similarly, Slack’s UVP, "Be more productive at work with less effort," highlights a direct benefit to the user’s daily routine. These statements are powerful because they are customer-centric, memorable, and make a clear promise that distinguishes the brand. How to Implement Your UVP Defining your UVP is a strategic exercise in understanding your customers and your unique strengths. It’s not just a slogan; it's the core of your messaging. Analyze Your Strengths: Start by completing this sentence: “Unlike our competitors, we uniquely offer ______.” This forces you to identify what truly sets you apart, whether it’s superior quality, unmatched customer service, or innovative features. Survey Your Customers: Your existing customers are a goldmine of information. Ask them directly why they chose you and what they value most about your product or service. Their language often reveals the true benefit you provide. Focus on Outcomes: Customers buy results, not features. Instead of saying you sell “high-resolution cameras,” say you help people “capture crystal-clear memories that last a lifetime.” Frame your value in terms of the positive change you create for your customer. Once defined, your UVP should be front and center across all your marketing materials. It’s the perfect tagline for your custom business cards , the headline on your website, and the core message in your ads. A consistent UVP ensures every customer interaction reinforces why your brand is the best choice. 3. Build an Authentic Brand Story Beyond logos and colors, your brand's heart lies in its story. Authentic brand storytelling is the art of weaving a narrative that connects your business's origins, values, and mission to your customers' emotions. For small businesses, this is a powerful tool. It allows you to compete with larger, more impersonal corporations by humanizing your brand and forging genuine connections. This is one of the most impactful small business branding tips because it transforms customers into advocates who don't just buy a product, but buy into a purpose. Think about how this creates differentiation. TOMS Shoes built an empire not just on footwear, but on its "One for One" giving model, a story of social impact. Similarly, Patagonia's narrative of environmental stewardship and rugged adventure resonates deeply with its audience, making its products symbols of a lifestyle. Your story doesn't need to be world-changing; it just needs to be true. It’s the human element, the passion behind your work, that builds loyalty far more effectively than any discount ever could. How to Craft Your Brand Story Your story already exists; you just need to articulate it. Focus on authenticity over perfection, as pioneered by thought leaders like Simon Sinek, who famously urged businesses to "Start With Why." Define Your "Why": Go back to the very beginning. What was the problem you wanted to solve or the passion that drove you to start your business? This origin story is the foundation of your entire narrative. Embrace Vulnerability: Don’t be afraid to share the struggles and challenges you overcame. These moments of imperfection make your brand relatable and human. The journey is often more compelling than a flawless victory. Make the Customer the Hero: Frame your story around how your business helps customers overcome their own challenges. As Donald Miller outlines in his StoryBrand framework , your brand should act as the guide that helps the customer (the hero) succeed. Weave It Everywhere: Your story isn't just for your "About Us" page. It should be present in your social media content, email newsletters, and even printed materials like product inserts or brochures from a service like 4OVER4, which can share a brief version of your mission with every order. 4. Leverage Local Community Engagement Building a brand isn't just an online activity; it's about creating real-world connections. Local community engagement involves actively participating in and supporting your immediate area through sponsorships, partnerships, and events. This hyper-local approach transforms your business from a simple storefront into a valued community member. This is one of the most powerful small business branding tips for brick-and-mortar companies because it fosters genuine loyalty and generates powerful word-of-mouth marketing that digital ads often can't replicate. When customers see your brand supporting a local 5K race or sponsoring a little league team, they associate your business with positive community values. A local bookstore that hosts author readings becomes a cultural hub, not just a place to buy books. Similarly, a restaurant that proudly partners with nearby farms builds a narrative around freshness and local support. This strategy, popularized by companies like Starbucks that aimed to create a "third place" between home and work, establishes your business as an indispensable part of the neighborhood's fabric. How to Implement Local Engagement Authentic community involvement is about showing up and contributing meaningfully. It’s a long-term investment in your brand’s local reputation. Choose Relevant Sponsorships: Don't just sponsor any event. Pick opportunities that align with your brand's values and target audience. A fitness studio sponsoring a health fair makes more sense than sponsoring a tech conference. Forge Local Partnerships: Collaborate with non-competing local businesses on joint promotions. A coffee shop could offer a discount to customers of a nearby boutique, and vice-versa, strengthening both brands. Utilize Your Space: If you have a physical location, offer it for community meetings, workshops, or small events. This brings new people through your doors and positions you as a community-centric business. Think Hyper-Locally with Print: Use print marketing to make a direct impact in your neighborhood. For instance, you can use custom printed door hangers from 4OVER4 to promote a special neighborhood-only event or partnership, showing your commitment to the people right next door. 5. Focus on Exceptional Customer Experience Your brand isn't just what you sell; it's the entire experience you provide. Customer experience branding means intentionally designing every single customer interaction to reflect and reinforce your brand's core values. For a small business, this is a powerful competitive advantage. While larger corporations often rely on standardized, impersonal service, you can offer personalized, memorable experiences that build deep-seated brand loyalty and turn customers into vocal advocates. This is one of the most impactful small business branding tips because it transforms a simple transaction into a lasting relationship. An exceptional experience makes your customers feel seen, heard, and valued, creating an emotional connection that transcends price. The online shoe retailer Zappos built its entire brand on this principle, offering a 365-day return policy and empowering its customer service team to go above and beyond to solve problems. Likewise, the Ritz-Carlton hotel chain is famous for authorizing every employee to spend up to $2,000 to resolve a guest's issue, demonstrating a powerful commitment to satisfaction. These brands understand that how a customer feels is a critical part of their identity. How to Implement Exceptional Customer Experience Building a brand around customer experience requires a proactive and systematic approach. It’s about being intentional with every point of contact. Map the Customer Journey: Start by outlining every touchpoint a customer has with your business, from their first visit to your website to post-purchase follow-up. Identify key moments where you can enhance the experience, whether through clearer communication, a simpler checkout process, or a personalized thank you. Empower Your Team: Your employees are your brand ambassadors. Train them thoroughly on your brand values and give them the autonomy to make decisions that favor the customer. When your team feels trusted, they are more likely to deliver outstanding service. Listen and Adapt: Implement a robust system for gathering customer feedback, such as surveys or online reviews, and more importantly, act on the insights you receive. Use this data to continually refine and improve the customer journey, addressing pain points and doubling down on what works. Personalize the Follow-Up: Small, thoughtful gestures can leave a huge impression. A handwritten note included with an order or one of 4OVER4’s high-quality, custom thank you cards can make a customer feel uniquely appreciated and strengthen their connection to your brand. 6. Maximize Social Media Brand Personality Your social media personality is how your brand's voice, tone, and values come to life online. It involves crafting a distinctive style that resonates with your target audience, making your business more human and relatable. For small businesses, this is a powerful branding tip because it allows you to build genuine connections and stand out from larger, more impersonal corporations. An authentic personality transforms your social feed from a simple advertising channel into a community hub. Developing a clear personality helps you create content that your audience wants to engage with. For instance, the fast-food chain Wendy's became famous for its witty and sarcastic Twitter persona, a stark contrast to typical corporate communication. Similarly, Innocent Drinks uses a playful and charmingly naive tone across its platforms, reinforcing its brand identity. A local restaurant could achieve this by showcasing its kitchen staff or sharing daily specials with a friendly, neighborhood voice. This approach turns followers into loyal fans. How to Define and Showcase Your Brand Personality Building a memorable social media presence starts with a clear strategy, not just random posts. Consistency is key to making your personality feel authentic. Define Your Voice Traits: Start by choosing 3-5 core personality traits. Are you witty, inspiring, educational, or quirky? Document these and create simple guidelines for how they translate into your writing style and content choices. Prioritize Quality and Consistency: Focus on creating high-quality, valuable content rather than just posting frequently. A consistent posting schedule is important, but not at the expense of your brand's integrity. Engage with Your Community: Social media is a two-way street. Respond to comments and messages promptly to show you’re listening. Sharing user-generated content and customer stories is another excellent way to build community and trust. This online personality can even bridge the gap between digital and physical marketing. For example, you could run a social media contest where the prize is a discount code featured on a professionally printed flyer, a great way to tie your online engagement to offline action. Explore how you can create eye-catching flyers from 4OVER4 to complement your digital campaigns. By aligning your online persona with all brand communications, you create a seamless and memorable customer experience. 7. Create Strategic Brand Partnerships No business is an island. Strategic brand partnerships allow you to collaborate with complementary, non-competing businesses to expand your reach, share resources, and create mutually beneficial marketing opportunities. For a small business, this is a powerful branding tip because it allows you to access new, relevant audiences and gain credibility through association. It’s about finding a partner whose audience could benefit from your products or services, and vice versa, creating a win-win scenario for everyone involved. This strategy adds value to your customer experience by introducing them to trusted resources. For example, a local fitness studio could partner with a nutritionist to offer joint wellness workshops, providing a more holistic service. Similarly, a coffee shop that partners with a beloved local bakery to sell fresh pastries instantly elevates its own offering. These collaborations build a community around your brand and show customers you are invested in providing comprehensive value. How to Implement Strategic Partnerships Effective partnerships are built on shared values and clear communication, not just audience overlap. Start small and build momentum. Identify Aligned Partners: Look for businesses that share your target audience and brand values but do not directly compete. Think about what other products or services your ideal customer uses. Define Clear Expectations: Before launching a collaboration, create a formal agreement. This document should outline each partner's responsibilities, promotional commitments, timelines, and how you will measure success (e.g., lead generation, sales, social media engagement). Co-Create Valuable Offers: The partnership should produce something of unique value. This could be a co-hosted event, a bundled product offering, or a joint content series like a webinar. For live events or in-store promotions, co-branded materials like high-quality vinyl banners from 4OVER4 can create a professional and unified presence that amplifies the impact of your collaboration. By choosing the right partners and executing thoughtfully, you can significantly grow your brand's authority and market presence without a massive increase in your marketing budget. 7 Small Business Branding Tips Comparison Strategy Implementation Complexity 🔄 Resource Requirements ⚡ Expected Outcomes 📊 Ideal Use Cases 💡 Key Advantages ⭐ Develop a Consistent Visual Identity System Medium: Requires professional design and maintenance Medium: Design tools, brand guidelines creation High: Increased brand recognition, trust, cost savings on design Businesses needing strong visual recognition and professionalism Strong brand recall, reduces design costs, builds credibility Define Your Unique Value Proposition (UVP) Medium: Research and market testing needed Low-Medium: Time for research/testing High: Clear messaging, better conversion rates, pricing justification Businesses needing differentiation in competitive markets Clarifies messaging, guides decisions, improves conversions Build an Authentic Brand Story Medium-High: Requires crafting genuine narratives Low-Medium: Content creation, storytelling skill High: Emotional connection, customer loyalty, content for marketing Brands emphasizing emotional engagement and authenticity Creates loyalty, differentiates from faceless corporations Leverage Local Community Engagement Medium: Ongoing involvement and coordination Medium: Time and budget for events and sponsorships Medium: Local brand recognition, word-of-mouth, networking Local businesses focused on community presence Builds local customer base, cost-effective marketing Focus on Exceptional Customer Experience High: Ongoing training and management High: Staff training, customer feedback systems High: Increased loyalty, premium pricing, positive referrals Service-oriented businesses prioritizing customer retention Builds loyalty, justifies premium pricing, competitive moat Maximize Social Media Brand Personality Medium: Consistent content creation and engagement Low-Medium: Time for posting and response Medium-High: Engagement, relationship building, viral potential Brands leveraging social media for personality and engagement Cost-effective marketing, direct customer relations Create Strategic Brand Partnerships Medium-High: Partner vetting and coordination Medium: Time and effort to manage partnerships High: Extended reach, shared costs, new revenue streams Businesses seeking expanded audience via collaboration Expands reach, builds credibility, shares marketing workload Bringing Your Brand to Life Embarking on the journey of building a brand is one of the most exciting and critical endeavors for any small business owner. It’s a process that transforms a simple commercial enterprise into a living, breathing entity with a distinct personality, a clear purpose, and a loyal following. The seven foundational strategies we’ve explored are not just individual tactics; they are interconnected pillars that support a powerful and resilient brand identity. From the foundational work of establishing a consistent visual identity and a unique value proposition to the more nuanced arts of storytelling and community engagement , each tip serves a vital function. Mastering your visual system ensures you are instantly recognizable, while defining your core promise tells customers exactly why they should choose you. Building an authentic story creates an emotional connection, and engaging your local community roots your brand in a tangible, supportive environment. Translating Strategy into Action The true test of any brand strategy lies in its execution. The most brilliant ideas remain abstract until they are brought into the real world. This is where consistency becomes your most valuable asset. The personality you cultivate on social media must align with the customer experience you deliver in person. The partnerships you form should reflect the core values embedded in your brand story. Effective execution requires meticulous organization. Managing a brand involves juggling countless assets, from logos and color codes to content calendars and campaign timelines. To effectively bring your brand to life, robust organization and planning are crucial. Tools like Notion can provide versatile workspaces for managing brand assets, content calendars, and project tasks. Explore various Notion templates for efficient brand management to streamline your branding efforts and ensure every element stays perfectly aligned. The Lasting Power of Tangible Branding In our increasingly digital world, the power of a physical brand touchpoint cannot be overstated. A well-designed business card, a vibrant brochure, or a striking piece of custom packaging creates a multi-sensory experience that digital ads simply cannot replicate. These tangible items are not just marketing materials; they are physical manifestations of your brand’s quality and commitment. They are what customers hold, feel, and remember long after they’ve closed their browser tab. Implementing these small business branding tips is a marathon, not a sprint. It requires dedication, a willingness to listen, and the courage to be authentic. By consistently applying these principles across every facet of your business, from your digital presence to your printed collateral, you build more than just a customer base. You cultivate a community of advocates who believe in your mission and champion your success. Your brand is your promise, and delivering on it, consistently and beautifully, is the ultimate key to lasting growth. Ready to bring your visual identity to life with stunning, professional quality? Explore the vast range of printing solutions at 4OVER4 . From business cards that make a powerful first impression to banners that command attention, we provide the tools you need to build a brand that endures.
 story
story Enhance Your Branding with spot uv business cards
Ever run your thumb over a business card and felt two different textures? Imagine a smooth, velvety matte finish for most of the card, but your logo and name are slick, glossy, and pop right off the surface. That’s the unforgettable first impression you get with spot UV business cards —a premium touch that adds serious visual and tactile flair to your brand. What Are Spot UV Business Cards Picture a rain-slicked city street at night. Most of the pavement is dark and muted, but the puddles and street markings catch the light, drawing your eye with a brilliant shine. Spot UV works a lot like that. It’s a special finishing technique where a high-gloss, clear polymer coating is applied to specific areas—or "spots"—of your card. This isn't your average all-over gloss. The real magic is in the contrast. When you pair a super-shiny spot UV layer with a non-reflective base, like a matte or silk laminate, you create a dynamic look and feel that’s impossible to ignore. This effect doesn't just look cool; it cleverly guides the recipient's eye and touch right where you want them. The Power of Tactile Marketing When you hand someone a spot UV card, you’re giving them more than just your contact info. You’re handing them a multi-sensory experience. The contrast between the smooth matte surface and the raised, glossy parts makes people want to touch it, feel it, and explore the design. This physical interaction sticks in their memory, creating a much stronger connection to your brand. In a crowded market, understanding the importance of brand recognition is everything, and a memorable card is a huge advantage. Spot UV turns a simple piece of cardstock into a powerful branding tool. It quietly communicates a commitment to quality and attention to detail before you even say a word, setting a professional tone from the first handshake. This finishing technique has quickly become a go-to for businesses wanting to make a real impact. Its popularity is surging, with industry reports showing orders for spot UV finishes have jumped by about 25% in recent years as professionals look for tangible ways to stand out. Core Benefits of Choosing Spot UV The advantages of this finish go way beyond just looking good. Let's break down how choosing spot UV directly impacts the way people perceive your brand. Benefit Impact on Your Brand Enhanced Visual Appeal The high-gloss finish makes colors in the coated areas look richer and more vibrant, creating a striking pop that grabs attention instantly. Creates a Premium Feel The luxurious texture and professional look signal to clients that your brand values quality and invests in the details. Increases Memorability That unique tactile experience makes your card—and by extension, your brand—far more likely to be remembered long after the meeting ends. Durable and Protective The UV-cured coating adds a tough layer of protection, helping your most important elements, like your logo, resist scuffs and moisture. Ultimately, choosing from the variety of spot UV printed products is a strategic move. It elevates your networking gear from a simple handout to a powerful marketing asset that works for you. How the Spot UV Printing Process Works Ever wonder how that perfectly glossy logo or pattern gets onto a business card with such pinpoint accuracy? The magic behind spot UV business cards isn't your everyday ink-on-paper job. It’s a fascinating mix of careful design and high-tech printing that feels closer to a specialized screen-printing process, but for a clear, liquid gloss. The whole thing starts with a solid foundation. You need a quality cardstock, usually one with a non-glossy finish like matte or silk. This creates the perfect canvas, giving you that rich contrast that makes the shiny spot UV elements pop right off the card. It's this difference in texture that grabs attention. Step 1: The Foundation and the Mask First things first, your main design—logo, contact info, background colors—gets printed onto the cardstock using standard methods. This is the base layer, the canvas where the spot UV magic is about to happen. Next comes the most critical part: the spot mask . Think of this as a digital stencil. It’s a separate, solid black file that tells the printing press exactly where to apply the clear varnish and where to leave the card’s surface alone. Every black shape on that mask file corresponds directly to an area that will get the glossy treatment. This diagram breaks down how those key benefits of spot UV come together to make a real impact. It’s a simple flow: first, you catch their eye. Then, you create a memorable tactile experience. The result? A stronger brand perception. Step 2: Applying the UV Varnish With the mask file ready to go, the printed cards are fed through a specialized machine. Here, a UV-curable polymer varnish is applied through a screen or roller, sticking only to the areas laid out by your spot mask. The precision here is incredible, which is how you get those clean, sharp edges on a logo, bit of text, or intricate pattern. At this point, the varnish is a wet, tacky photopolymer sitting right on top of the cardstock. It's a far more advanced technique than the old-school method of just flooding the whole card with a simple gloss coat. The secret to a flawless spot UV finish is perfect alignment between the printed design and the spot mask. If it's even a fraction of a millimeter off, the gloss will look off-center. That's why professional printers have such rigorous quality checks at this stage. Step 3: Curing with Ultraviolet Light Finally, we get to the "UV" in spot UV. Immediately after the varnish is applied, the card zips under a set of high-intensity ultraviolet lights. This blast of UV light triggers an instant chemical reaction called curing . The liquid varnish hardens almost instantly into a solid, durable, and brilliantly glossy layer. Unlike regular inks that dry slowly through evaporation, this curing process is immediate, which means no smudging or spreading. What you're left with is a crisp, slightly raised, and super shiny finish that makes your chosen design elements impossible to ignore. Seeing the craftsmanship involved really shows why spot UV is considered a premium finish. It’s a multi-step process that requires a perfect marriage of precise digital prep and sophisticated machinery. If you're curious about the broader world of modern printing, you can explore more about the technologies that make finishes like this possible in high-quality digital printing . How to Prepare Your Design Files for Spot UV Printing Getting a flawless spot UV result doesn't start at the printing press—it starts with your design file. Nailing your artwork setup is the single most important step to ensure your cards look as incredible in person as they do on your screen. The process is all about making smart design choices and creating a separate instruction file for our printers. Here's a simple way to think about it: your main design file is the painting, and the spot UV file is a super-precise stencil that tells the varnish exactly where to go. If the stencil is off, the whole effect falls apart. Let’s walk through how to create both so you get a professional, eye-catching finish every time. Choosing What to Highlight with Spot UV First things first, you need to decide which elements of your spot uv business cards will get the glossy treatment. The trick is to be selective. If you try to highlight everything, nothing stands out. The magic of spot UV is in the contrast. Here are a few classic choices that always work well: Your Logo: This is a no-brainer. Making your logo the immediate focal point reinforces your brand identity with a touch of class. Your Name or Company Name: Highlighting key text makes it pop off the card, adding a sophisticated, premium feel. Subtle Background Patterns: A "blind" spot UV (gloss applied directly to the matte cardstock) can create an elegant, textured pattern you only see when the light hits it just right. It’s a real showstopper. Key Graphics or Icons: Got some cool social media icons or a unique graphic? Make them shine—literally. Just as important is knowing what not to highlight. Super-thin lines or tiny, intricate text are tough for the varnish to stick to perfectly. This can lead to a blurry or incomplete finish. For the best results, stick to bold, clearly defined shapes and text. Creating the Spot UV Mask File This is where we get a little technical, but don't worry, it's straightforward. The spot mask , sometimes called a spot layer, is a separate file you'll send us along with your main color design file. This file is the blueprint for our printing press. Think of the spot mask as a black-and-white map. Every area that is solid black on this map will get the glossy UV coating. Everything you leave white will keep the original matte or silk finish of the card. Creating this file is simple, but precision is everything. If your mask is misaligned with the main design by even a fraction of a millimeter, the gloss will look off-center and ruin the effect. Here’s a quick guide to creating your spot mask: Duplicate Your Design: Make a copy of your finished business card design. This copy will become your mask. Isolate the Target Elements: In the new file, delete everything you do not want to be glossy. Convert to 100% K Black: Now, change the color of every remaining element (your logo, text, pattern, etc.) to solid black. It is absolutely critical that this is 100% K black (C:0, M:0, Y:0, K:100), not a "rich black" mix. Save as a Separate File: Save this black-and-white file with a clear name, like "MyBusinessCard_SpotMask.pdf" or something similar. Final File Preparation Checklist Before you hit that upload button, give this checklist a quick once-over. Catching common mistakes here will save you time and headaches later, ensuring a perfect print run. This level of precision is also key for other custom finishes; for instance, understanding the file specs for die-cutting can open up a whole new world of creative card shapes. Ready to prep your artwork? Here’s a simple checklist to follow. Spot UV File Preparation Checklist Checklist Item Specification or Requirement Two Separate Files You need one full-color design file and one separate black-and-white spot mask file. Perfect Alignment The black elements in your mask must line up perfectly with the elements in your design file. Correct Black Value The spot mask must use 100% K Black only. Rich black will cause printing errors. Vector Artwork Preferred Whenever you can, use vector graphics for your spot mask to get the sharpest, cleanest edges. No Fine Details Avoid applying spot UV to hairlines, tiny text, or overly complex details that might not print clearly. Follow these steps, and you'll be all set. Preparing your artwork correctly is the final piece of the puzzle to ensure your spot uv business cards deliver that "wow" factor you're looking for. Spot UV Compared to Other Premium Card Finishes Picking a finish for your business card is a lot like choosing the right accessory for an outfit—it pulls the whole look together and makes a specific statement. While spot UV business cards deliver a stunning, touchable contrast, they're just one of several fantastic ways to make your cards stand out. To make the right call, it helps to see how spot UV stacks up against other popular choices like foil stamping, embossing, and debossing. Each one creates a totally different vibe. Spot UV is perfect for creating a subtle, sophisticated gloss that you can both see and feel. It’s a modern, minimalist hero. But what if your brand needs a bit more bling or a different kind of texture? That’s where the other options come into play. Spot UV vs. Foil Stamping For pure, unapologetic luxury, foil stamping is the undisputed champion. Instead of a clear varnish, this process uses heat and pressure to bond a thin layer of metallic or colored foil directly onto the cardstock. The result? An opaque, brilliantly reflective finish that catches the light like nothing else. Here’s a quick breakdown: The Look: Spot UV adds a clear, high-gloss layer that makes the color underneath pop. Foil stamping, on the other hand, gives you a solid, metallic shine—think gold, silver, copper, or even holographic effects. When to Use It: Go with spot UV for adding subtle texture to a logo or pattern. Choose foil for high-impact, glamorous elements that scream prestige and value. The Feel: Spot UV creates a slightly raised, perfectly smooth surface. Foil is usually pressed into the paper, creating a slight indentation (or deboss) that feels distinctly high-end. If your brand is all about making a bold, glamorous statement, it’s worth exploring what you can do with foil stamping . Spot UV vs. Embossing and Debossing While spot UV adds a layer to the paper, embossing and debossing physically reshape the paper itself. These techniques are all about creating 3D texture without any ink or varnish at all. Embossing uses a custom die to press a design up from the back of the card, creating a raised, three-dimensional element on the front. Picture a classic monogram on a fancy wedding invitation. It’s elegant, traditional, and adds real physical depth. Debossing is the exact opposite. It presses a design down into the card from the front, leaving a crisp, indented impression. This creates a subtle, handcrafted effect that just begs to be touched and communicates a sense of quiet craftsmanship. Embossing and debossing are purely textural. They use the paper itself to create plays of light and shadow, offering a timeless, classic form of luxury that relies on structure, not shine. So, how do you decide? For a Sleek, Modern Contrast: Spot UV is your best bet. It lives in the interplay between matte and gloss. For a Classic, Raised Texture: Embossing gives your logo or text a traditional, tangible lift. For an Understated, Indented Feel: Debossing offers that high-quality, letterpress-style impression. Ultimately, the best finish depends on the story you want your card to tell. Spot UV whispers modern sophistication, foil shouts luxury from the rooftops, and embossing conveys a sense of timeless quality. Alright, you’ve nailed down the design and prepped your files. Now for the fun part: bringing those brilliant spot UV business cards to life. Ordering with 4OVER4 is a straightforward process, designed to make sure what you see on your screen is exactly what you get in your hands. This is where all that careful file prep really pays off. The whole thing kicks off on our spot UV business card page. We've built an easy-to-use project calculator that guides you through every single option, so you can build your perfect card step-by-step. Step 1: Configure Your Card Specifications First things first, you'll lock in the core details of your card. Think of this as laying the foundation. Before you even think about uploading your artwork, you'll make a few key decisions that define the final look and feel. You’ll choose from some top-notch paper stocks, but for spot UV, a sturdy 16pt cardstock is a fantastic choice. It's our most popular for a reason—its thickness gives the card a premium, substantial feel and creates the perfect canvas for that glossy finish to really pop. Next, you'll dial in the rest: Quantity: How many do you need? We can handle small batches for boutique agencies or massive runs for your next big conference. Size: Standard business card dimensions are always a safe bet, but don't be afraid to explore other sizes if you want to make a truly unique impression. Turnaround Time: Got a trade show sneaking up on you? Or just doing a standard restock? Pick the production speed that fits your schedule. This is the main interface where you'll lock in all these important choices. As you can see, the project calculator updates the pricing in real-time as you tweak quantities, paper, and turnaround times. No surprises. Step 2: Upload Your Artwork and Spot Mask This is the moment of truth. Once you've set your card specs, it’s time to upload your files. And as you know, for a successful spot UV run, you need two perfectly aligned files. You’ll need to upload: Your Full-Color Design File: This is your main artwork, the whole visual shebang (e.g., "MyCard_Design.pdf"). Your Spot UV Mask File: This is your simple black-and-white map that tells us exactly where to apply the gloss (e.g., "MyCard_Mask.pdf"). Getting these two files prepared and labeled correctly is absolutely critical for a flawless result. Our system is built to handle this two-file process smoothly, taking any guesswork out of it for you. Pro Tip: Do a final sanity check before you hit upload. Open both files in your design program and layer them on top of each other. Is the alignment perfect? A millimeter off can throw the whole effect. This five-minute check can save you a world of headaches. And hey, if you don't have a print-ready design, no worries. We've got you covered with our free online design tool. It’s packed with thousands of templates you can customize with your logo, text, and brand colors, making professional-level design accessible to anyone. Step 3: Review Your Digital Proof After your files are uploaded and your order is in, our prepress team jumps into action. We don't just blindly send your files to the printer—that's not how we roll. Instead, we create a digital proof and send it back to you for one final approval. This proof is your last chance to see exactly how your card will look, spot UV placement and all. It’s your opportunity to catch any last-minute typos, check alignment, and make sure everything is perfect before we start printing. Giving your proof a quick approval is the key to keeping your order moving on schedule. It's a simple quality-check step that guarantees you'll love what you see when you open the box. Finalizing your order is a huge step, but it's just one piece of building a powerful brand. To see all the possibilities, feel free to explore our full range of professional business cards printing services. Once your files are uploaded and your proof is approved, all that's left is to sit back and wait for your incredible new cards to arrive. Which Industries Get the Most Out of Spot UV Cards? While just about any business card can get a boost from a premium finish, some industries see a truly powerful return on their investment with the tactile elegance of spot UV. It’s not just about looking good; it’s a strategic move. A spot UV card sends a clear message about brand values like creativity, luxury, and a serious commitment to detail. For these sectors, a card that engages the sense of touch isn't just a "nice-to-have"—it's a competitive edge. The Go-To for Creatives Professionals in highly visual and creative fields are a natural fit for spot UV business cards . Think about photographers, graphic designers, architects, and interior decorators. Their entire business is built on a sharp aesthetic and an eye for the little things. A card that uses spot UV to pop a crisp logo or lay down a subtle, glossy pattern on a matte background becomes a miniature portfolio piece. It’s a physical demonstration of their design skills before a client ever even sees their actual work. Communicating Luxury and Sophistication For businesses swimming in the luxury market, projecting an image of undeniable quality isn't optional. The subtle, sophisticated vibe of spot UV is a perfect match here. High-End Real Estate Agents: A spot UV card can subtly trace the sleek lines of a modern home or a luxury condo, giving a feel of premium quality that perfectly mirrors the properties they represent. Boutique Agencies and Consultants: For marketing strategists, financial advisors, or creative consultants, the card’s refined texture helps build immediate trust and reinforces their position as a high-value expert. Luxury Retail: Brands in fashion, jewelry, or high-end cosmetics use spot UV to echo the premium feel of their products. A glossy logo on a soft-touch card can evoke the same sense of quality a customer would expect from the item itself. The choice to use a premium finish like spot UV is a direct signal to potential clients. It says, "We invest in quality in everything we do, and that includes the very first impression we make on you." This focus on tangible branding tools is a key reason the market is so healthy. In fact, market analysis predicts the global business card market will climb to an estimated $380 million by 2033, powered by a sustained demand for sensory marketing that digital channels just can't replicate. You can find more insights about the growing business card market on UPrinting.com . This growth proves that professionals really get the power of a card that makes a lasting, physical impression. Got Questions About Spot UV? We've Got Answers. Even after seeing all the possibilities, you probably have a few practical questions kicking around. That's smart. Getting these final details sorted out is the key to ordering your spot UV cards with total confidence. Let's tackle the most common questions we hear every day. Can I Get Spot UV on Both Sides of My Card? You absolutely can. Applying spot UV to both sides is a fantastic way to create a fully immersive, premium experience. A popular strategy we see is highlighting the logo on the front with a glossy pop, then using a more subtle, tactile pattern on the back. Think a repeating geometric shape or even your brand's initials. Of course, the choice is completely up to you and what you want your design to achieve. Will the Spot UV Layer Scratch or Peel Off? Not a chance, at least not with normal use. When it's professionally applied and cured, the spot UV finish is incredibly tough. The UV curing process bakes the varnish into a hard, solid layer that stands up to scuffs and scratches from daily handling way better than a standard gloss coat. Think of it this way: the UV-cured varnish forms a permanent bond with the paper. It’s not a sticker or some delicate film; it's a resilient finish designed to make a lasting impression without wearing away. How Much More Do Spot UV Cards Really Cost? Let's be upfront: because spot UV is a premium finish, these cards do cost a bit more than your standard matte or glossy options. The price bump covers the extra materials, the specialized machinery, and the additional steps needed in production to get that effect just right. However, most businesses we work with see it as a worthwhile investment, not just an expense. The major boost in perceived value and the unforgettable first impression you make with a tactile card easily justifies the small increase in cost. It turns a simple piece of paper into a powerful networking tool that people actually hold onto. Ready to create a business card that people will actually remember? At 4OVER4 , we make it easy to design and order premium spot UV business cards that show off the quality of your brand. Start designing your unforgettable cards today!
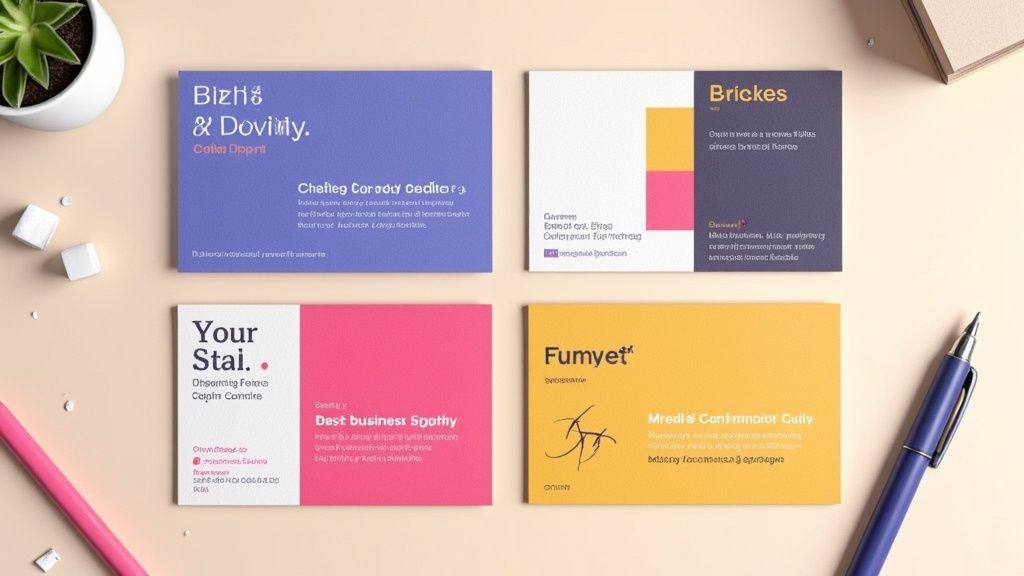 story
story Top Tips for Designing Business Cards That Impress
In an increasingly online world, a well-designed business card remains a powerful branding tool, a conversation starter, and a tangible representation of your professional identity. While digital networking has its place, the physical exchange of a card creates a memorable, personal connection. However, a flimsy, cluttered, or poorly designed card can do more harm than good, signaling a lack of attention to detail and undermining your credibility before a conversation even begins. The key to success lies in treating your card as a micro-marketing campaign, a strategic asset designed for maximum impact. A great card doesn’t just share your contact details; it communicates your brand’s value and personality in a split second. This guide provides eight crucial tips for designing business cards that not only look stunning but also function effectively to build your network and grow your brand. We will move beyond the basics, offering actionable insights into typography, material choices, color psychology, and technical print preparation. Following these steps will ensure your card stands out, gets remembered, and ultimately, drives results for your business. 1. Keep It Simple and Uncluttered In the world of business card design, clarity is king. The primary goal of a business card is to quickly and effectively convey who you are and how to contact you. An uncluttered design, centered around essential information, eliminates distractions and projects an image of professionalism and confidence. This approach treats whitespace, or negative space, not as an empty area but as an active design element that guides the viewer's eye and enhances readability. Think of it this way: your business card has about five seconds to make an impression. A cluttered card creates cognitive friction, forcing the recipient to search for the information they need. A simple, clean layout respects their time and makes the information effortlessly accessible. This aligns with fundamental user centered design principles , which prioritize making a product (in this case, your card) functional and easy for the end-user to understand. The result is a design that is not just aesthetically pleasing but also highly effective. How to Implement Simplicity Achieving a powerful, minimalist design requires intentional choices. This is one of the most crucial tips for designing business cards that leave a lasting, positive impression. Prioritize Essential Information: Limit the text to only what is absolutely necessary. This typically includes your name, title, company name, phone number, email address, and website. Resist the urge to add every social media handle or a long list of services. Embrace Whitespace: Don’t be afraid of empty space. Aim for 30-40% of your card to be free of text or graphics. This negative space frames your contact details, making them stand out and appear more significant. Limit Your Fonts: Stick to a maximum of two complementary typefaces. Use one for your name or logo to create a focal point, and a clean, legible font for the smaller contact information. Test for Legibility: Once you have a draft, hold it at arm's length. Can you easily read the most important details? If not, the font may be too small or the layout too crowded. 2. Choose the Right Typography Typography is more than just text; it's the voice of your brand. The fonts you select for your business card directly influence how your professionalism and personality are perceived, while also determining how easily a potential client can read your contact details. Effective typography involves choosing the right typefaces, sizes, weights, and spacing to create a harmonious and legible design, especially at a small scale. The right font can instantly communicate your industry and brand ethos. For example, a modern tech company might use a clean sans-serif like Helvetica or Futura, while a traditional law firm might opt for a classic serif like Garamond to convey authority and heritage. This careful selection ensures your card not only looks good but also aligns perfectly with your brand identity. To truly master this, you might find further insights into typography useful. How to Implement Strong Typography Choosing the right fonts is one of the most impactful tips for designing business cards that resonate with your audience. Here is how to apply typographic principles effectively. Limit Your Font Families: Stick to a maximum of two complementary font families. A common and effective pairing is a serif with a sans-serif. This creates visual interest and a clear hierarchy. Establish a Visual Hierarchy: Make your name the most prominent element, typically between 10-14pt. Your title and company name should be slightly smaller, and contact details should be the smallest but still perfectly legible, usually around 7-8pt. Prioritize Readability: Avoid decorative or script fonts for critical information like email addresses and phone numbers, as they can be difficult to read. Save these for a logo or your name if it fits your brand. Test at Actual Size: Before sending your design to print, always print a sample at 100% scale. This allows you to check if the font sizes are legible and the overall composition feels balanced in its physical form. 3. Use High-Quality, Appropriate Materials The physical quality of your business card communicates brand value before a single word is read. The choice of paper weight, texture, and finish creates a tactile experience that can leave a powerful and lasting impression. A flimsy, generic card can suggest a lack of attention to detail, while a premium, substantial card conveys professionalism, quality, and confidence. This is one of the most impactful tips for designing business cards because it directly engages the sense of touch, making your brand more memorable. The material you choose should be a deliberate extension of your brand identity. For instance, a luxury real estate agent might opt for an ultra-thick 32pt silk-laminated card to project exclusivity, while an eco-conscious brand could use recycled or seed-embedded paper to demonstrate its commitment to sustainability. The right material doesn't just hold your information; it tells a story about your business and its values, ensuring your branding is consistent across all touchpoints. For those looking to extend this tactile branding to other marketing collateral, exploring custom notepads with similar high-quality paper can create a cohesive experience. How to Implement High-Quality Materials Selecting the right substrate requires balancing brand identity, budget, and practicality. It's a key decision that elevates your design from good to unforgettable. Align Material with Brand Values: Match the material to your brand's personality. A tech startup might use a sleek plastic card with NFC capabilities, whereas a high-end restaurant could choose a classic letterpress on thick cotton stock. Request Sample Packs: Before committing to a large order, always request a sample pack from your printer. Feeling the different weights, textures, and finishes in your hand is the only way to make an informed decision. Consider Practicality: Think about how the card will be used. A matte or uncoated finish is ideal if you want recipients to be able to write notes on it. For industries like construction, a more durable, tear-resistant stock might be necessary. Don't Default to Standard: While 16pt cardstock is a solid professional standard, explore thicker options (18-32pt) or unique substrates like wood, metal, or kraft paper to truly stand out. 4. Incorporate Strategic Color Psychology Color is far more than an aesthetic choice; it's a powerful psychological tool that communicates emotion, builds brand identity, and influences perception instantly. Strategic color selection on a business card can reinforce your brand’s core message before a single word is read. It works by tapping into established emotional and cultural associations, helping you convey trust, creativity, or sophistication without saying anything at all. Think about major brands and their color palettes. Financial institutions like Chase often use navy blue to project stability and trust, while wellness companies use green to suggest health and nature. Your business card is a key piece of your marketing toolkit, and using color intentionally ensures it aligns with your broader branding, similar to how you would design matching full color presentation folders . A well-chosen color scheme makes your card memorable and reinforces the specific qualities you want associated with your brand. How to Implement Color Psychology Choosing the right colors is one of the most impactful tips for designing business cards that resonate with your target audience. This requires a blend of brand strategy and practical design knowledge. Align Colors with Your Industry: Select colors that match the expectations and values of your sector. Blue often works for corporate and tech firms (reliability), black and gold for luxury brands (sophistication), and bright, energetic colors like orange or yellow for creative agencies. Prioritize Readability and Contrast: Ensure there is sufficient contrast between your text and the background. The Web Content Accessibility Guidelines (WCAG) recommend a contrast ratio of at least 4.5:1. This makes your contact details easy to read for everyone. Use a Pantone Color System (PMS): For brand-critical colors, use the Pantone Matching System. This ensures your specific shade of blue or green prints exactly the same across all materials, from cards to banners, maintaining brand consistency. Consider Print and Paper: Always request a printed proof to see how your chosen colors appear on your selected paper stock. Colors can look dramatically different on glossy versus matte or textured paper. 5. Optimize Size and Orientation The physical dimensions of a business card are a fundamental part of its design, influencing both its first impression and its long-term utility. While the standard North American size (3.5" x 2") is designed for practicality, fitting perfectly into wallets and cardholders, a deliberate choice of size and orientation can make your card instantly memorable. This choice is about balancing creative distinction with functional convenience. Thinking beyond the standard rectangle can be a powerful branding statement. For example, a square card can project an image of balance and modernity, while a vertical orientation can feel fresh and dynamic. These subtle shifts break expectations and can make a recipient pause and take a closer look. However, the key is purpose. A unique size should complement your brand identity, not just be different for its own sake, ensuring the card remains a useful tool rather than a novelty that gets discarded. How to Implement Size and Orientation Effectively Choosing the right format is one of the most impactful tips for designing business cards that align with your brand's unique personality. Stick to Standard (Unless It Makes Sense): The 3.5" x 2" horizontal card is the safe and practical choice. Deviate only if the non-standard size or shape reinforces a key brand attribute, such as a house-shaped card for a realtor. Consider Vertical Orientation: A vertical layout can make your card stand out in a stack of traditional horizontal cards. It works especially well for brands in creative fields like photography or fashion, but ensure all text remains horizontal for easy reading. Explore Custom Shapes: Die-cutting allows for unique shapes that can directly reflect your business, like a camera for a videographer. This creates a highly memorable and tactile experience for the recipient. Test for Practicality: Before committing to a print run, create a paper mock-up of your custom-sized card. Test if it fits comfortably into a standard wallet or card holder. If it's too big or an awkward shape, it may be inconvenient for people to keep. Add Subtle Refinements: If a non-standard size feels too risky, consider adding rounded corners to a standard card. This small change adds a premium, modern feel without sacrificing practicality. 6. Include Essential Information Only A business card's effectiveness is defined by its ability to communicate vital information at a glance. Information hierarchy is paramount; including too much creates clutter and overwhelms the recipient, while including too little fails to provide the necessary avenues for connection. The core purpose is to be a bridge, not a brochure. Focusing only on essential contact details ensures your card is scannable, memorable, and ultimately, functional. Think of your card's real estate as a valuable, limited resource. Every element must justify its place. For instance, a modern web designer might strategically omit a physical address and phone number, directing all traffic to their portfolio website and email. Conversely, a real estate agent must include their license number to comply with industry regulations. This strategic curation of information is one of the most practical tips for designing business cards that respect the recipient's time and attention, making your details easy to absorb and act upon. How to Prioritize Information Mastering information hierarchy involves a deliberate process of selection and exclusion. The goal is to facilitate a connection, not to list every possible communication channel. Stick to the Core Essentials: Always include your full name, job title, company name, one primary phone number, one professional email address, and your website. This forms the foundation of your professional identity. Be Selective with Social Media: Only include social media handles that are professionally curated and actively maintained for business purposes. LinkedIn is often a safe bet, while a personal Instagram account may be inappropriate. Rethink the Physical Address: Unless your business relies on foot traffic or local meetings, consider replacing a full street address with just a city and state or omitting it entirely. This saves space and modernizes the card's feel. Use QR Codes Strategically: If you have extensive information to share, like a full vCard or a portfolio link, use a QR code. This keeps the physical design clean while offering a gateway to more comprehensive details. 7. Make It Memorable with Unique Design Elements In a stack of standard business cards, a unique design element can be the difference between being remembered and being forgotten. The goal isn't just to be different for the sake of it, but to thoughtfully incorporate distinctive touches that capture your brand's personality and create a lasting impression. This approach transforms your card from a simple information slip into a memorable brand experience that recipients are reluctant to discard. A unique design can be a powerful conversation starter, immediately conveying creativity and attention to detail. For example, a personal trainer's card that folds into a miniature figure doing a squat is far more memorable than a generic one. Similarly, a DJ's card designed like a tiny vinyl record or a locksmith's card die-cut to resemble a lock pick instantly communicates their profession in a clever, tangible way. These creative choices make your brand story interactive and engaging. How to Implement Unique Elements Injecting personality into your card requires a balance of creativity and brand alignment. This is one of the most effective tips for designing business cards that not only inform but also delight your audience. Align Uniqueness with Your Brand: Ensure any creative element serves a purpose and reinforces what you do. A divorce lawyer’s card with a perforated line down the middle is bold and memorable because it directly relates to their service. Utilize Special Finishes: Subtle touches can have a major impact. Consider spot UV to make your logo glossy, letterpress for an elegant indented feel, or colored edges for a surprising pop of brand color. Explore Unconventional Materials: Move beyond standard cardstock. Options like wood, metal, plastic, or even recycled materials can make your card feel substantial and unique, reflecting a brand's commitment to quality or sustainability. Add Functional Value: Make your card a tool. A web designer could include a screen pixel density chart, a writer could feature common proofreading marks, or a general contractor could add a small ruler along the edge. You can explore more options for business cards printing on 4over4.com to find the perfect fit. Incorporate Interactive Features: Use die-cuts, folds, or pop-up elements that encourage the recipient to engage with the card physically. Just ensure any interactive component is sturdy and works flawlessly. 8. Ensure Proper Print Specifications and Digital Optimization A brilliant design can fall flat if it doesn't translate perfectly from your screen to the final printed product. The technical setup of your file is just as crucial as the creative elements. Properly preparing your design for print ensures colors are accurate, cuts are clean, and text is sharp, preventing costly and frustrating reprints. This process bridges the gap between digital concept and tangible reality, safeguarding your brand's professional image. Furthermore, in today's digital-first world, your business card often lives a second life online. It might be photographed, scanned by an app, or attached to an email. A design that is not optimized for digital viewing can become illegible or distorted, undermining its purpose. Considering both print specifications and digital optimization from the start is one of the most practical tips for designing business cards that work effectively in every context, ensuring consistency whether held in hand or viewed on a screen. How to Implement Technical Precision Mastering the technical side of card design guarantees that what you see on your screen is what you get from the printer. This attention to detail is a hallmark of professional design. Set Up Your File Correctly: Begin with the right foundation. Create your document in CMYK color mode , not RGB, to match printing processes. Set the canvas to the standard business card size (e.g., 3.5" x 2") and ensure your resolution is at least 300 DPI to avoid pixelation. Use Bleeds and Safe Zones: Add a 1/8" (or 3mm) bleed around your entire design. This is an extra margin for any background colors or images that extend to the edge, preventing white slivers after cutting. Conversely, keep all critical text and logos at least 1/8" inside the trim line to create a "safe zone" so they don't get accidentally clipped. Optimize for Digital Use: After finalizing the print version, save a separate high-resolution PNG or JPG copy. This version is perfect for email signatures, social media profiles, or sending via text. Also, test any QR codes at their actual printed size with multiple devices to confirm they scan reliably. Finalize for the Printer: Before exporting, convert all text to outlines or paths. This turns the text into a vector shape, preventing font issues at the print shop. Export your final file as a print-ready PDF, such as a PDF/X-1a, to lock in all specifications. For specialized finishes, understanding options like lamination on 4over4.com can help you communicate your needs to the printer. 8 Key Tips Comparison Guide Aspect Keep It Simple and Uncluttered Choose the Right Typography Use High-Quality, Appropriate Materials Incorporate Strategic Color Psychology Optimize Size and Orientation Make It Memorable with Unique Design Elements Ensure Proper Print Specifications and Digital Optimization Implementation Complexity 🔄 Low - Focus on minimal elements and whitespace Medium - Requires careful font selection and testing Medium - Choosing and sourcing materials can be complex Medium - Requires color theory knowledge and print testing Medium - Balancing uniqueness with practicality High - Involves innovative, often custom design techniques High - Demands technical knowledge of print/digital standards Resource Requirements ⚡ Low - Basic printing, simple design tools Medium - Access to quality fonts and design software High - Premium materials and specialty finishes increase cost Medium - Color proofs and matching add time and cost Medium - Custom sizes/shapes may increase print and die-cutting costs High - Special finishes, die-cuts, interactive elements cost more Medium to High - Requires professional design software and proofs Expected Outcomes 📊 Clear, professional, timeless business cards Enhanced readability and brand identity Strong tactile impression and perceived quality Improved brand recognition and emotional impact Functionality with memorable aesthetics Memorable, conversation-starting cards that reflect brand Accurate, high-quality prints and optimized digital usability Ideal Use Cases 💡 Corporate, professional industries prioritizing clarity Brands emphasizing professionalism and readability Luxury brands, eco-conscious companies, tech startups Brands leveraging emotional brand messaging Those wanting to stand out with functional uniqueness Creative professionals, marketers wanting standout cards Any business needing consistent, error-free print and digital cards Key Advantages ⭐ Cost-effective, easy to read, timeless style Strong brand voice, natural hierarchy, legibility Durability, unique tactile experience, premium perception Emotional connection, increased memorability Fits standard storage or stands out with unique shapes Higher retention, brand personality, social sharing potential Avoids print errors, ensures brand consistency, digital friendly Key Challenges 🔄 May appear plain or lack personality Risk of poor printing if fonts not embedded/licensed Increased cost and potential print delays Higher print costs, cultural color variations Risk of cards not fitting wallets or being discarded Higher cost, possible loss of functionality, complexity Requires technical skills; variable printer specs Your Next Handshake, Perfected At its core, a business card is far more than a simple piece of paper with contact details. It's a physical extension of your brand identity, a tangible reminder of a personal connection, and a powerful marketing tool that continues to work long after a conversation has ended. Throughout this guide, we've explored the critical tips for designing business cards that leave a lasting, professional impression. By moving beyond generic templates and applying thoughtful design principles, you can create a card that doesn't just inform, but also captivates. Synthesizing Strategy into a Small-Scale Masterpiece The journey from a blank canvas to a compelling business card involves a series of strategic decisions. Remember the foundational principle we discussed: simplicity is your ally . An uncluttered layout ensures your essential information is digestible at a glance, preventing cognitive overload and conveying confidence. This clarity is amplified by your choice of typography, which should be legible, on-brand, and thoughtfully scaled to create a clear visual hierarchy. These elements work together to build a foundation of professionalism. The true impact, however, often lies in the details that engage the senses. The tactile experience of a high-quality, substantial cardstock communicates a commitment to quality before a single word is even read. When you pair this with a strategic color palette rooted in psychology, you begin to evoke specific emotions and reinforce your brand's personality, whether it's the trustworthy calm of blue or the energetic passion of red. These are the subtle yet powerful cues that transform a standard card into a memorable artifact. From Concept to Conversation Starter The ultimate goal is to create a card that not only avoids the recycling bin but actively sparks interest. This is where unique design elements come into play. A clever die-cut, an elegant foil stamp, or a minimalist QR code that links to an impressive portfolio can make your card a talking point. Yet, this creativity must be balanced with practicality. Only include the most crucial contact information, and ensure your design is technically sound for printing with proper bleed, resolution, and color modes. Ultimately, mastering these tips for designing business cards is about creating a cohesive brand experience. Each choice, from the paper's weight to the font's kerning, contributes to the story you are telling. You are not just handing someone your phone number; you are handing them a representation of your professional standards, your attention to detail, and your brand’s unique value. A well-designed card validates your credibility and ensures that your first impression is one of excellence, opening doors to future opportunities and solidifying your place in a new contact’s professional network. Ready to transform these insights into a tangible, high-quality business card? Bring your perfected design to life with 4OVER4 . With an extensive selection of premium papers, specialty finishes like spot UV and metallic foils, and a commitment to print perfection, 4OVER4 provides all the tools you need to create a business card that truly stands out.
 story
story What Are Pocket Folders: Boost Branding & Organization
People often overlook the importance of pocket folders in businesses. This is the world of digital media where LinkedIn and Google give you information about all your competitors. You may think about why you should consider custom pocket folders. In spite of all the evolution taking place, we cannot entirely dismiss the value of printed materials. Have you ever thought that in a meeting or conference, digital access is often limited? Even in the office when there’s a visitor, it looks odd to keep looking at your mobile or laptop. In such situations, the traditional custom printed pocket folders can be of great help. Many businesses rely on it for sharing vital company info. What is a pocket folder? What are pocket folders with brads? These are some common questions that come to mind while thinking about how to store company information when the digital mode doesn’t work. The presentation folders are usually called pocket folders. The custom custom pocket folder is when you customize the presentation folder with text, logos, or die-cut shapes instead of just using a simple wrapper. There are many printing companies like 4Over4 that can help you to get folder printing, the way you want. Purpose of Custom Pocket Folder The purpose of custom presentation folders with pockets is to hold relevant documents and papers. It does not just have functional usage but also helps with the branding of your company. The pocket folders with brads are the two pocket folders with three brads to hold the papers securely. We offer high-quality print such as spot UV folders , foil stamping, etc. along with free templates to design and customize your folder. These exclusive custom printed pocket folders reflect your company in a big light and also acquire great responses. Features of Presentation Folders The custom folders are engaging, attention-grabbing as well as highly attractive. You must ensure the marketing materials inside the custom presentation folders are beautiful too. Can you imagine how wonderful it will be to handover such a presentation folder to your clients? The recipient will surely value your investments made on your company and brand and get highly impressed. Learn the benefits of custom presentation folders with pockets in business. Enhance Your Presentation with Custom Pocket Folder The pocket folders are tangible which makes it interactive for the audiences. You can make a presentation more enticing by including the display and other complementary materials in the presentation folder. The color printed custom pocket folders help in organizing your data and keep the audiences glued to your presentation. When you hold the customized folder in hands while giving a presentation, it helps the clients get brief info ahead of your display. It also helps your audiences to refer to your products and services and reach you whenever they want. Apart from the verbal display, a custom printed pocket folder adds a different level of professionalism to your company. It also helps your audiences to trust your services and products and convince them about your deliverables. 4Over4 is one of the most trusted online platforms to design your full-color custom presentation folder . You can print it using artistic styles, business logos, and texts. Custom folders help to attract the attention of the audiences instantly. Endorse Your Brand and Company with the Custom Pocket Folders Do you want to endorse your product digitally? You may send the custom pocket folders along with the emails to your clients. It helps to build and succeed in the mail campaigns. You may also include a CD with the promotional video of your company inside the pocket folder. When you choose the custom folders for endorsing your brand, do not include the brochures and flyers. Save Cost of Promotion with the Customized Presentation Folders Large format printing involves significant expense. Carrying a custom presentation folder during the events give you an opportunity to create a lifelong impression on the potential customers of your business. A well-branded folder can help in marketing your business. So, train your employees well for networking conferences. This method of promotion doesn’t involve a high cost. It helps in making your company appear organized and professional. Boost Sales with Custom Folders The primary goal of any business is revenue generation and boost sales. The custom pocket folders help in branding your business and market your company efficiently. You must use it correctly with precise information about your company to increase the traffic flow of your business. You may use the pocket folders as catalogs. The right promotion and branding can result in higher sales that will eventually lead to higher profits. Office Organization with Custom Pocket Folders The custom presentation folders are indeed helpful for external events. But, it is also a great way to keep your office organized. The internal meetings call for several important documents. It may get misplaced if not stored properly. The pocket folders are a great way to hold all the documents in one place. These printed materials give a professional appearance to your office. It helps your employees to keep their desks organized. While serving any client, your staff can also build a great impression with the customized folders. Share Extra Info in the Custom Folders The digital mediums have space constraints when it comes to advertising your brand and company. With the custom pocket folders, you get the freedom to add additional information regarding your company or products. For instance, the launch of a new product or a branded gift. You get more room to explore your creativity with the customized pocket folders. You may also insert business cards into the business card slits pocket. Distribute the folders in the event to tap as many people as possible. It helps your audience to receive information about your company instantly. Efficient Working with Custom Pocket Folders If you wish to run your business smoothly, the customized presentation folders can be of great help. When you choose the full color or silk laminated folders for customizing, each of your departments like finance, marketing, accounts, or human resource look great and work efficiently. For the inter-company communications, the presentation folder design helps the staff to read on the same lines. It helps them to remain aware of the mission and goals of the company. The custom folders can also be used to refer to the recently added policies and practices in the company. When all your work remains organized, there’s less scope of any confusion and conflicts and more of a friendly atmosphere in the office. Additional Features to Consider Pocket folders are not just a simple storage solution for keeping all of your documents in order. They come with a variety of features designed to meet specific needs, whether for professional presentations, school projects, or personal use. Learning about these extra features will help you decide which one is right for your needs. One key attribute to look for is business card slot inserts. These little, die-cut slits are most often found on the interior of one or both pockets. With them, you can present or file business cards in an orderly fashion. This unique feature in pocket folders makes them extremely convenient in a professional environment. For example, during a client meeting or a job interview, having your business card easily accessible adds a polished touch. Even if you only intend to use these folders for personal use, these slots can fit sticky notes or reminders, making the folder even more useful. One more powerful attribute to pocket folders is the composition of the folder. Most typical pocket folders are constructed out of paper or cardstock. You’ll come across long-lasting versions in materials such as polypropylene or vinyl. All of these materials are water-resistant and tear-resistant. That is why they are the perfect option for outdoor use and protecting valuable documents. A kindergarten student might select a simple, lightweight cardstock folder for daily use in the classroom. A contractor operating on-site may choose a vinyl pocket folder to protect drawings and permits. Folders with prongs and/or fasteners This is another stand out category. These design elements allow you to quickly store your hole-punched documents in the folder securely. Now get the best of both worlds—a binder and a pocket folder—all in one portable design. They’re great for presenting reports, training materials, or other multi-page projects that need to be in a certain order. To illustrate, a teacher developing a new lesson plan will consider this feature critical. Likewise, a team leader sending out a project proposal will find them incredibly useful. Finally, think about the pocket folder’s storage space. Certain multi pocket folders are even made with expanding pockets so they can hold more than the average 25–50 sheets of paper. This works great during times when you need to transport a higher capacity of papers while maintaining the integrity of orderliness. Legal professionals and real estate agents handling contracts do well with these higher-capacity folders. They can store all their documents and handouts in one folder, rather than juggling three different folders. The Best Online Destination for Printing Presentation Folders If you are looking for some great designs and unique printing options, 4Over4 is one of the best destinations for online printing of the customized file folders. From a range of papers and finishes to die-cutting, we offer it all. Our range also includes silk laminating, soft touch, and spot UV coating, custom office supplies printing services. Place the bulk order for your office and our extremely hard-working customer service team will help you to meet every requirement. Trust us as we deliver quality at your doorstep. FAQs(Frequently Asked Questions) What is a Custom Pocket Folder? A custom pocket folder is a personalized folder designed to hold documents, brochures, or other materials. It can be customized with a company logo, branding, or specific design elements. What is a pocket folder? A pocket folder is a type of folder with one or more pockets or compartments for holding papers and documents. It helps in organizing and presenting materials in a professional manner. What are pocket folders with brads? Pocket folders with brads are folders that include fasteners (brads) inside the pockets to securely hold hole-punched papers or documents in place. This feature helps in keeping the contents organized and prevents them from falling out. Purpose of Custom Pocket Folder The purpose of custom presentation folders with pockets is to provide a professional and organized way to store, carry, and present important documents, marketing materials, or promotional items for businesses. Features of Presentation Folders The custom folders are engaging, attention-grabbing as well as functional. They can be designed with unique shapes, finishes, and printing techniques to make them visually appealing and memorable for recipients. Enhance Your Presentation with Custom Pocket Folder The pocket folders are tangible which makes it interactive for the audience during presentations. It allows for easy access to materials and gives a professional impression, enhancing the overall impact of the presentation. Endorse Your Brand and Company with the Custom Pocket Folders If you want to endorse your product digitally? You may send your message across effectively by using custom pocket folders that showcase your brand identity and leave a lasting impression on clients and partners. Save Cost of Promotion with the Customized Presentation Folders Large format printing involves significant expense. Carrying out promotions through customized presentation folders can be a cost-effective alternative while still providing a professional and impactful representation of your brand or business. Boost Sales with Custom Folders The primary goal of any business is revenue generation and custom folders play an important role in influencing potential clients or customers. By presenting information in an organized and visually appealing manner, custom folders can contribute to boosting sales. Office Organization with Custom Pocket Folders The custom presentation folders are indeed helpful for maintaining office organization by providing a designated space for important documents, reports, or client materials. They contribute to a professional and tidy work environment. Share Extra Info in the Custom Folders The digital mediums have space constraints when it comes to sharing additional information about products or services. Custom folders provide an opportunity to include extra details, brochures, or inserts alongside essential documents, allowing for comprehensive communication. Efficient Working with Custom Pocket Folders If you wish to run your business smoothly, the customized pocket folders aid in efficient working by streamlining document organization, storage, and presentation. They contribute to professionalism and productivity within the workplace. The Best Online Destination for Printing Presentation Folders If you are looking for some great designs and unique printing options for presentation folders, our online platform offers high-quality printing services with customizable design templates to meet your specific business needs.