
How to Use Print Layout Templates in Photoshop Without Getting Your File Rejected


A print template is three lines and a locked layer. Opening the template, setting the four things that decide whether it prints, and exporting a press ready file is the whole job below.
Open the template, lock its guide layer, build your artwork on a new layer above it at 300 ppi, convert to CMYK at the end, then hide the guide layer and flatten before you export. The template is a ruler, not part of the design. Photoshop has no bleed field, so the bleed only exists because the canvas is 0.125 in larger than the trim on every side.
Quick answer
Three lines, one locked layer, and a canvas that already includes the bleed
A print template gives you the trim, the bleed, and the safe zone at your product's exact size, and your only job is to design between them. Lock the guide layer, add your own layer above it, work at 300 ppi, run edge-to-edge art out to the canvas edge, and keep text 0.125 in inside the trim. Convert to CMYK once at the end with Edit, Convert to Profile. Hide the guide layer, flatten, and upload. The diagram below shows the three lines in inches and in pixels.
Why a Template Beats a Blank Photoshop Document
A blank Photoshop document knows one thing about your job: the canvas size. It does not know where the blade lands, how far a background has to run past the edge, or how close your phone number can sit to the corner before a stack shift clips it. The template draws all three.
Commercial cutting happens in lifts of several hundred sheets at a time, and the whole lift can drift by a hair against the blade. That drift is why the trade works with a 0.125 in bleed and a 0.125 in safe zone instead of trusting the cut to be exact. When a card comes back with a thin white sliver down one side, the press was fine and the file simply stopped at the trim line.
Starting from the product template removes that whole class of problem before you draw anything. The blank template library has a correctly sized file for every product we print, and it is the same geometry our prepress checks against. If you would rather not open Photoshop at all, the online design tool holds the same guides for you inside the browser.
Opening a PSD Template Versus a PDF Template
Templates arrive in two shapes and Photoshop treats them very differently, which trips people up on the first click.
A PSD template opens the way you expect. The guides sit on their own layer, usually named something like Template or Do Not Print, and the resolution and canvas size are already correct. Lock that layer with the padlock in the Layers panel straight away, then add your own layer above it. Nothing else needs changing.
A PDF template opens through the Import PDF dialog, and this is where files go wrong. Photoshop asks you for a resolution and a color mode before it rasterizes, and it defaults to whatever you used last, which is often 72 ppi and RGB. Type 300 into the resolution field and choose your mode there. Also check the crop dropdown: pick Bleed Box if you want the full canvas including the bleed area, because Trim Box or Media Box will hand you the wrong dimensions and you will not notice until the file is finished.
One habit saves both cases. After the template opens, press Command Option I or Control Alt I to look at Image Size and confirm the width, height, and resolution match what the product needs. Thirty seconds there beats rebuilding a layout. Our guide on changing DPI in Photoshop covers what to do when the numbers come back wrong.
Resolution, Color Mode, Bleed, and Safe Zone
Four settings decide whether the file prints. Get them right at the start and the rest of the job is just design.
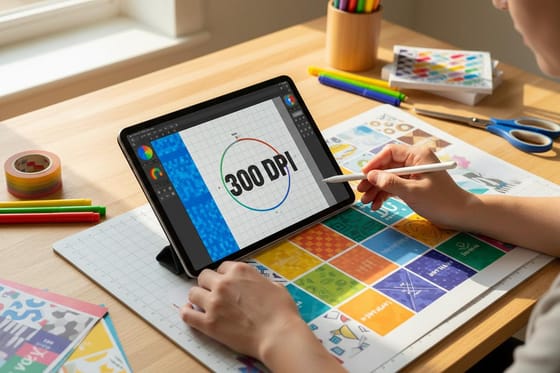
Resolution. 300 ppi at final size for anything handheld. Set it in the New Document dialog, because raising it later only interpolates pixels that were never captured. If the piece is mostly type and line art rather than photographs, 600 ppi gives noticeably cleaner letter edges at the cost of a heavier file.
Color mode. Design in RGB, then convert once at the end with Edit, Convert to Profile, choosing U.S. Web Coated SWOP v2. That path shows you the shift and lets you correct it. Image, Mode, CMYK Color does the same conversion silently using whatever profile is set in Color Settings, which is how two files from the same designer end up different colors. There is more detail in our guide to converting RGB to CMYK.
Bleed. Photoshop has no bleed setting. This is the difference that catches InDesign users hardest. Your bleed exists only because the canvas is bigger than the trim, so a 3.5 by 2 in card is built on a 3.75 by 2.25 in canvas and the extra quarter inch is the bleed. Any color or photo touching an edge must run all the way to the canvas edge, not to the trim line.
Safe zone. Keep text, logos, page numbers, and anything you cannot lose 0.125 in inside the trim. On a business card that is a comfortable margin. On a folded piece it applies to every panel edge, not just the outside of the sheet.
| Template line | Where it sits | What goes there | What happens if you ignore it |
|---|---|---|---|
| Bleed | 0.125 in outside the trim, at the canvas edge | Background color, photos, patterns, anything full-bleed | A thin white line along one or two edges after cutting |
| Trim | The finished product size | Nothing specific; it is where the blade lands | Wrong finished dimensions, or art built at the bleed size and cut short |
| Safe zone | 0.125 in inside the trim | All text, logos, QR codes, contact details | Clipped descenders, a logo missing its edge, a QR code that will not scan |
| Fold or score | Marked on folded and multi-panel templates | Nothing across the line; keep type clear of it | Text broken by the crease, or a panel that reads upside down |
For a fuller walk through the geometry on its own, read bleed, cut line, and safety, and how much bleed a full-bleed job needs.
Designing Inside the Template Layers
Lock the template layer, make a new layer above it, and do not touch the template again until export. That is the whole discipline. What follows are the four things that go wrong even when people follow it.
- Placed images scaled past 100 percent. Photoshop lets a 600 px photo fill a 1125 px card without a word of warning. Select the layer, press Command T or Control T, and check the width percentage. Above roughly 110 percent you are printing softness. Placing images as Smart Objects at least keeps the original pixels available when you scale back down.
- Black type built from four inks. In a CMYK document, set body text to 0 cyan, 0 magenta, 0 yellow, 100 black. A rich black mixed from all four is beautiful in a large solid panel and terrible on 8 pt type, because any tiny misregistration on press leaves a colored fringe on every letter. Our rich black guide explains where each version belongs.
- Transparency left behind. A checkerboard background means no white. If the sheet should print white there, add a white layer at the bottom. If you want unprinted stock, that is a different product decision, not a file setting.
- Fine print set in Photoshop. Legal lines, disclaimers, and address blocks under about 7 pt are the one place Photoshop is genuinely the wrong tool, since every letter is rasterized at the document resolution. Size it up, raise the document to 600 ppi, or set that block in a vector tool. The business card dimensions guide shows the numbers for the most common case.
Sanity check as you go by hiding your own artwork layer for a second. If the template lines underneath are still exactly where they started, nothing has been nudged.
Removing the Template Layer and Exporting Clean
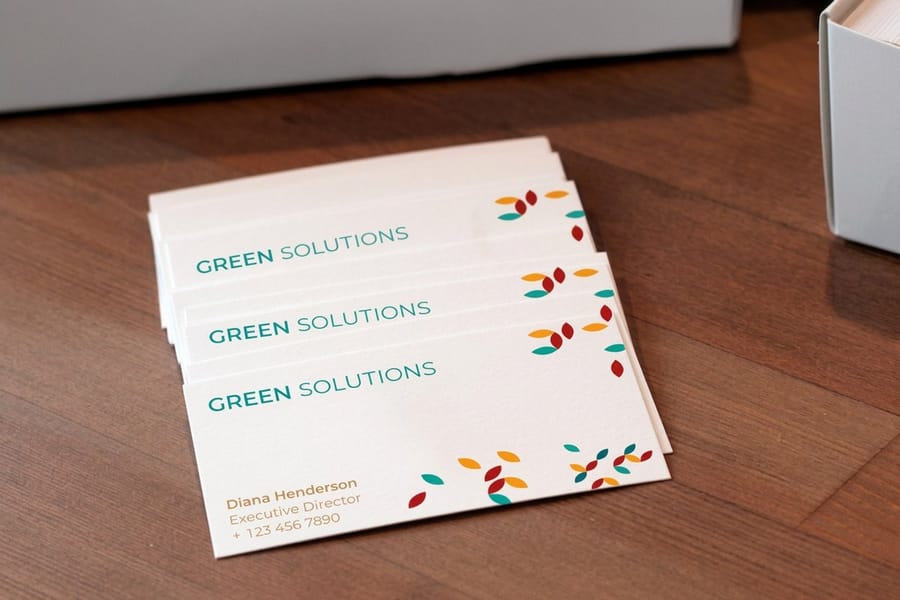
The order of the last two moves decides whether the guide lines print. Hide the template layer first, then flatten. Layer, Flatten Image discards hidden layers rather than merging them, so doing it in that order removes the guides permanently. Flatten first and the lines are already pixels.
Watch for the version of this that survives a careless check. A guide layer set to Multiply at 20 percent opacity looks like a faint texture on screen and reads as a faint magenta grid on the printed card. Toggle every layer off one at a time before you export if the file came from someone else.
Then save. A flattened PDF or a flattened 300 ppi TIFF both work, in CMYK, at trim plus 0.125 in bleed on all four sides. Crop marks are not required, since the cut is positioned from the file dimensions. Keep the layered PSD for yourself and treat the uploaded file as final, because the version that goes to press should have nothing left to switch off. The print-ready PDF guide lists the export dialog settings, and creating commercial print-ready files covers the same ground for other applications.
Every upload runs through our free file check before it reaches a press, which catches wrong dimensions, missing bleed, and RGB files. It is a safety net, not a substitute for the four settings above, since it cannot invent resolution you never had.
Get the Right Template for Your Product
Templates are only useful when they match the exact product, size, and fold you ordered. A 4 by 6 postcard template will not save a 5 by 7 job, and a tri-fold template has panel widths that are deliberately unequal so the inner panel tucks without buckling.
Download the file for your product from the blank template library, then order the matching item: standard business cards from $17.57, standard postcards from $16.48, standard flyers from $39.54, or standard brochures from $57.11. Pricing moves with quantity, stock, and finish, and the configurator updates as you set each one.
If your product is not in the library, build the canvas yourself from the trim size: add 0.25 in to width and height for bleed, set 300 ppi, and pull guides 0.125 in inside the trim for the safe zone. That is the same file the template would have given you. Browse the full range at business card printing or postcard printing to confirm the trim size before you start.
Wally explains print templates in Photoshop
Lock the guides, design above them, switch them off before you save
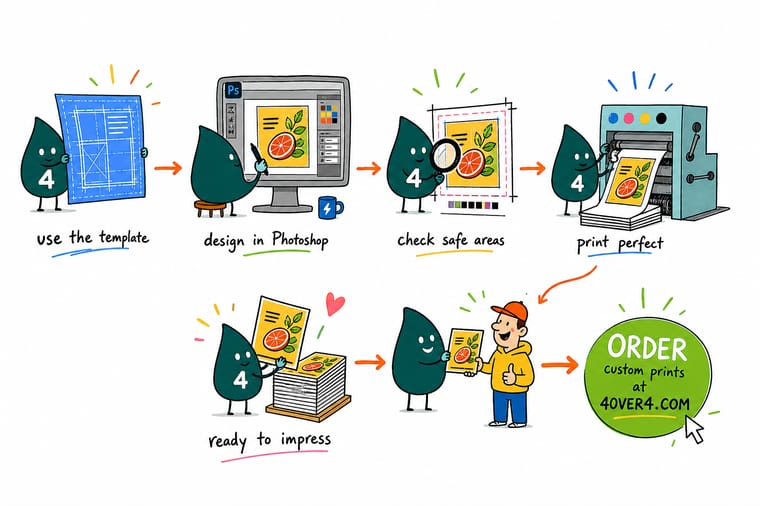
Wally opens the template, clicks the padlock on the guide layer, and makes himself a fresh layer on top. Background art runs all the way to the canvas edge, past the trim, because the blade can wander. Text stays a comfortable eighth of an inch inside. When the design is done he hides the guide layer, flattens, and saves in CMYK. The lines were for him, never for the press.
Get the template for your product →Specs and pricing
Sizes, stocks, and starting prices for the products templates cover
Confirm the trim size before you build the canvas. Each panel below pulls live configuration options and starting prices from the 4OVER4.COM configurator.
Print it
Print the file you just built
Explore more
Where to go next
By the numbers
Files checked and printed by 4OVER4
Common Questions
Your Photoshop print setup questions, answered
Can I set up a real print file in Photoshop, or do I need Illustrator?
Photoshop is fine for anything photo-led: postcards, flyers, packaging panels, most business cards. The one thing it does worse is type. Photoshop resolves every letter into pixels at the document resolution, so a 6 pt address line at 300 ppi has slightly furry edges that a vector file would keep razor sharp. If the piece is mostly small text, set it in Illustrator or InDesign instead, or raise the document to 600 ppi. Our companion guide to layout templates in Illustrator covers the vector route step by step.
What resolution should a Photoshop print template be?
300 ppi at final size for anything held in the hand, and that includes the bleed area. Work it out in pixels once and you never have to think about it again: multiply the size in inches by 300. A 3.5 by 2 in business card plus 0.125 in bleed all round is 3.75 by 2.25 in, which is 1125 by 675 px. Large-format work is the exception, because a banner viewed from ten feet away prints cleanly at 100 to 150 ppi at full size, and building it at 300 would give you a file too large to open comfortably.
Should I convert to CMYK before or after I design?
Design in RGB, convert at the end, and keep the RGB version. Working in CMYK the whole time locks you out of some blend modes and adjustment behavior, and every edit is happening inside a smaller gamut than your monitor shows anyway. When the layout is final, use Edit, Convert to Profile, pick U.S. Web Coated SWOP v2, and look at what moved. Bright oranges, electric blues, and saturated greens are the colors that drop hardest, so that is the moment to adjust them by eye rather than after the job prints.
How do I actually remove the template layer before export?
Turn its visibility off in the Layers panel, then use Layer, Flatten Image, which discards hidden layers rather than merging them. That order matters. If you flatten first and hide second, the guide lines are already baked into the pixels and no amount of toggling brings them back. The other trap is a guide layer set to Multiply at low opacity, because it looks like a faint watermark on screen and prints as a faint watermark on the card.
Why was my file flagged for low resolution when Photoshop said 300 ppi?
Because the document is 300 ppi but the photo inside it is not. Photoshop happily lets you drag a 600 px wide web image into a 1125 px wide card and scale it to fill, and it gives you no warning. The document resolution stays 300, the effective resolution of that image drops to about 160, and the print shows it. Check by selecting the placed layer and pressing Command T or Control T: if the width reads well above 100 percent, the image is being stretched past what it has.
What file should I upload once the Photoshop layout is done?
A flattened PDF or a flattened 300 ppi TIFF, sized at trim plus 0.125 in bleed on every side, in CMYK, with no guide layers and no transparency left in the background. Crop marks are optional, since the cut positions off the file dimensions. Keep the layered PSD for yourself, because the version you upload should have nothing left to switch off. Standard business cards start at $17.57 and standard postcards at $16.48, and the configurator shows the exact price as you set quantity, stock, and finish.
Get Started
File ready? Print it.
Upload your flattened CMYK file with bleed, pick your stock and quantity, and our free file check runs before anything reaches a press.
Legal Disclaimer
Gold Standard guarantees apply to all standard orders placed through 4over4.com. Price match requires verifiable proof of a competitor's published price for an equivalent product with matching specifications and turnaround time. Satisfaction guarantee covers manufacturing defects and print quality issues. Contact support with order number and documentation. On-time delivery rate based on tracked orders 1999 to 2026. Individual results may vary based on shipping carrier performance.
